> ## Documentation Index
> Fetch the complete documentation index at: https://docs.partnero.com/llms.txt
> Use this file to discover all available pages before exploring further.
# Integrate Brilliant Directories
This guide will walk you through the steps to integrate Partnero with Brilliant Directories to track website visitors, capture sign-ups, and monitor sales. Following these instructions will enable accurate tracking of user interactions on your website and ensure that all relevant data is sent to Partnero.
These instructions can also be found on your Partnero account, under **Integration** > **Guides** tab > **Brilliant Directories**: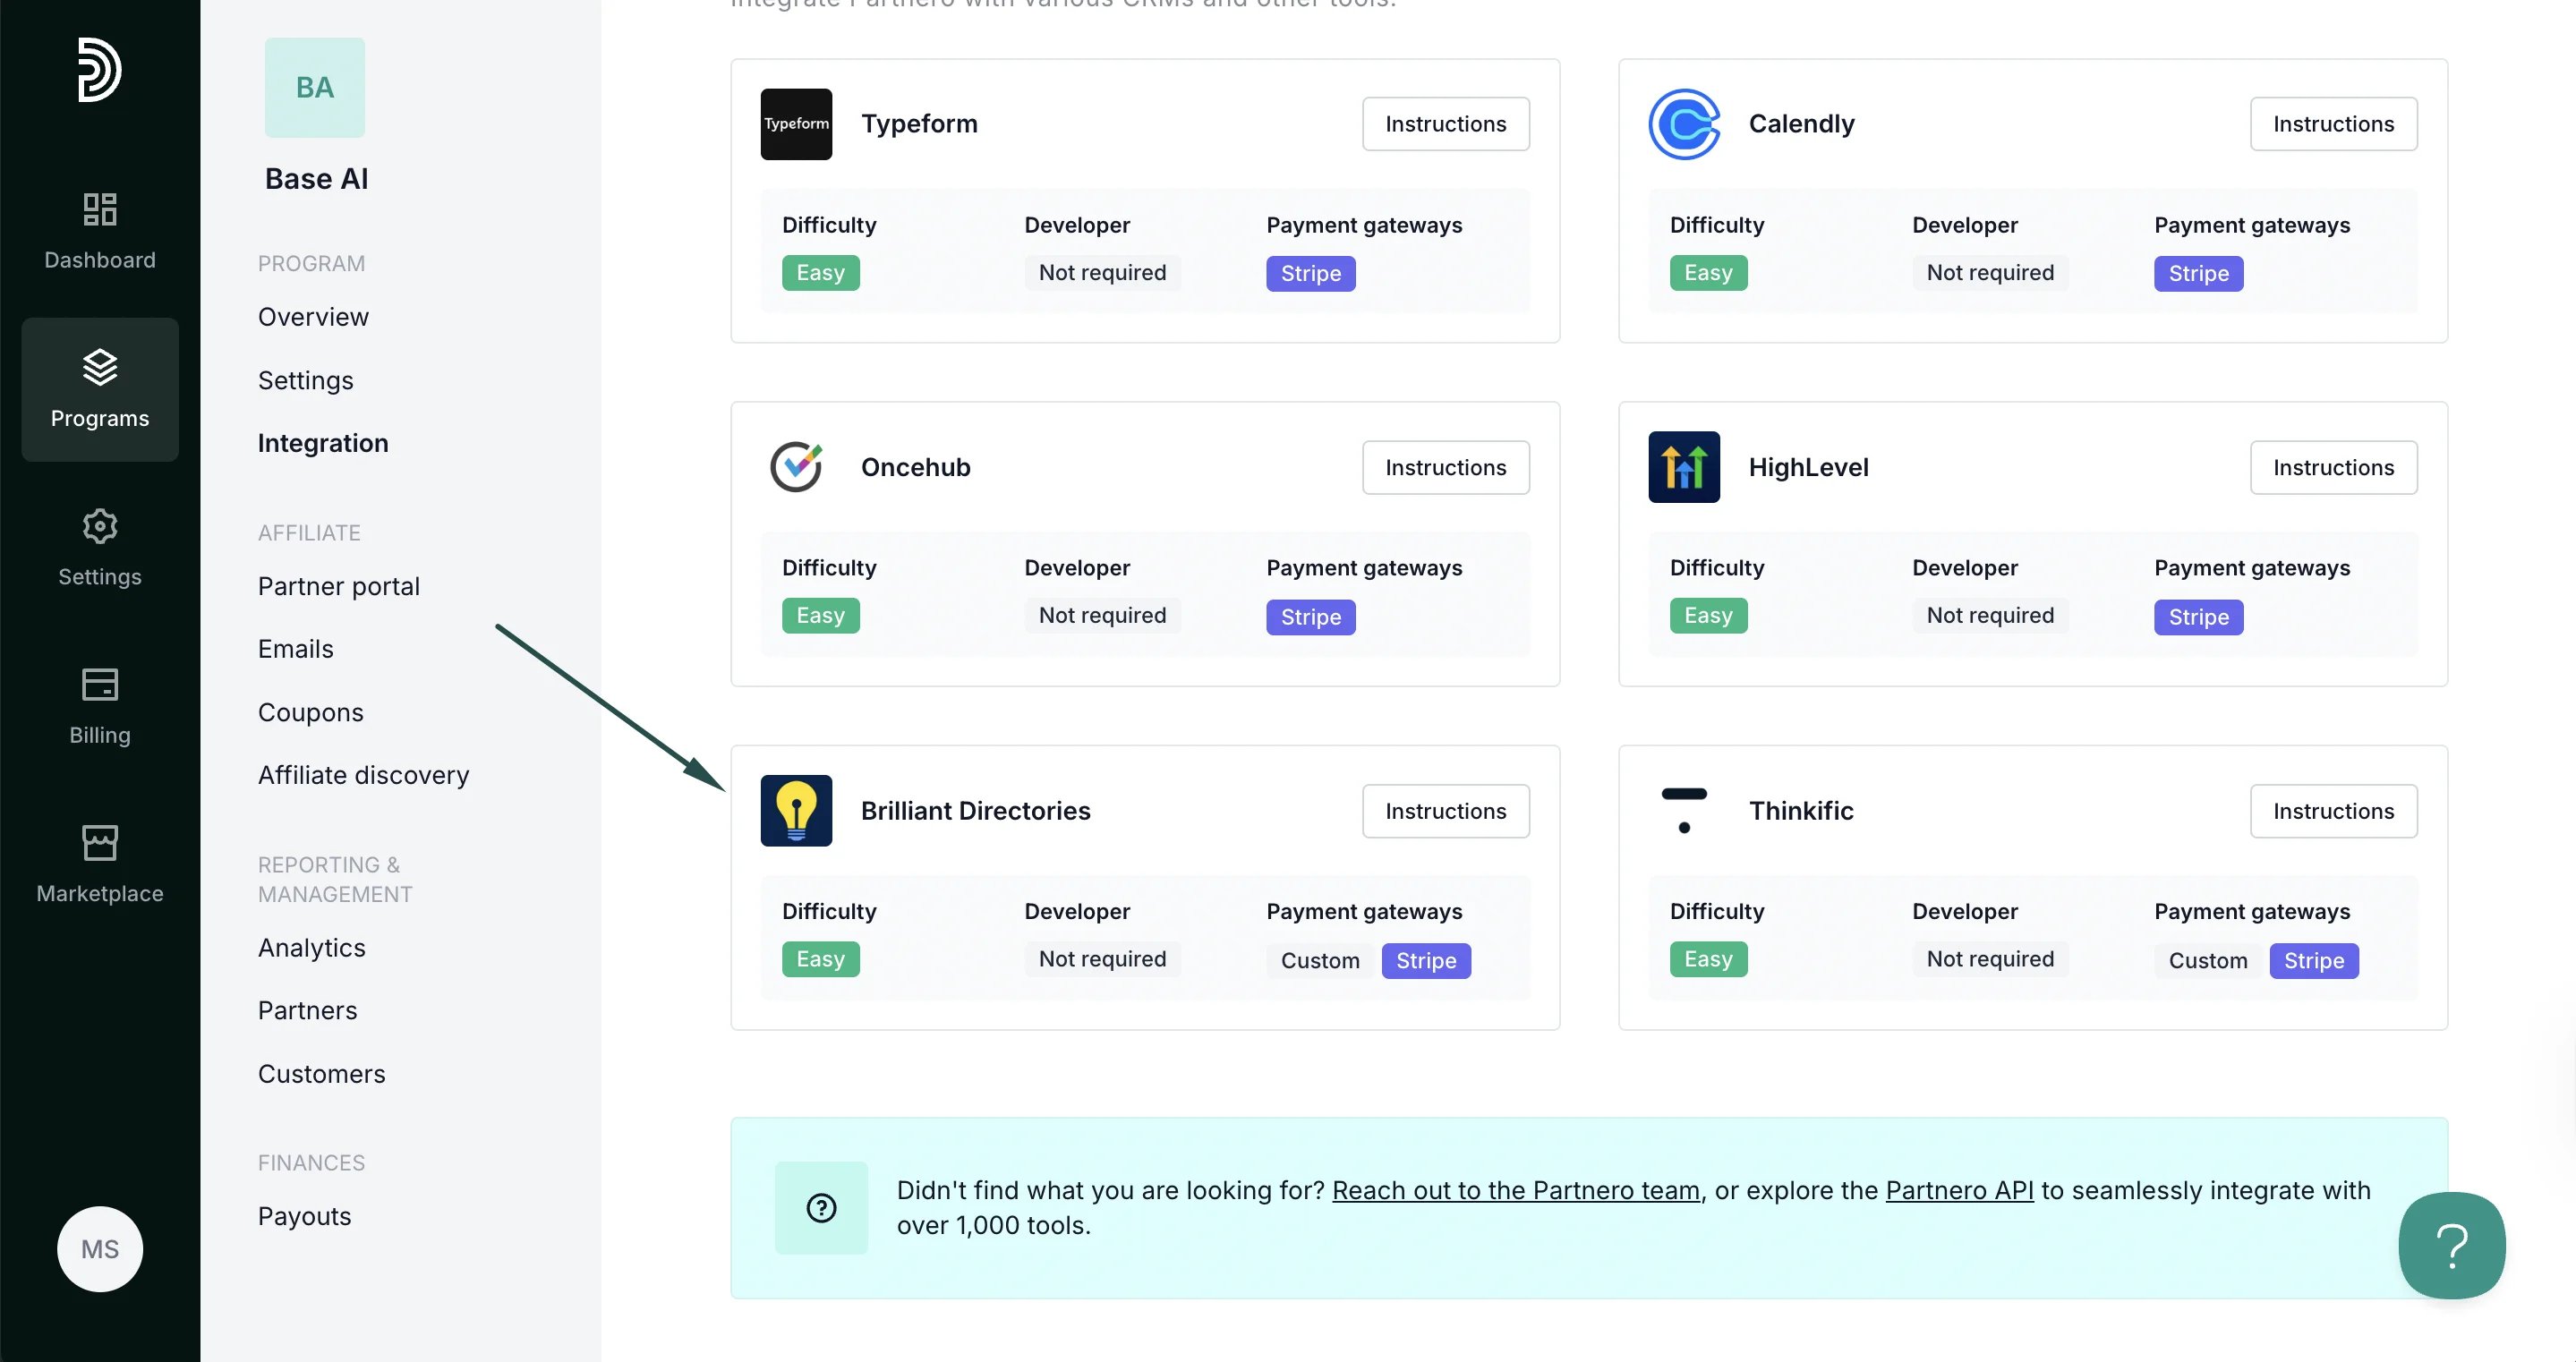 ***
### Step 1: Start tracking website visitors
To track visitors on your website, you need to install the PartneroJS snippet as custom code.
#### Install the PartneroJS Snippet
1. On Partnero, go to **Integration** > **Guides** tab > **Brilliant Directories**. Click **Instructions**.
2. Copy the PartneroJS snippet:
***
### Step 1: Start tracking website visitors
To track visitors on your website, you need to install the PartneroJS snippet as custom code.
#### Install the PartneroJS Snippet
1. On Partnero, go to **Integration** > **Guides** tab > **Brilliant Directories**. Click **Instructions**.
2. Copy the PartneroJS snippet: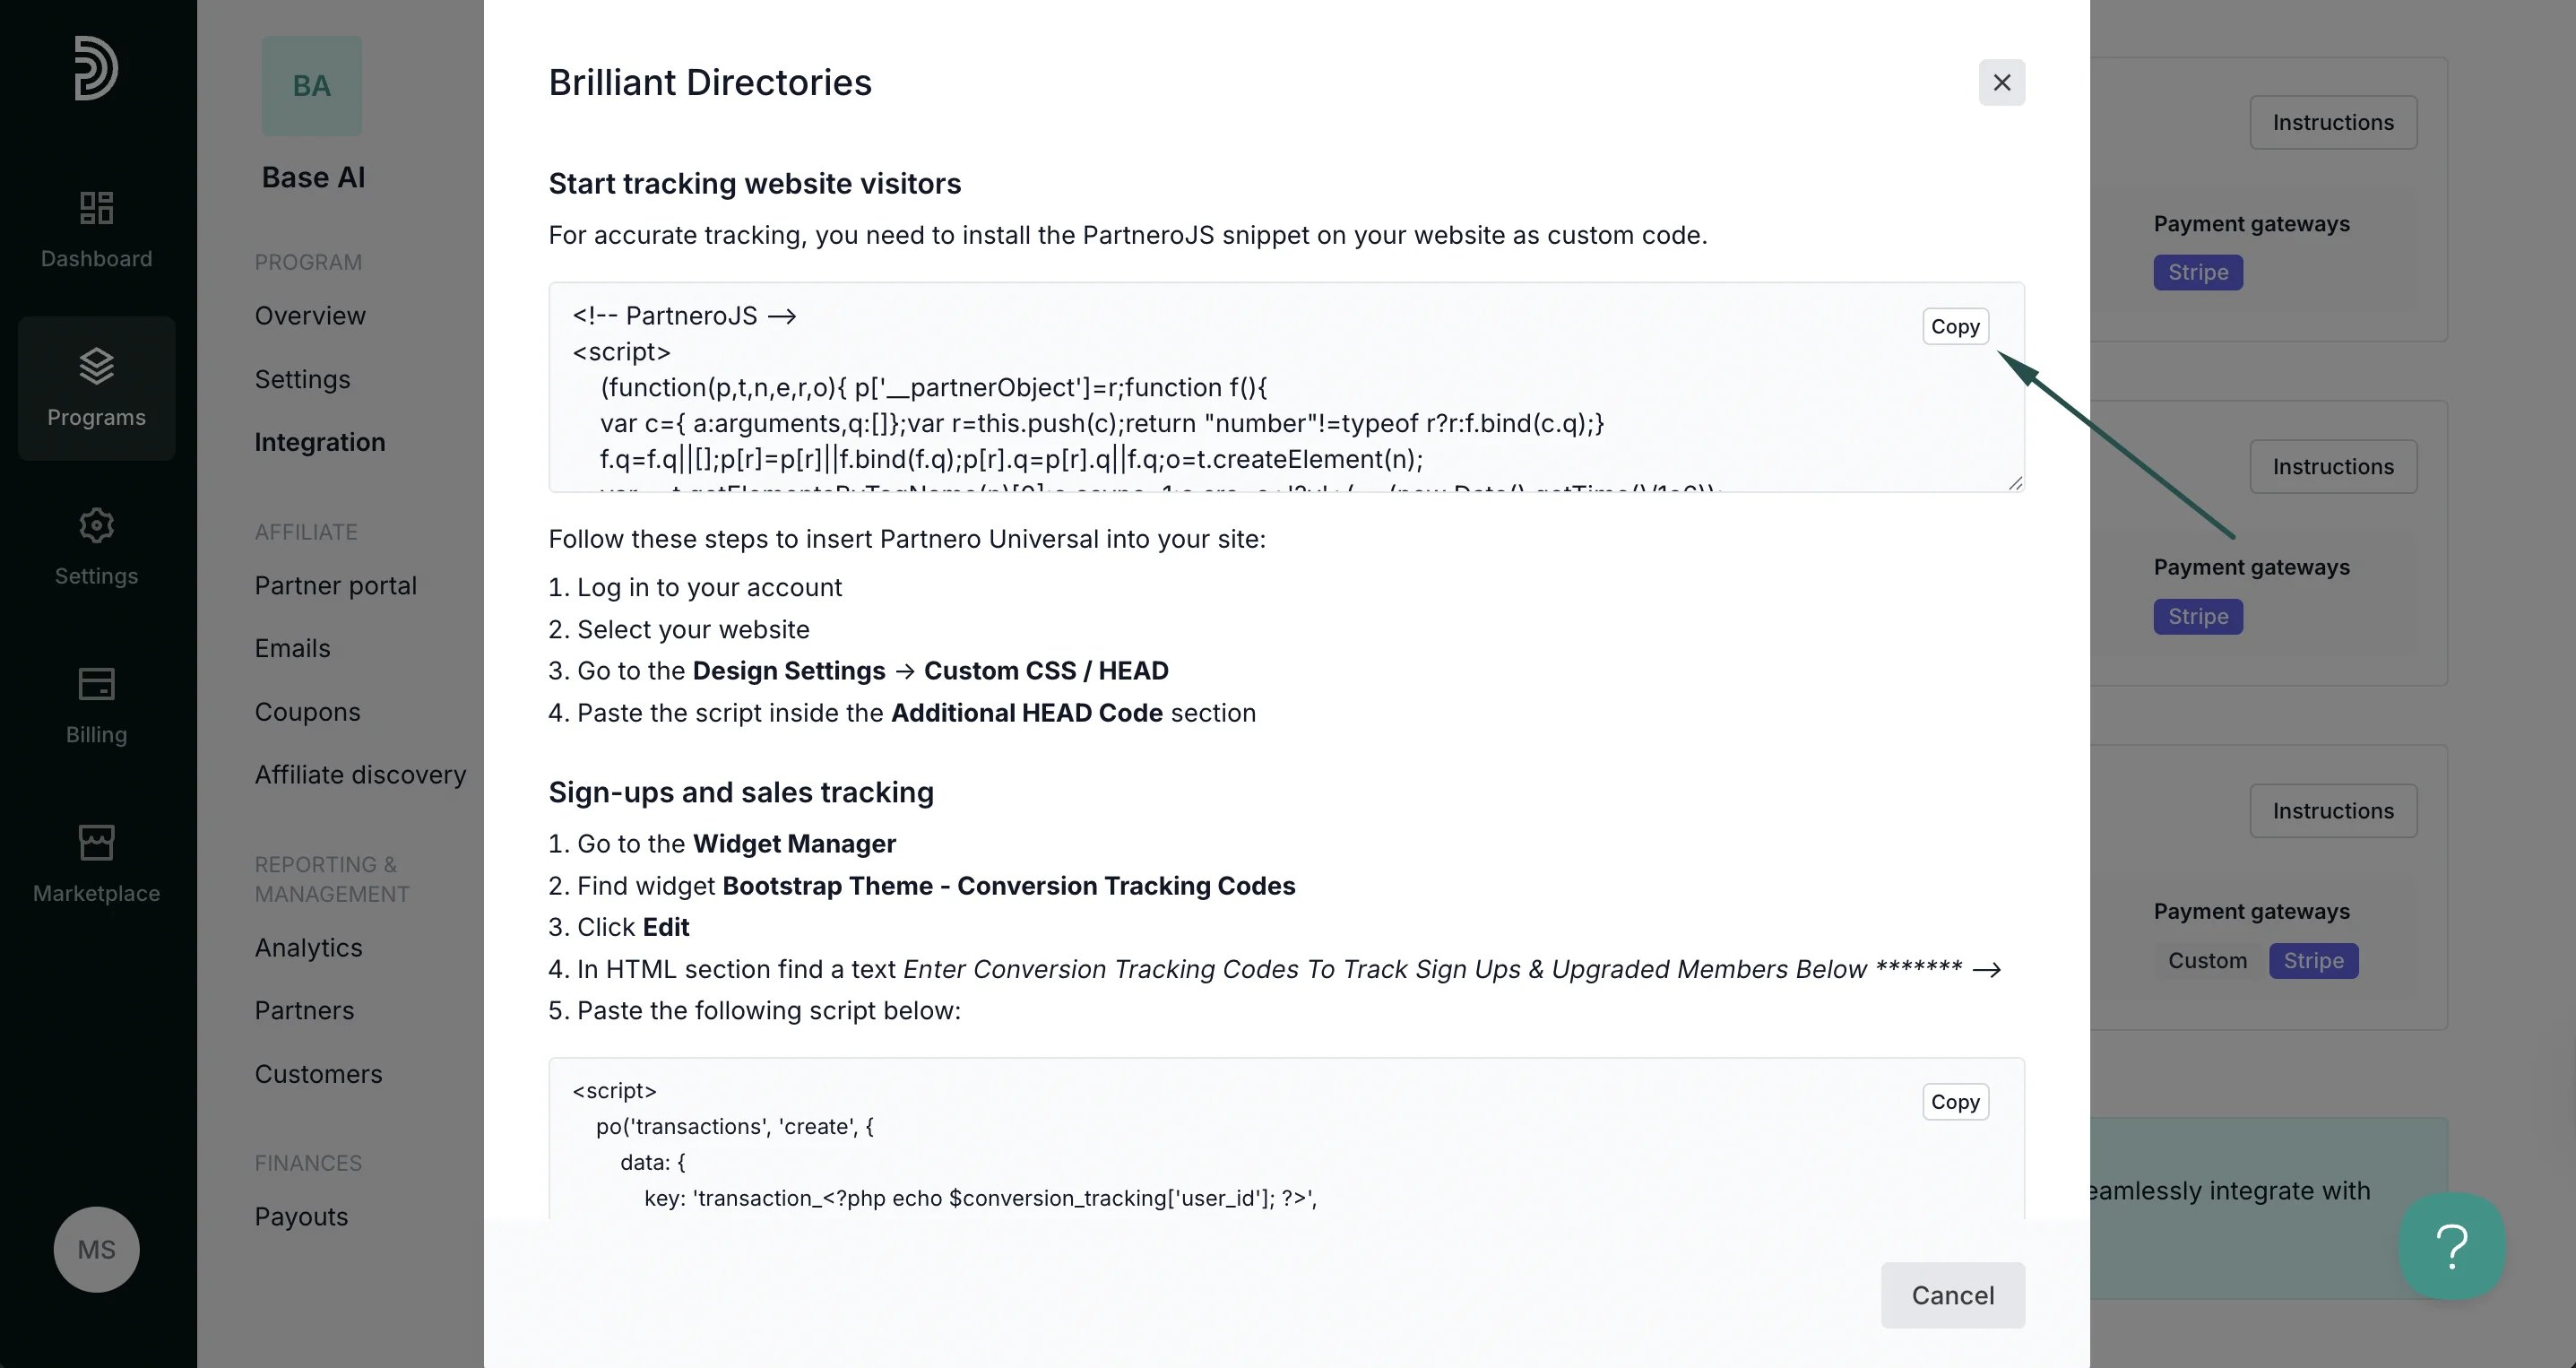 3. Log in to your Brilliant Directories account and select your website.
4. Go to the **Design Settings** > **Custom CSS** / **HEAD**.
5. Paste the script inside the **Additional HEAD Code** section.
***
### Step 2: Sign up and sales tracking
Here's how to set up order tracking during checkout:
1. On Partnero, copy the sign-up and sales tracking code from the Brilliant Directories integration guide:
3. Log in to your Brilliant Directories account and select your website.
4. Go to the **Design Settings** > **Custom CSS** / **HEAD**.
5. Paste the script inside the **Additional HEAD Code** section.
***
### Step 2: Sign up and sales tracking
Here's how to set up order tracking during checkout:
1. On Partnero, copy the sign-up and sales tracking code from the Brilliant Directories integration guide: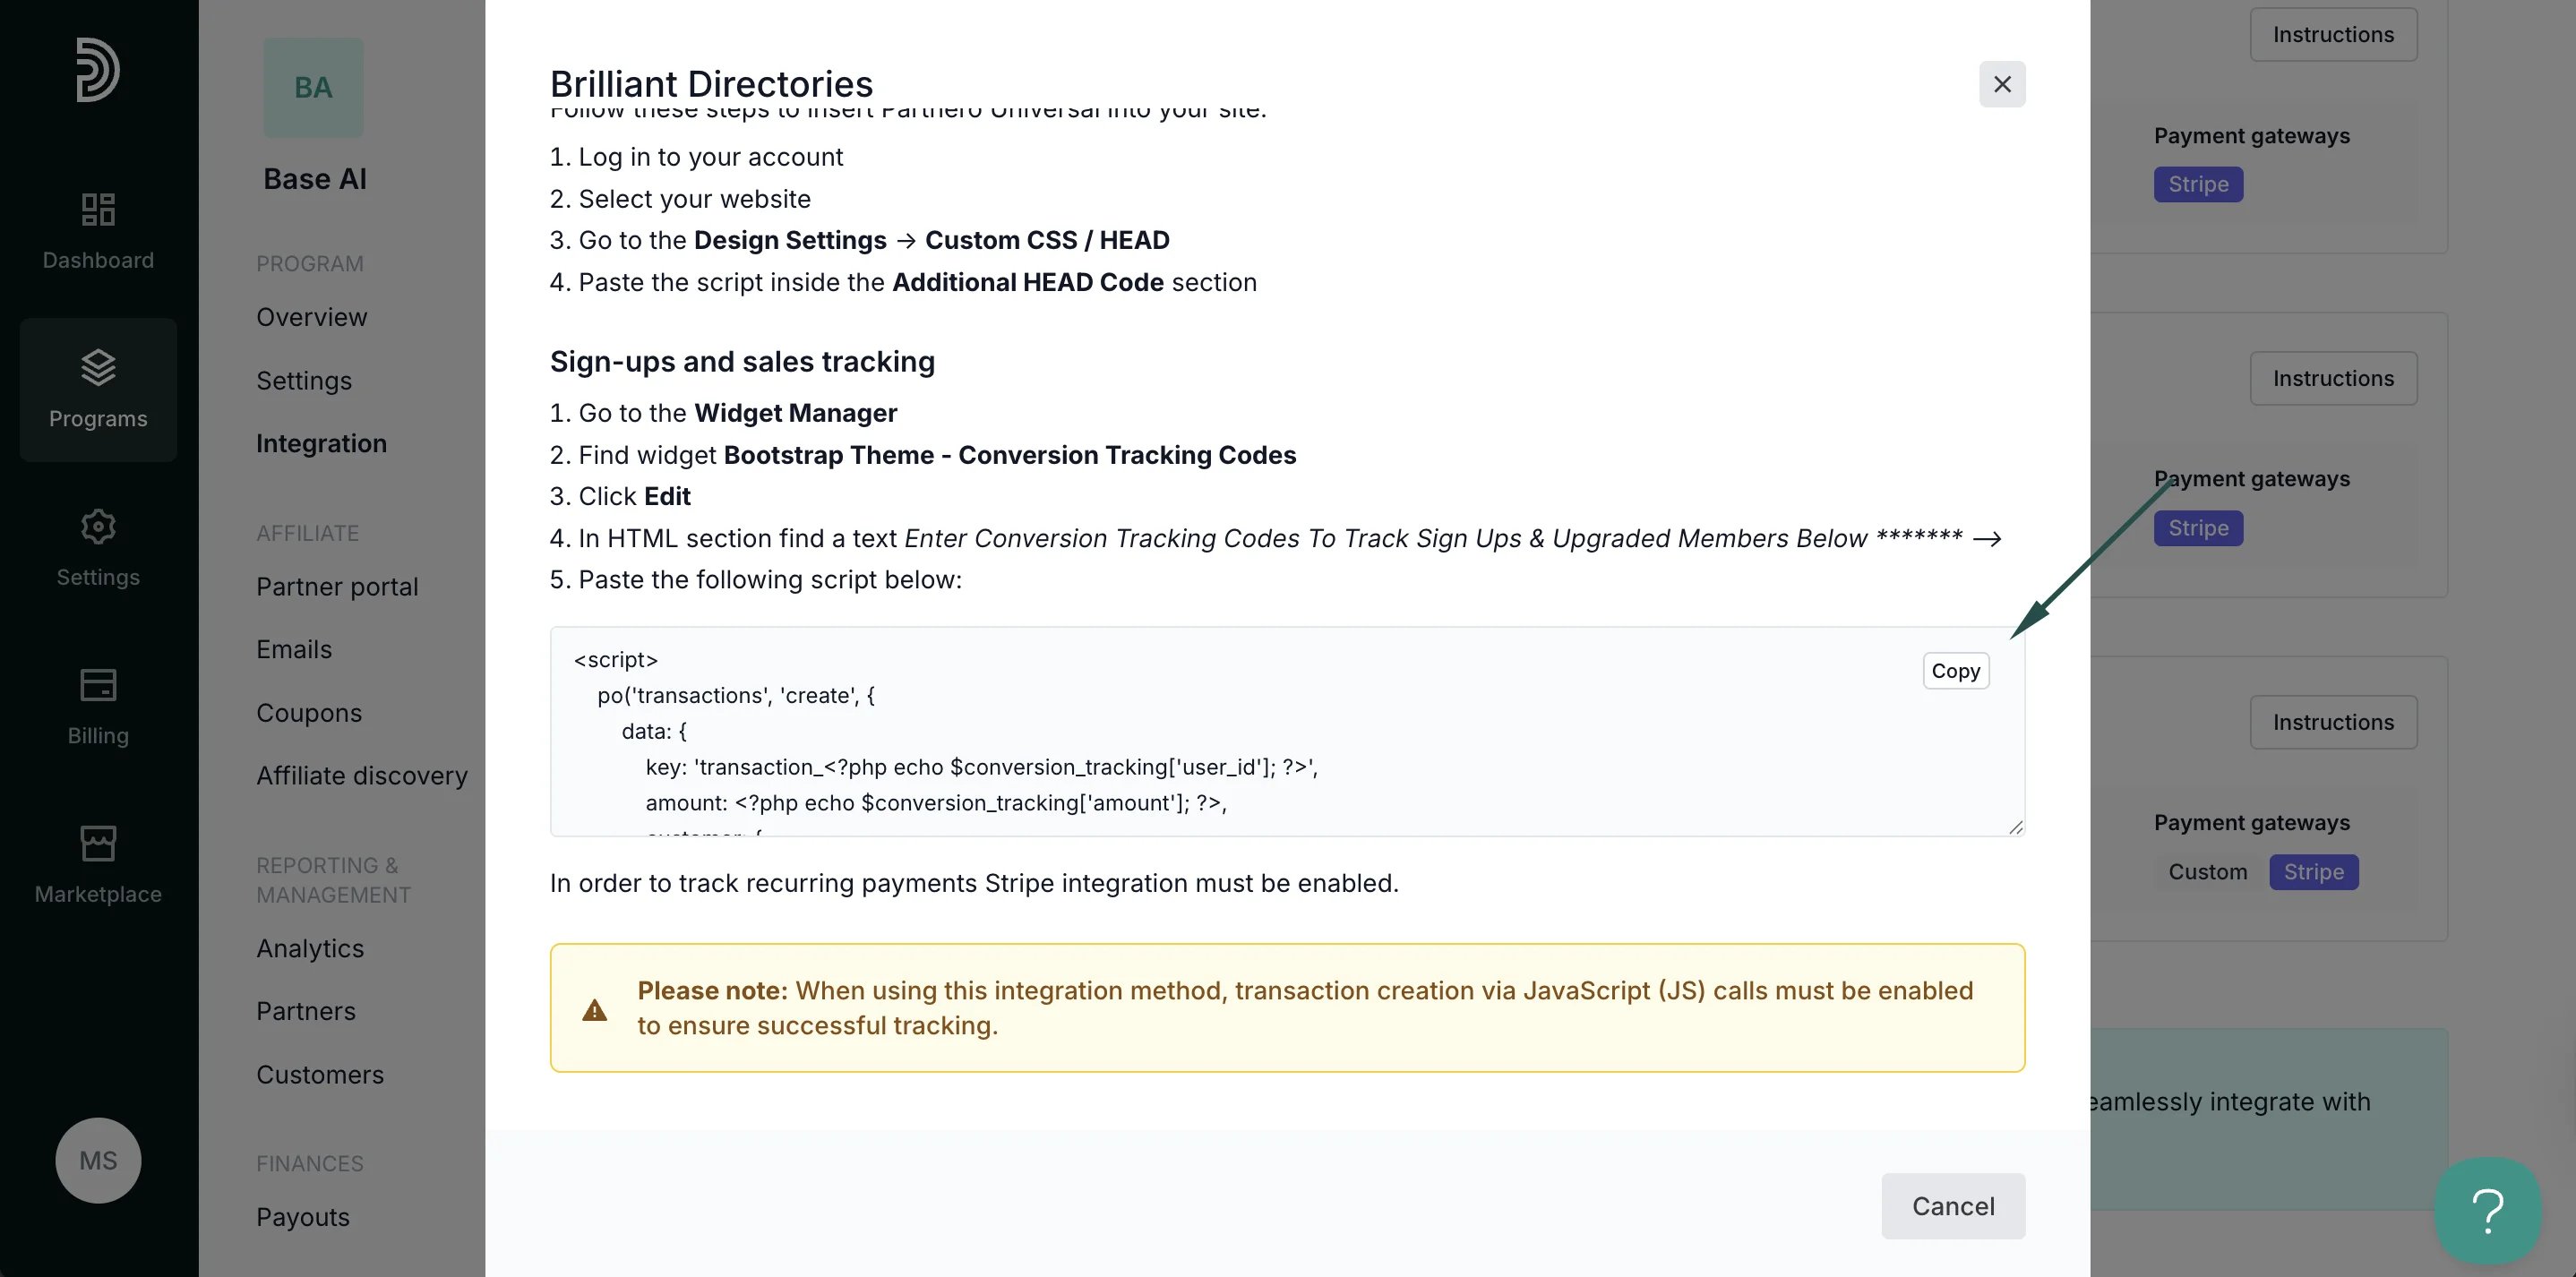 2. On Brilliant Directories, go to the **Widget Manager**.
3. Find widget **Bootstrap Theme - Conversion Tracking Codes**.
4. Click **Edit**.
5. In the HTML section find a text *Enter Conversion Tracking Codes To Track Sign Ups & Upgraded Members Below \*\*\*\*\*\*\* -->*
6. Paste the script and save.
***
### Step 3: Authorize Stripe
Next, you'll need to authorize Stripe to track recurring sales.
1. Go to **Integration** > scroll down to **Apps & integrations** > click **Authorize** next to Stripe:
2. On Brilliant Directories, go to the **Widget Manager**.
3. Find widget **Bootstrap Theme - Conversion Tracking Codes**.
4. Click **Edit**.
5. In the HTML section find a text *Enter Conversion Tracking Codes To Track Sign Ups & Upgraded Members Below \*\*\*\*\*\*\* -->*
6. Paste the script and save.
***
### Step 3: Authorize Stripe
Next, you'll need to authorize Stripe to track recurring sales.
1. Go to **Integration** > scroll down to **Apps & integrations** > click **Authorize** next to Stripe: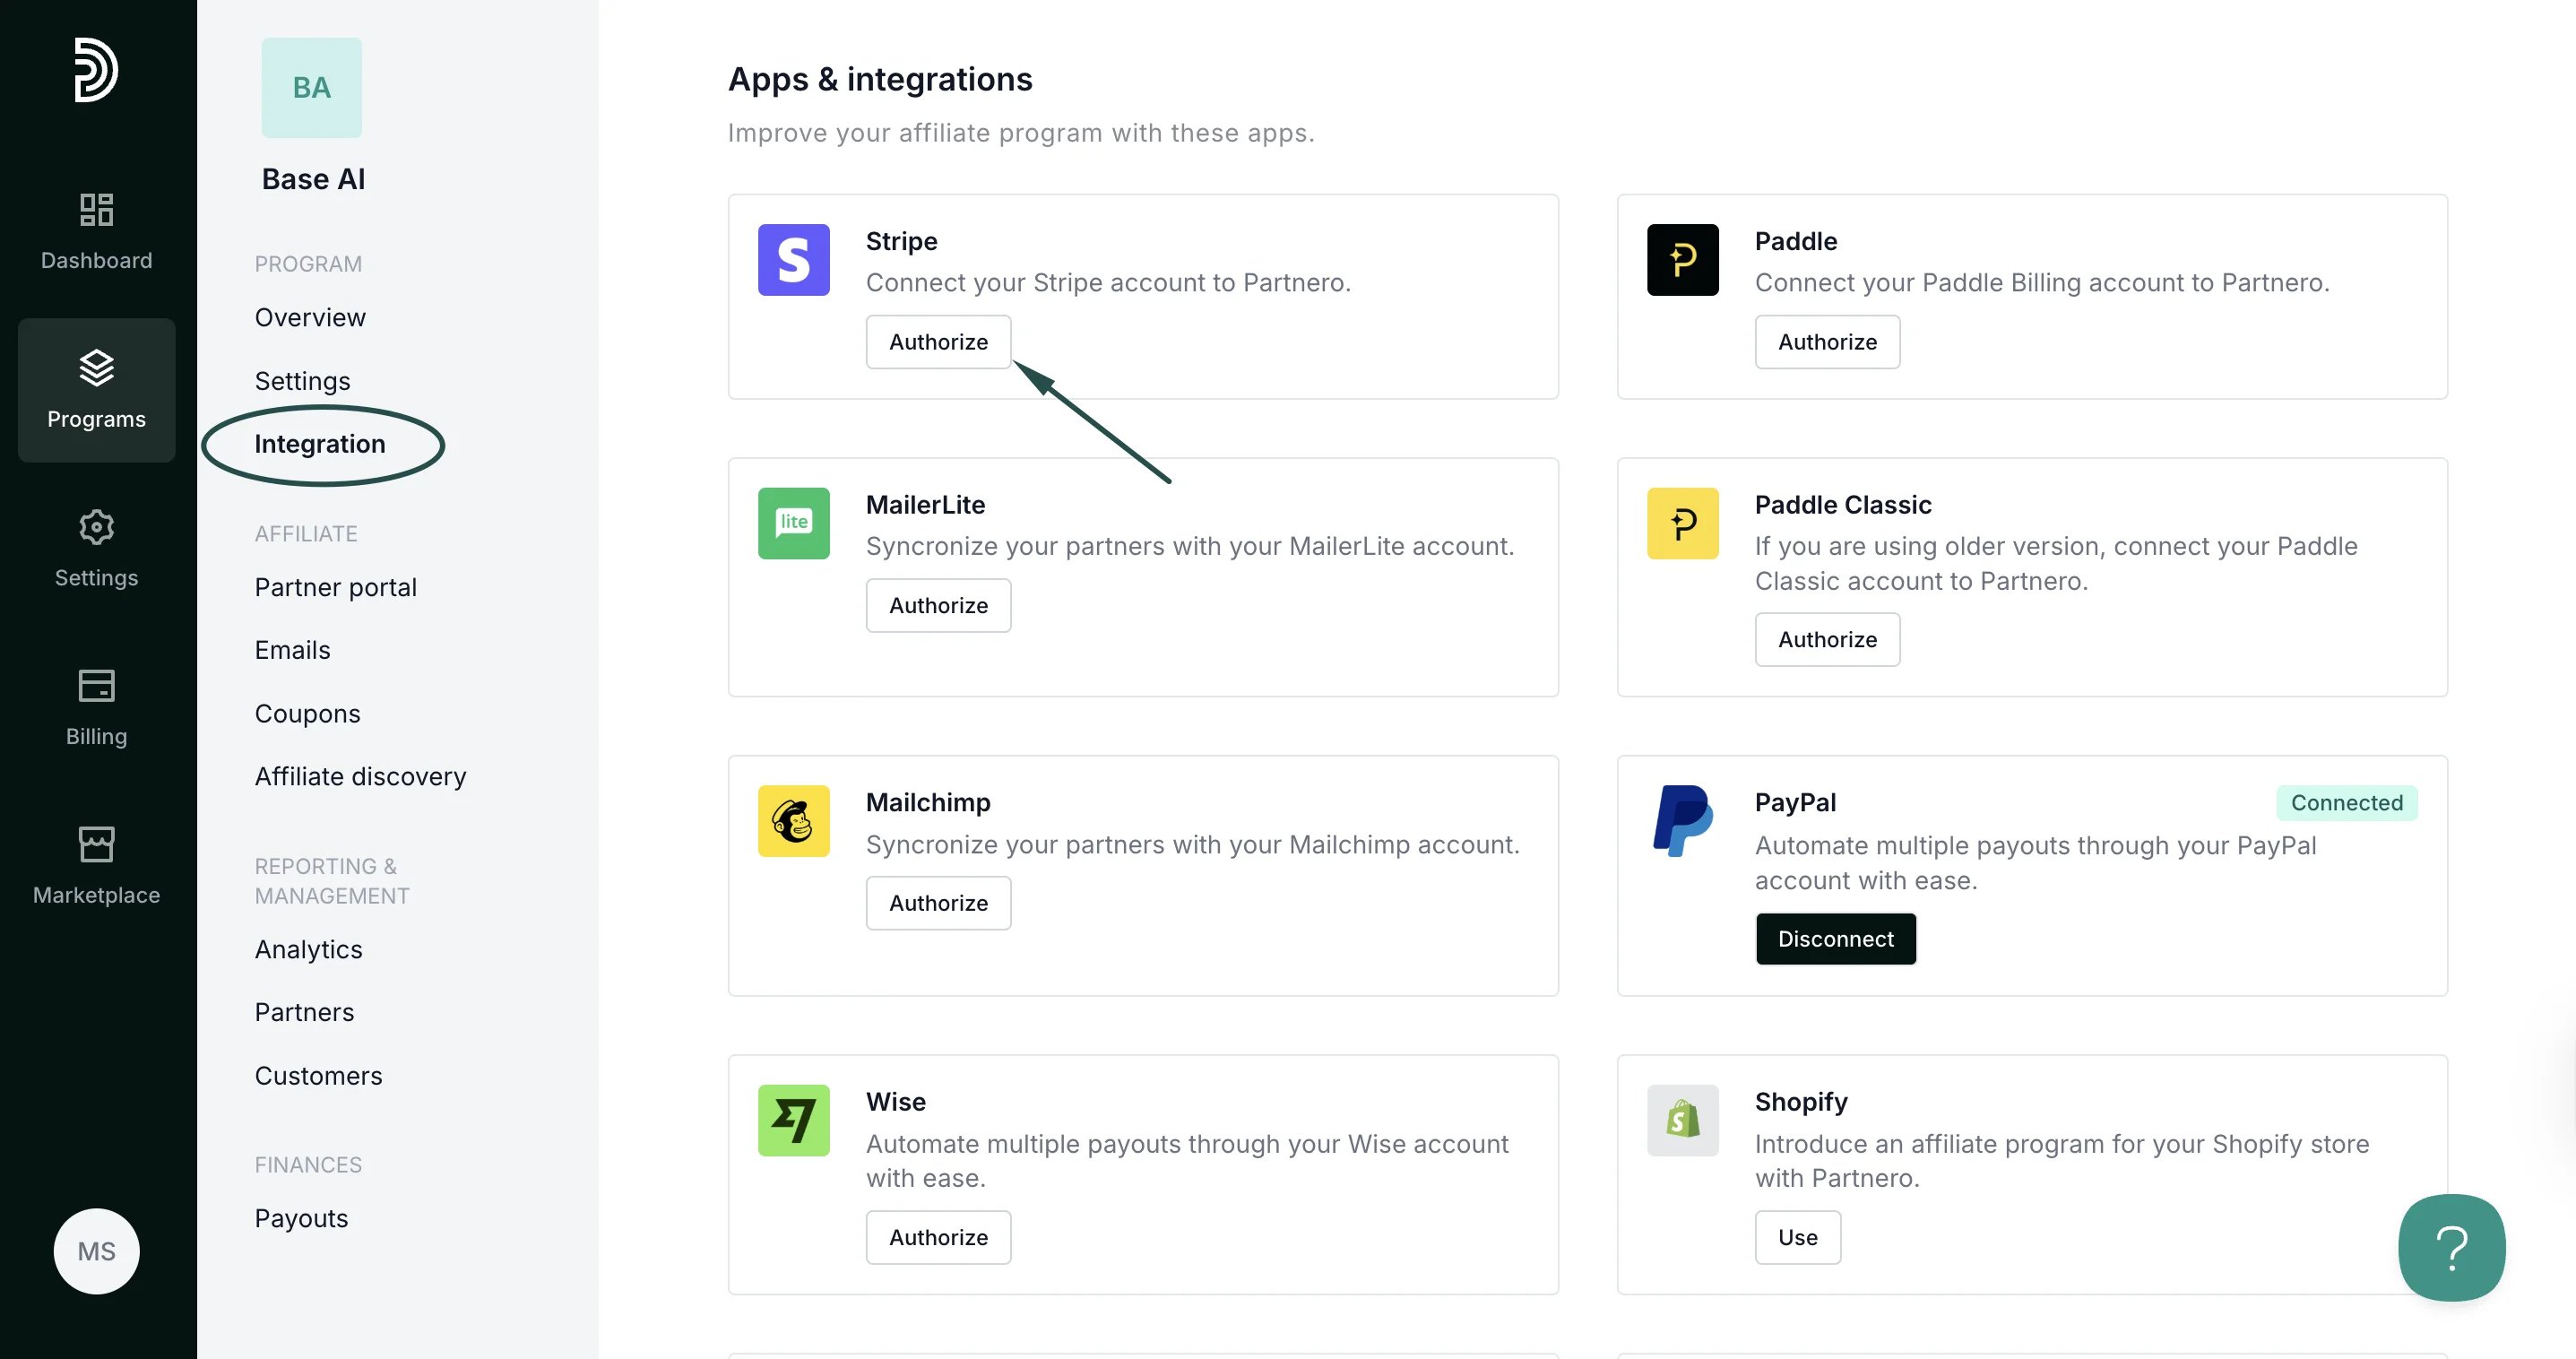 2. There are two authorization methods available: OAauth or API key.
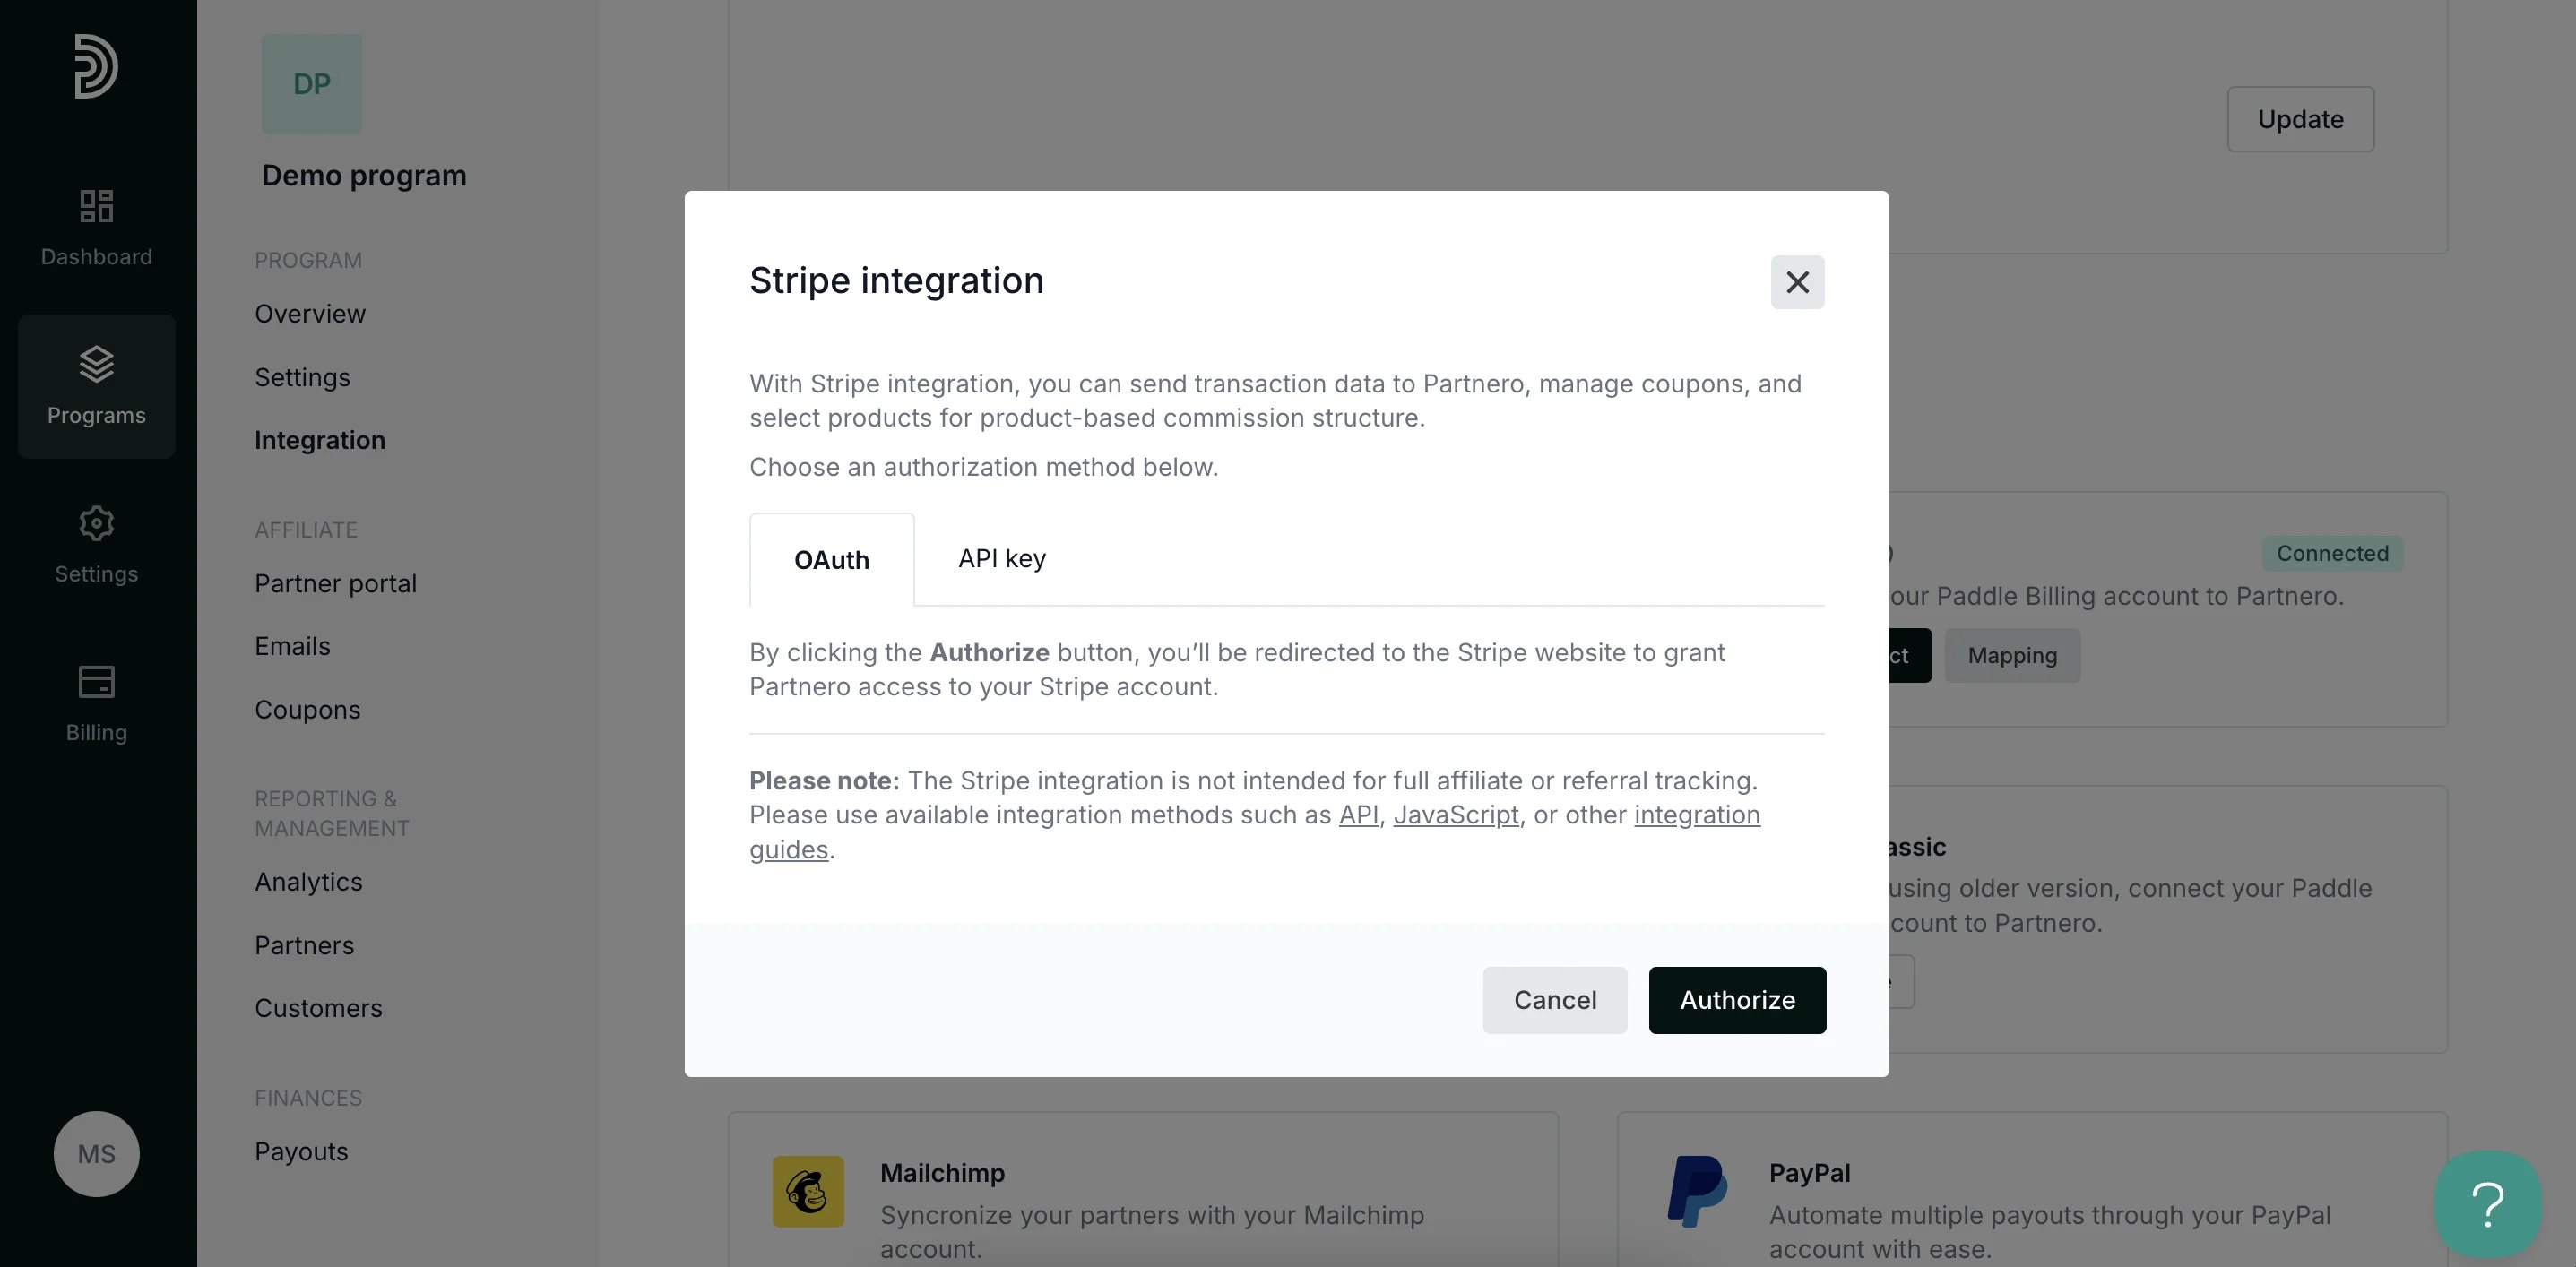 OAuth: click Authorize to be redirected to your Stripe account to grant Partnero access.
API key: Enter your Stripe API key. Go to Developers > API keys in your Stripe dashboard to find your Stripe API key.
OAuth: click Authorize to be redirected to your Stripe account to grant Partnero access.
API key: Enter your Stripe API key. Go to Developers > API keys in your Stripe dashboard to find your Stripe API key.
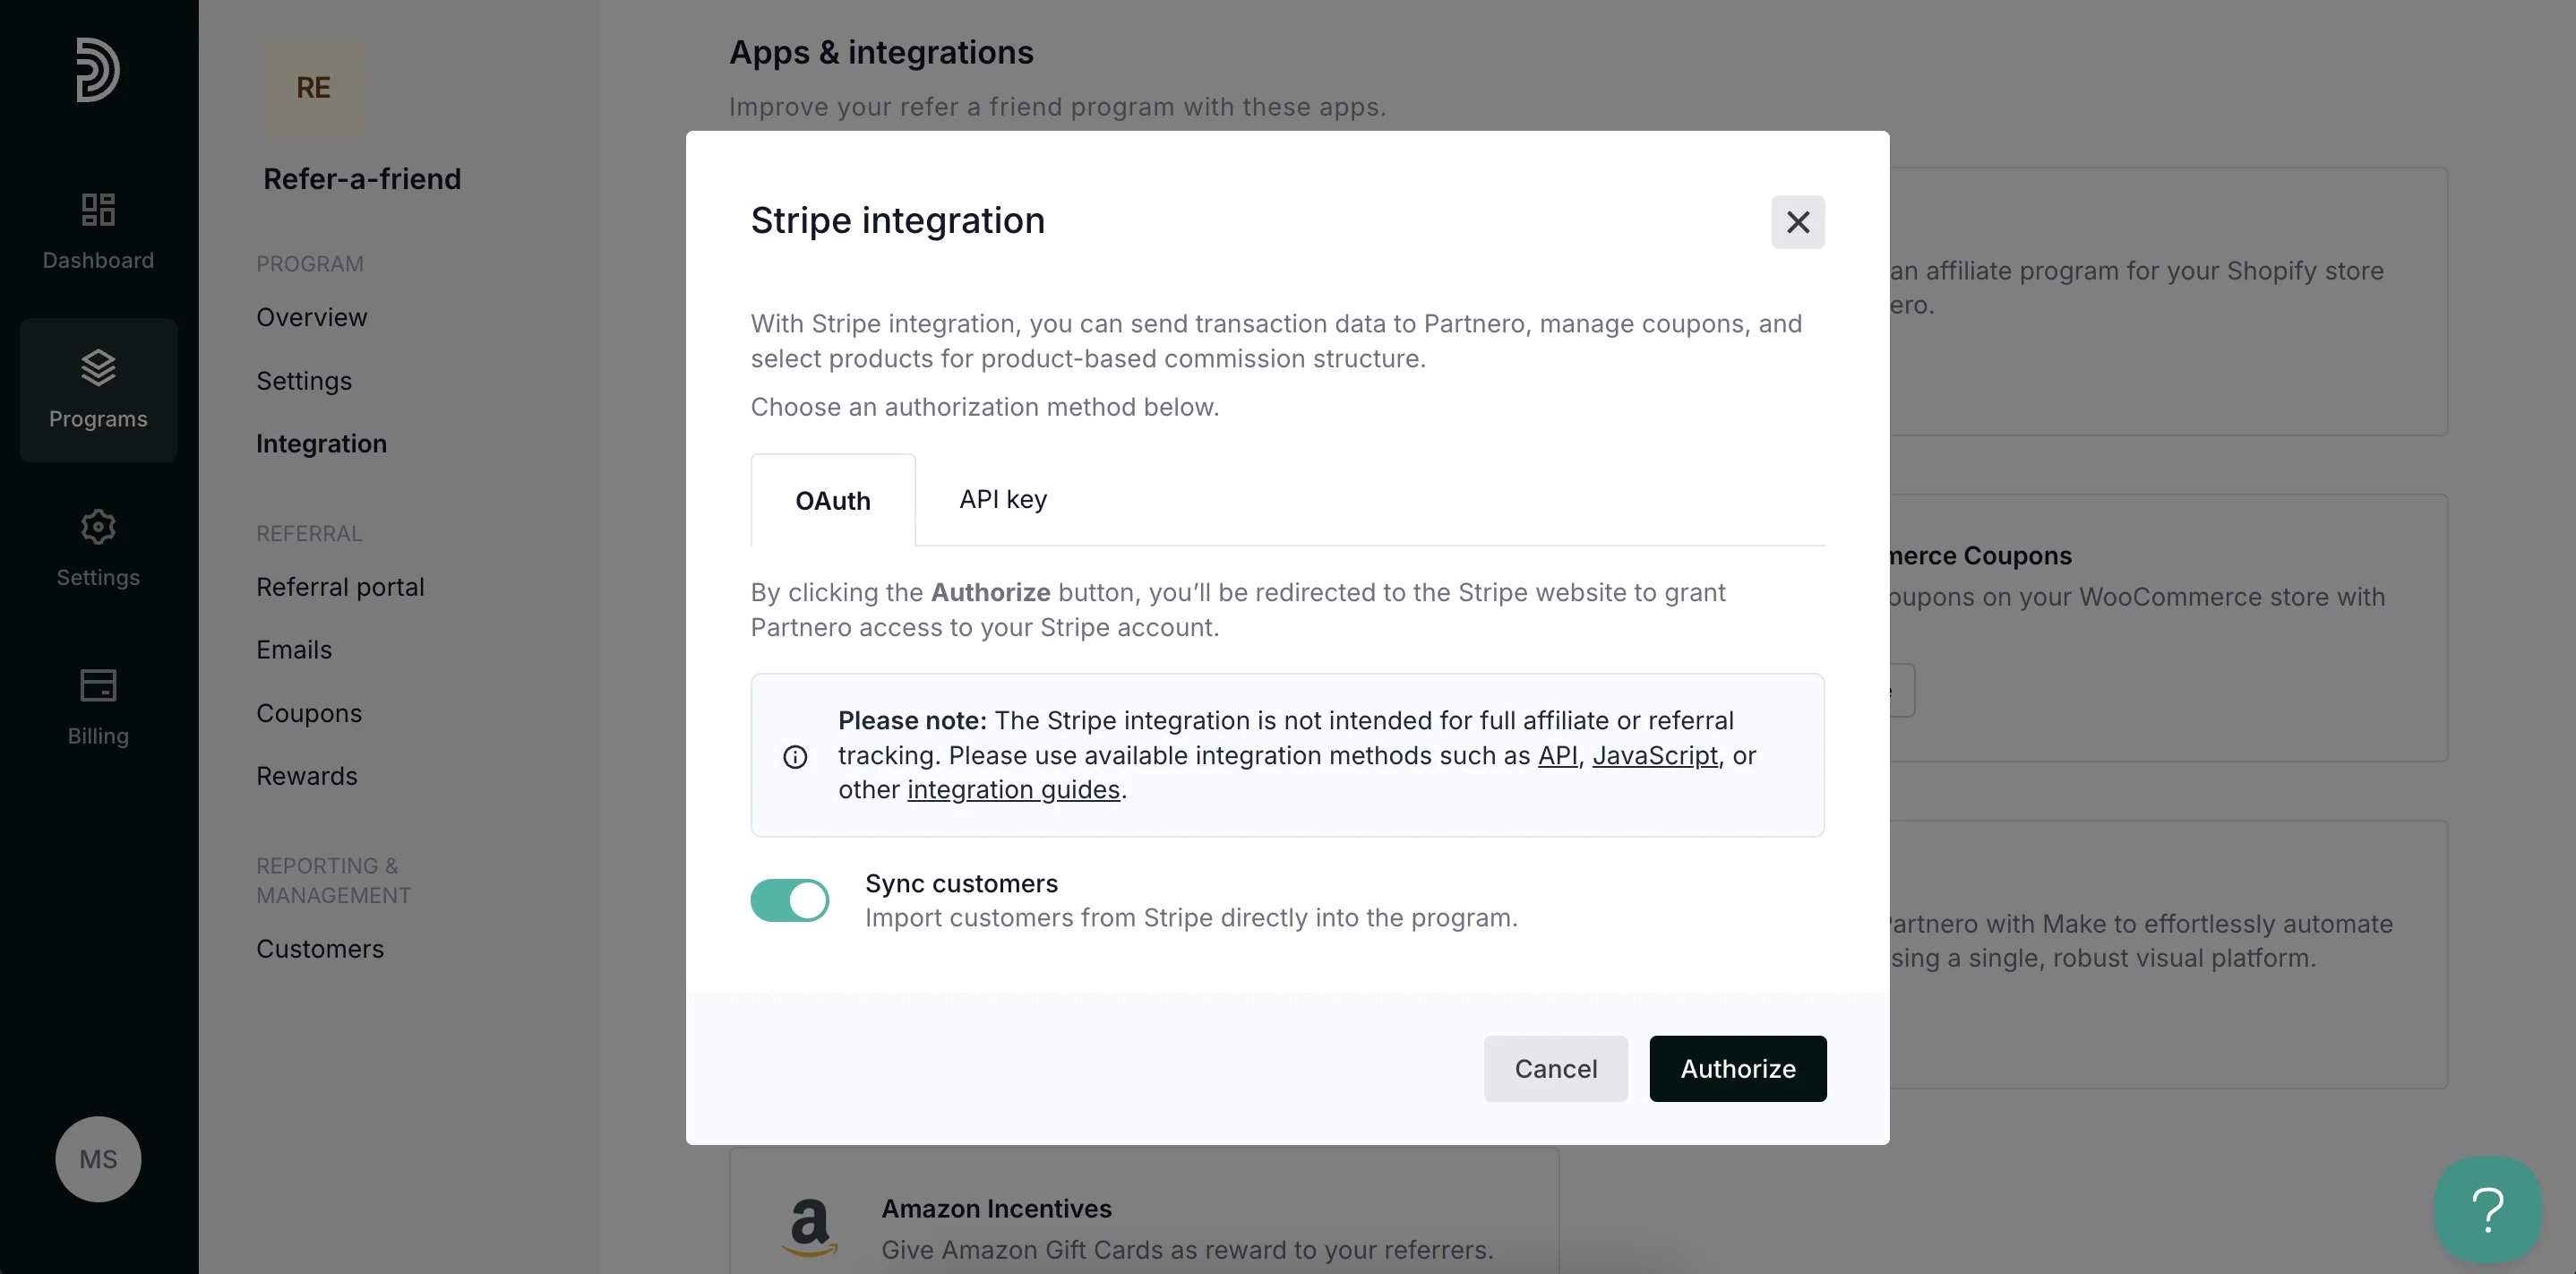 3. Click **Authorize**.
***
### Step 4: Enable transaction creation via JS
Lastly, transaction creation via JavaScript must be enabled on your Partnero account. To do that:
1. On your Partnero account, go to **Integration** > **Security** tab.
3. Click **Authorize**.
***
### Step 4: Enable transaction creation via JS
Lastly, transaction creation via JavaScript must be enabled on your Partnero account. To do that:
1. On your Partnero account, go to **Integration** > **Security** tab.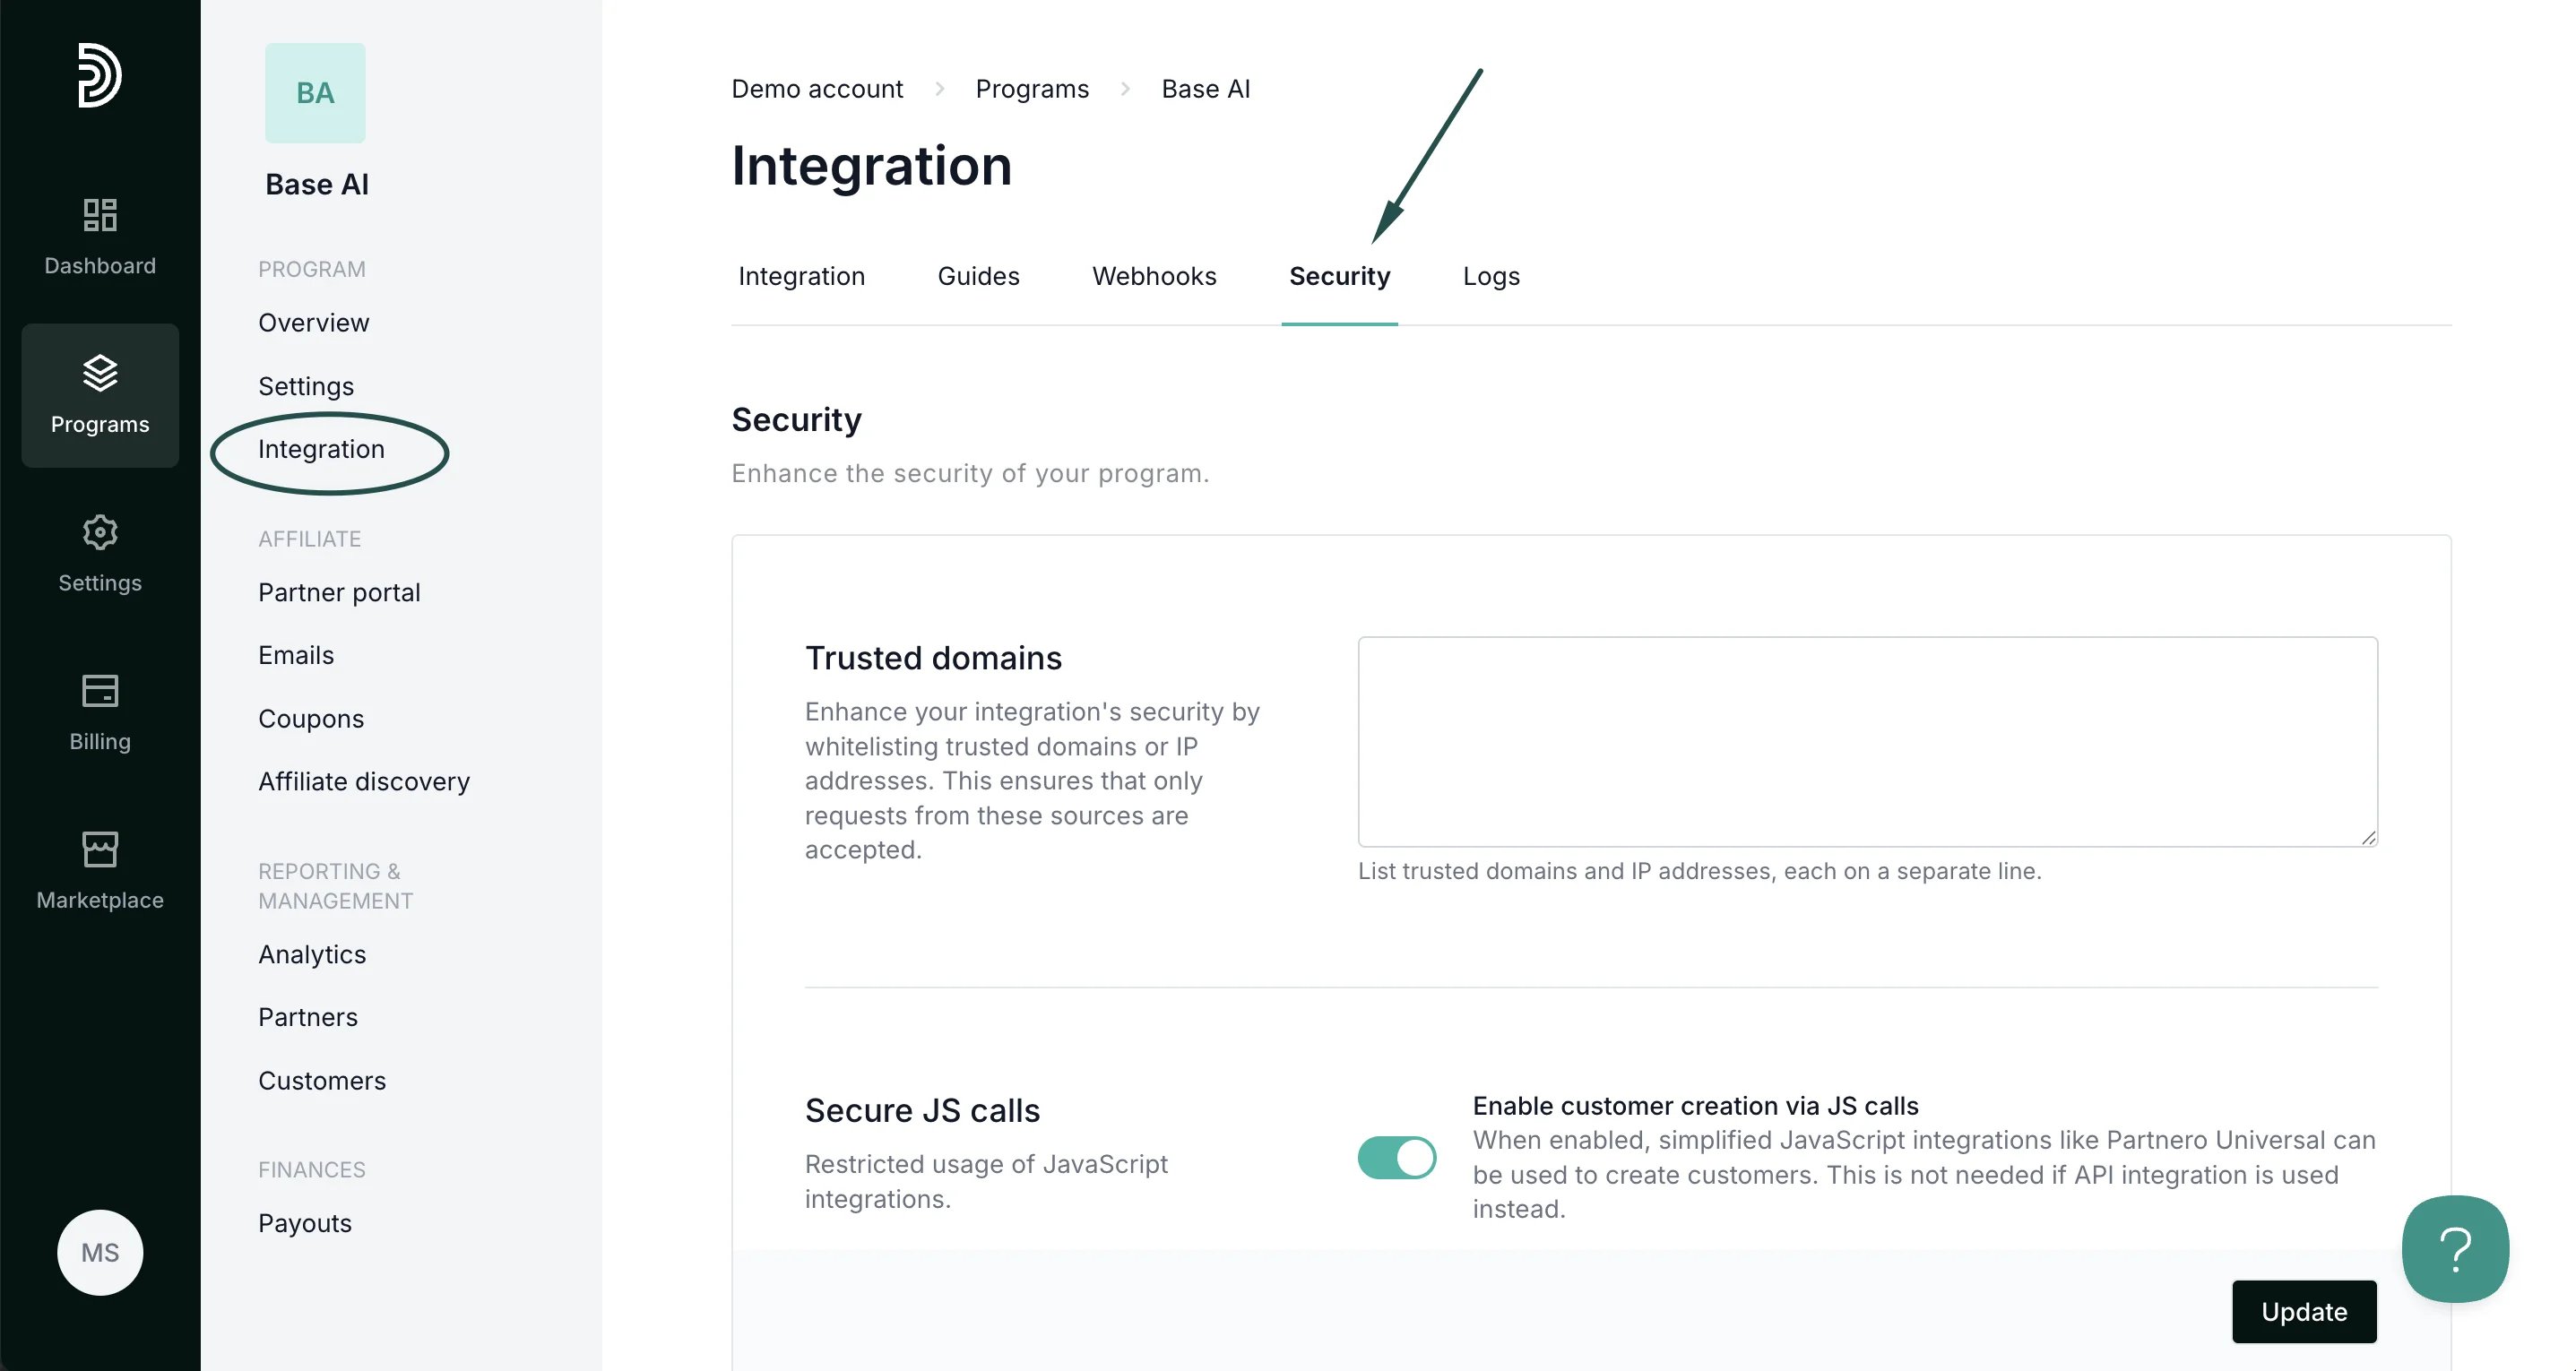 2. Scroll down to **Secure JS calls**. Toggle to enable transaction creation:
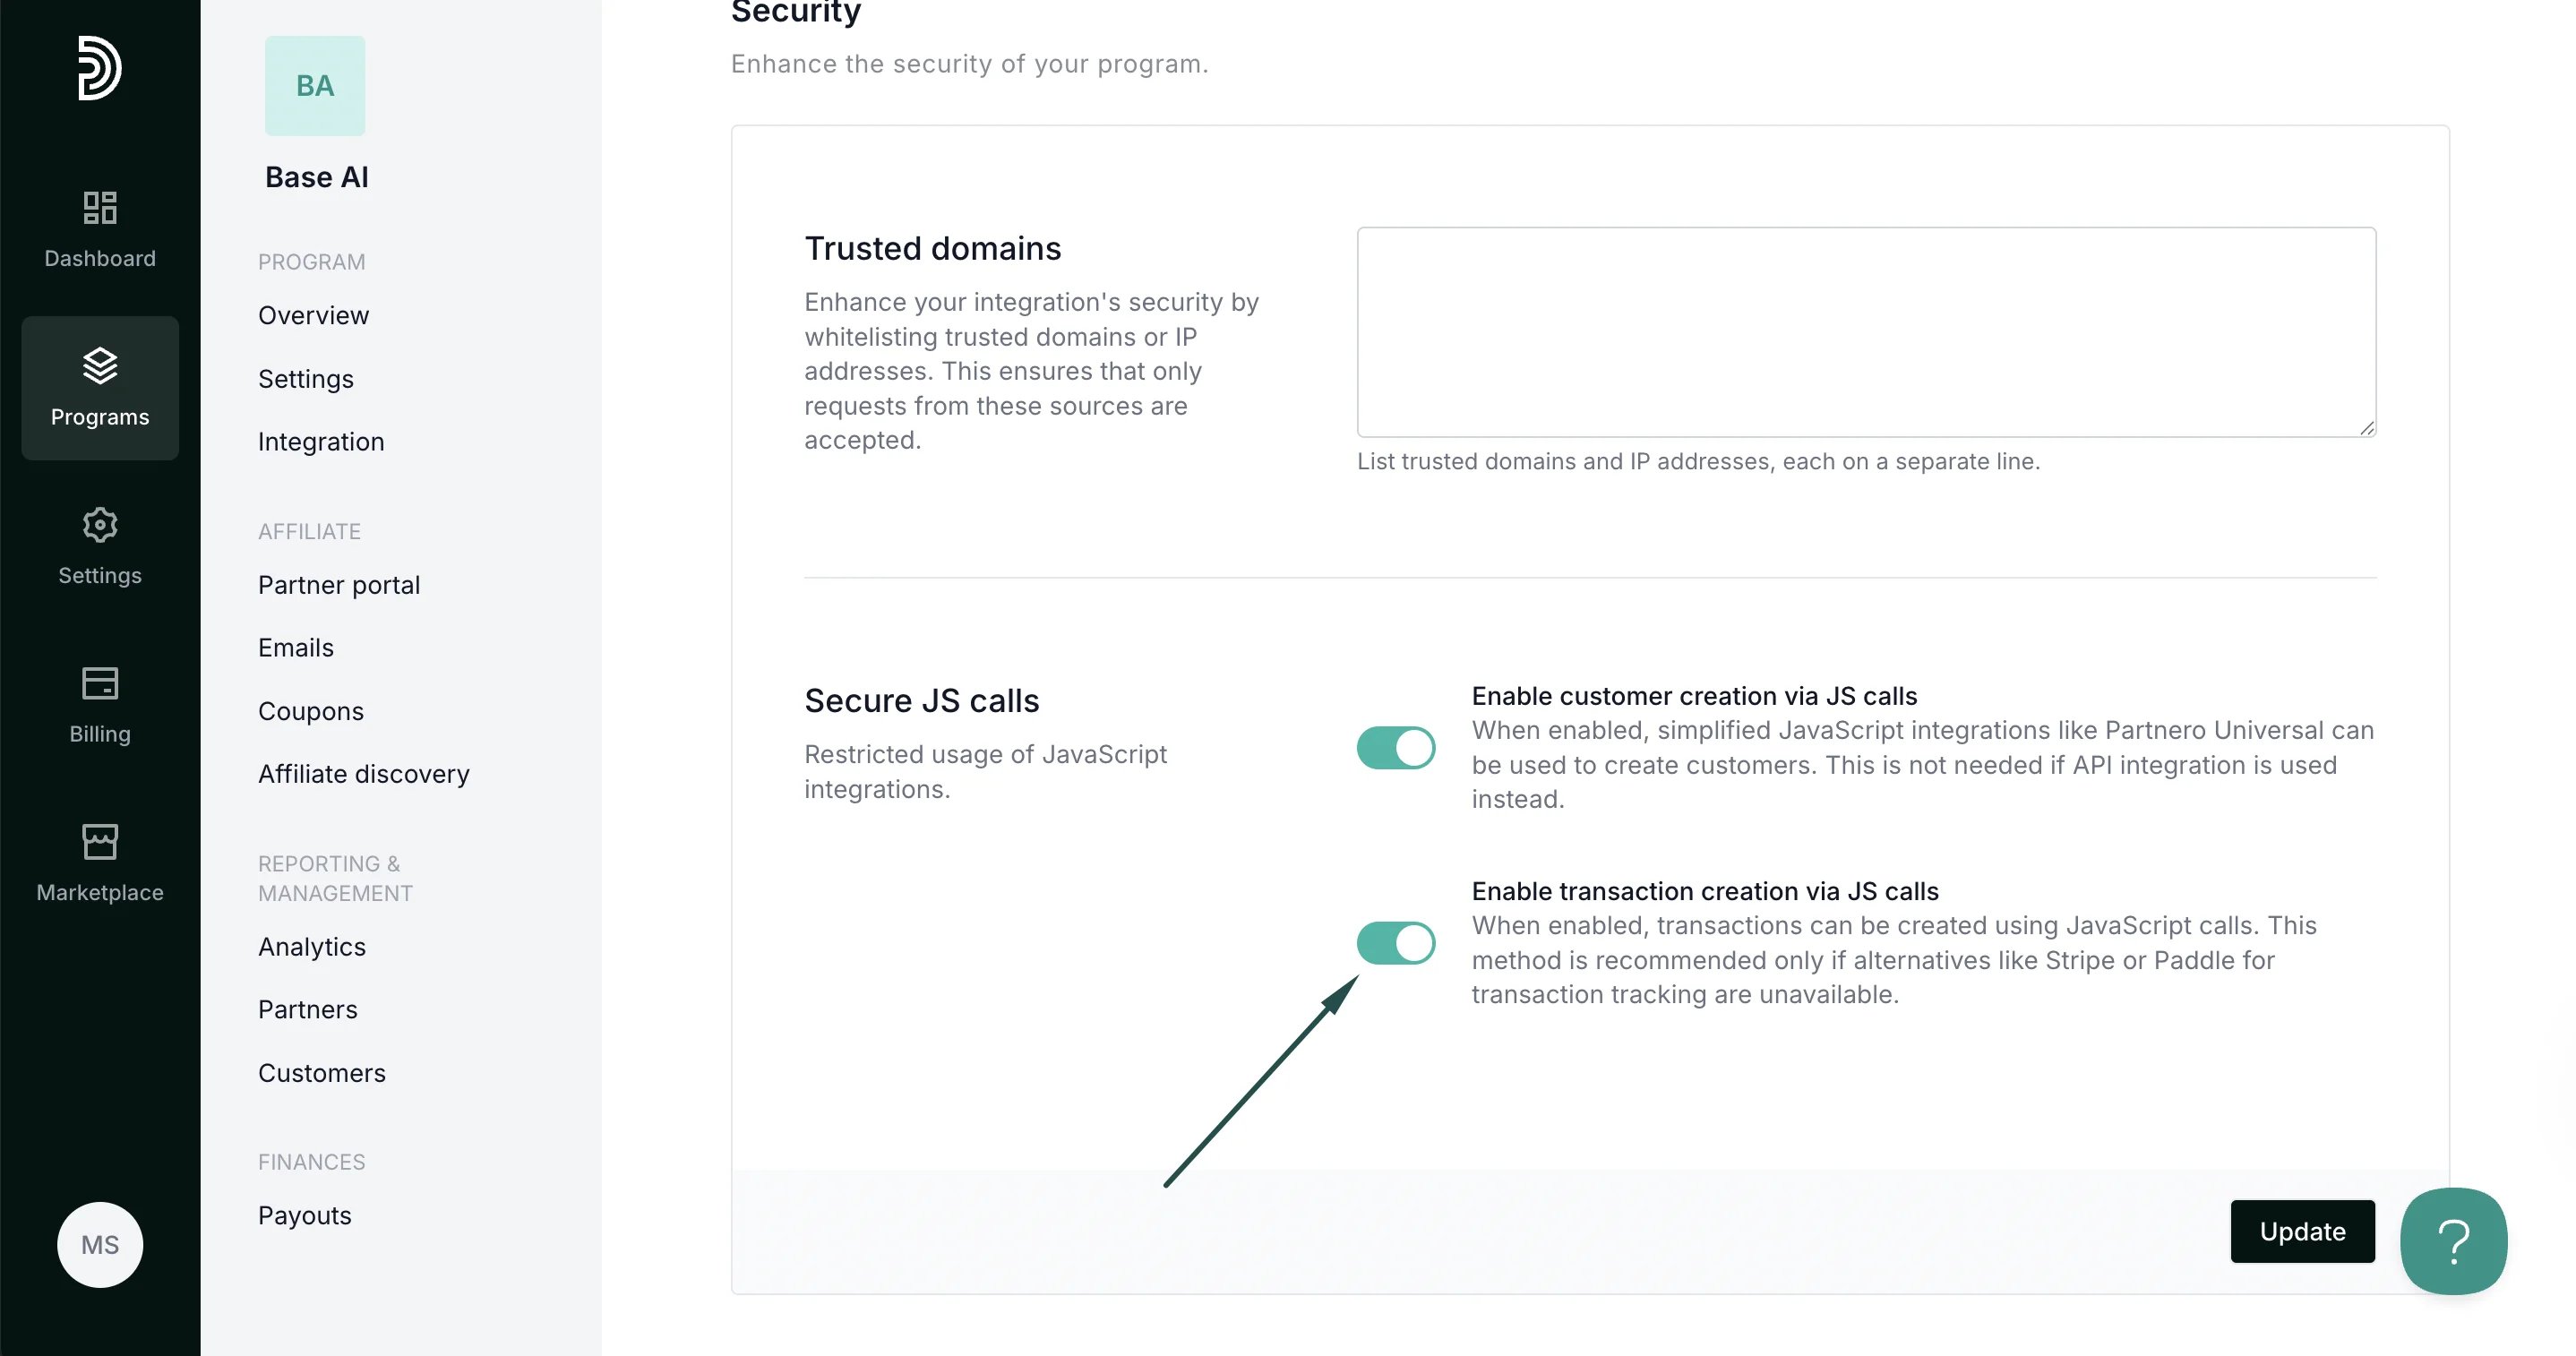 3. Click **Update**.
***
Your integration with Brilliant Directories is now complete! We strongly recommend testing the integration by purchasing through an affiliate link.
This documentation is built and hosted on [Mintlify](https://mintlify.com), a developer documentation platform.
3. Click **Update**.
***
Your integration with Brilliant Directories is now complete! We strongly recommend testing the integration by purchasing through an affiliate link.
This documentation is built and hosted on [Mintlify](https://mintlify.com), a developer documentation platform.