> ## Documentation Index
> Fetch the complete documentation index at: https://docs.partnero.com/llms.txt
> Use this file to discover all available pages before exploring further.
# PayPal Links & Buttons integration
This article covers how to integrate Partnero affiliate tracking when you use **PayPal Pay Links and Buttons to accept payments on your website.**
*To learn about integrating PayPal Mass Pay for automated payouts, [click here](/integrations/paypal).*
***
### How does the PayPal Links & Buttons integration work?
There are two main parts to the integration:
1. Creating a referred customer on Partnero.
2. Tracking the customer's purchases.
We'll cover both in this article. These instructions can also be found on your Partnero account, under **Integration** > **Guides** tab > **PayPal Links & Buttons**: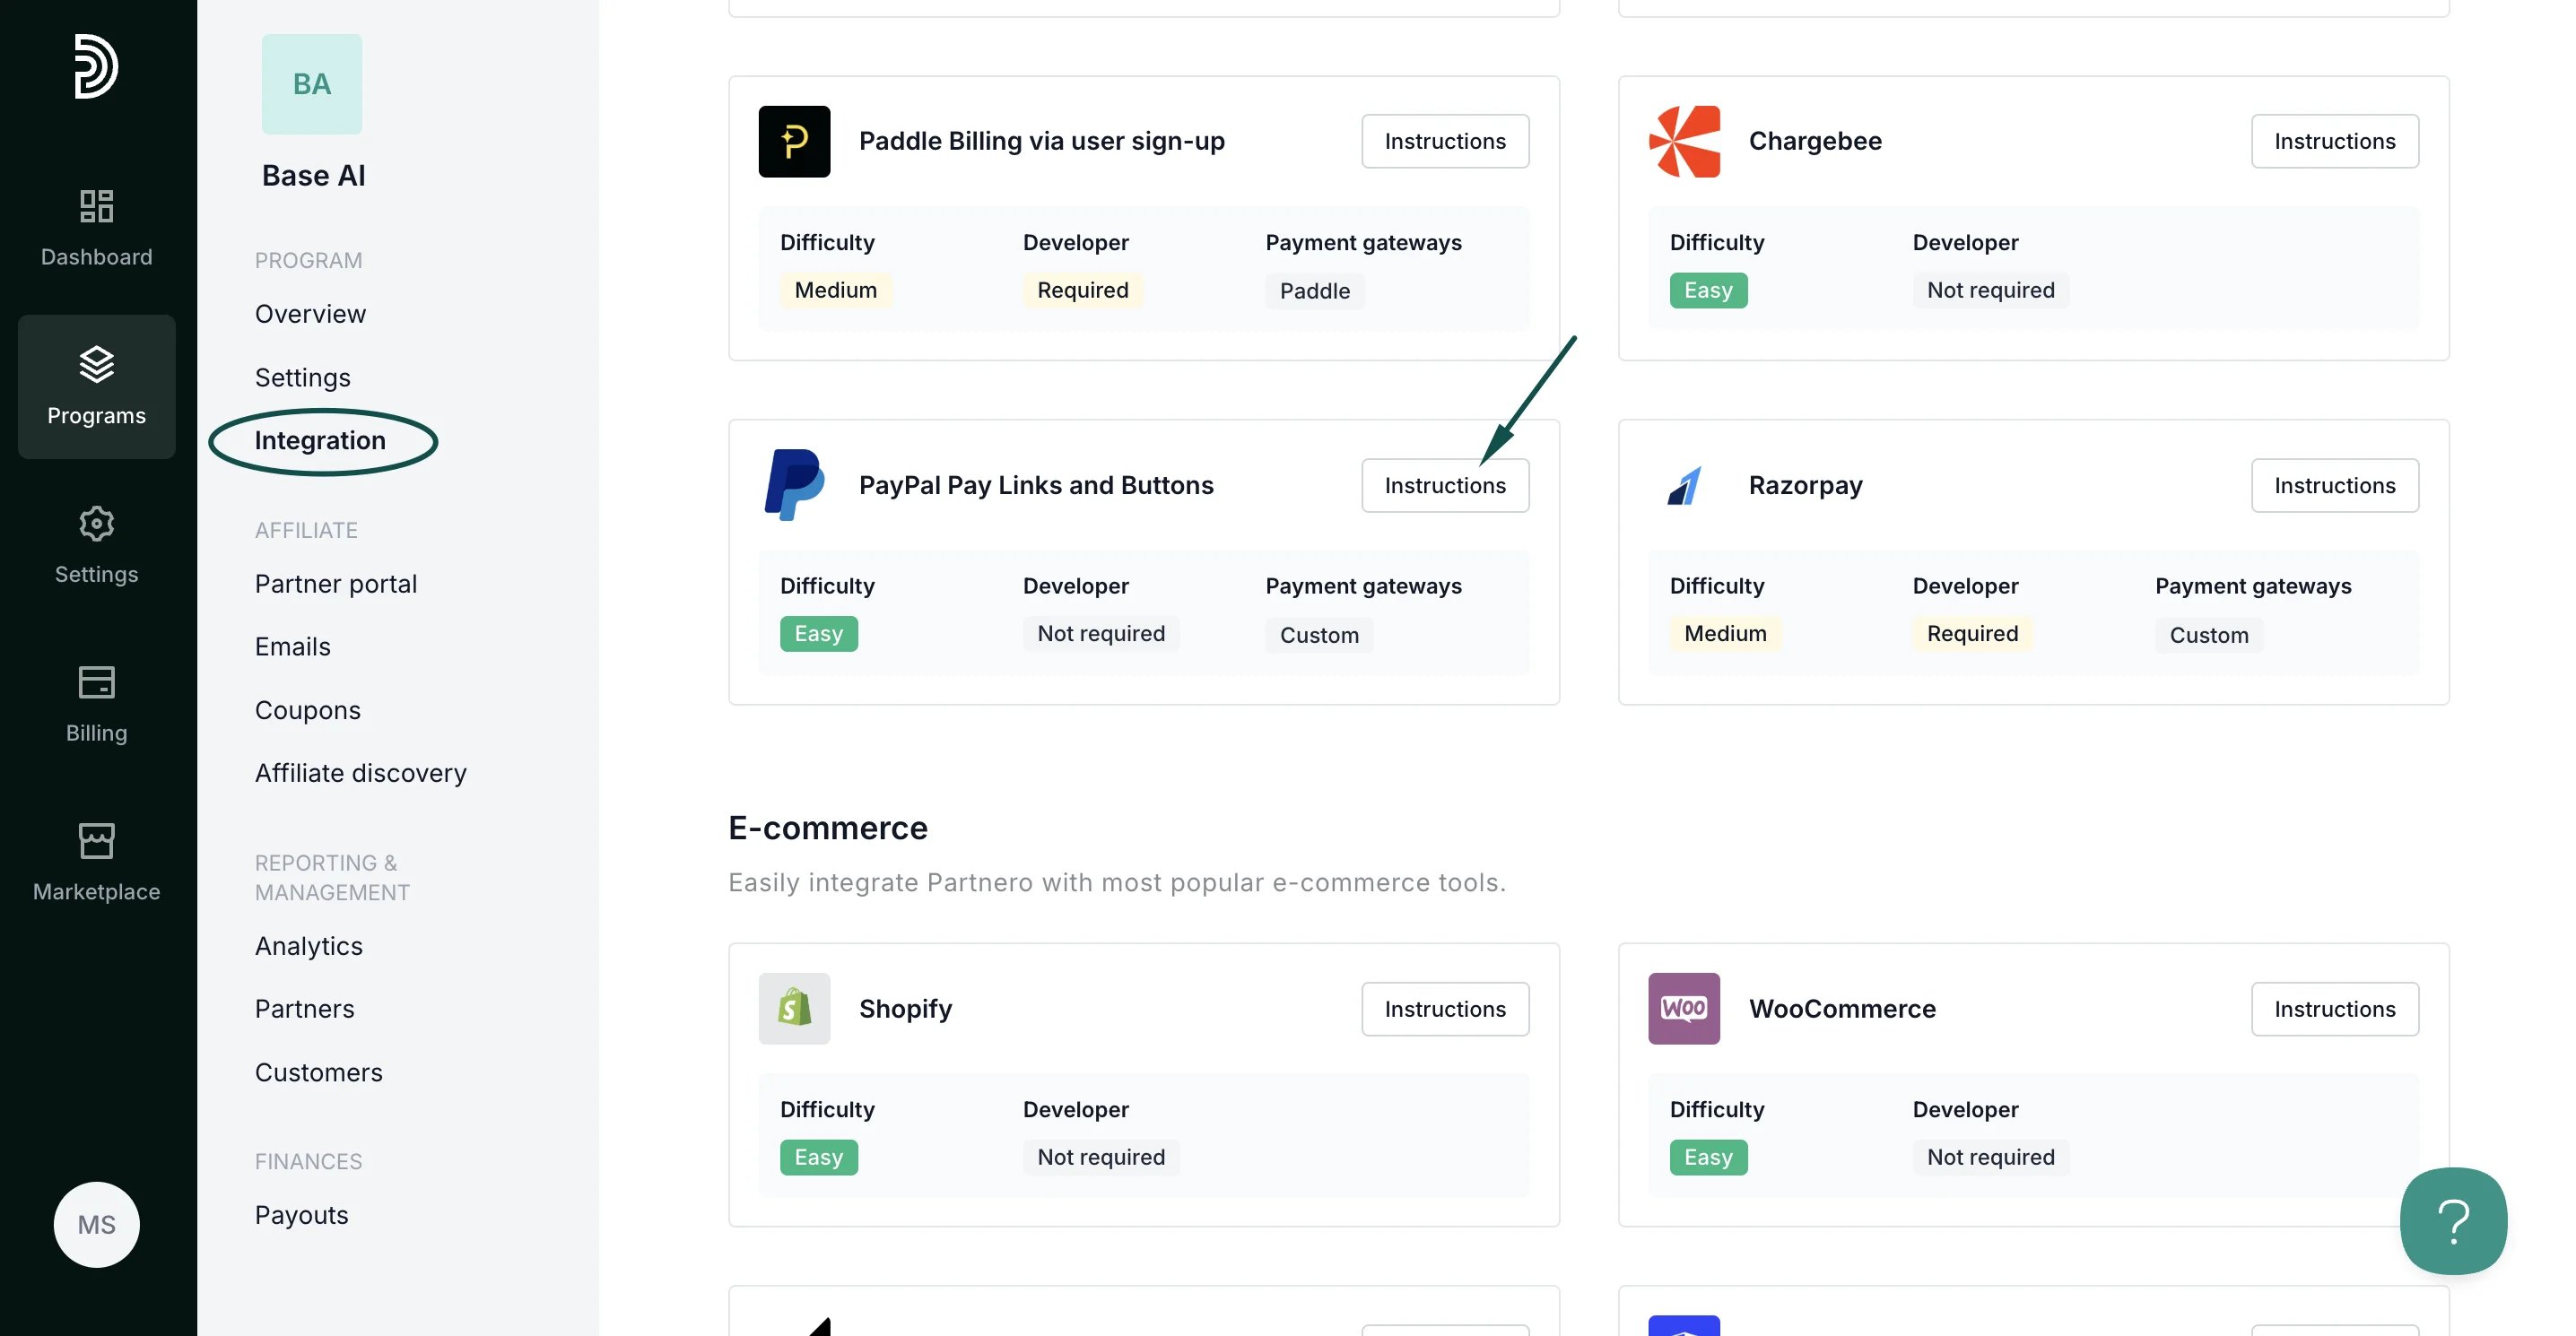 ***
### Step 1: Start tracking website visitors
To track visitors on your website, you need to install the PartneroJS snippet as custom code.
#### Install the PartneroJS Snippet
1. On Partnero, go to **Integration** > **Guides** tab > **PayPal Links & Buttons**. Click **Instructions**.
2. Copy the PartneroJS snippet:
***
### Step 1: Start tracking website visitors
To track visitors on your website, you need to install the PartneroJS snippet as custom code.
#### Install the PartneroJS Snippet
1. On Partnero, go to **Integration** > **Guides** tab > **PayPal Links & Buttons**. Click **Instructions**.
2. Copy the PartneroJS snippet: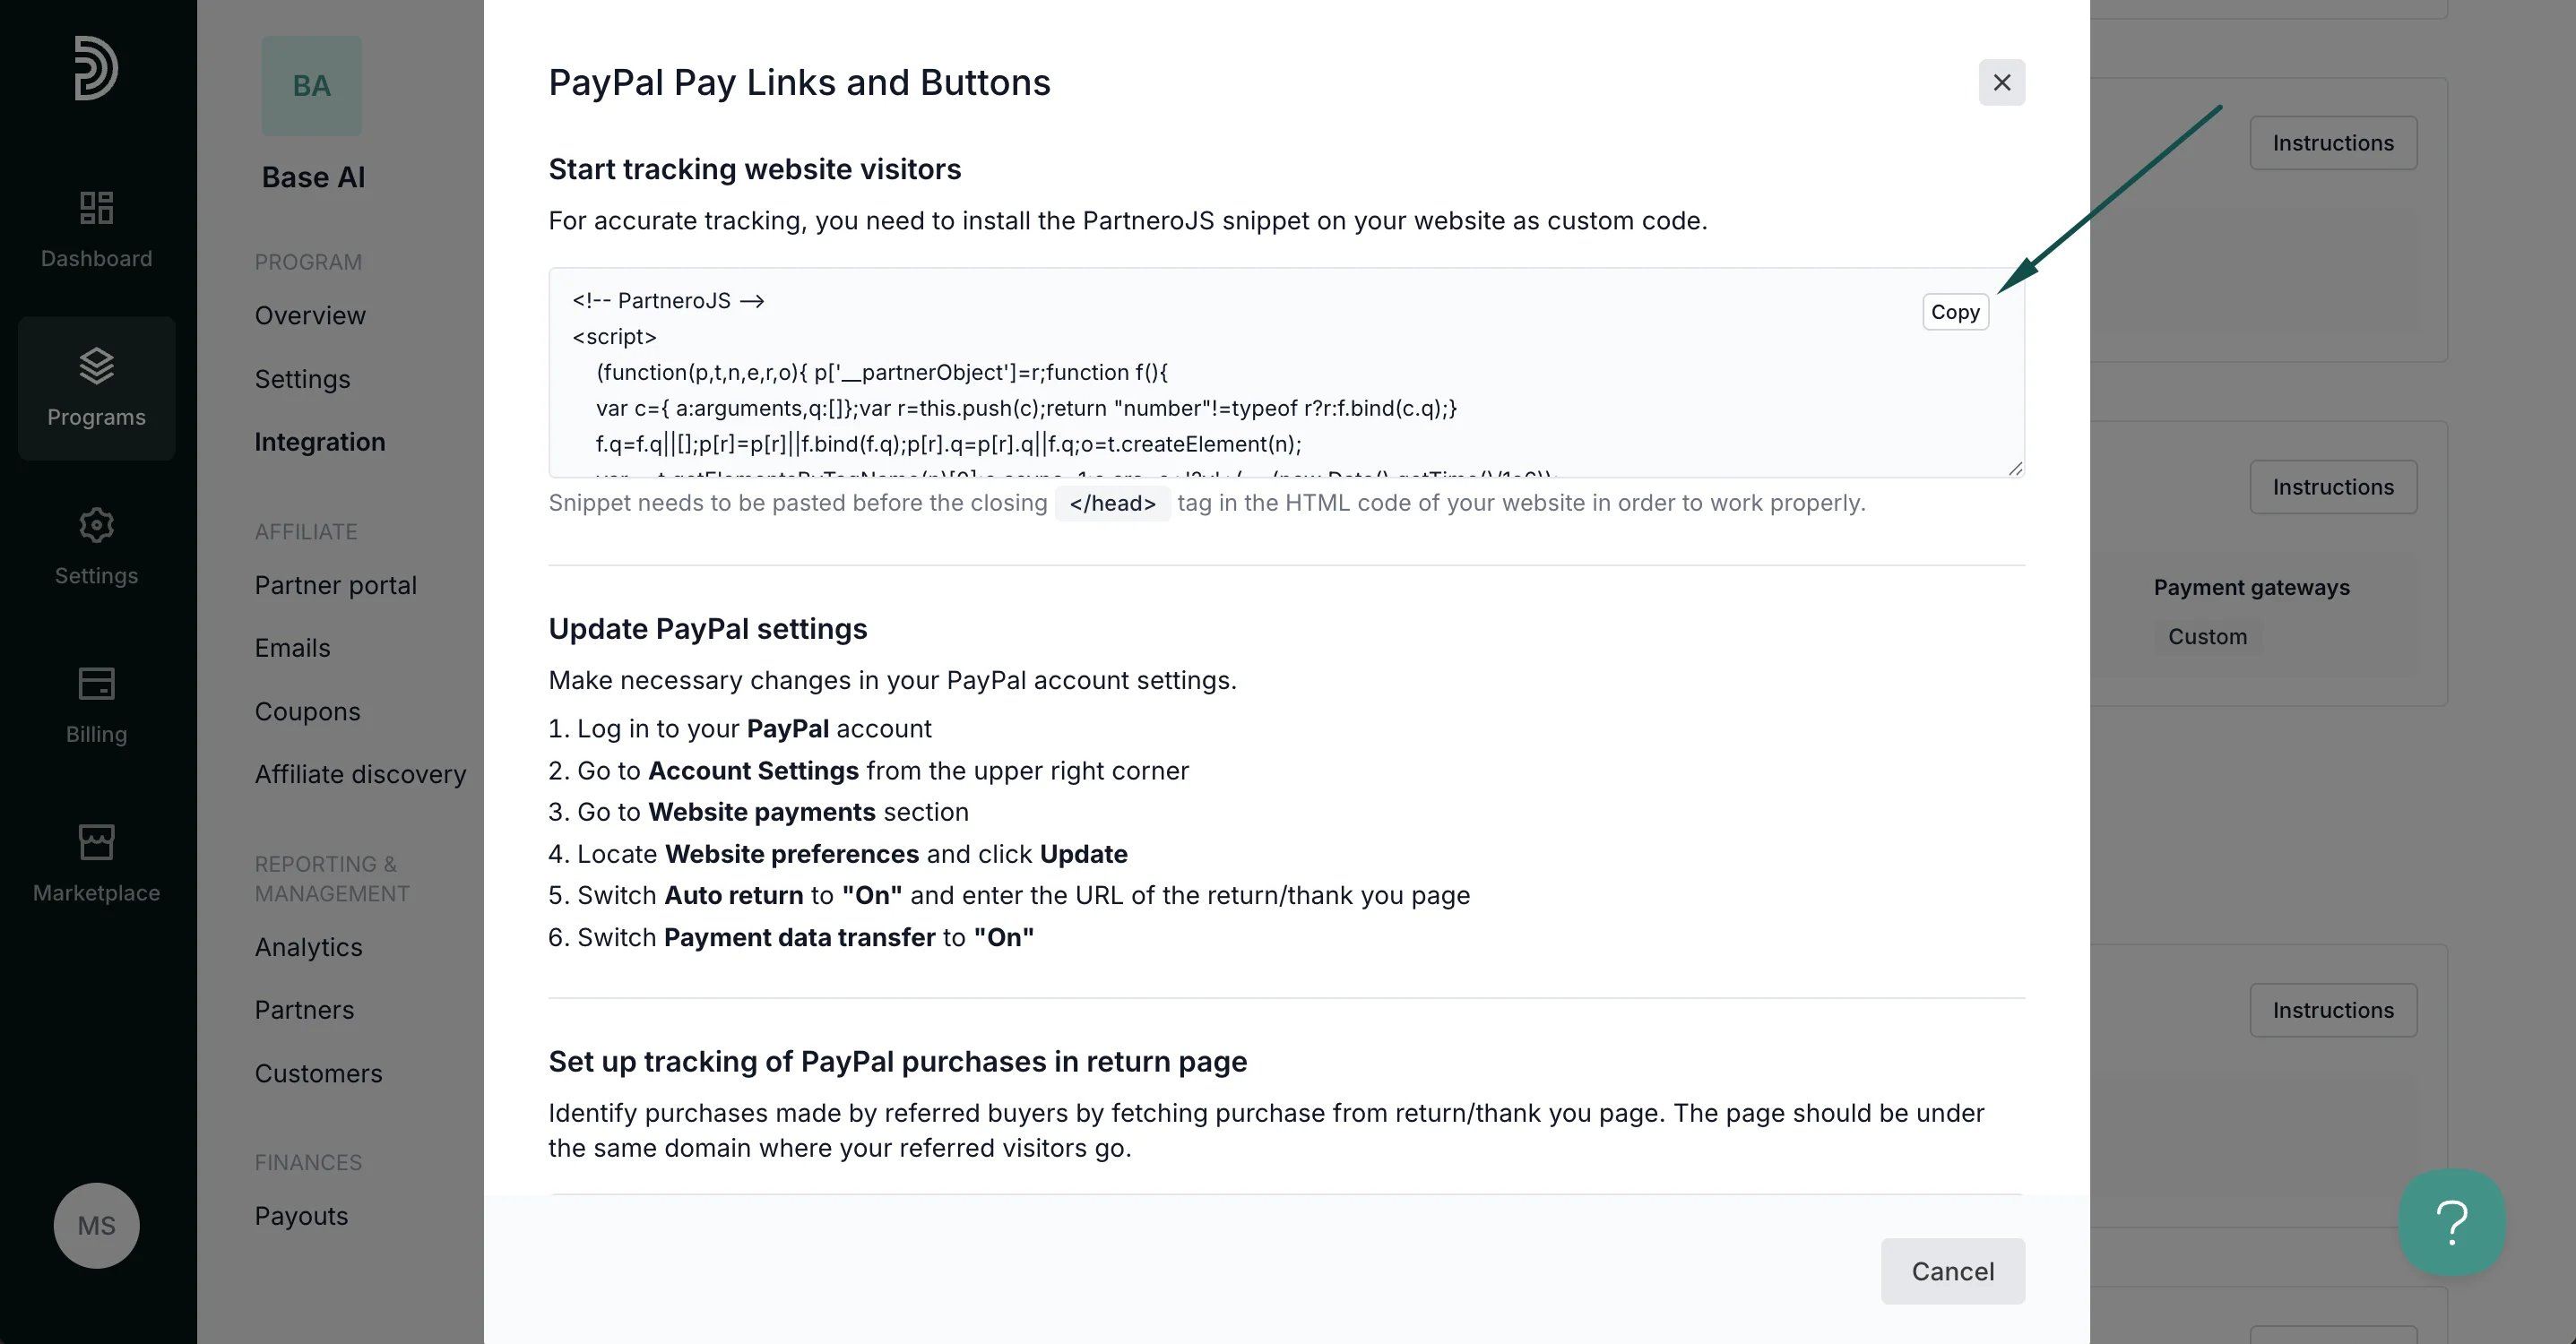 3. Pase the script before the closing *\* tag in the HTML code of your website.
***
### Step 2: Update PayPal settings
Edit the following settings on your PayPal account:
1. Go to **Account Settings** from the upper right corner:
3. Pase the script before the closing *\* tag in the HTML code of your website.
***
### Step 2: Update PayPal settings
Edit the following settings on your PayPal account:
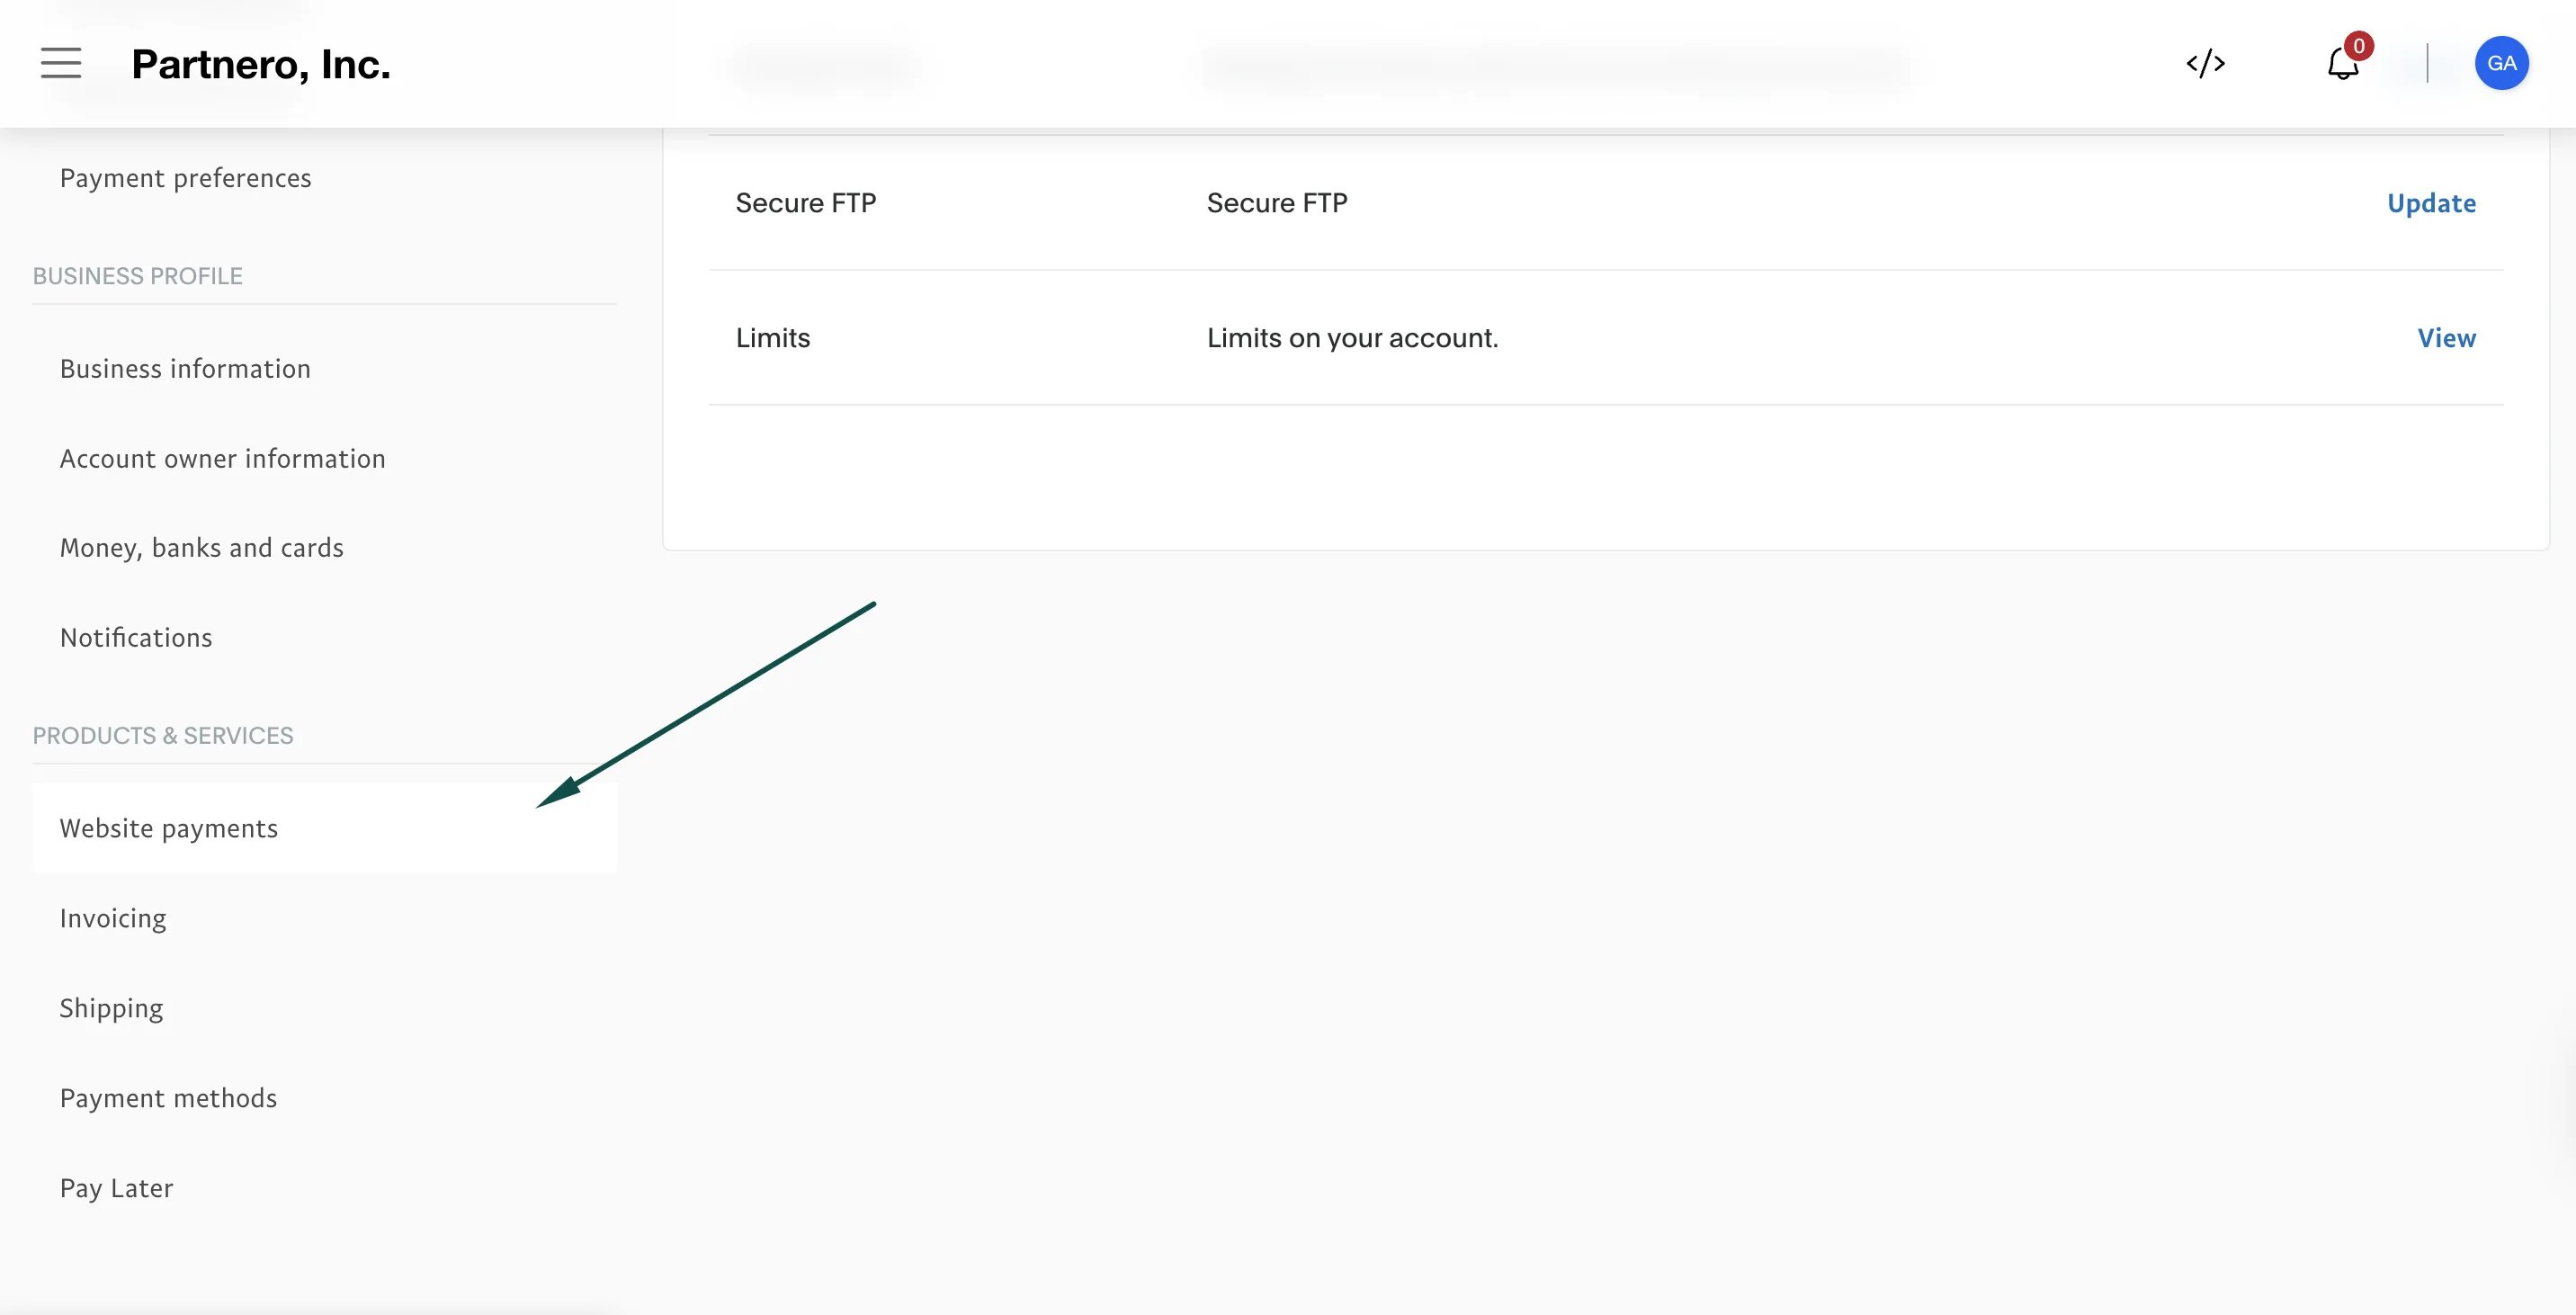
1. Go to **Account Settings** from the upper right corner: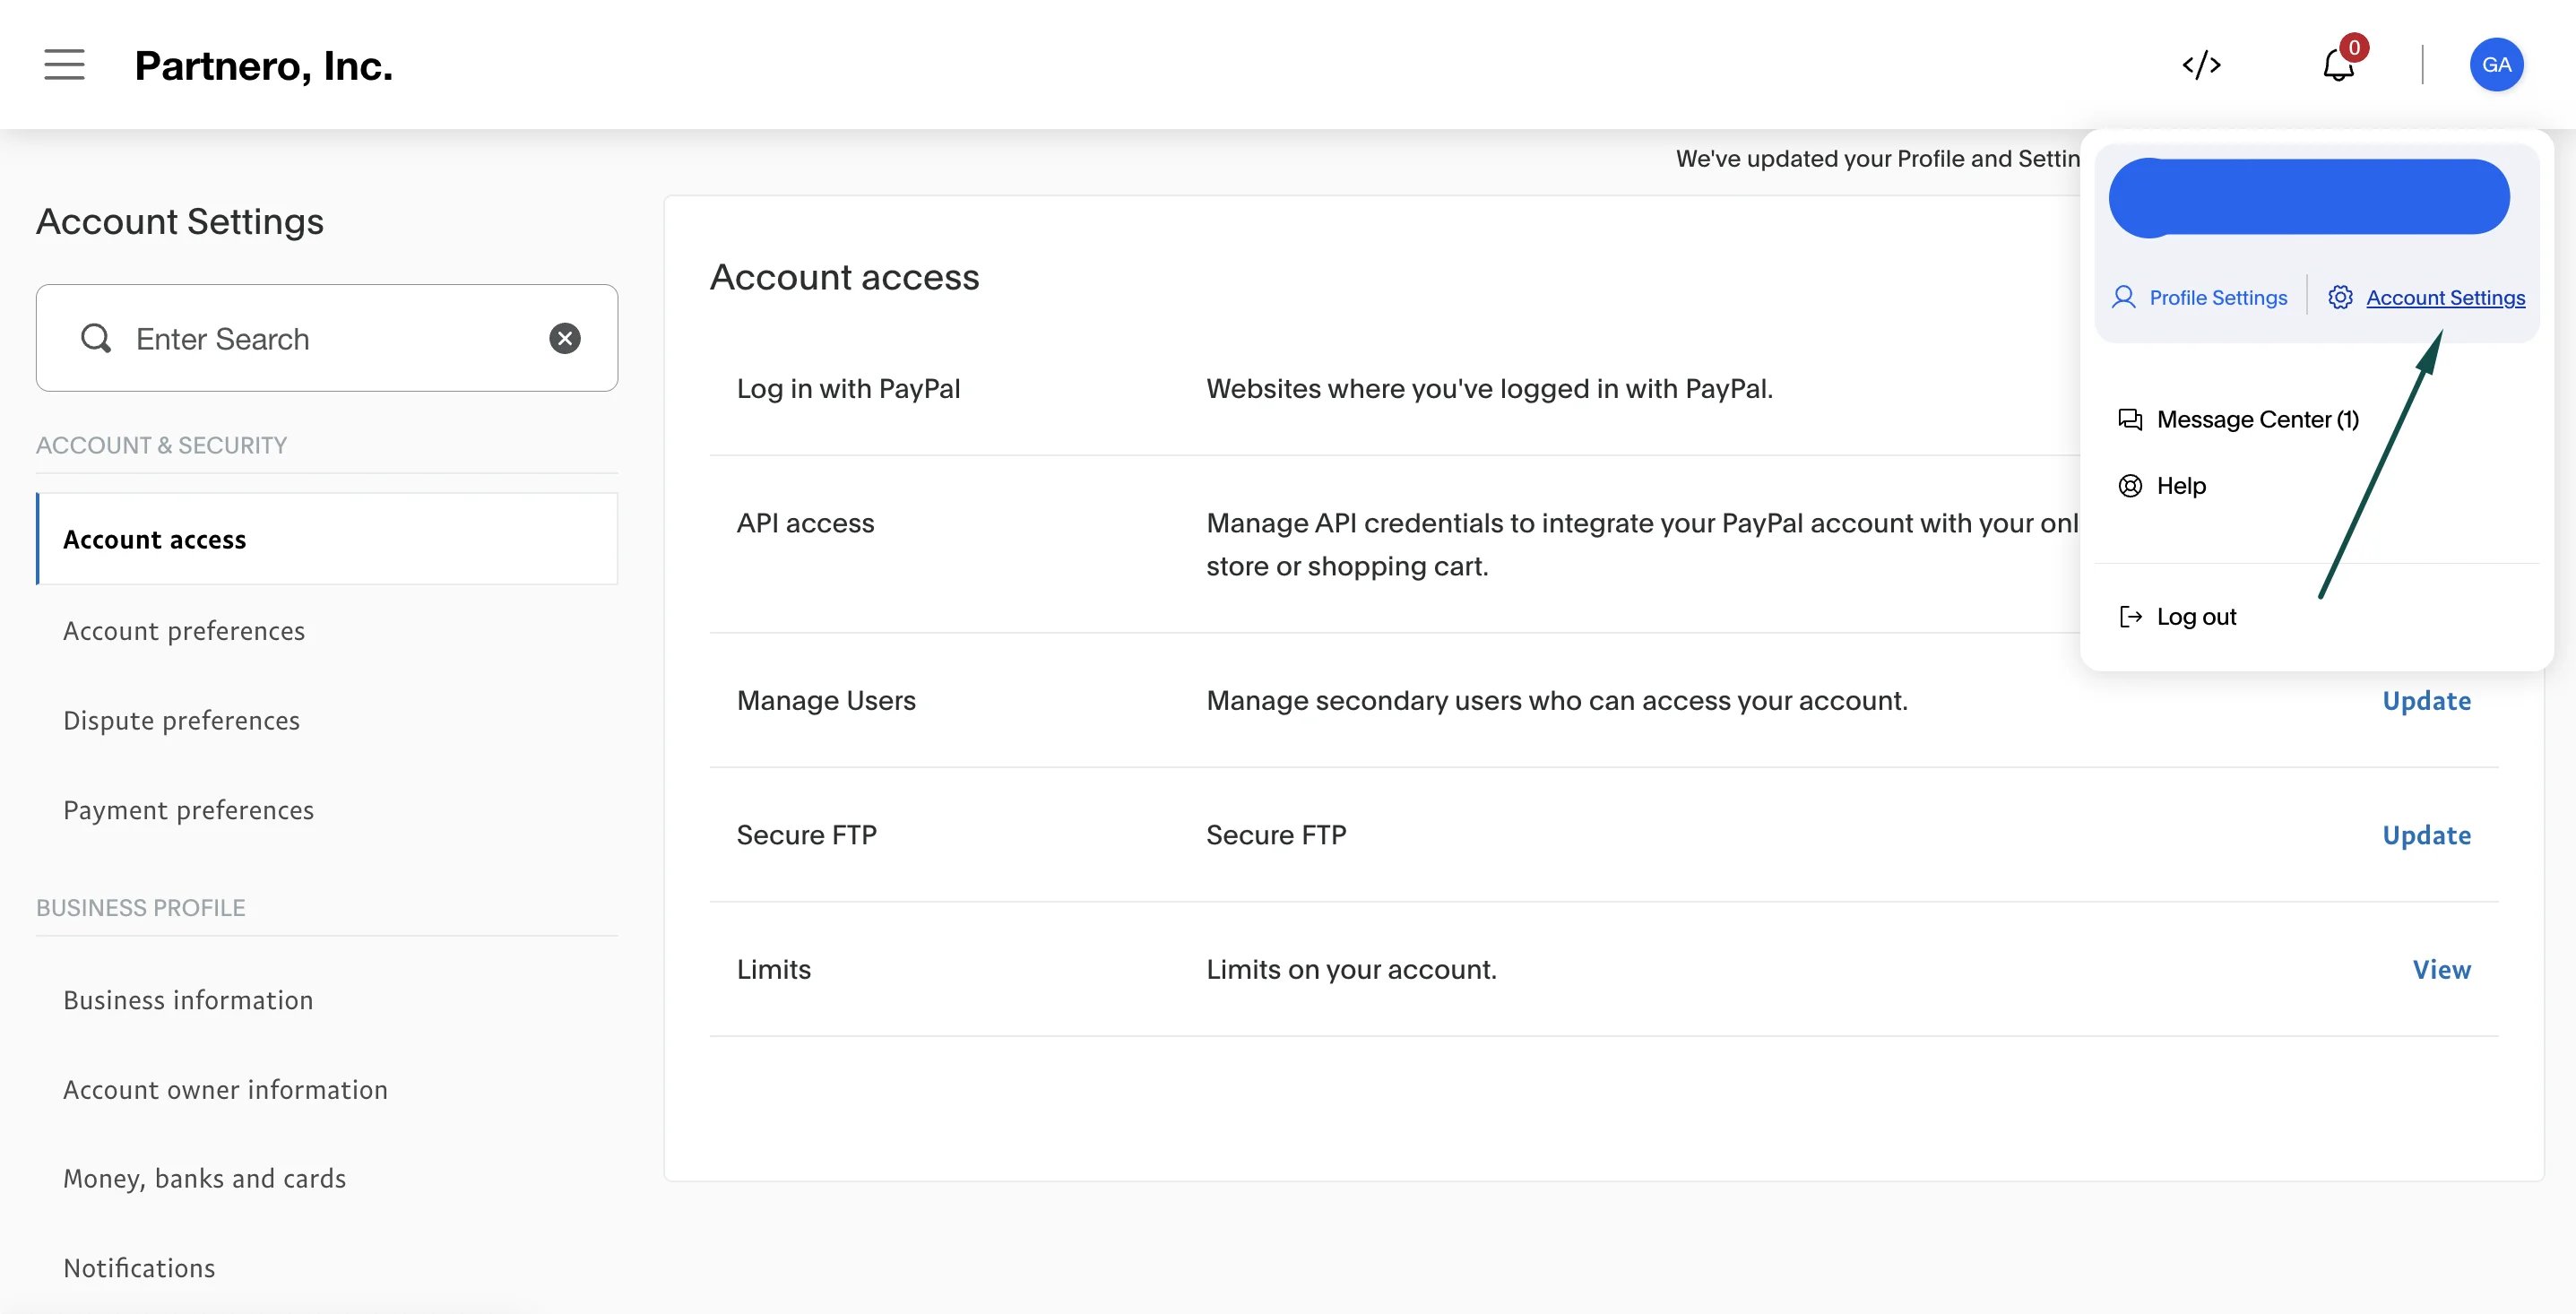 2. Go to **Website payments** section under Products & services:
 3. Locate **Website preferences** and click **Update**:
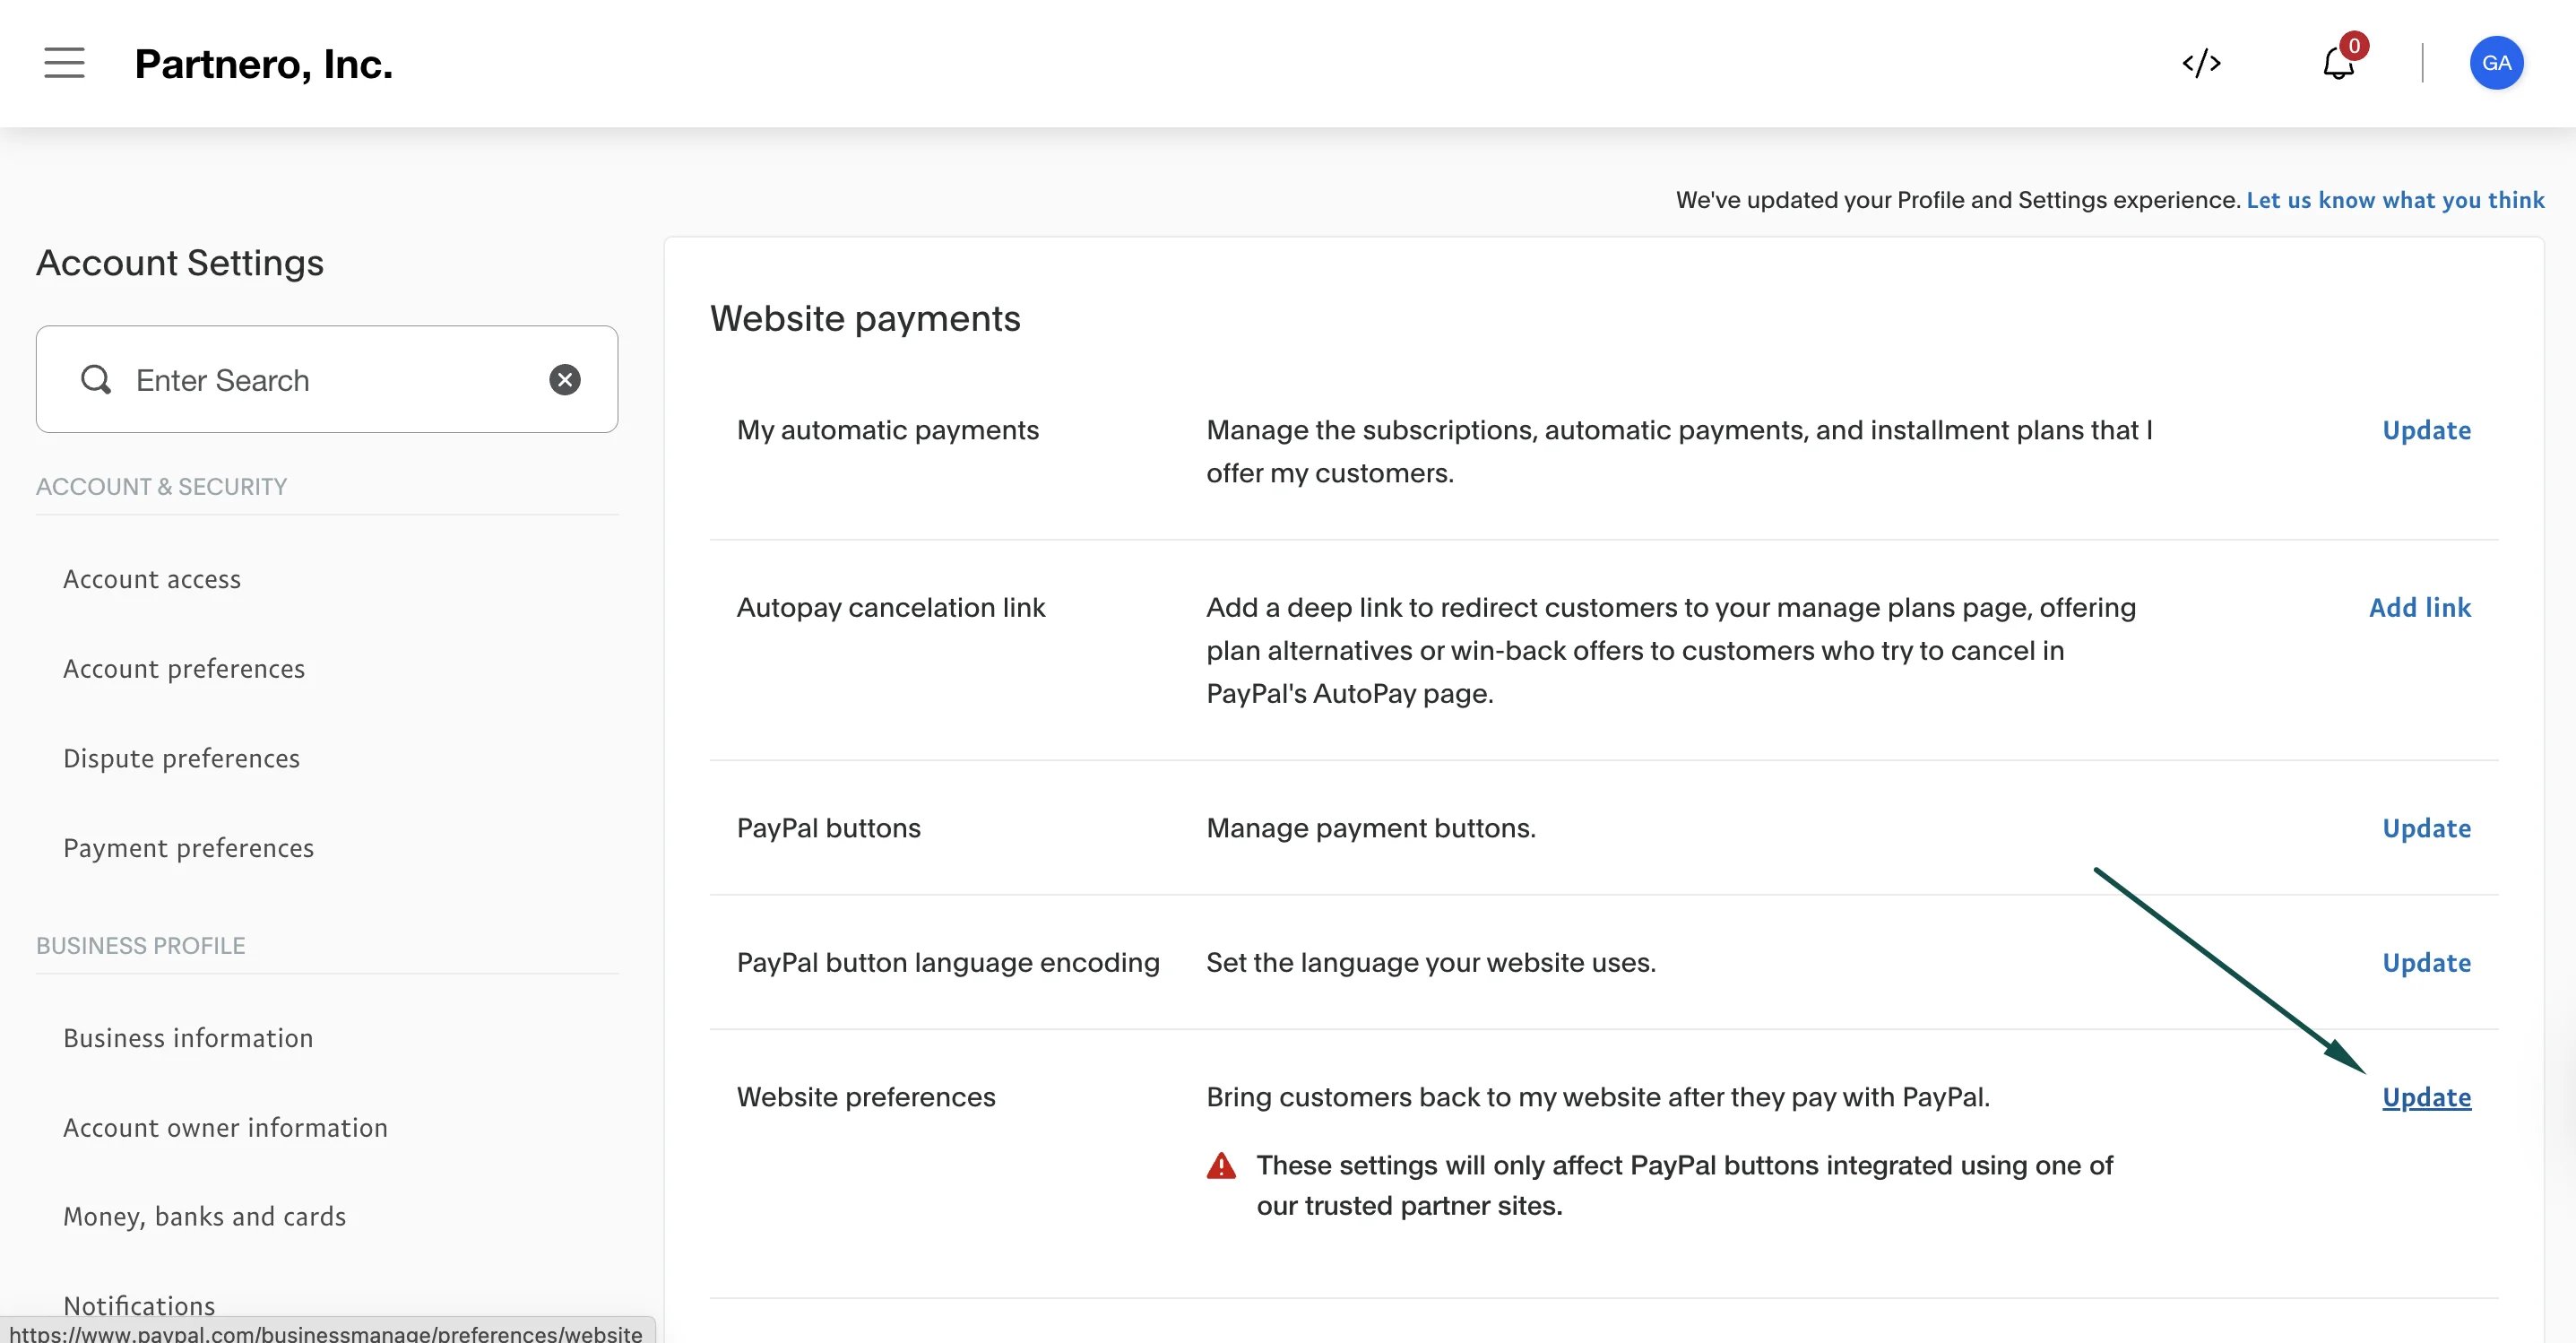 4. Switch **Auto return** to "On" and enter the URL of the return/thank you page:
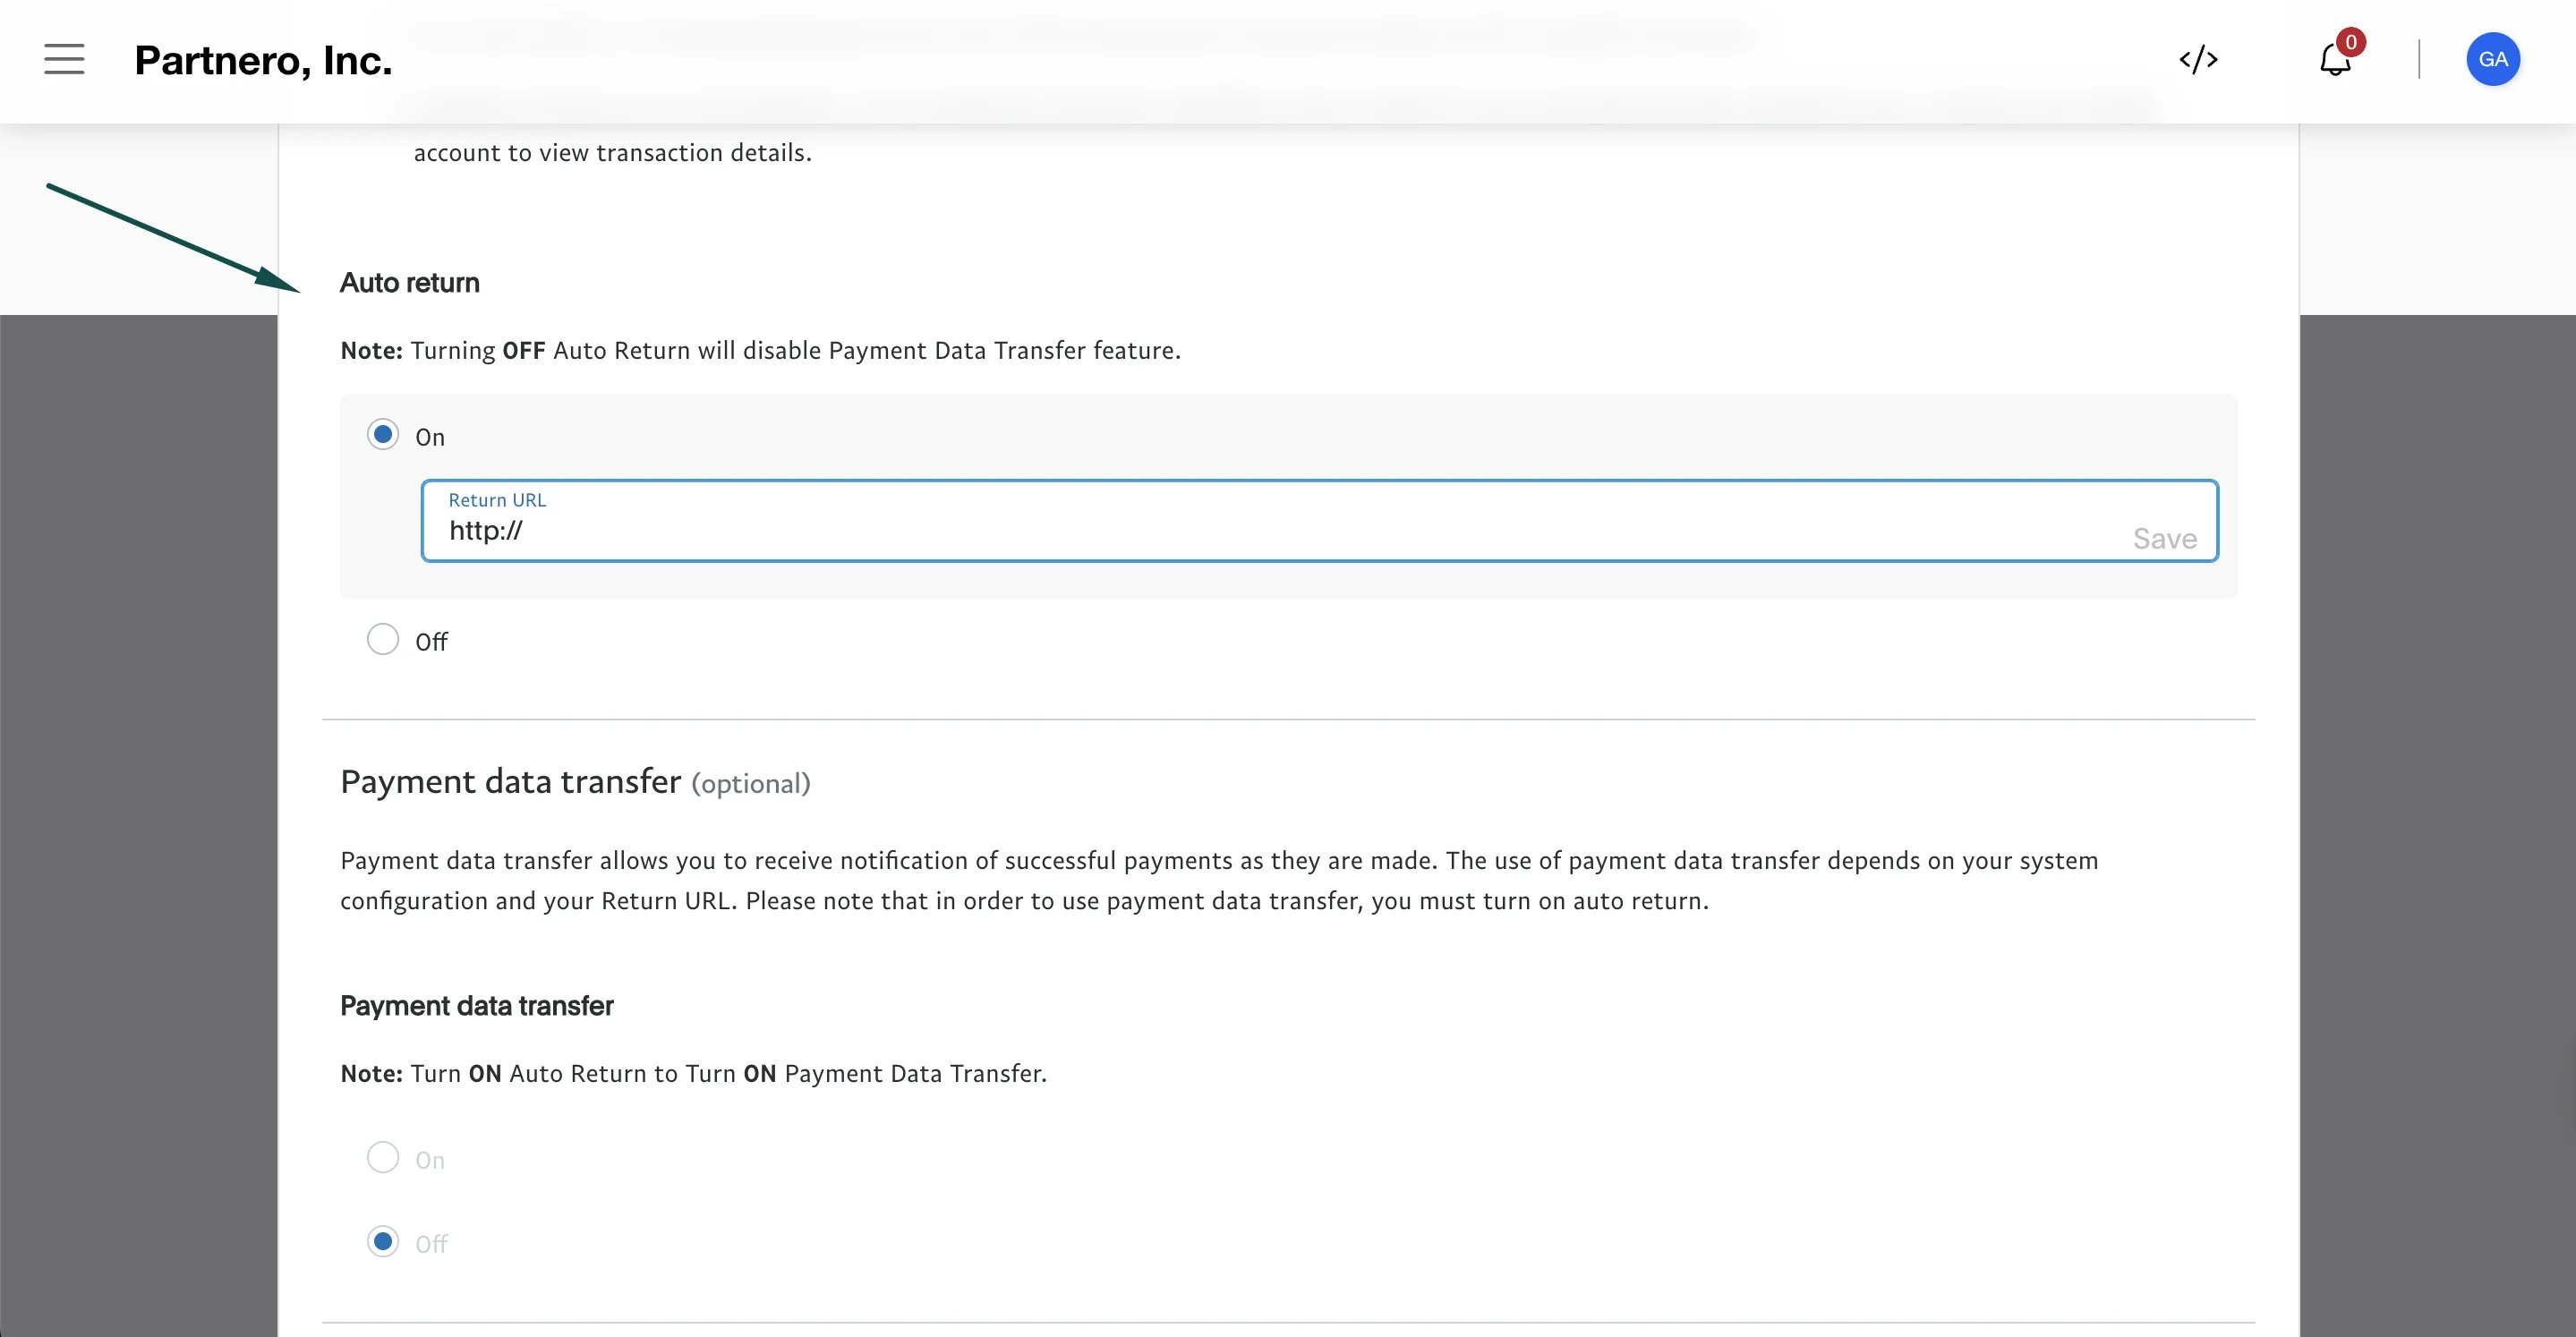 5. Switch **Payment data transfer** to "On":
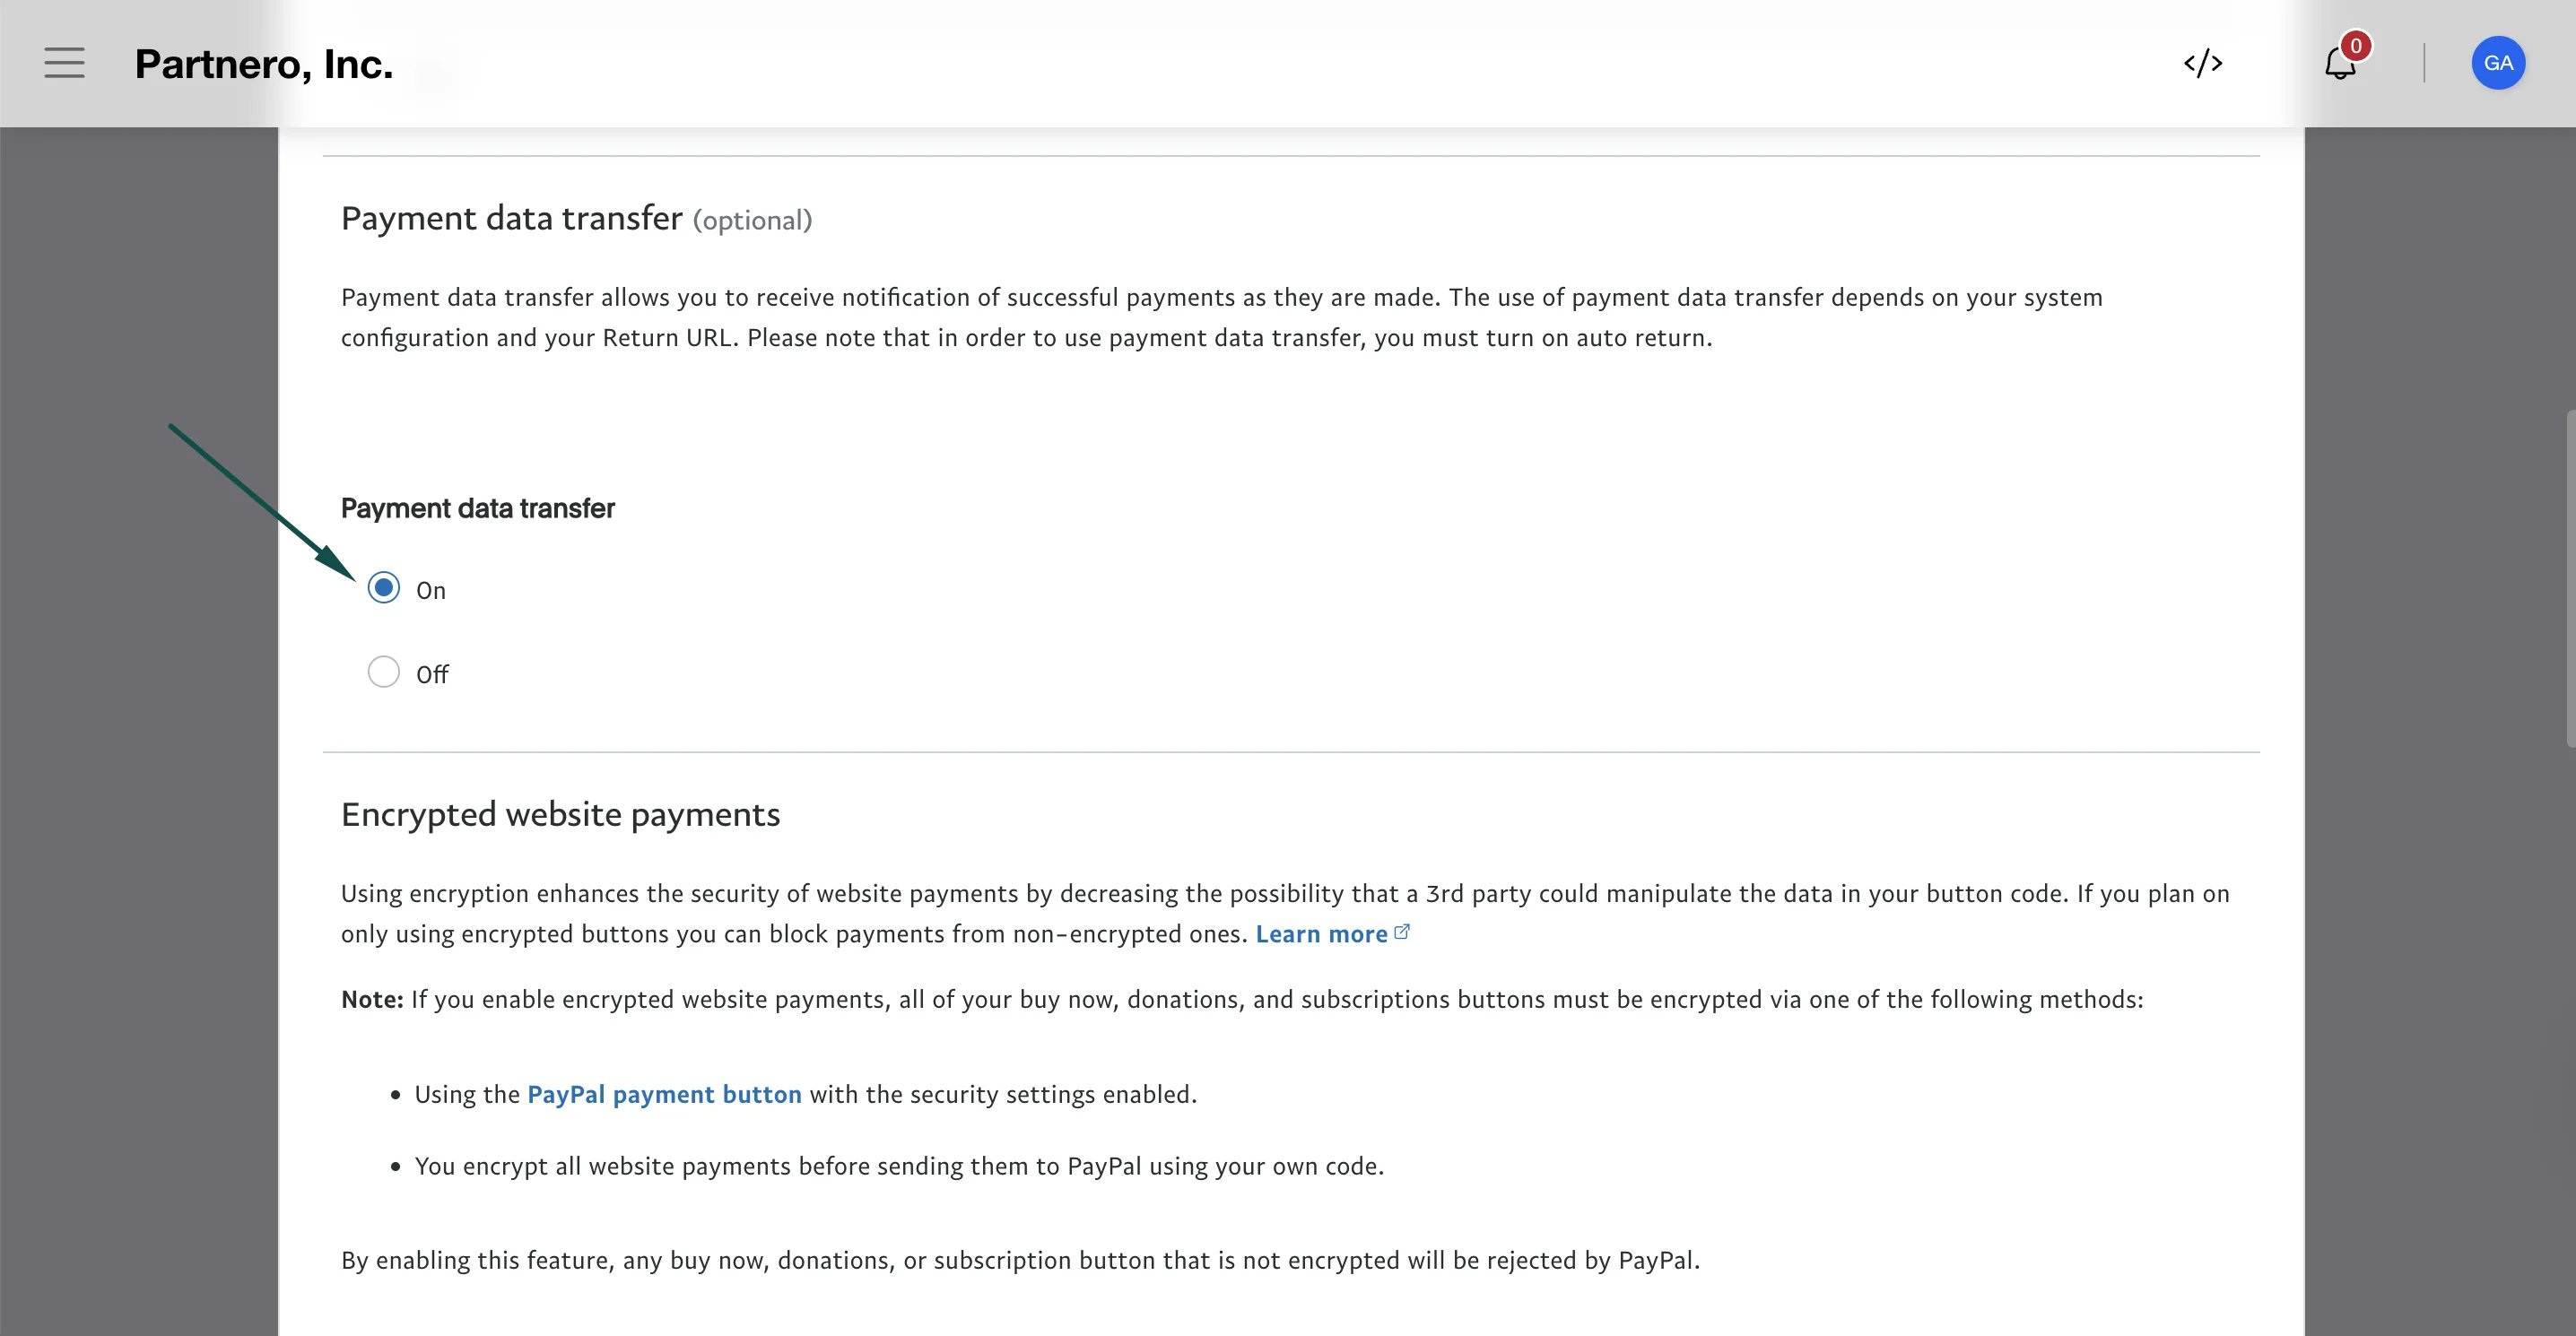 ***
### Step 3: Set up sales tracking on the return page
Here's how to set up order tracking during checkout:
1. On Partnero, copy the sales tracking code from the integration guide:
***
### Step 3: Set up sales tracking on the return page
Here's how to set up order tracking during checkout:
1. On Partnero, copy the sales tracking code from the integration guide: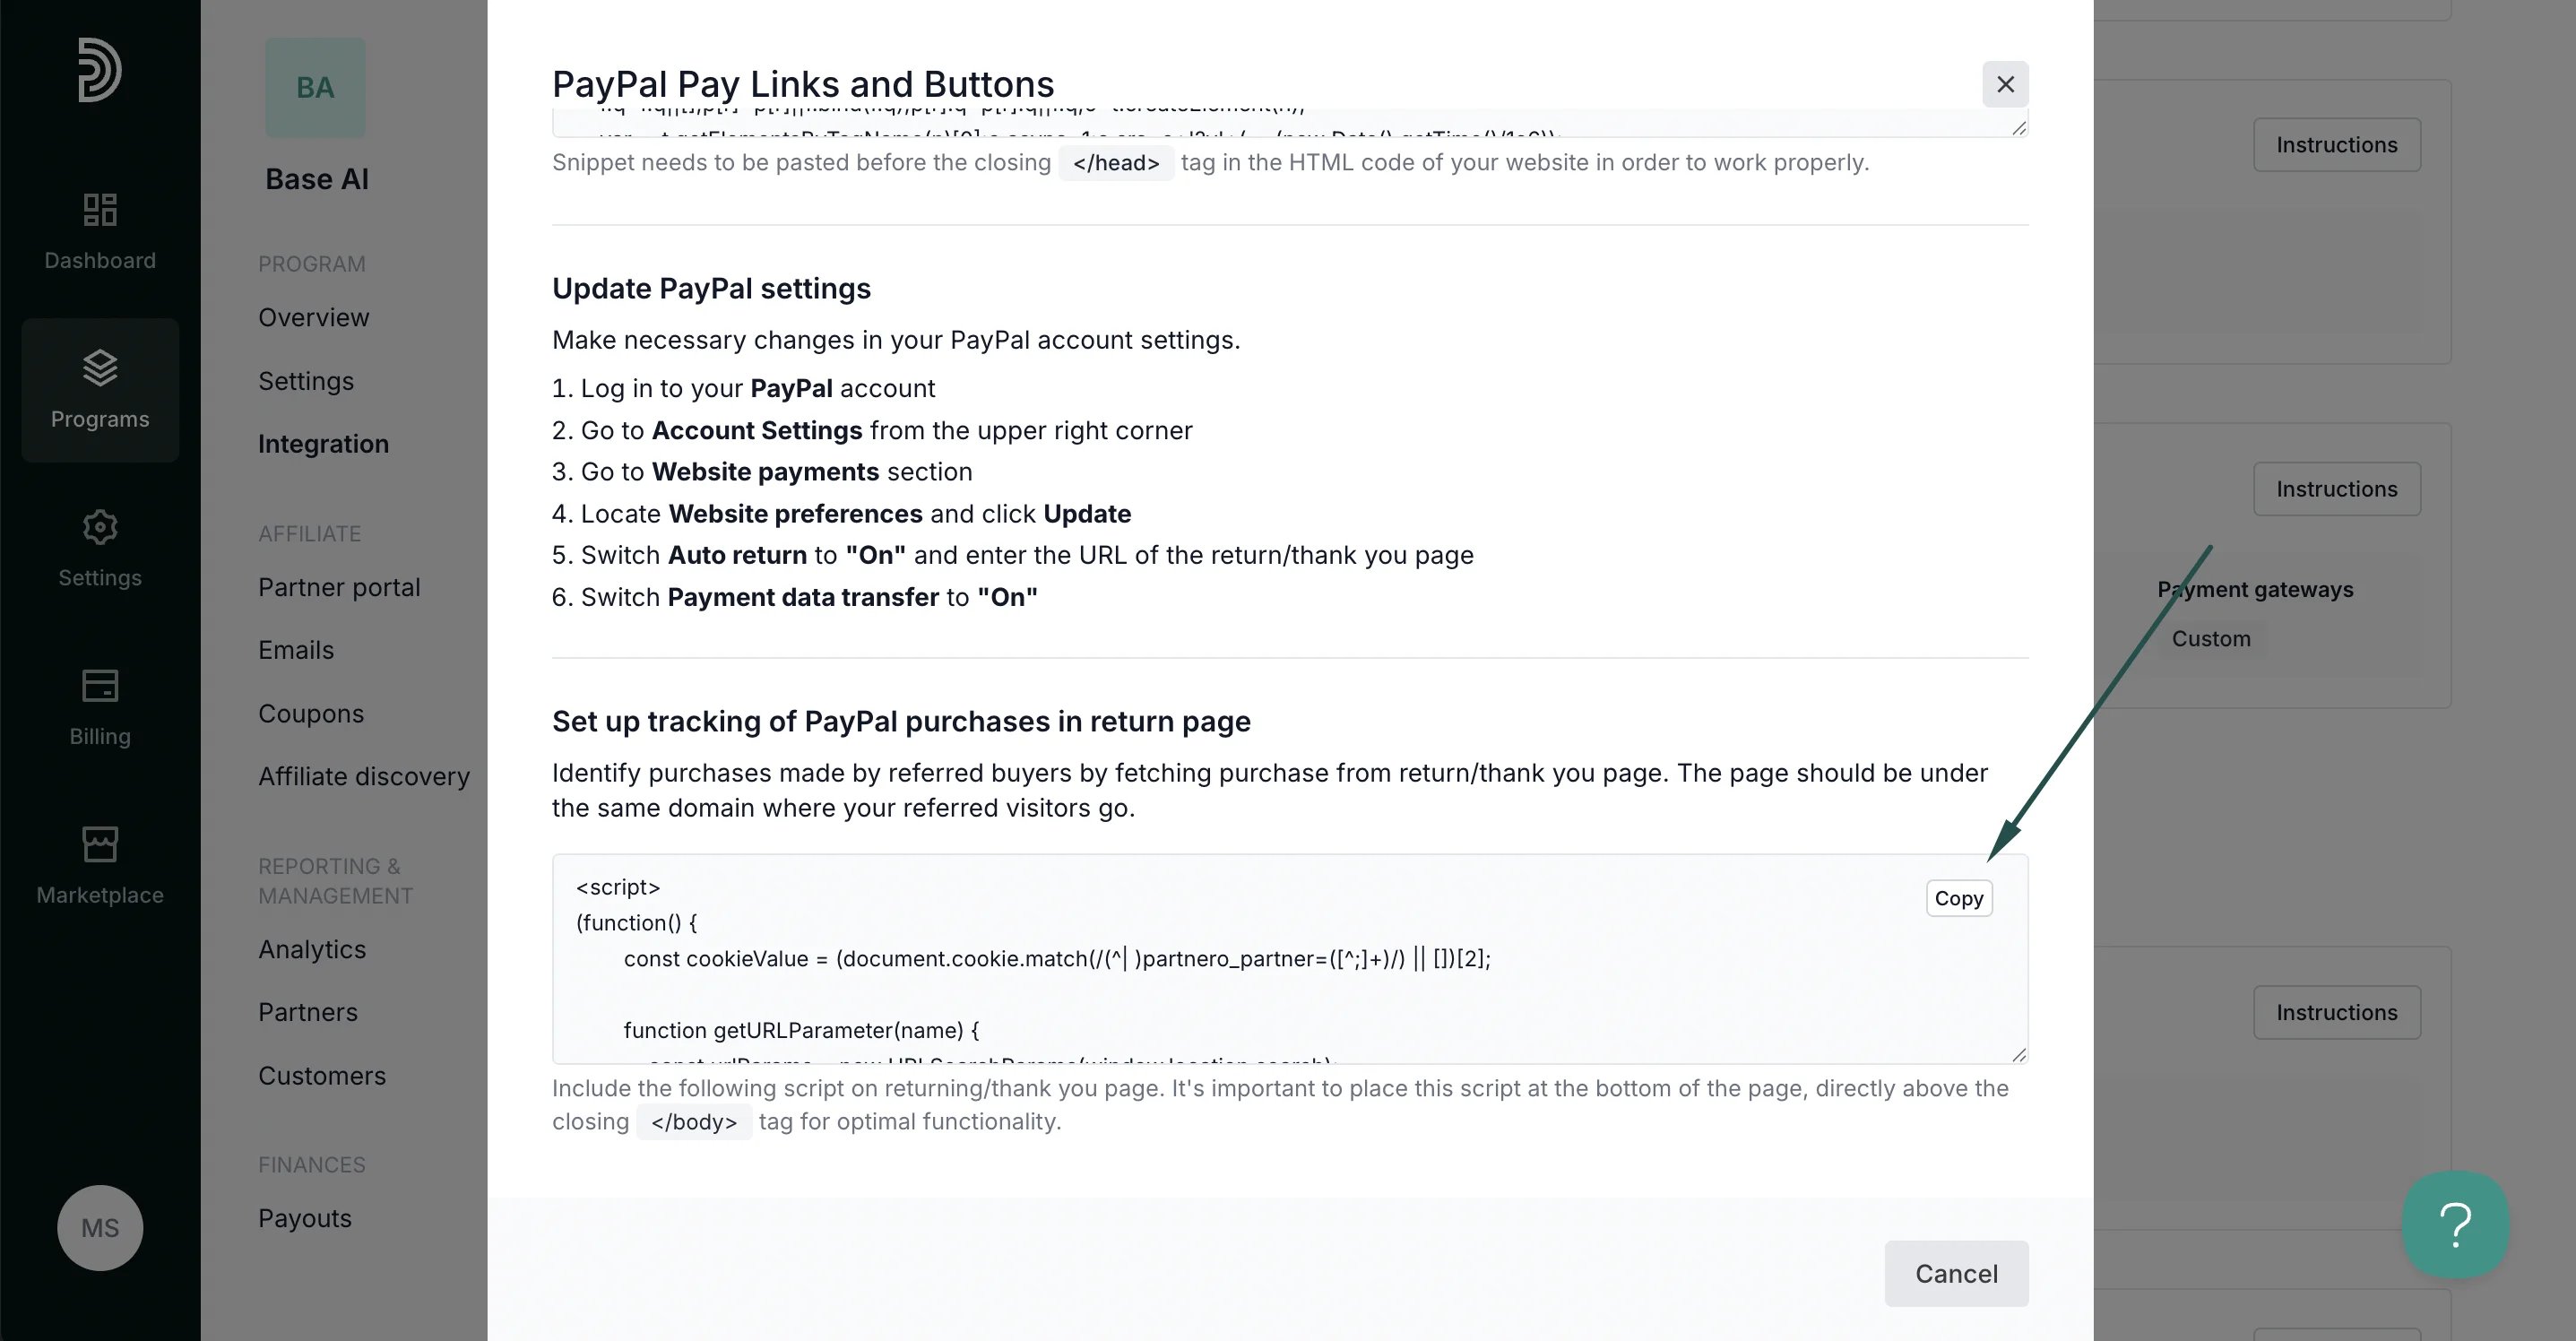 2. Paste the script on the returning/thank you page. It's essential to place this script at the bottom of the page, directly above the closing *\* tag for optimal functionality.
***
### Step 4: Enable transaction creation via JS
For this integration method to work, transaction creation via JavaScript must be enabled on your Partnero account. To do that:
1. On your Partnero account, go to **Integration** > **Security** tab.
2. Paste the script on the returning/thank you page. It's essential to place this script at the bottom of the page, directly above the closing *\* tag for optimal functionality.
***
### Step 4: Enable transaction creation via JS
For this integration method to work, transaction creation via JavaScript must be enabled on your Partnero account. To do that:
1. On your Partnero account, go to **Integration** > **Security** tab.