> ## Documentation Index
> Fetch the complete documentation index at: https://docs.partnero.com/llms.txt
> Use this file to discover all available pages before exploring further.
# Customer tags overview
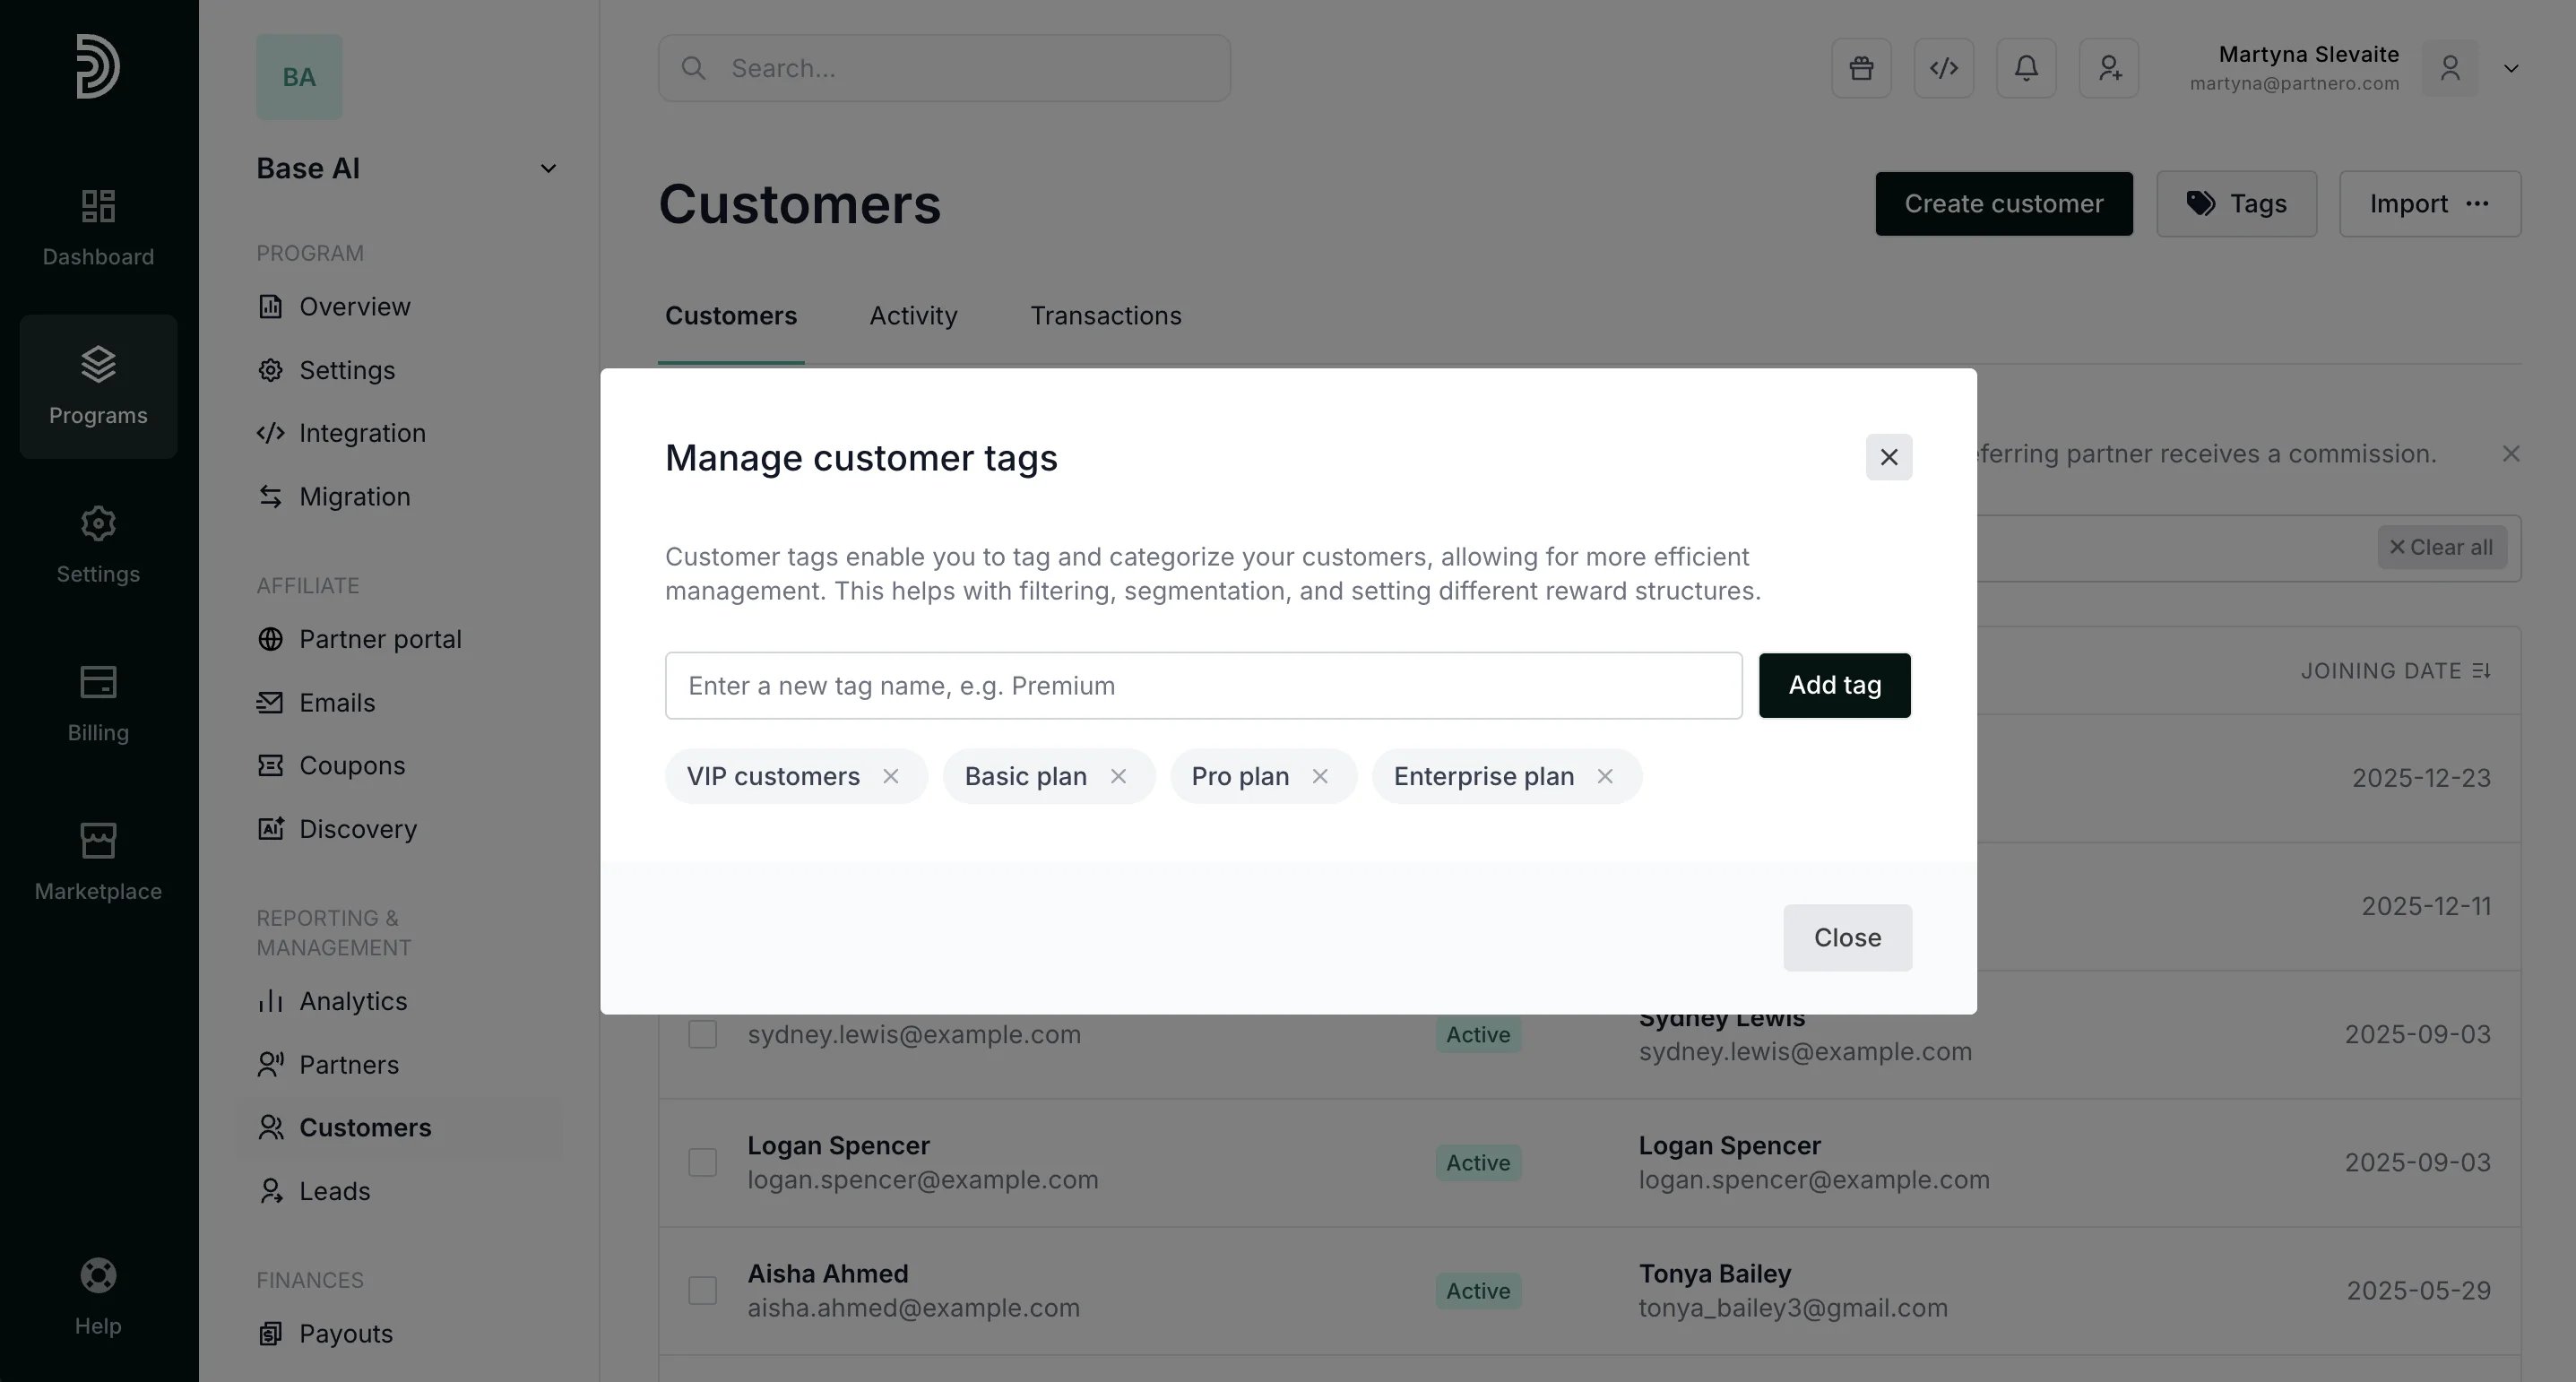
Customer tags allow you to tag and categorize your customers, allowing for more efficient management. This enables you to:
* set **custom partner rewards** based on the customer tags;
* filter, segment, and manage your customers.
Let's review how to create and manage tags and how to set custom partner rewards.
***
### How to create and manage customer tags
To create, view existing, edit or delete tags:
1. In your program, click on **Customers** in the left-hand side menu.
2. Click on **Tags** in the upper right-hand corner: 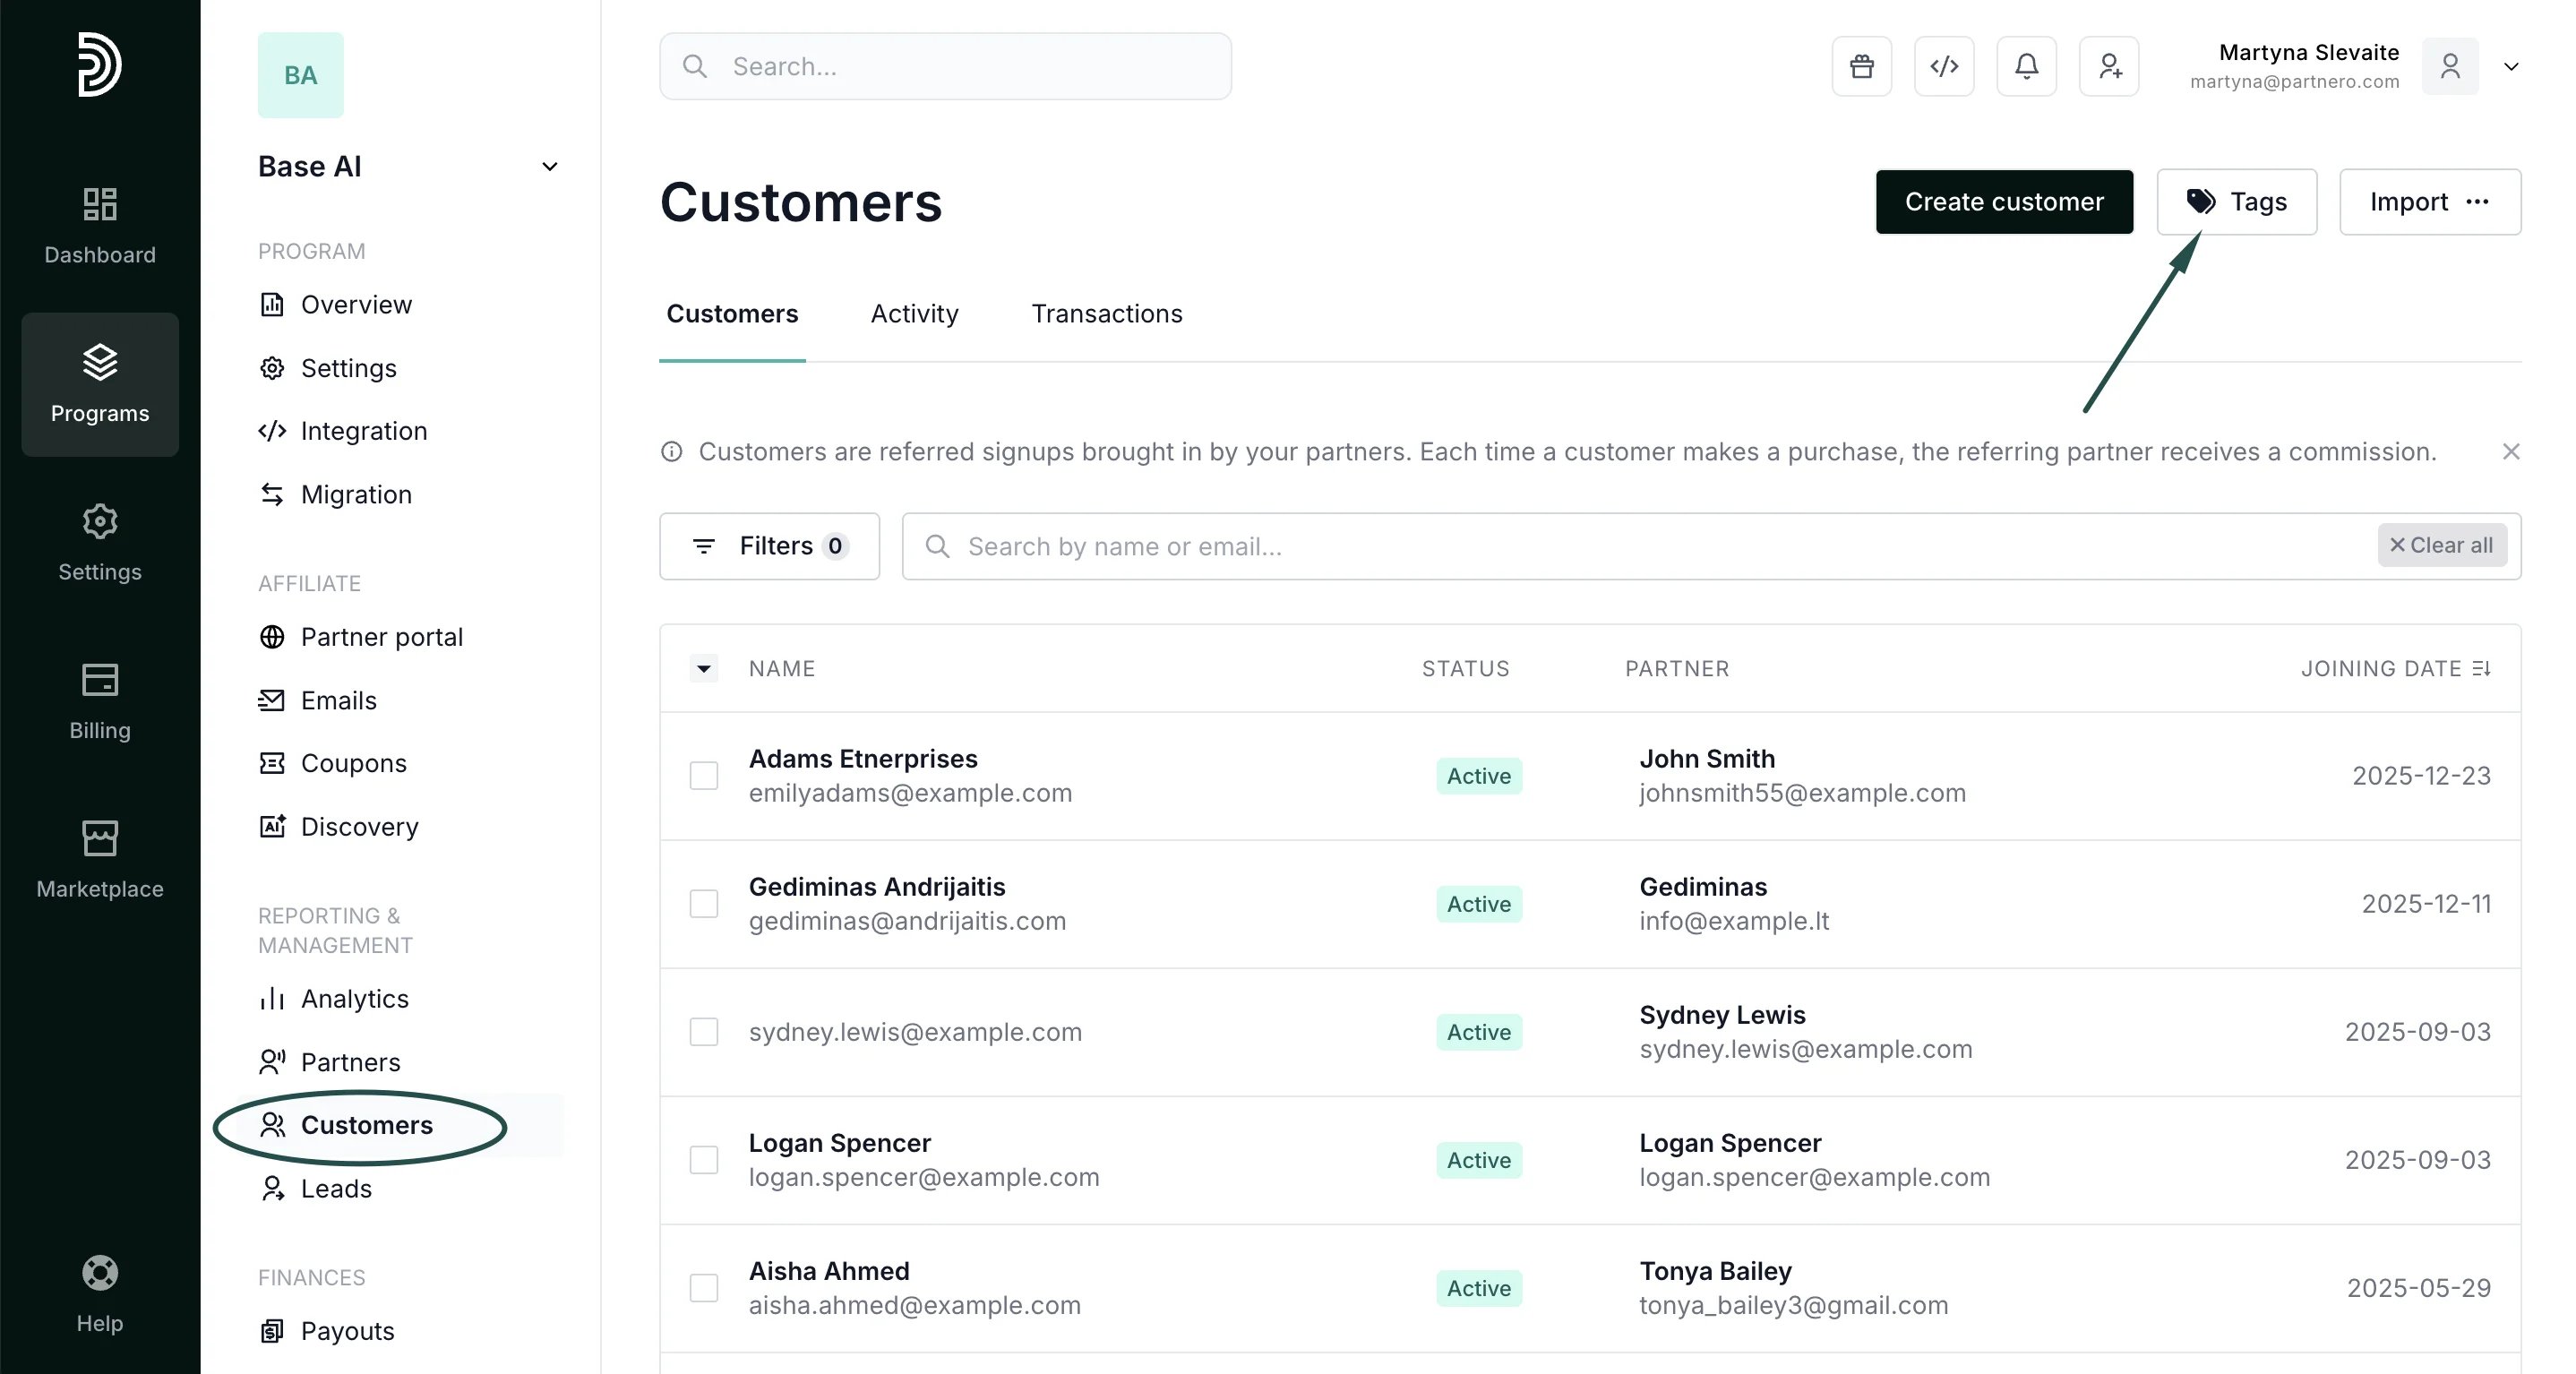 3. Here you can view and delete existing tags or add new ones:
  > \_Click here to read more on how to create customer tags using Partnero API and JavaScript
> \_*→* [Create customer tags using API or JavaScript](/knowledge-base/customers-leads/create-customer-tags-using-api-or-javascript)
***
### How to assign customer tags
Tags can be assigned to a customer from their profile or from the Customers table.
To assign tags from the Customers table:
1. In your program, click on **Customers** in the left-hand side menu.
2. Select the customers you'd like to tag and click **Assign tags**:
> \_Click here to read more on how to create customer tags using Partnero API and JavaScript
> \_*→* [Create customer tags using API or JavaScript](/knowledge-base/customers-leads/create-customer-tags-using-api-or-javascript)
***
### How to assign customer tags
Tags can be assigned to a customer from their profile or from the Customers table.
To assign tags from the Customers table:
1. In your program, click on **Customers** in the left-hand side menu.
2. Select the customers you'd like to tag and click **Assign tags**: 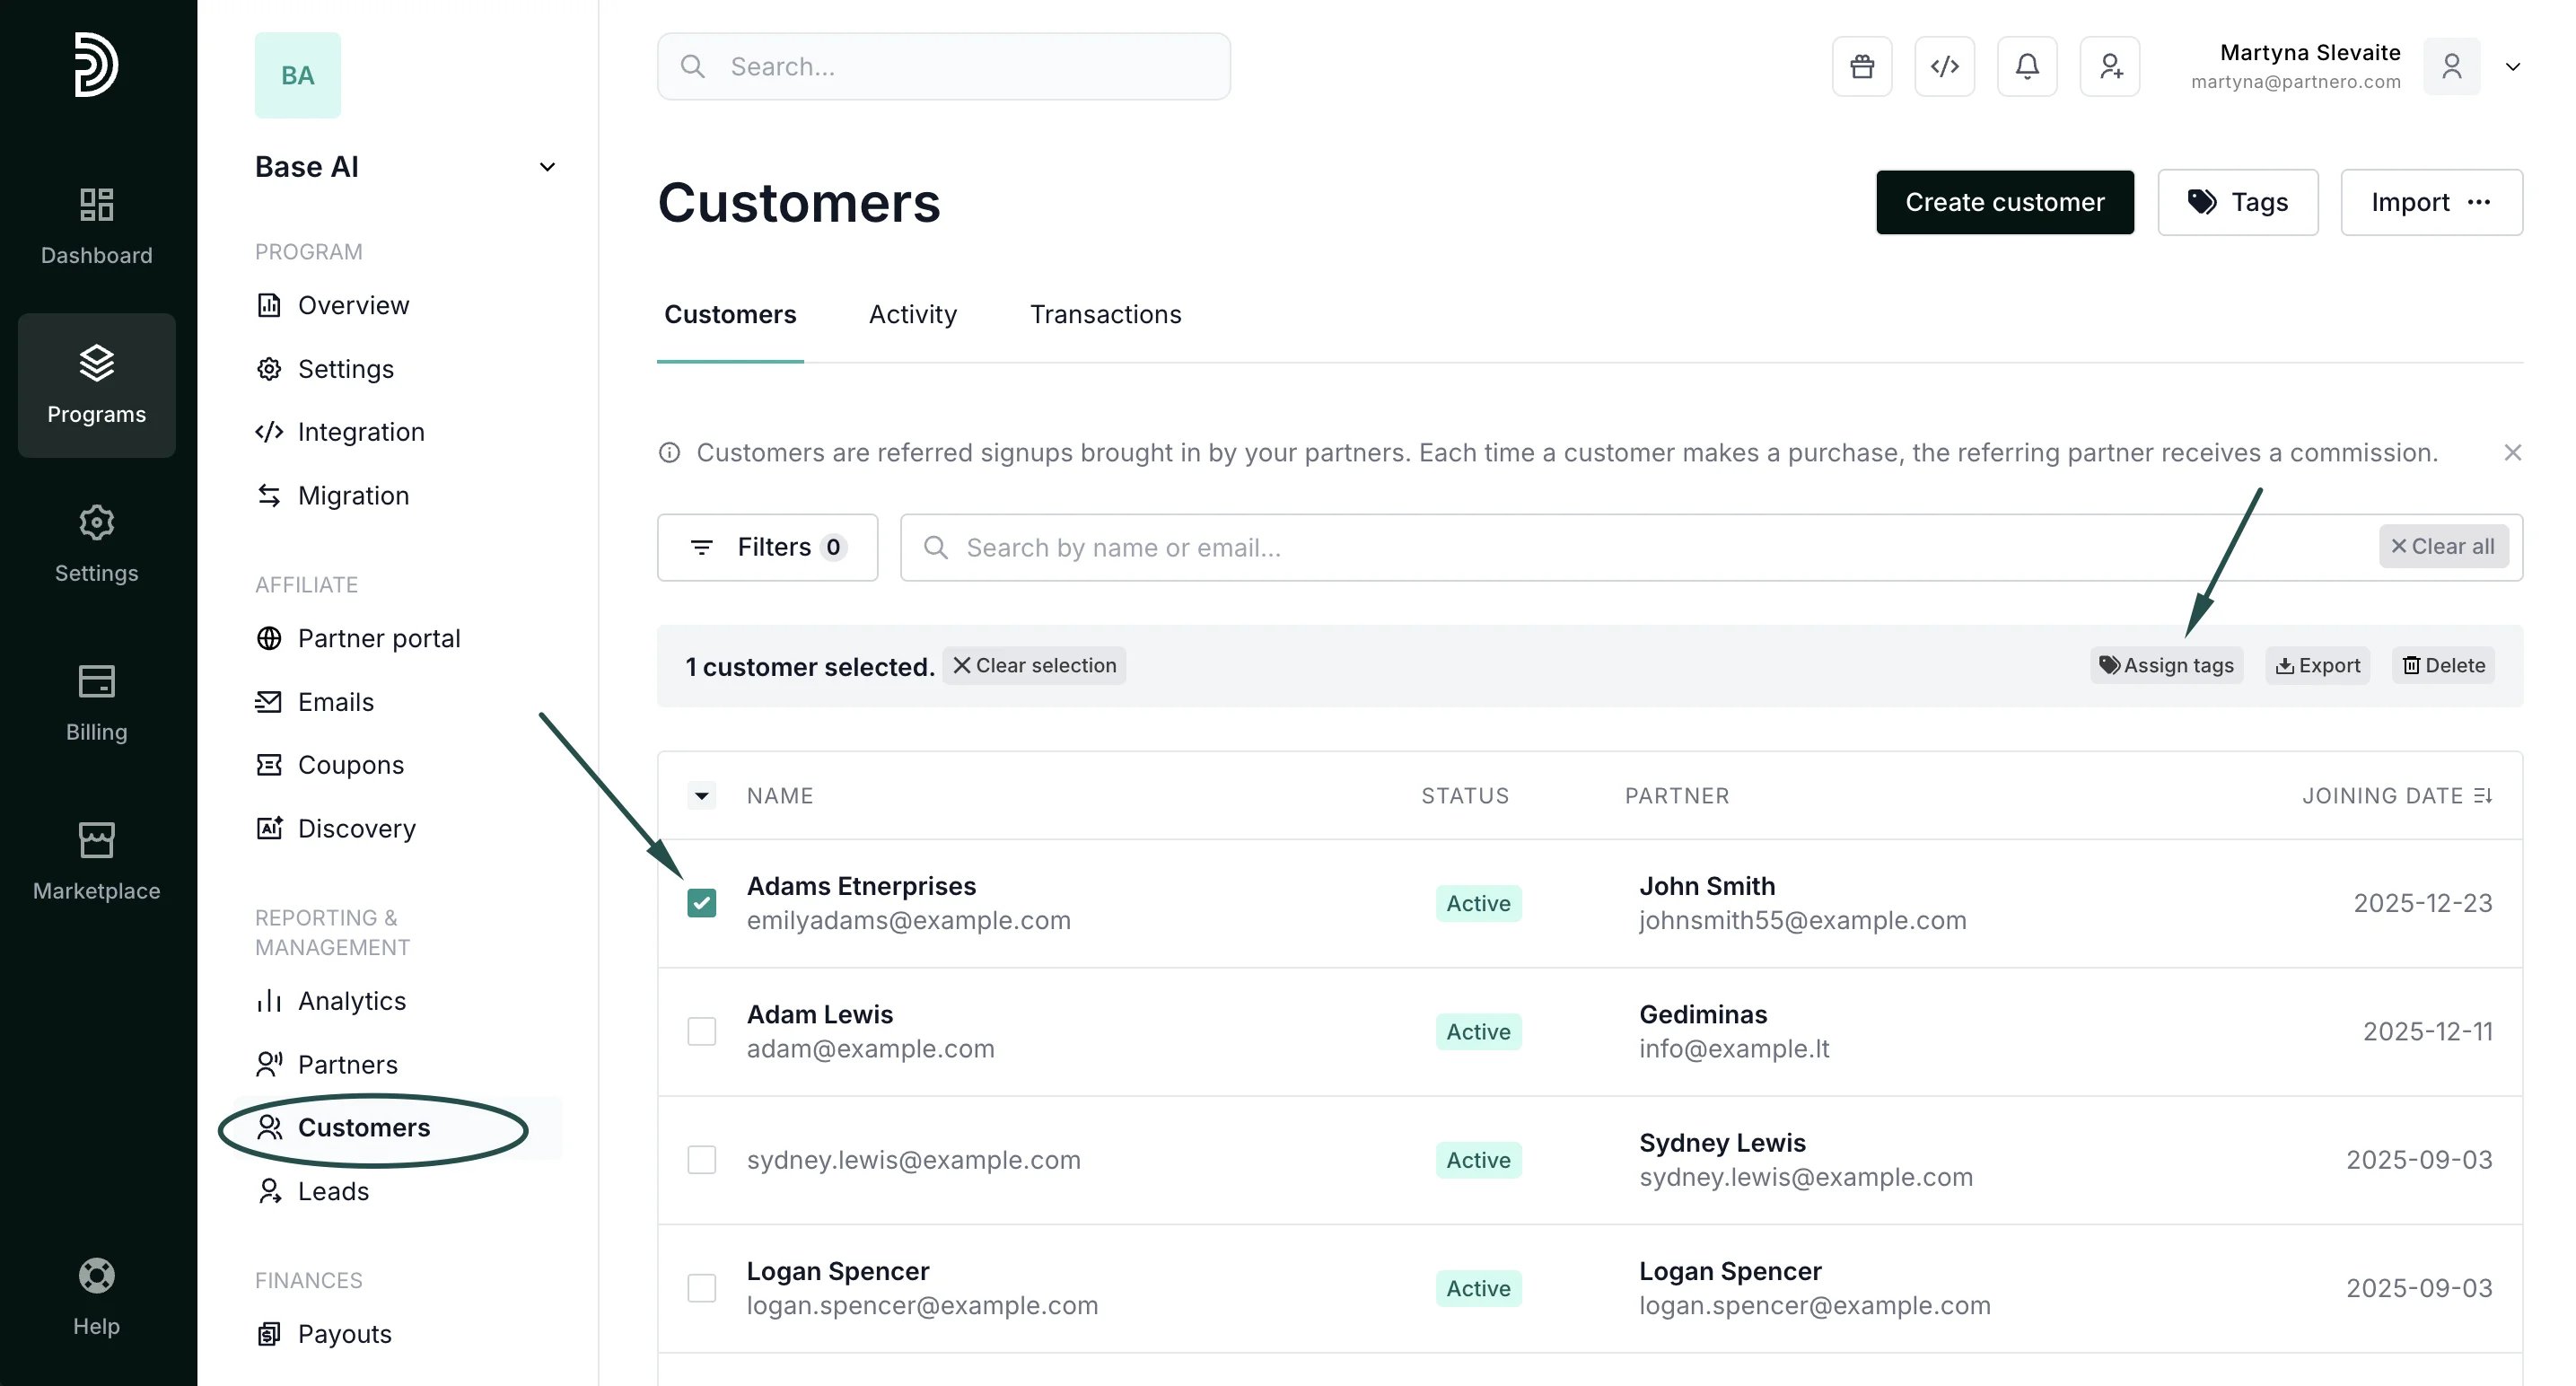 3. Click on the tags you wish to assign:
 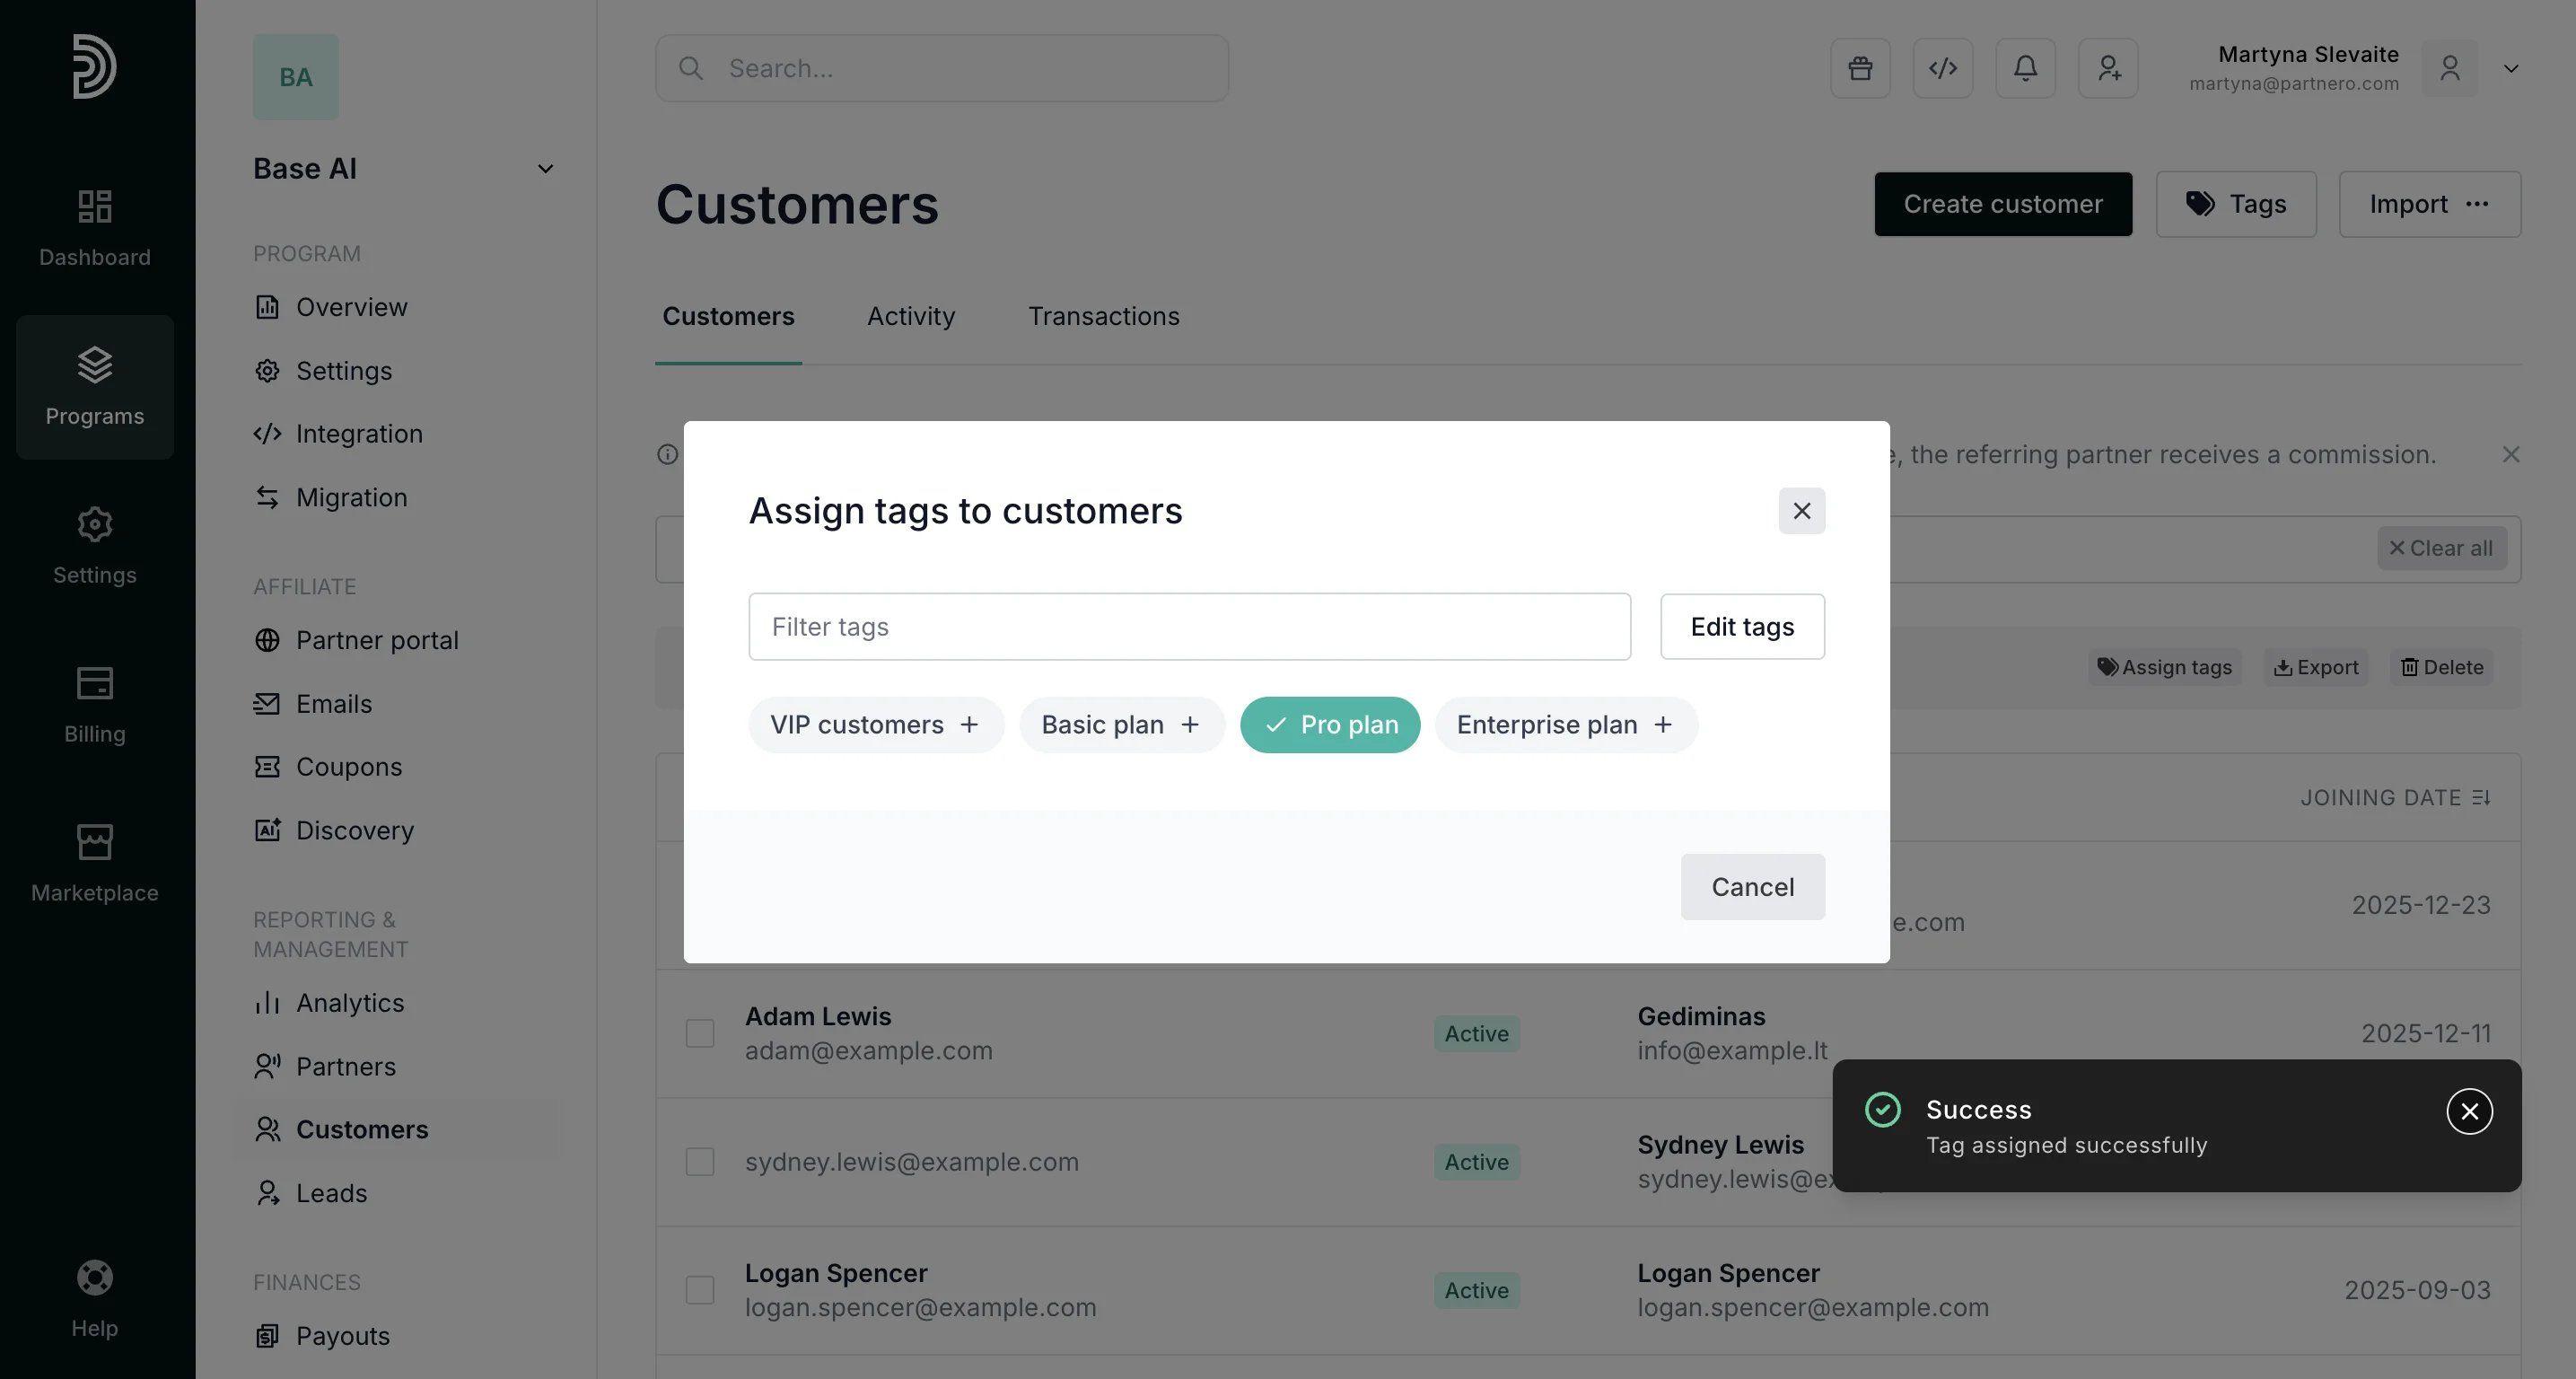 Additionally, you can click **Edit tags** to create new tags.
To assign tags to an individual customer:
1. In your program, click on **Customers** in the left-hand side menu.
2. Find a partner using their name or email and click on them to open the profile:
Additionally, you can click **Edit tags** to create new tags.
To assign tags to an individual customer:
1. In your program, click on **Customers** in the left-hand side menu.
2. Find a partner using their name or email and click on them to open the profile: 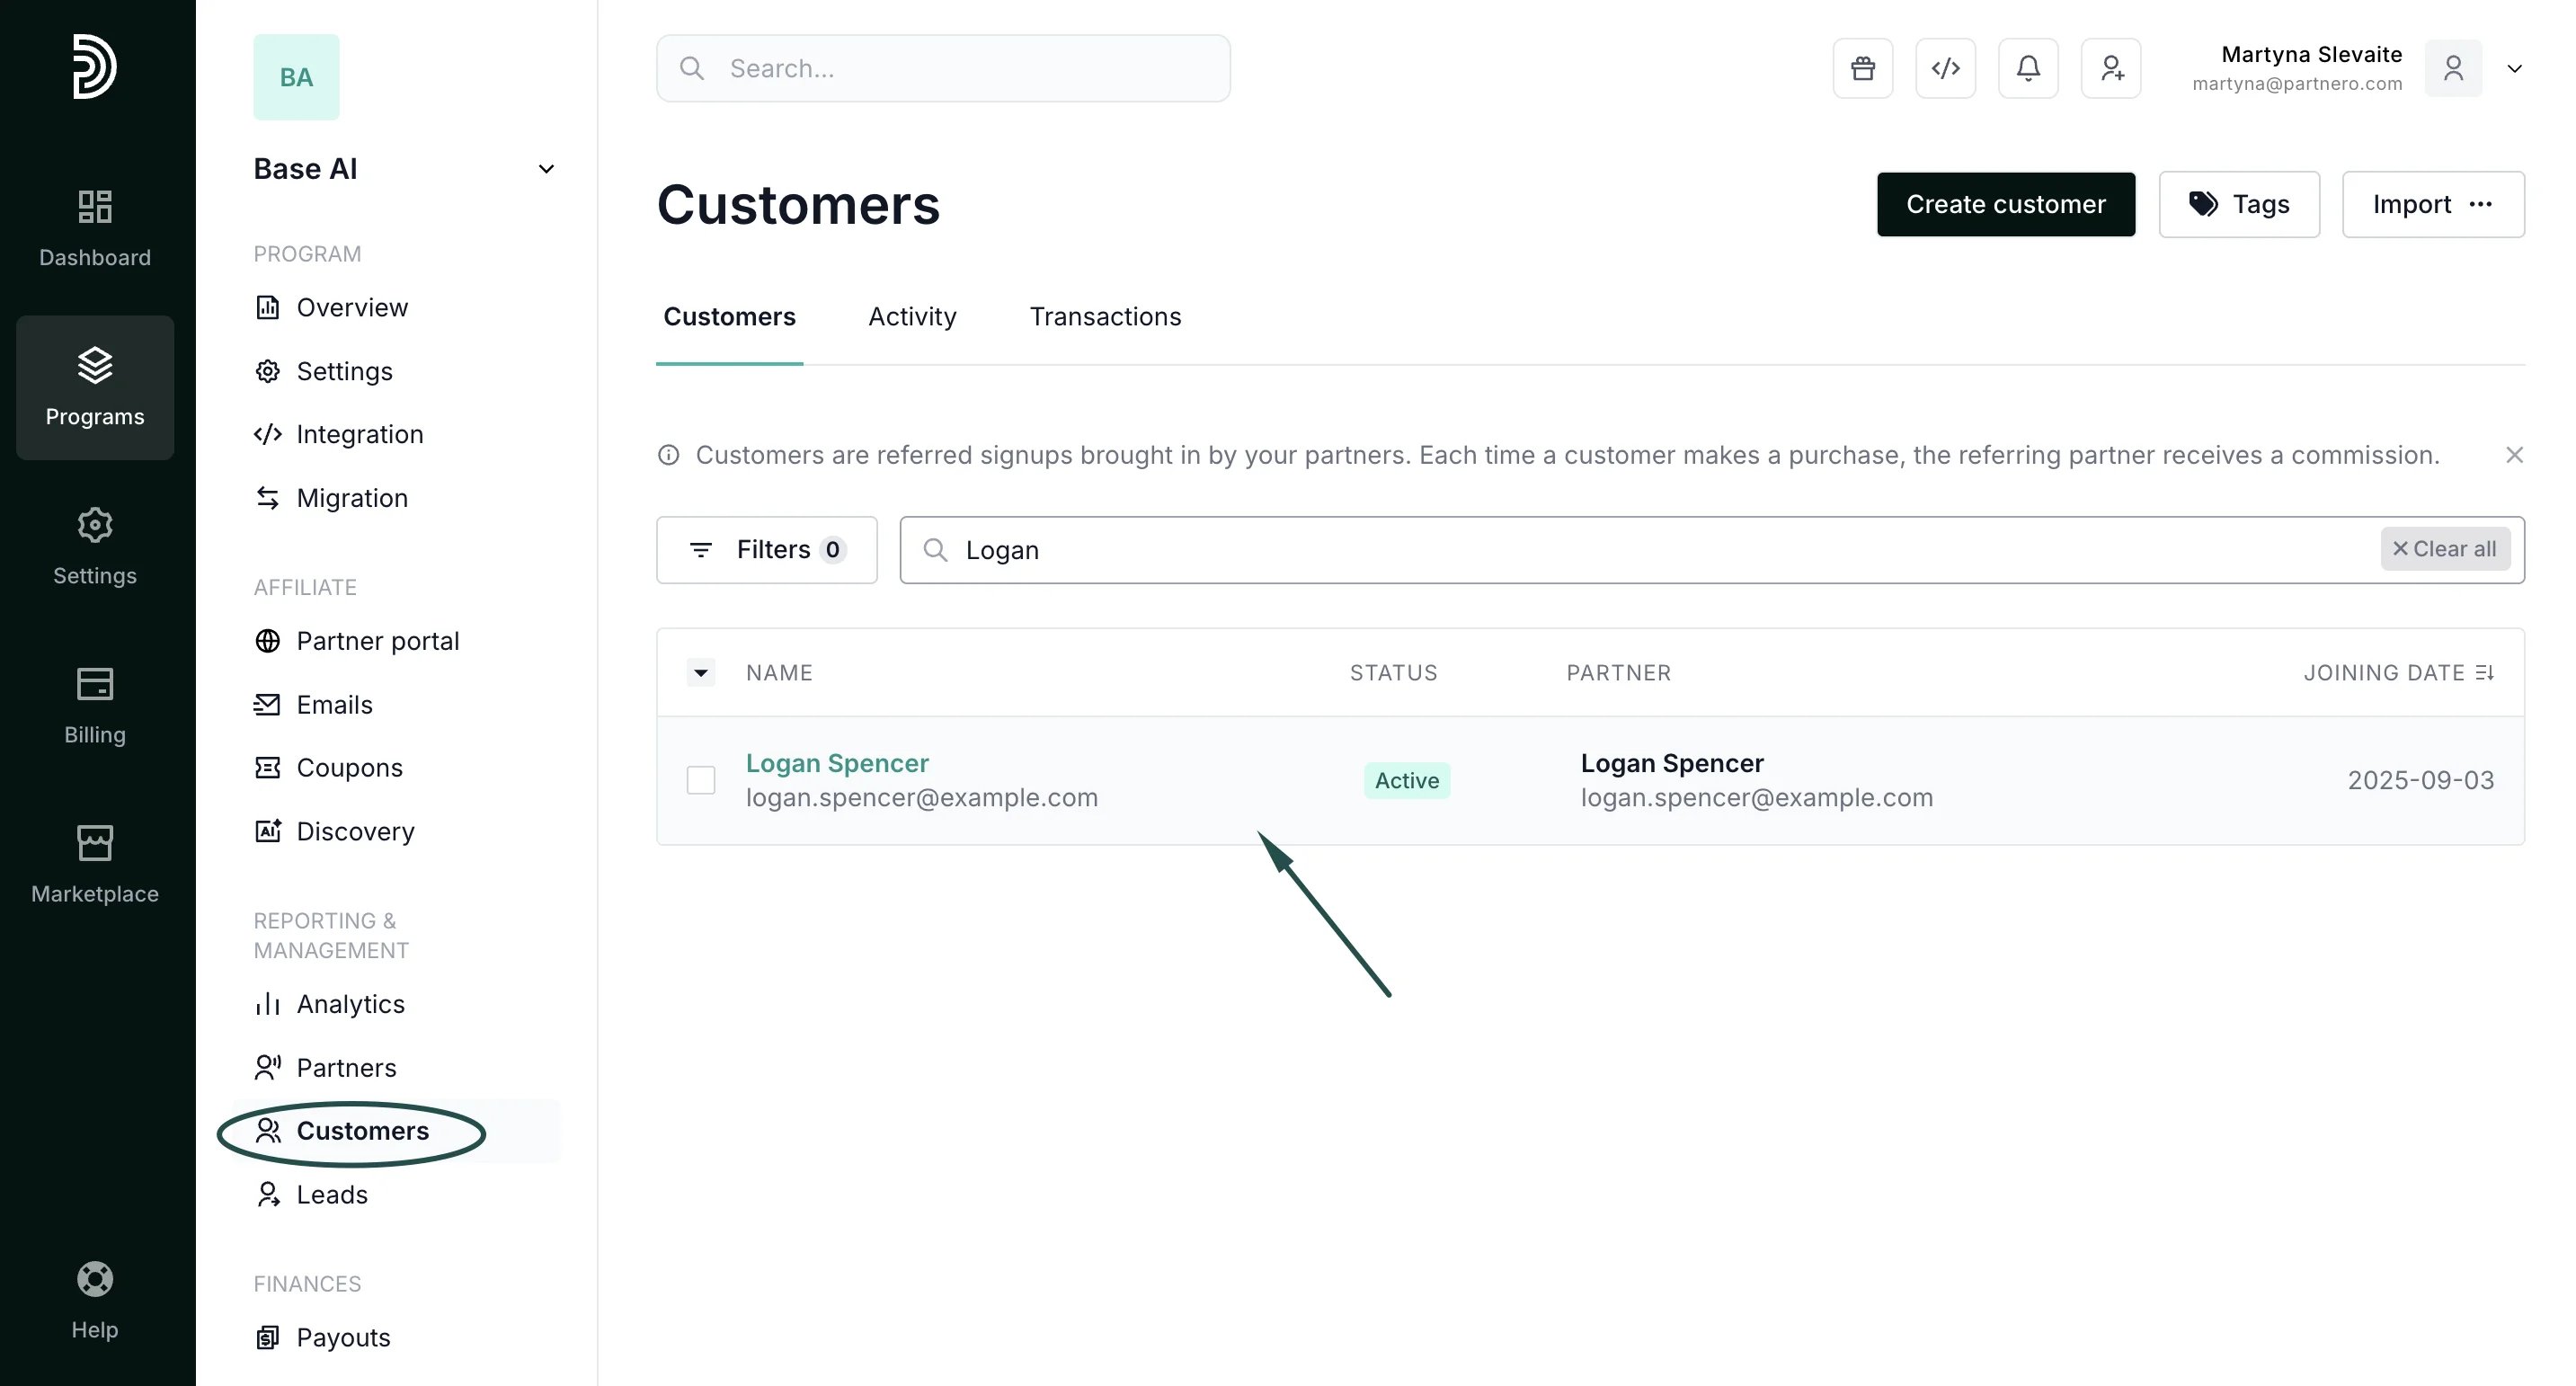 3. Click on the three dots in the upper right corner and click **Manage**:
 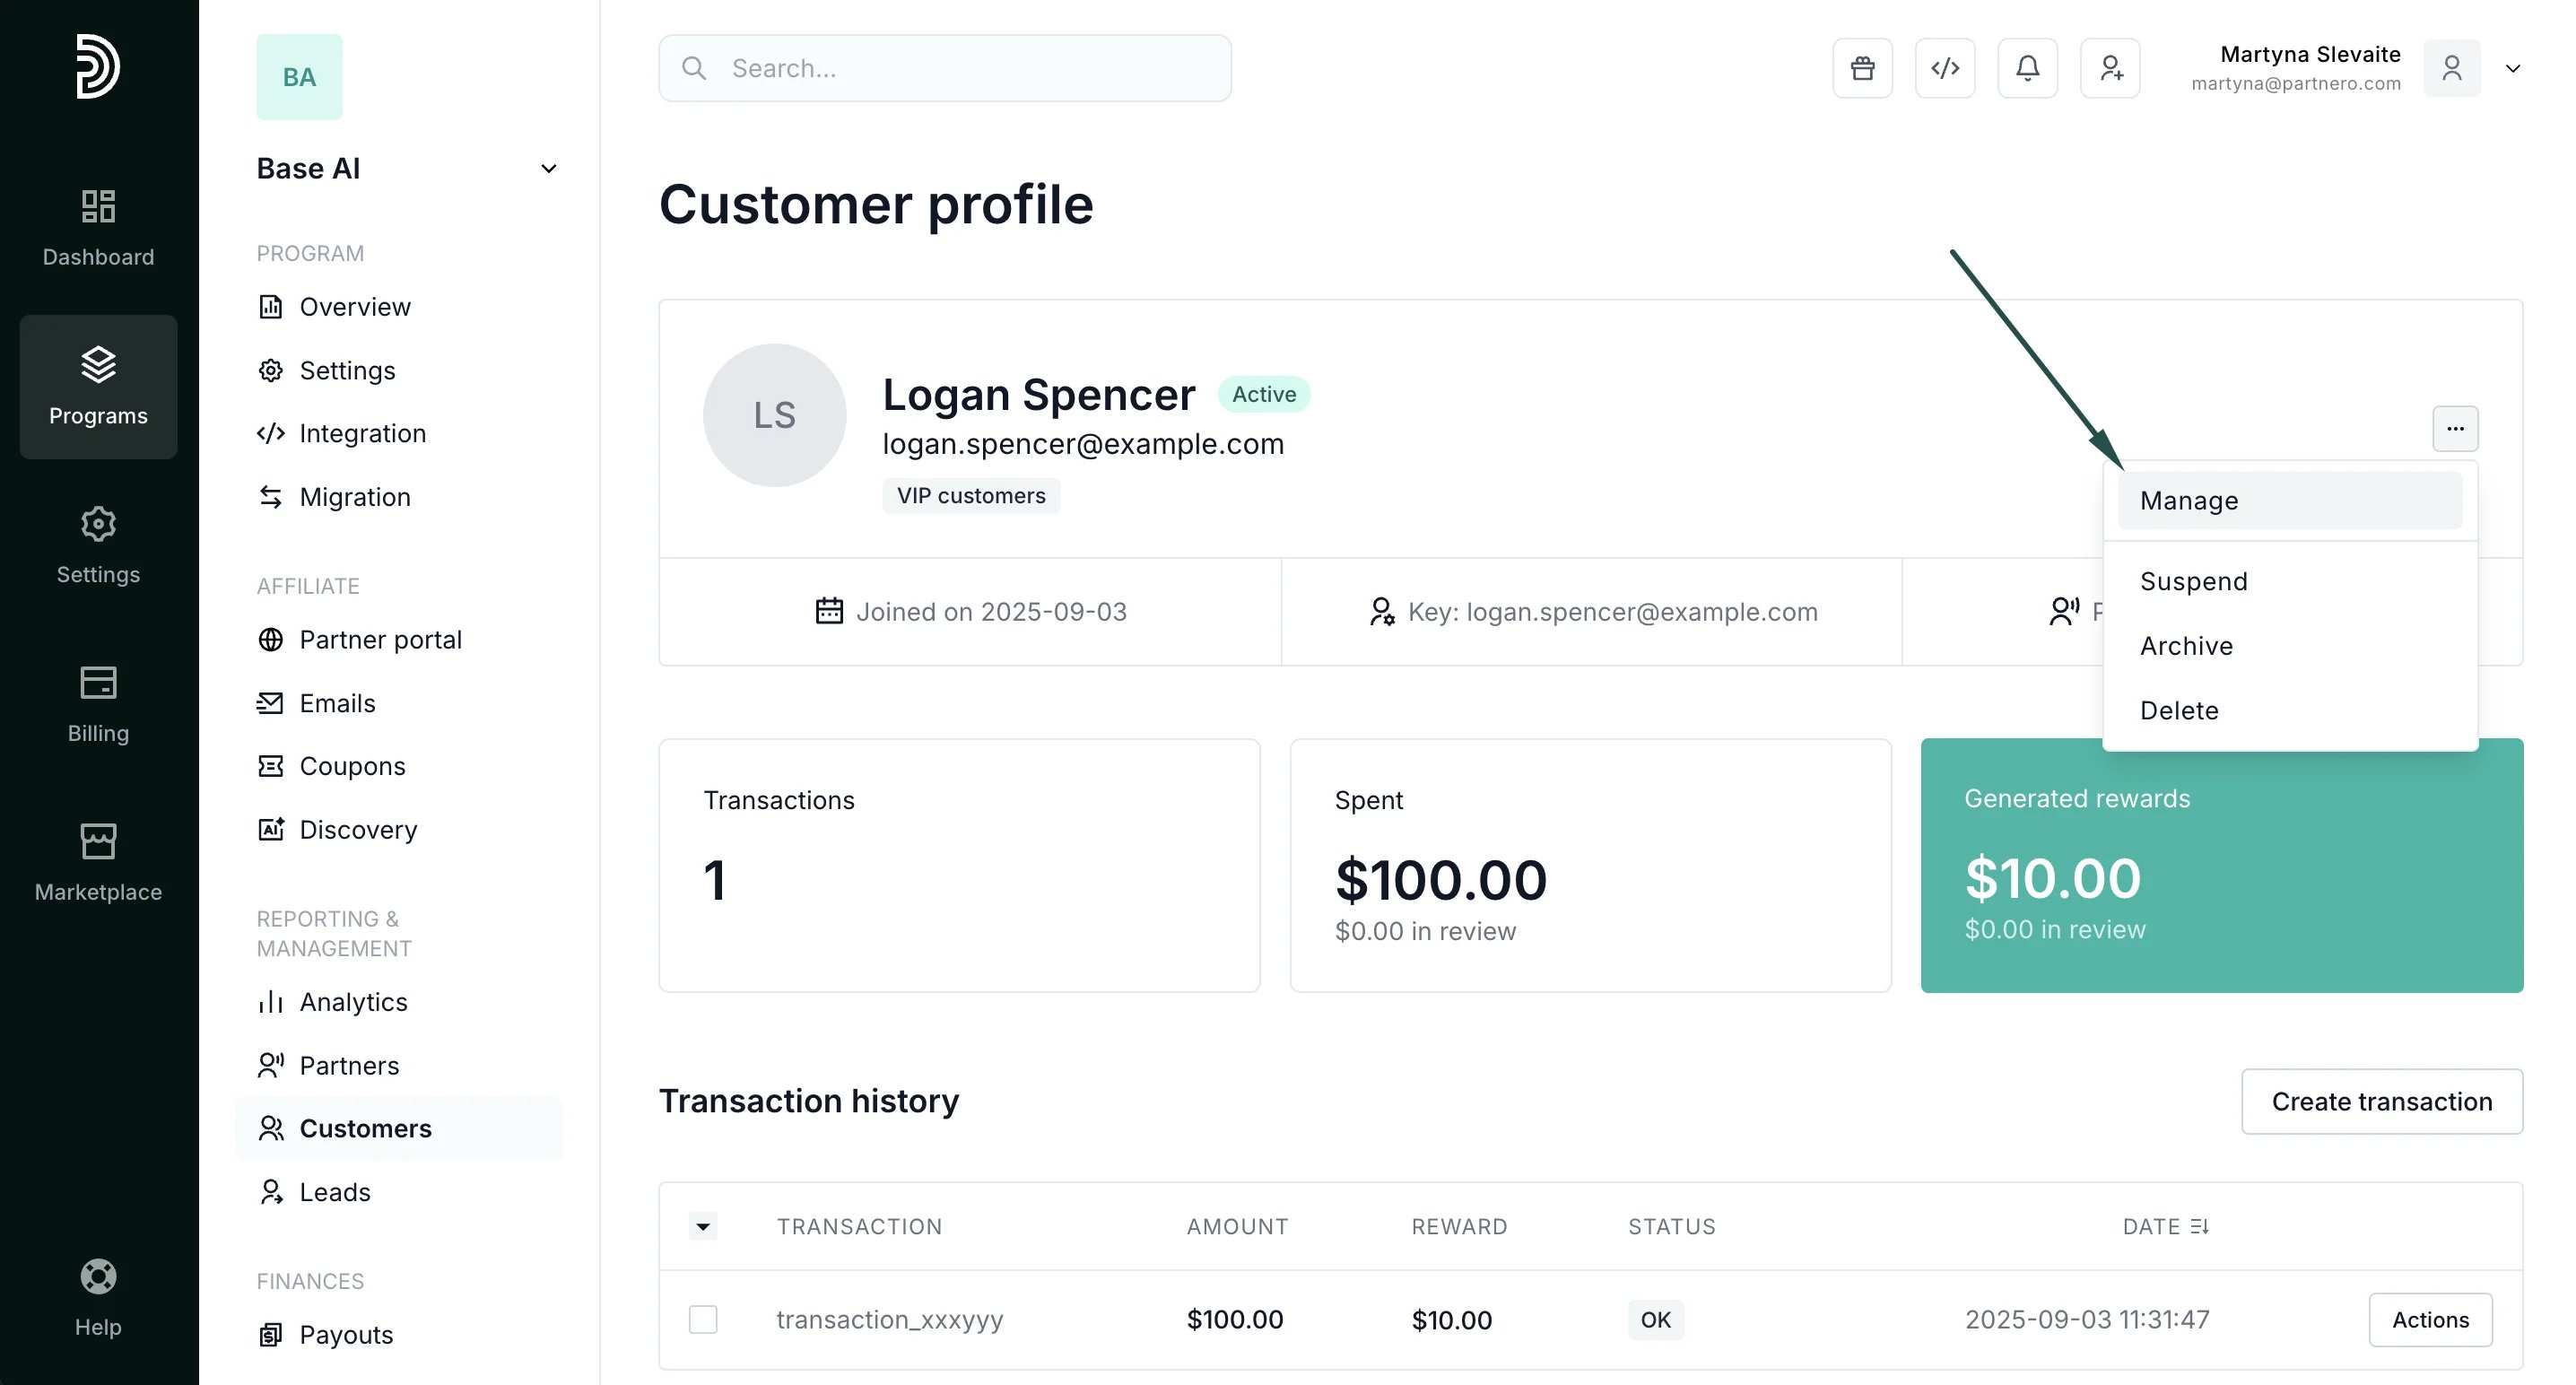 4. Switch to the **Tags** tab and click on the tags you wish to assign:
 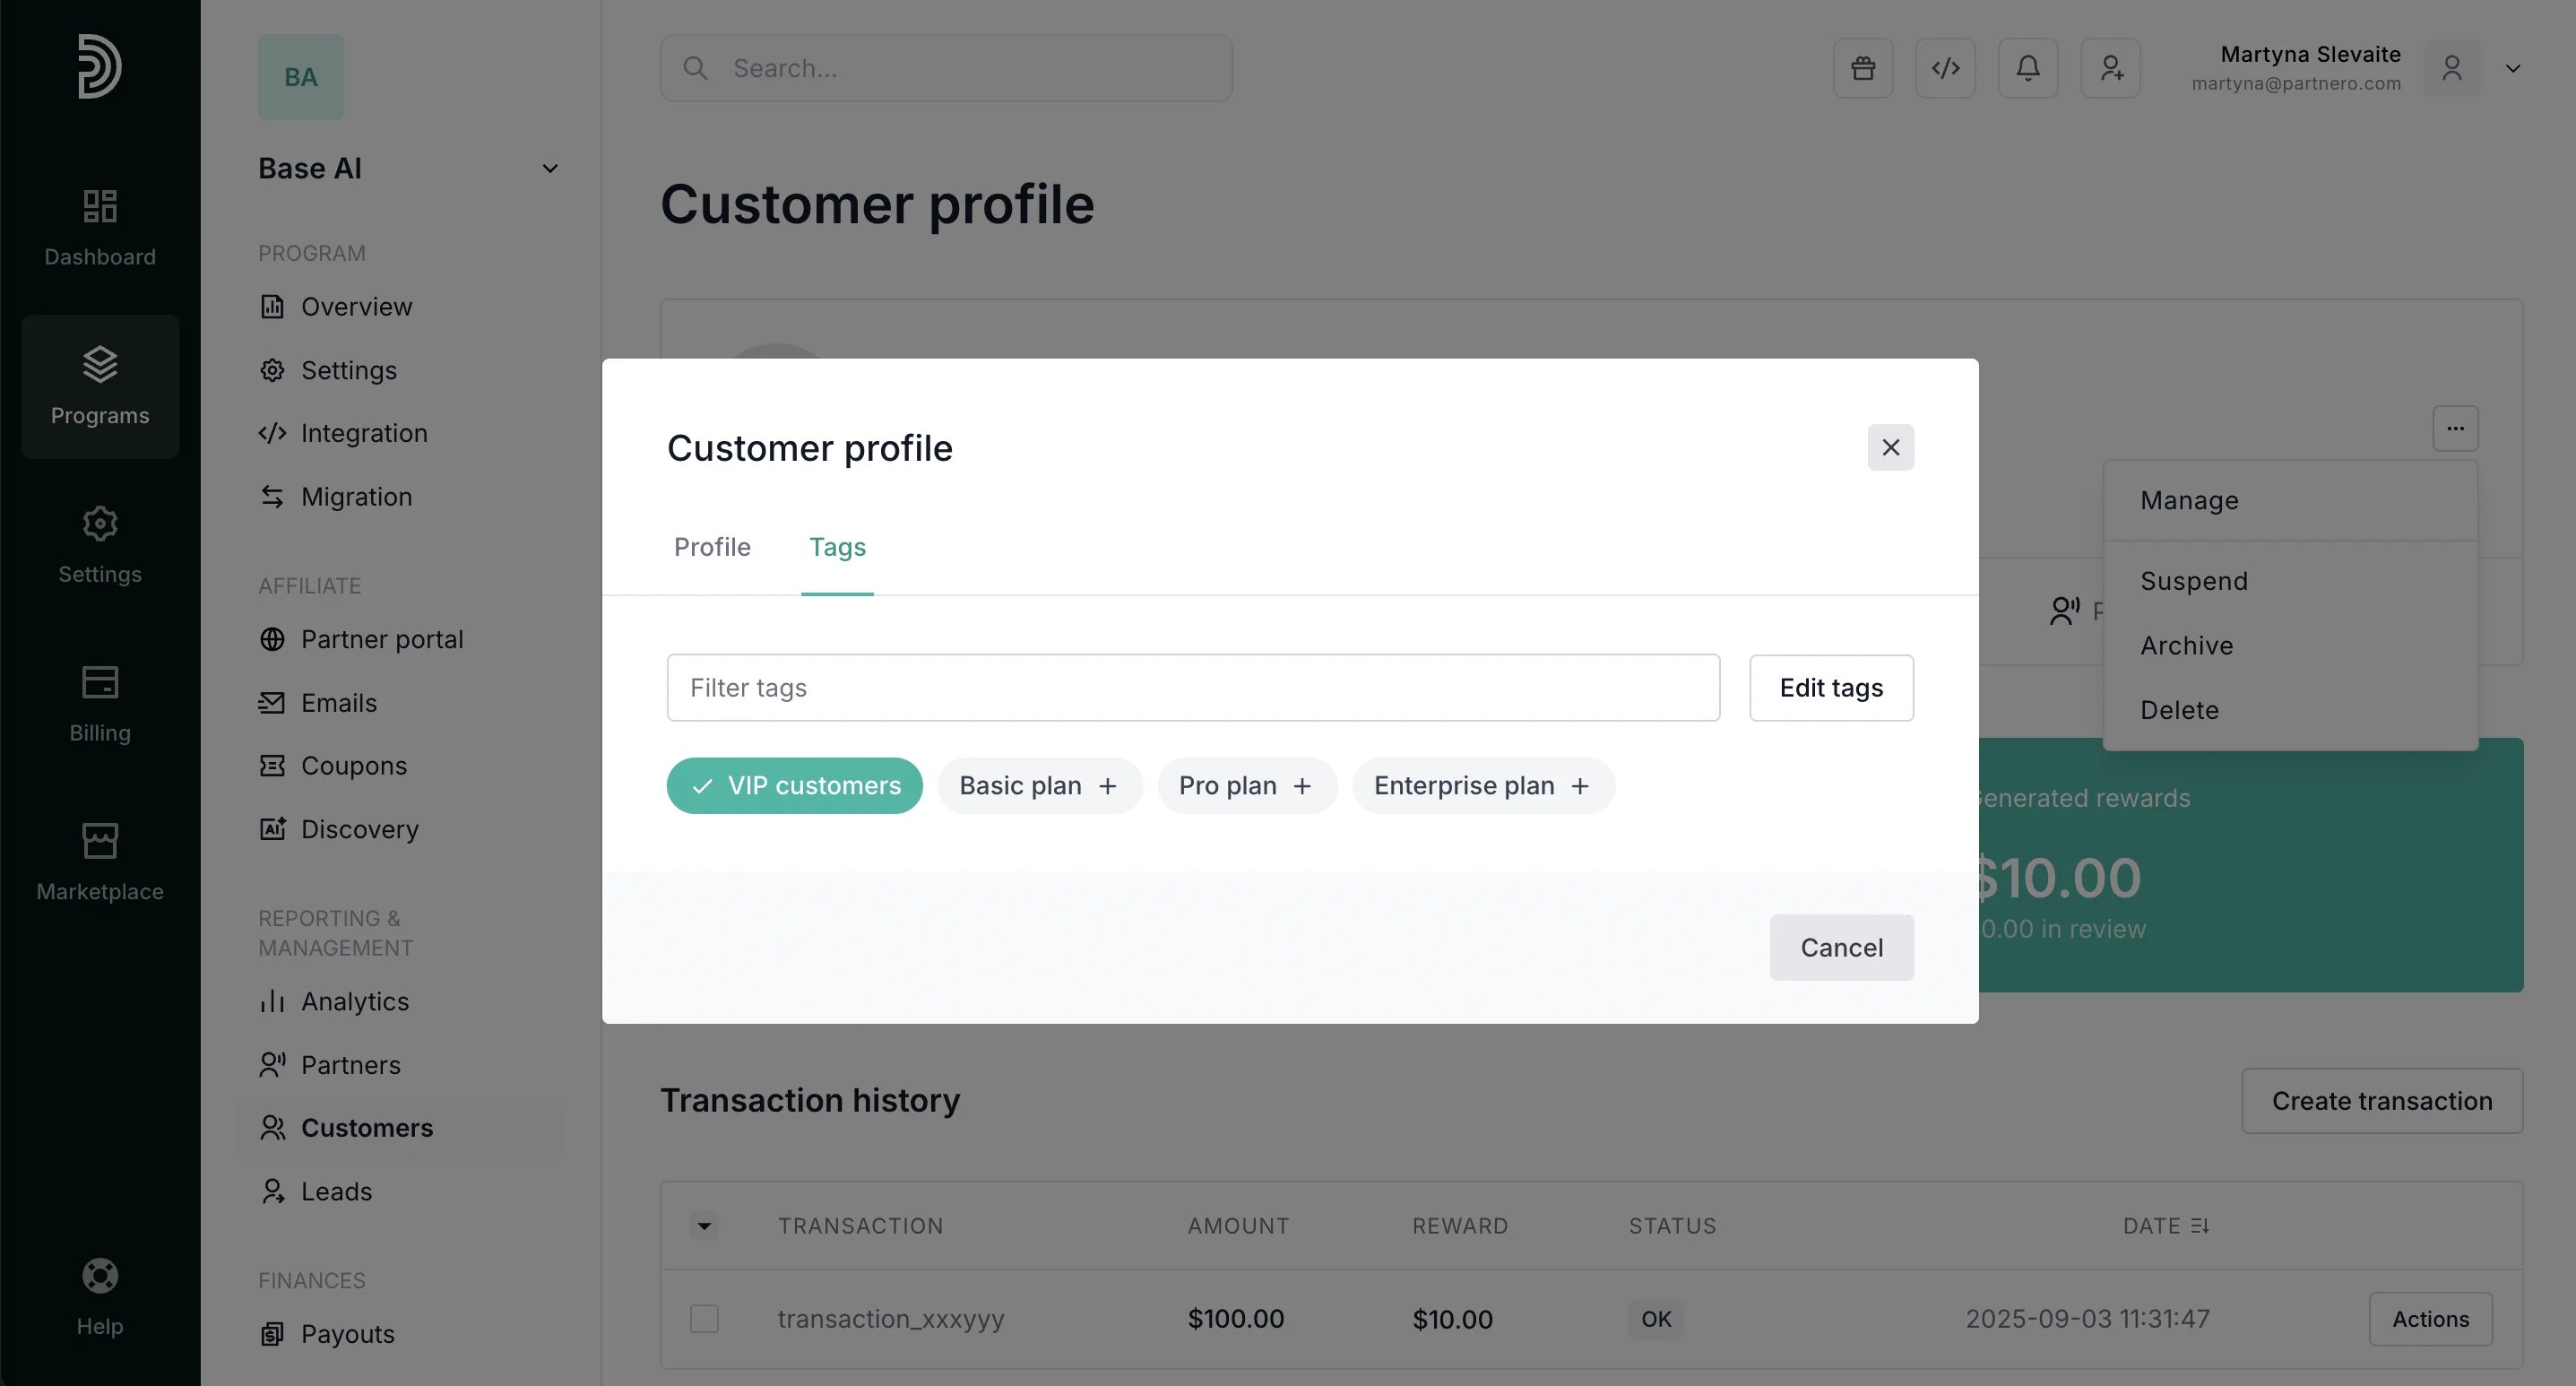 Additionally, you can click **Edit tags** to create new tags, if needed.
***
### How to set up commissions for specific tags
Your partners can receive different rewards based on the customer tags. To set up rewards:
1. Go to **Settings** under Program and click to set up **Commission rules**:
1.
Additionally, you can click **Edit tags** to create new tags, if needed.
***
### How to set up commissions for specific tags
Your partners can receive different rewards based on the customer tags. To set up rewards:
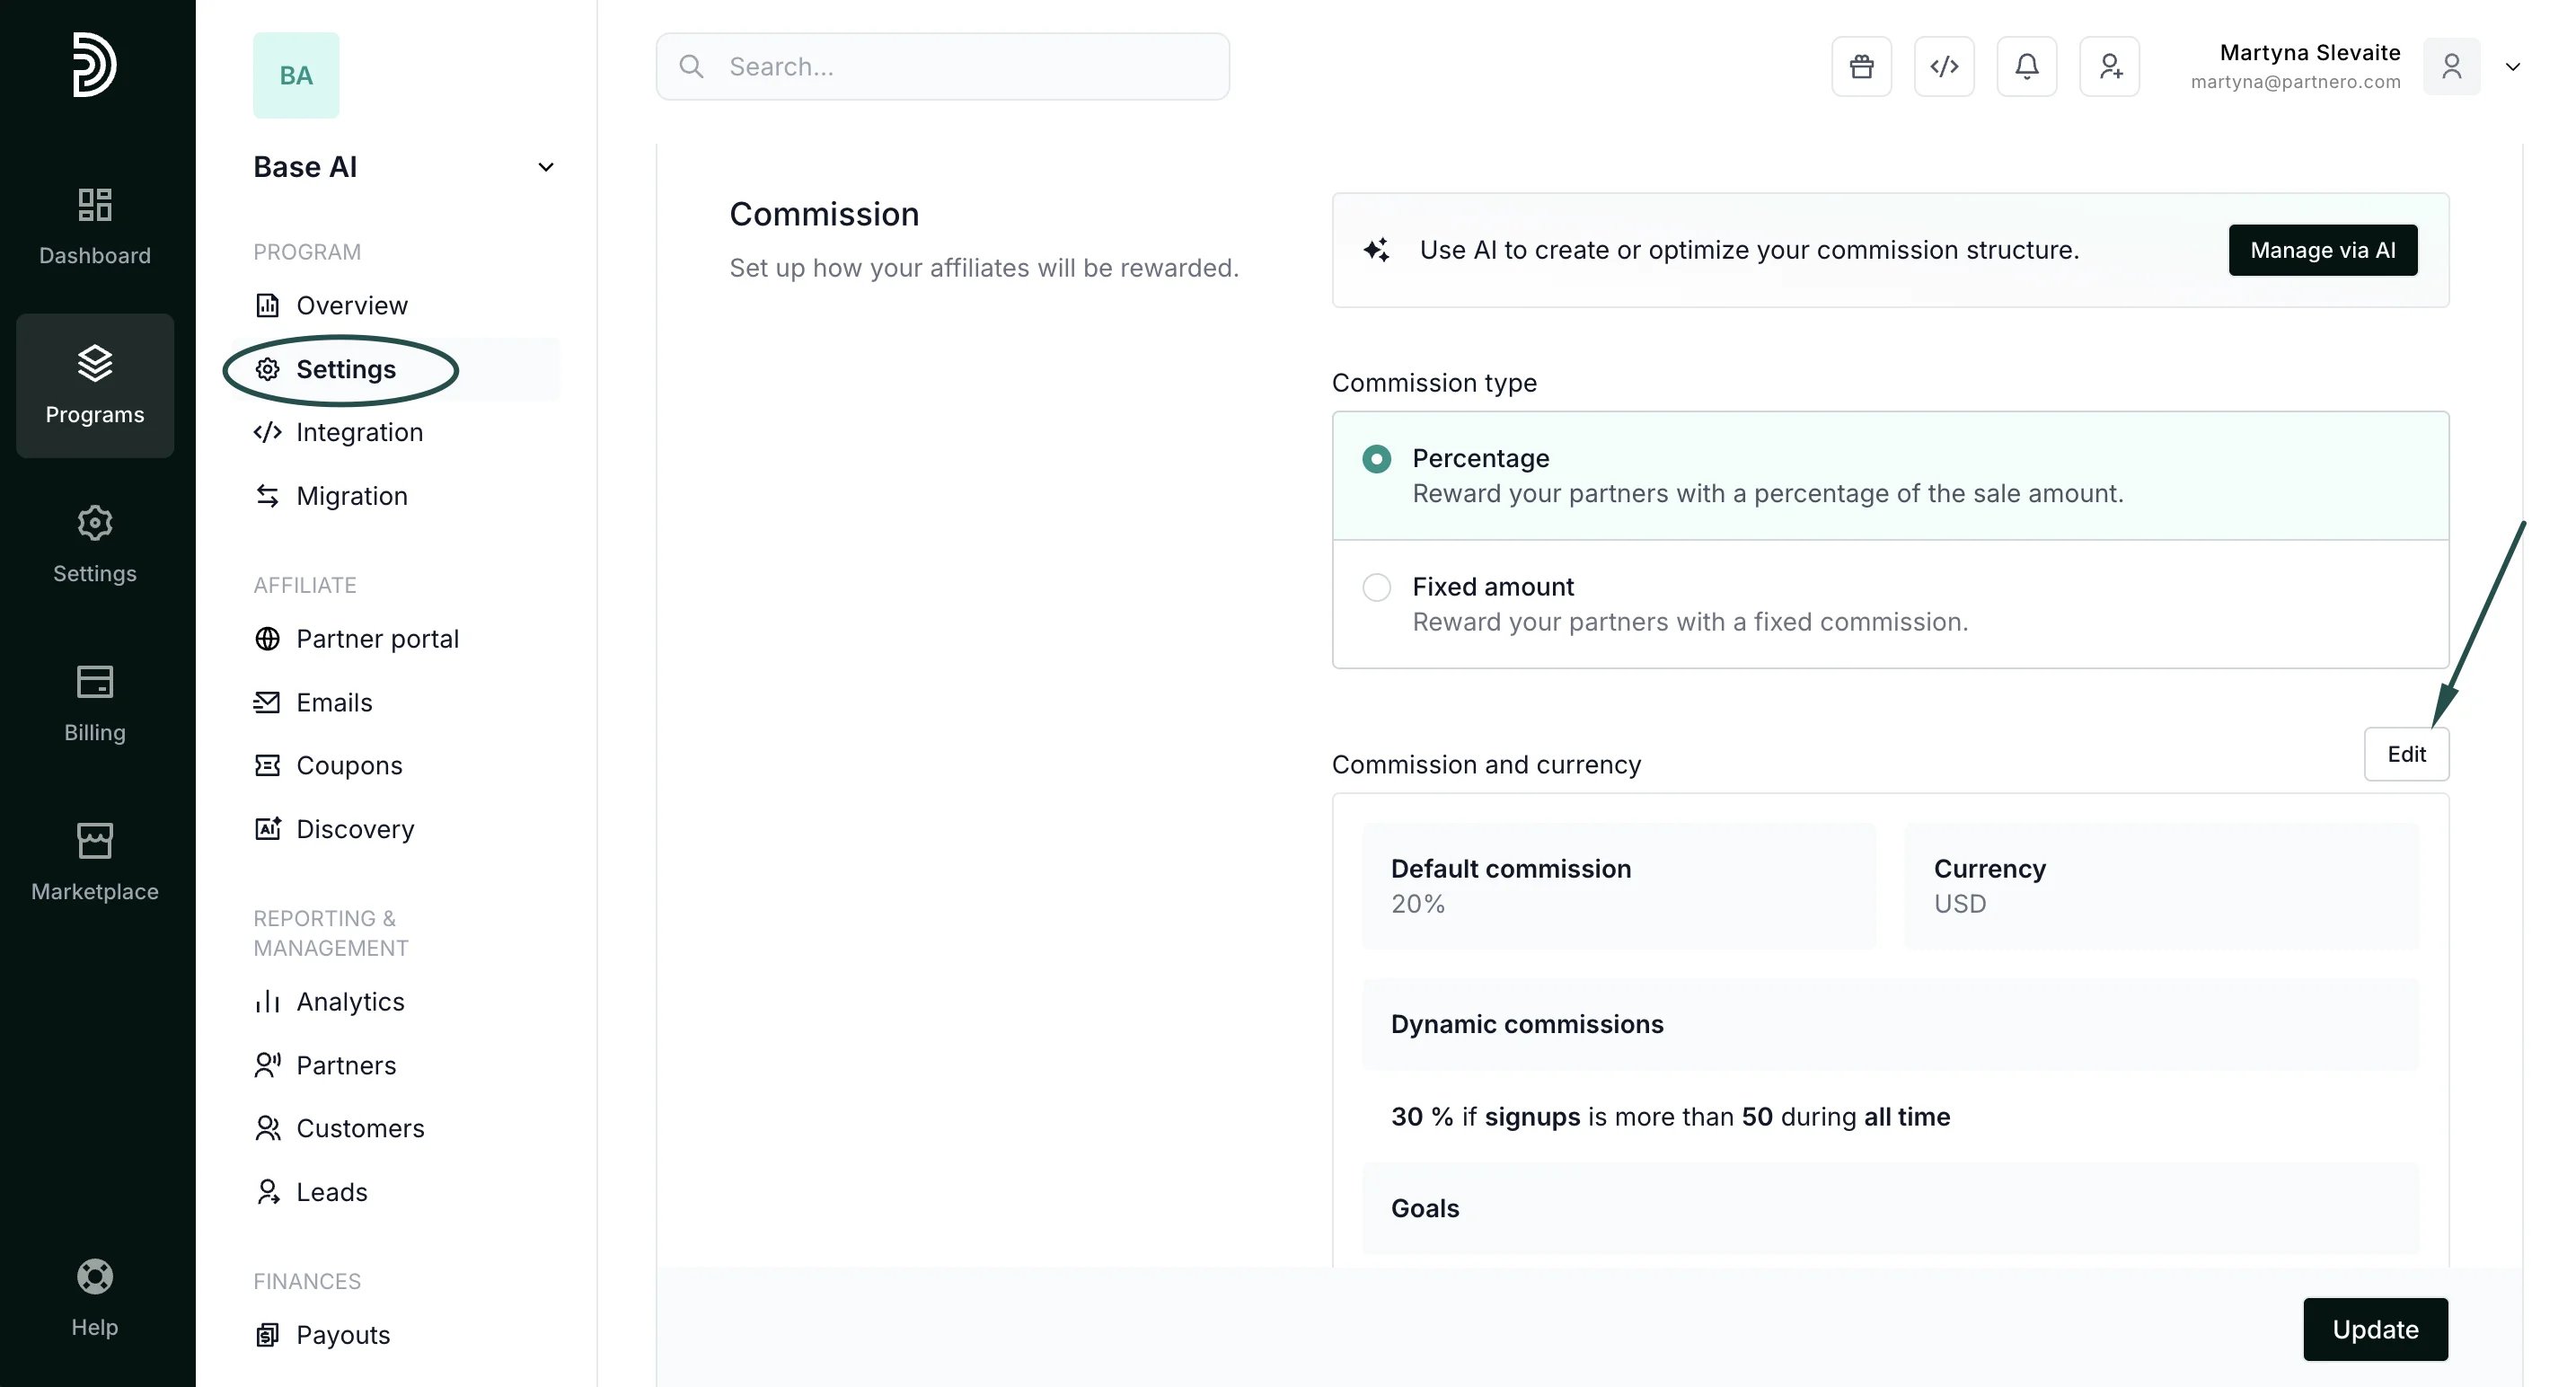
1. Go to **Settings** under Program and click to set up **Commission rules**:
1. 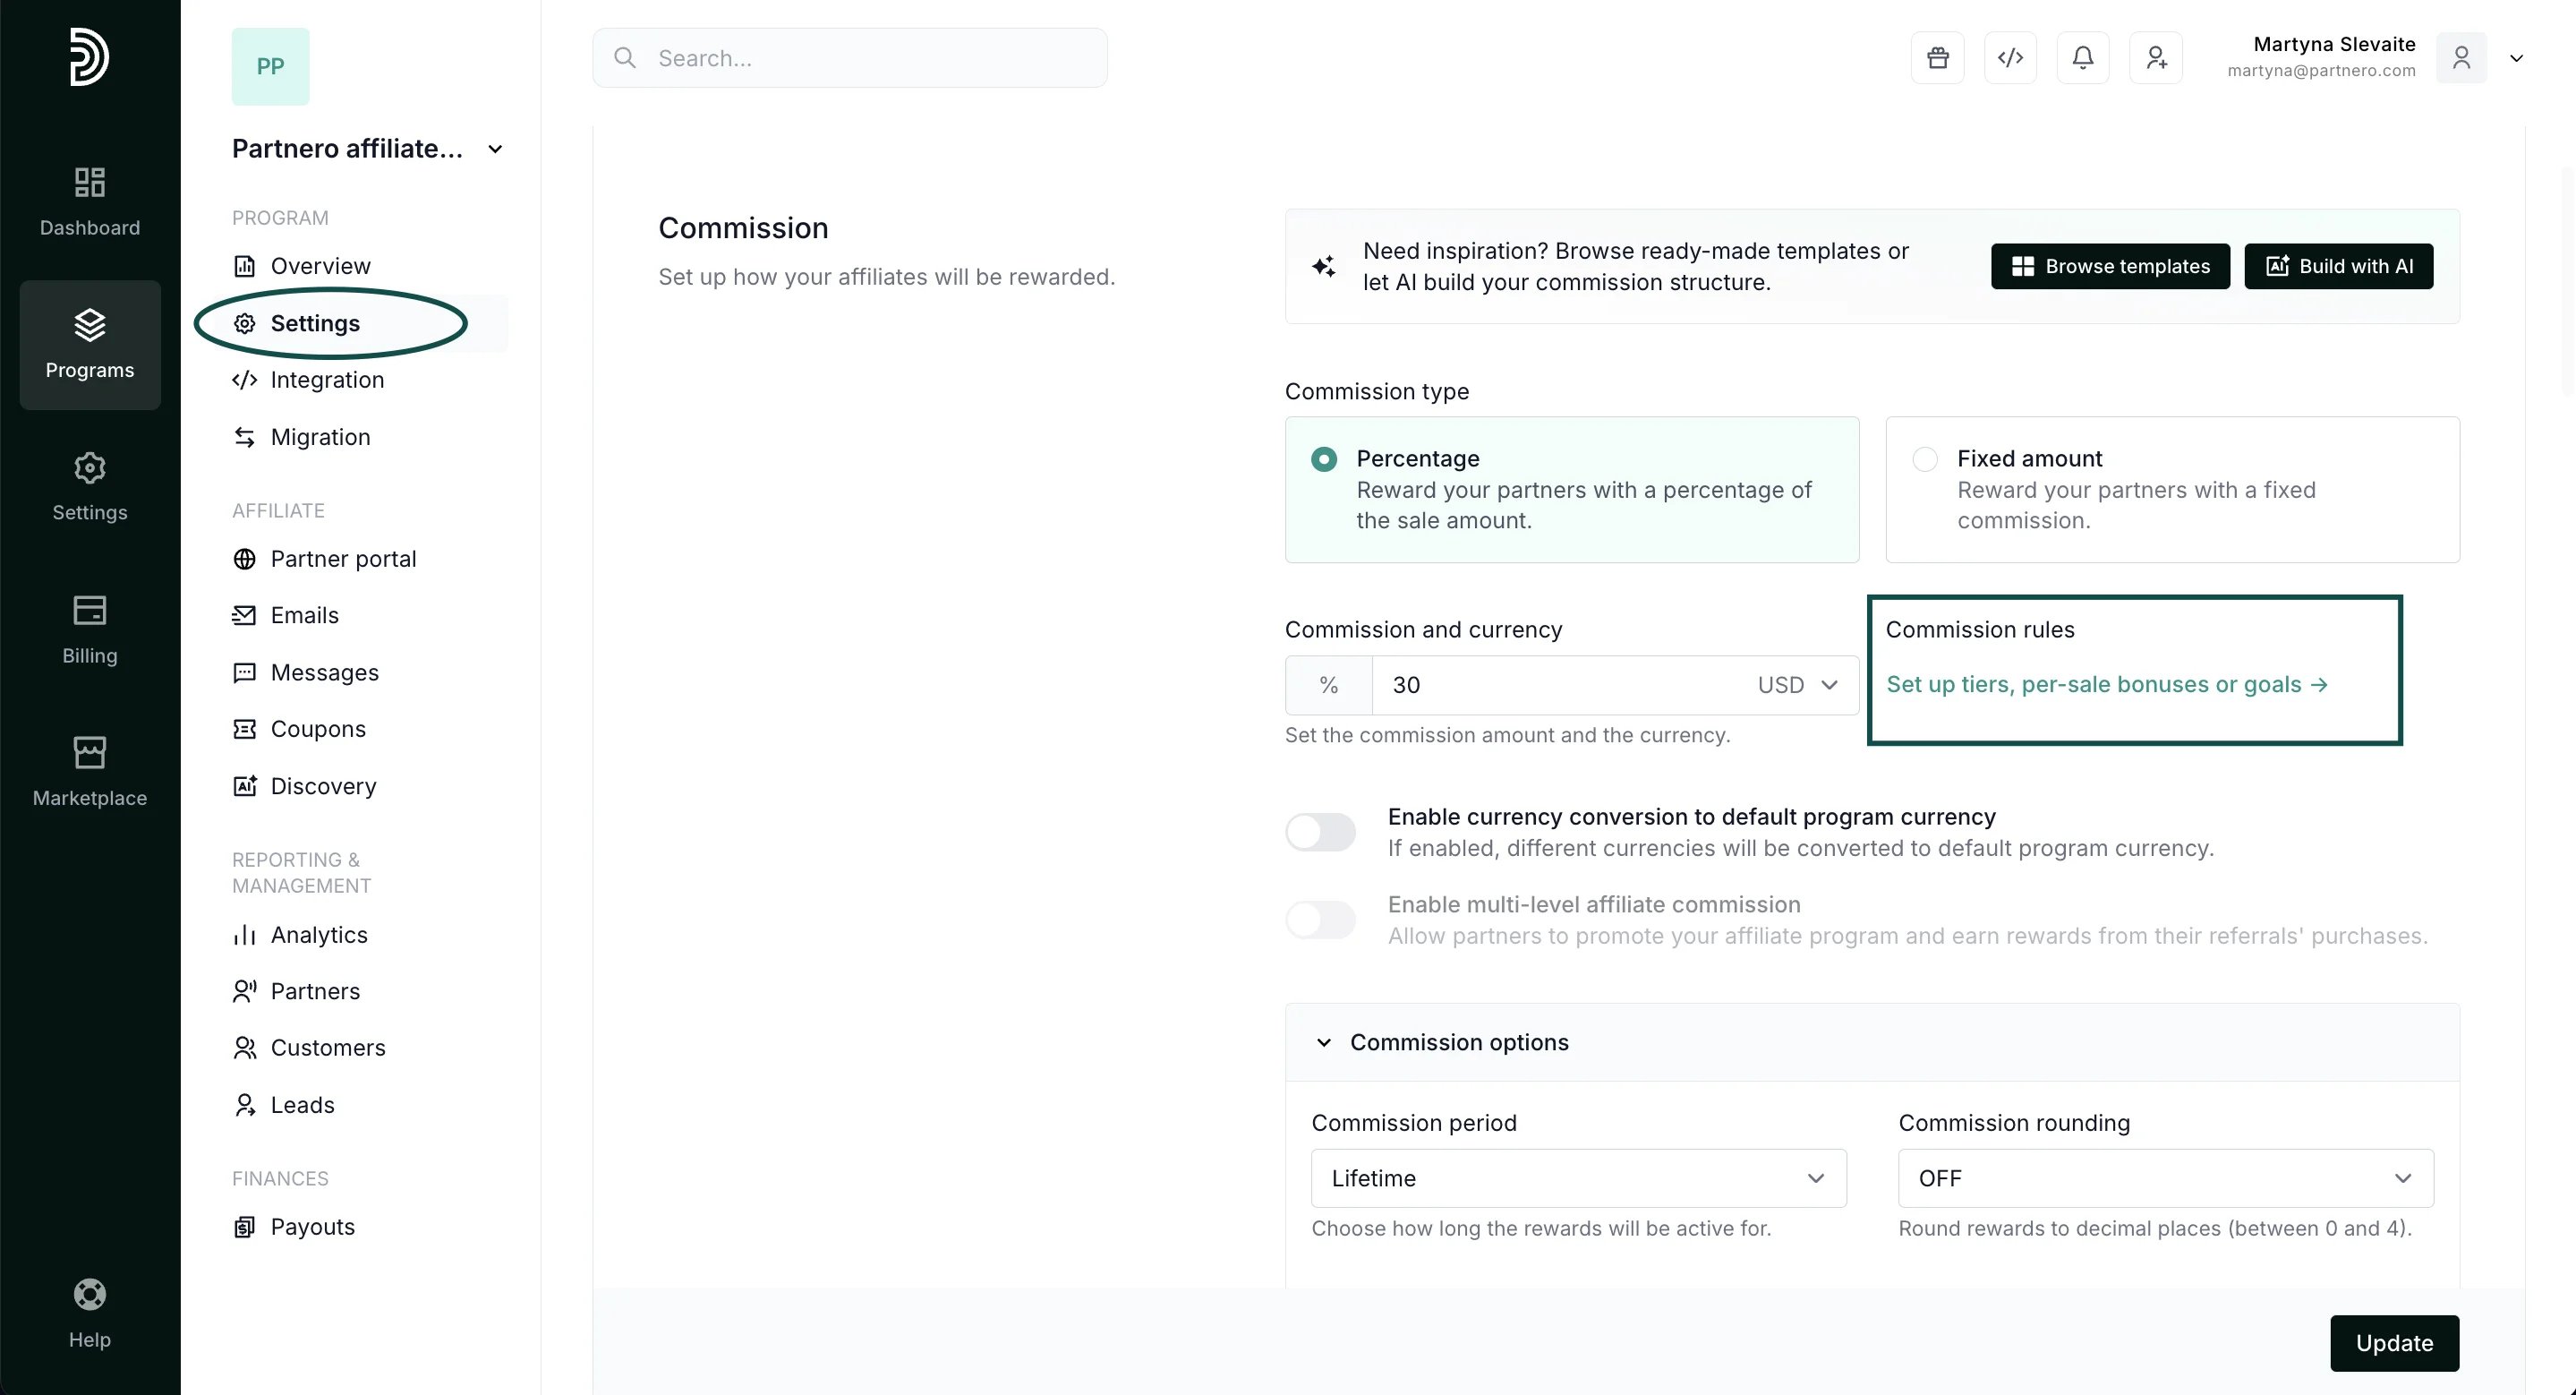 If you already have other advanced commissions set up, click **Edit**:
  2. In the **Dynamic commissions** tab, click **+Add tier** and set up the reward condition.
In the example below, we're offering 35% commission if a *customer* > *belongs to >\_\_" VIP customers"*:
2. In the **Dynamic commissions** tab, click **+Add tier** and set up the reward condition.
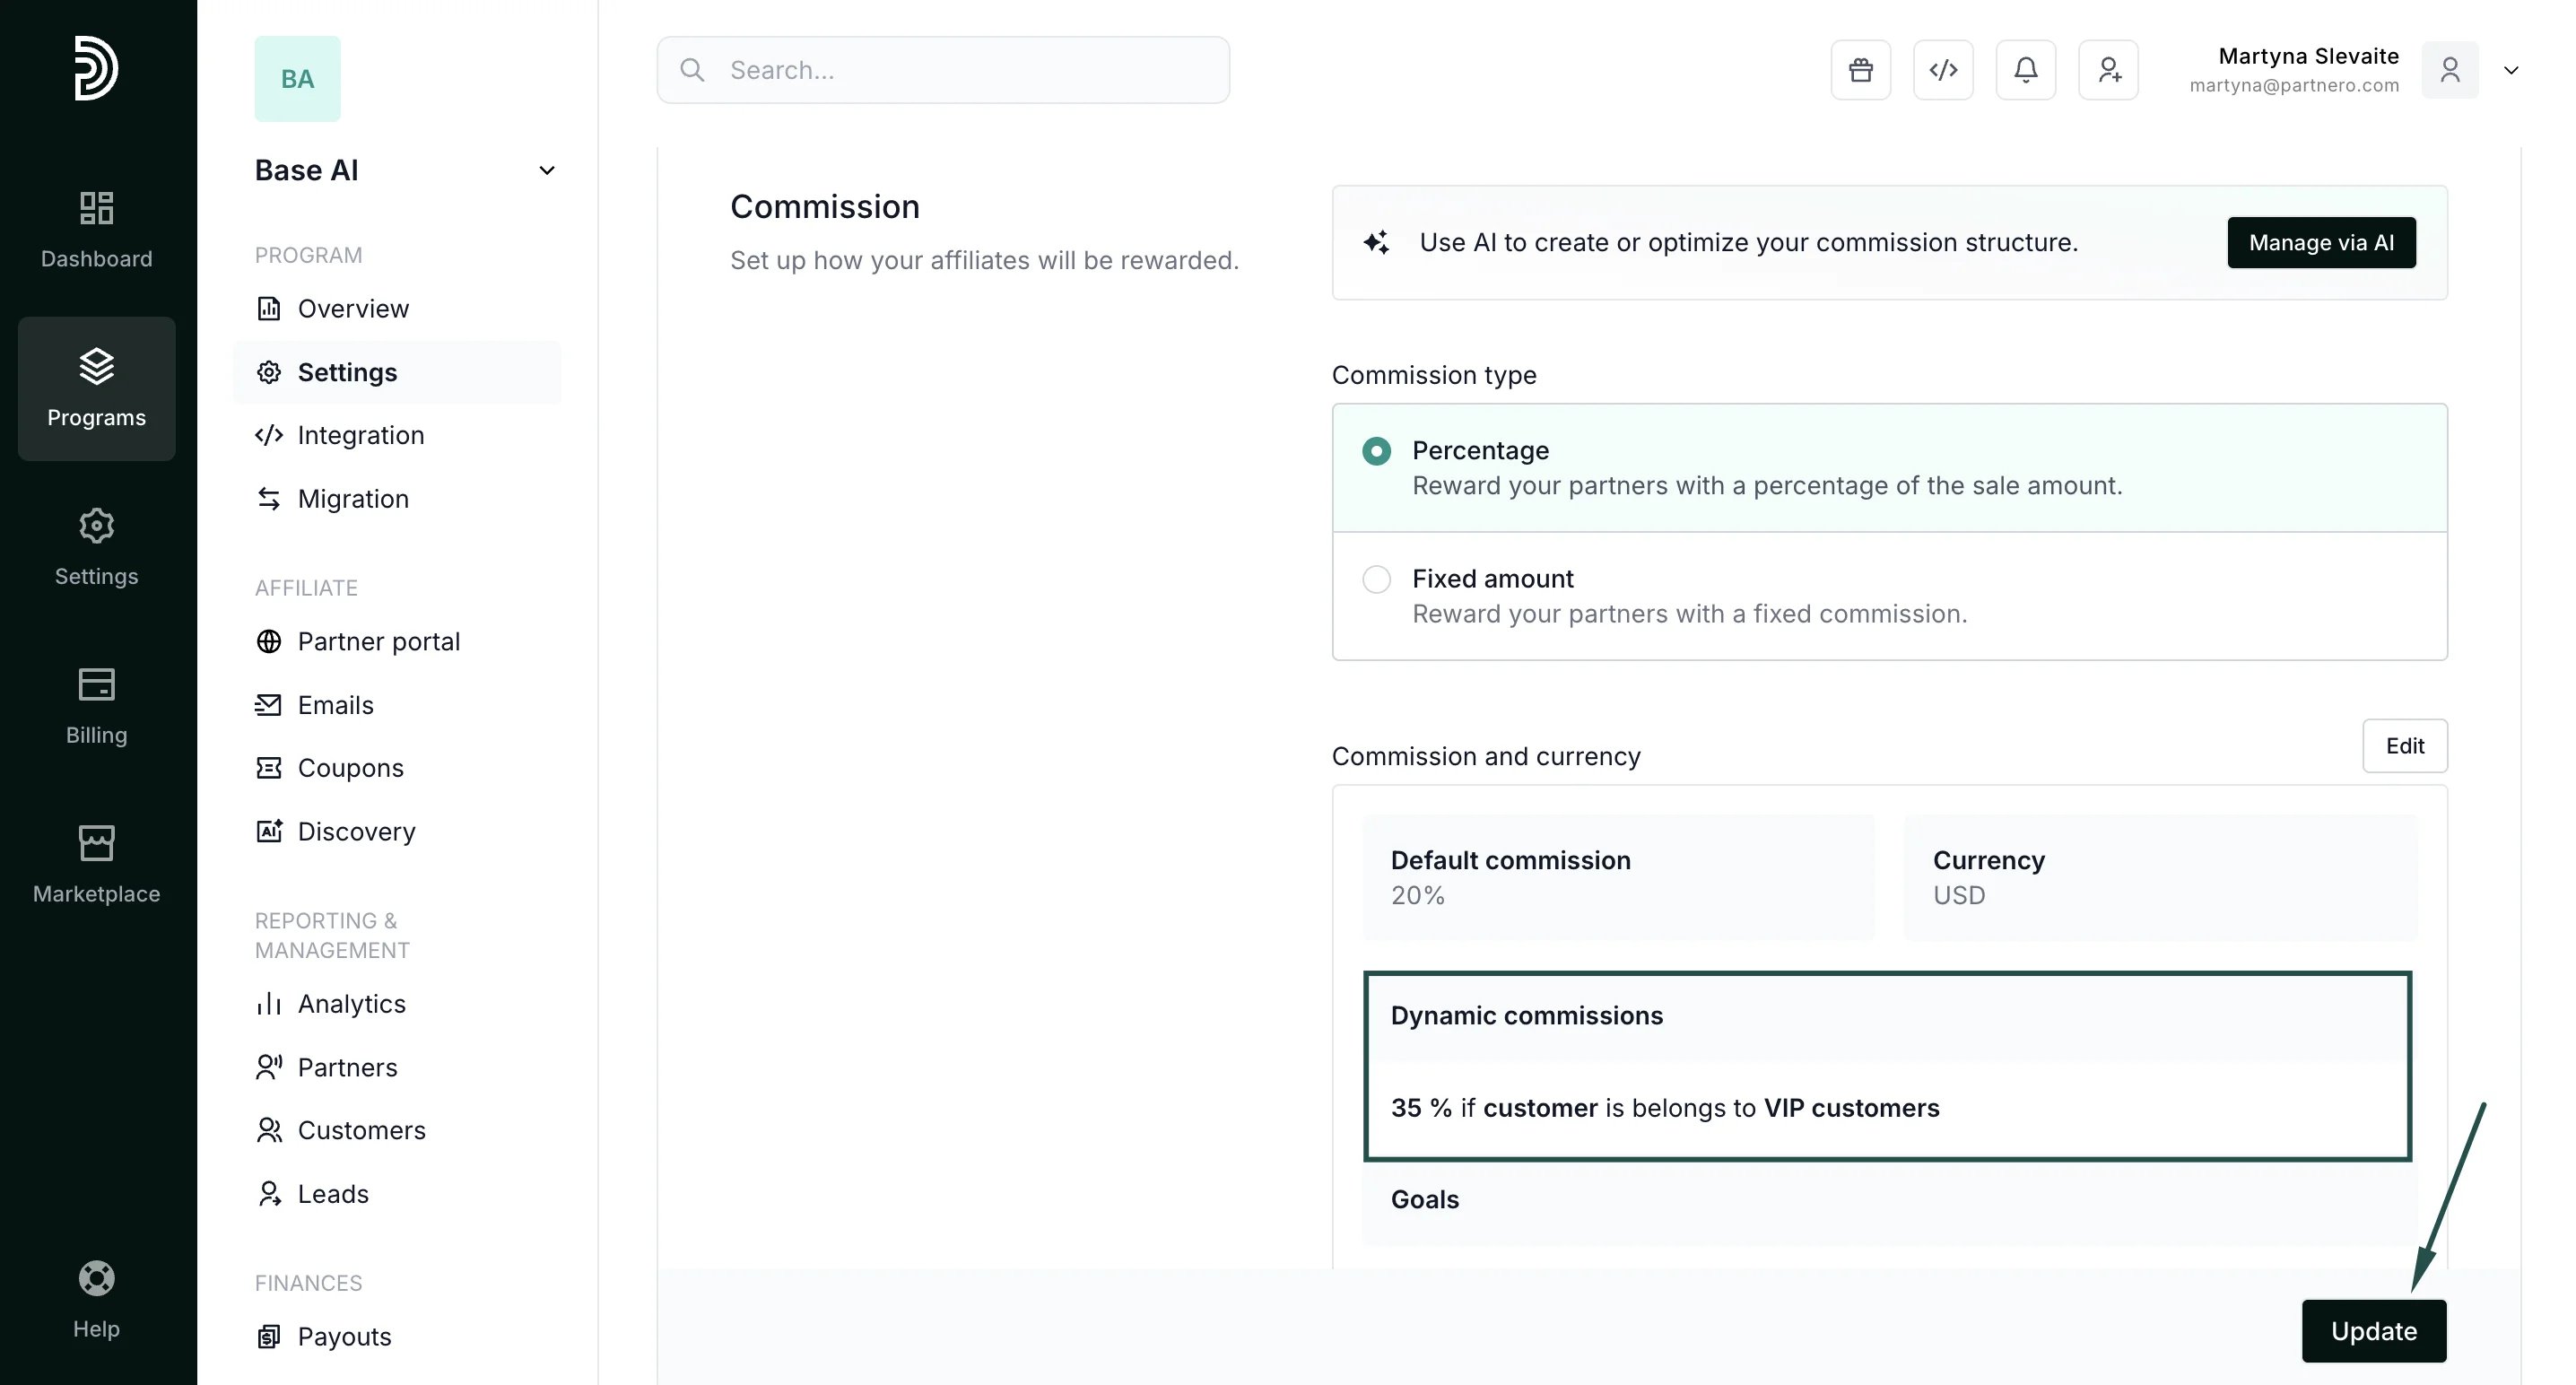
In the example below, we're offering 35% commission if a *customer* > *belongs to >\_\_" VIP customers"*: 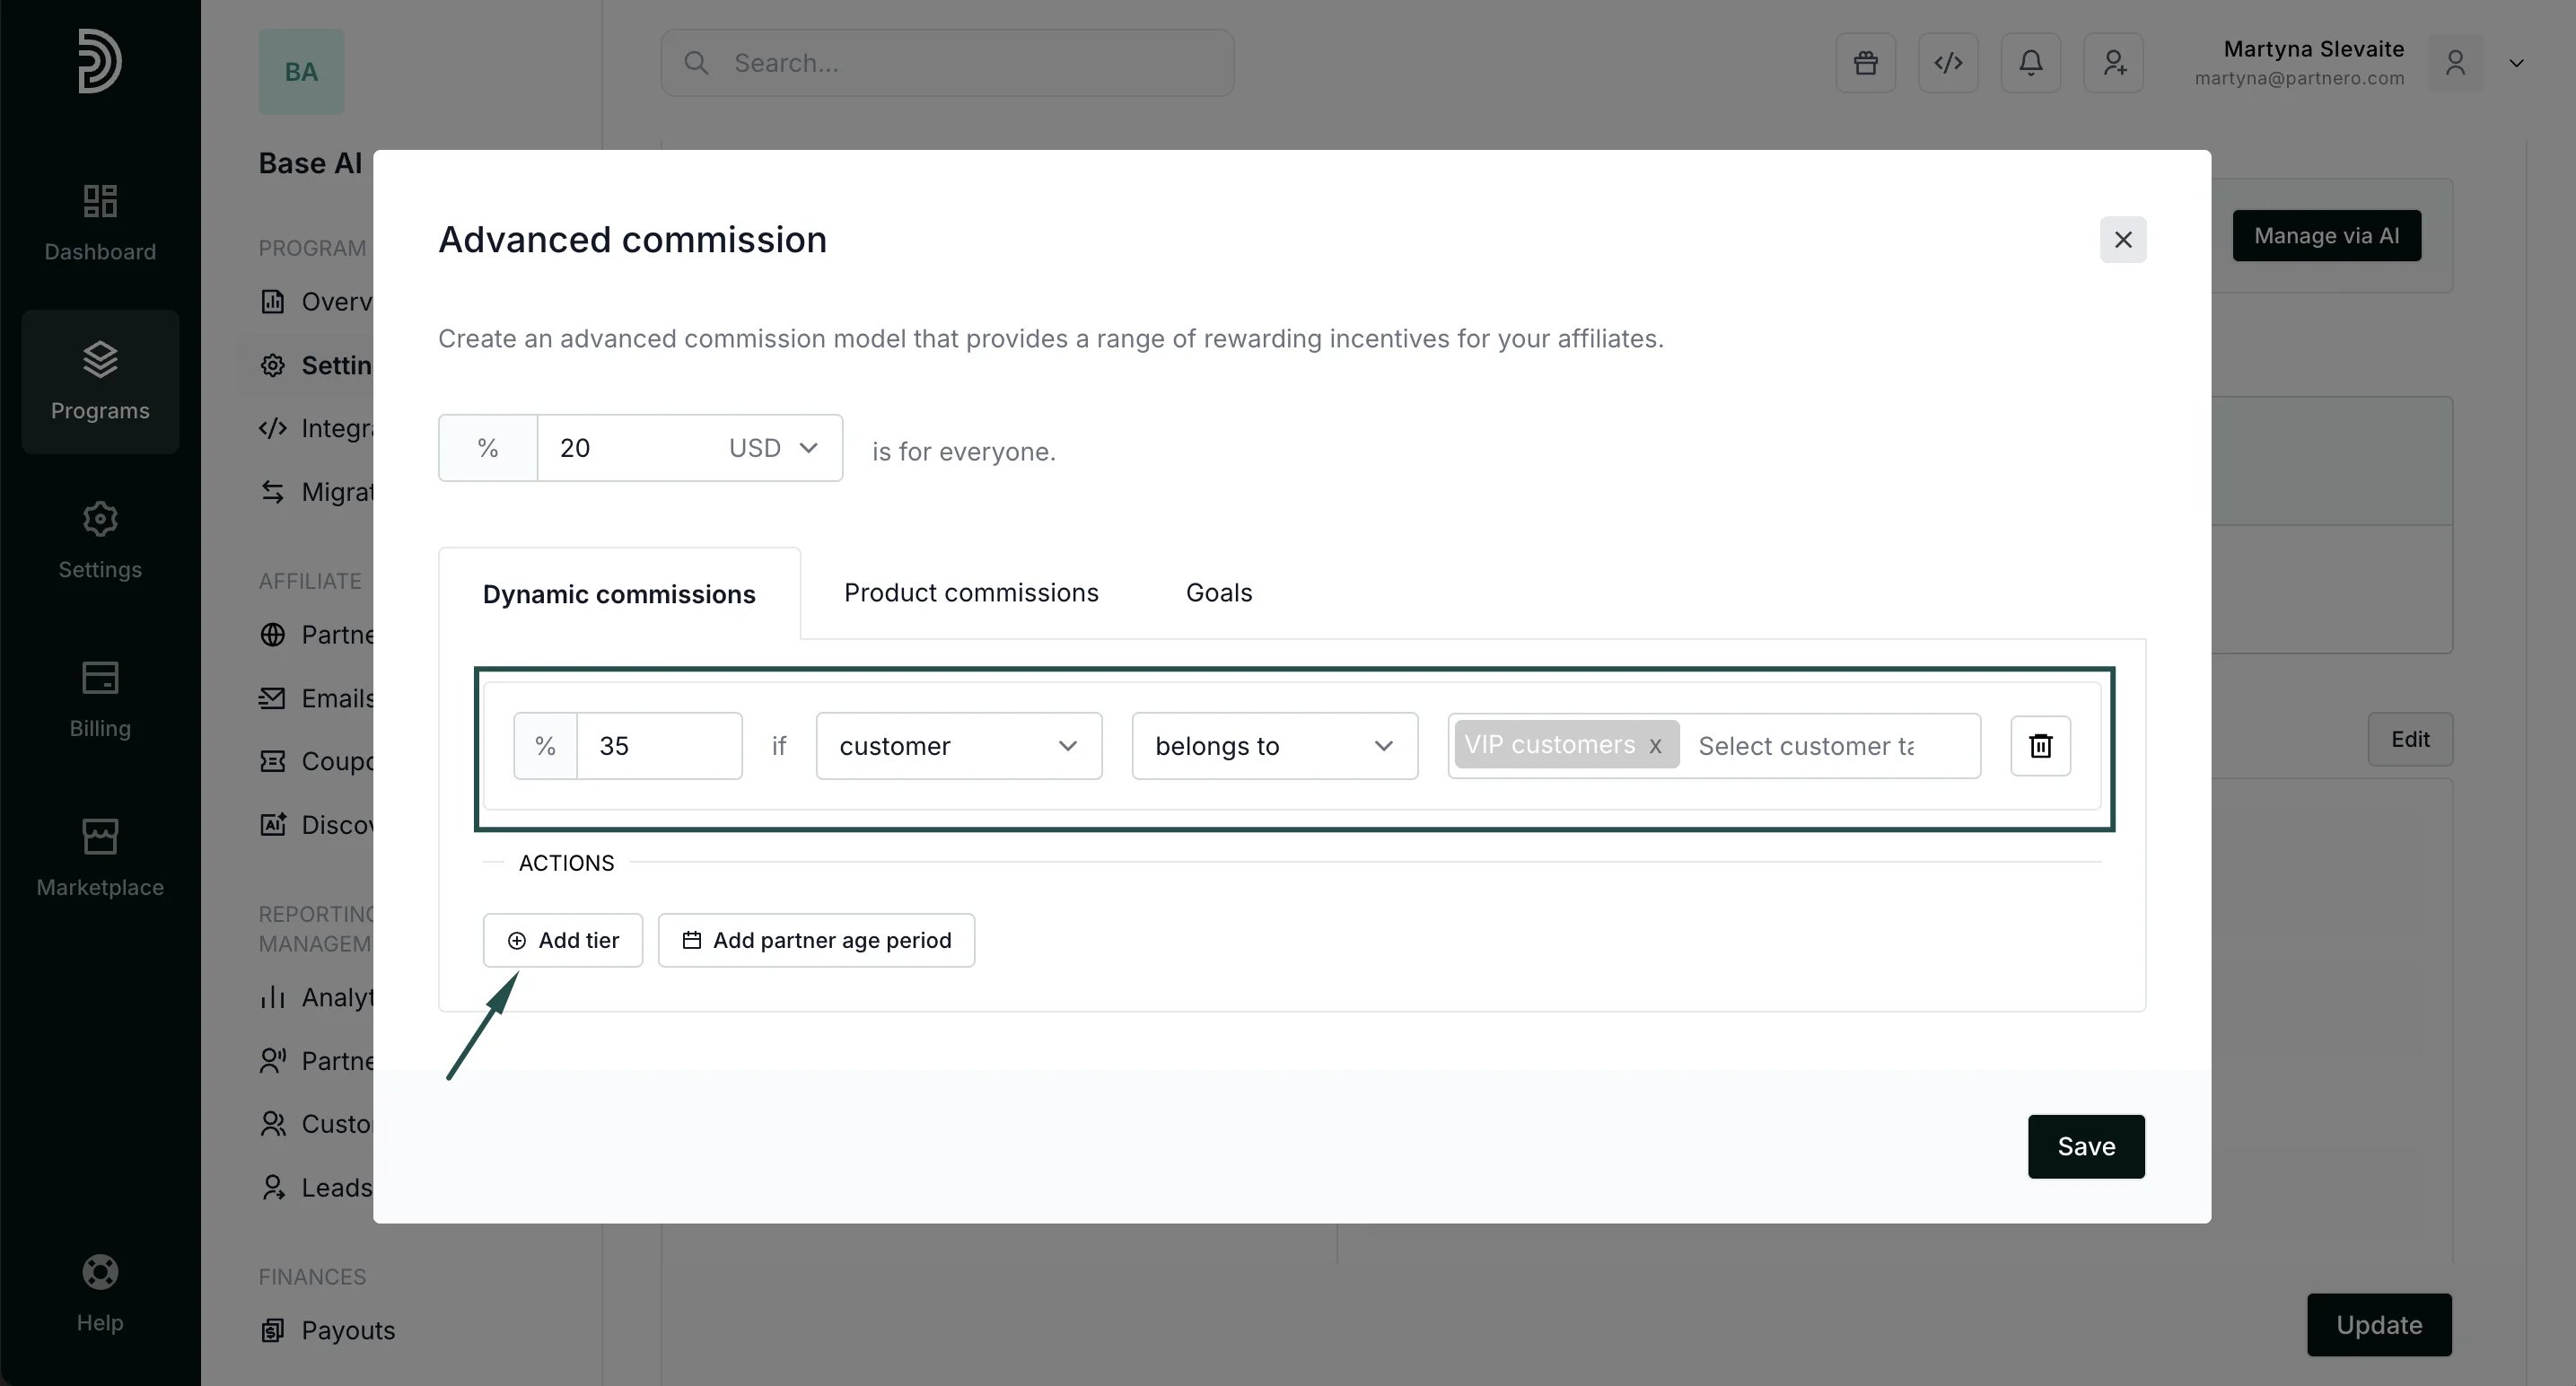 3. Click **Save**. You'll see the new condition displayed under the program commission settings. Click **Update** to save your changes:
  ***
This documentation is built and hosted on [Mintlify](https://mintlify.com), a developer documentation platform.
***
This documentation is built and hosted on [Mintlify](https://mintlify.com), a developer documentation platform.