> ## Documentation Index
> Fetch the complete documentation index at: https://docs.partnero.com/llms.txt
> Use this file to discover all available pages before exploring further.
# Create and enable partner approval form
### Approval process
With Partnero, you can choose to make your program **open to all registrants** or set up an **approval process**.
If partner approvals are enabled:
* Upon sign-up, each partner will be asked to complete and submit an approval form.
* The program owner will see all pending approval requests in the dashboard.
* Each request must be reviewed and either **approved** or **rejected**.
Only approved partners will gain access to the partner portal and receive their unique affiliate link to promote your product.
***
### Enable and customize the approval process
To enable the partner approval process:
1. Open the program you’d like to work with.
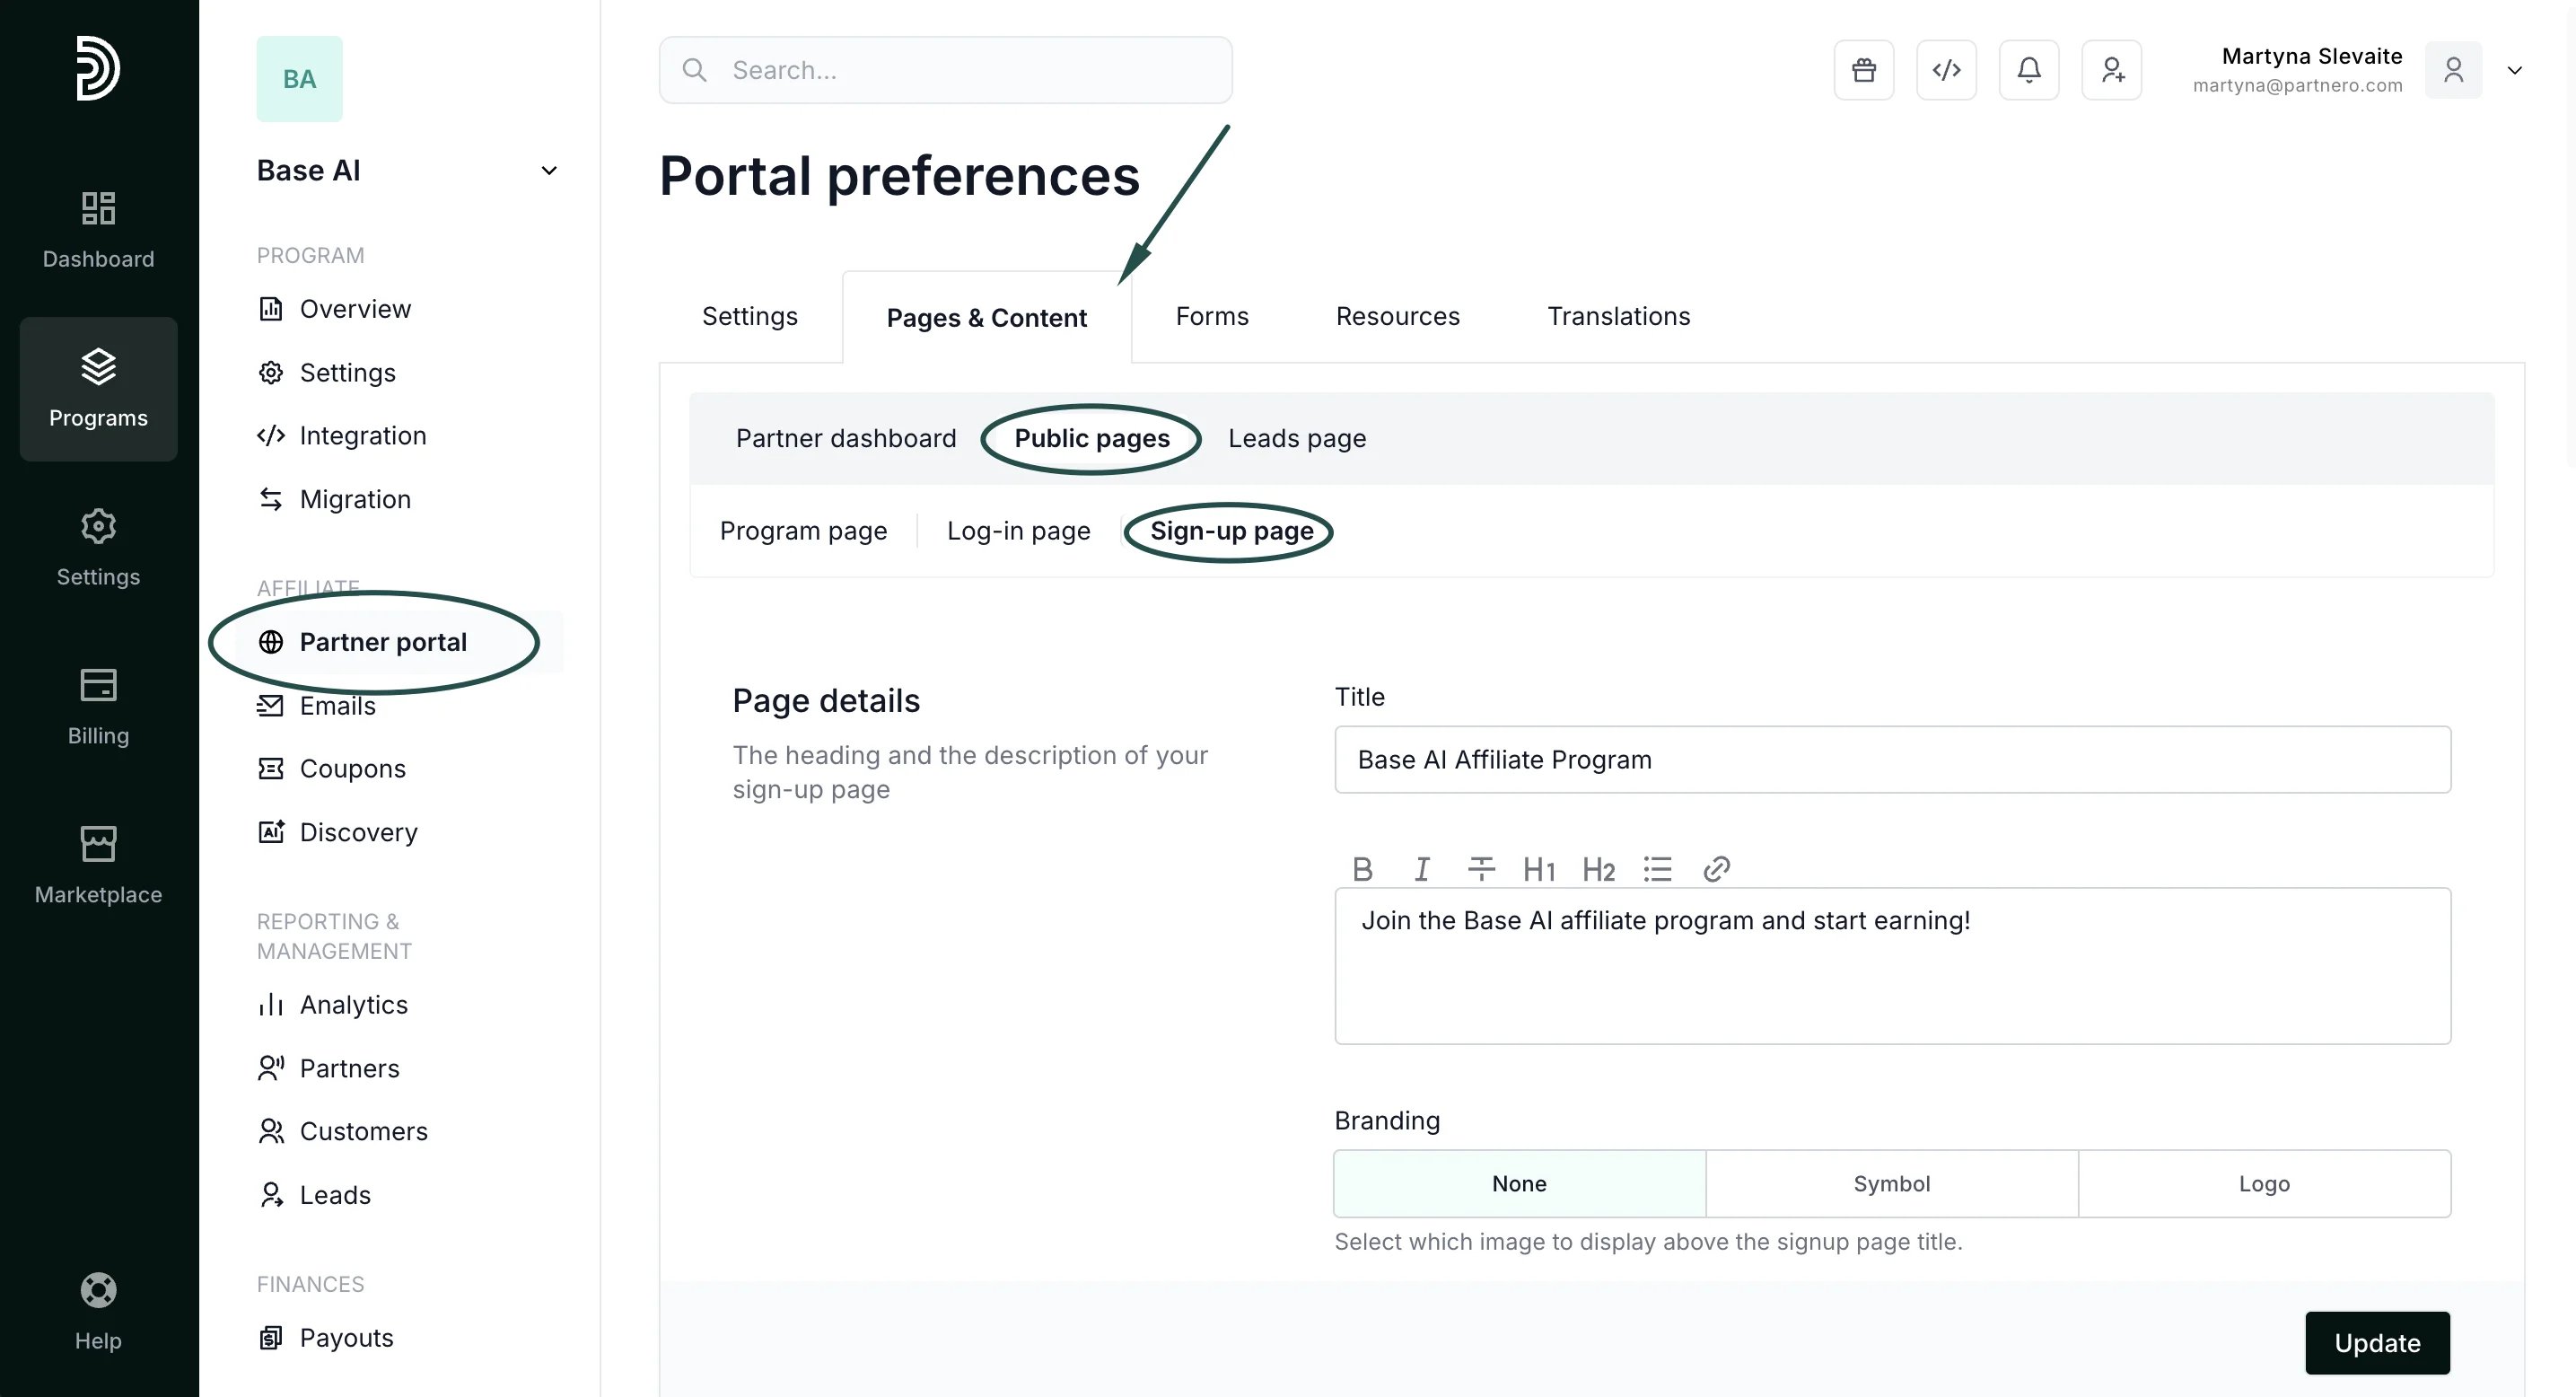
2. On the left sidebar, click on **Partner Portal** under **Affiliate.**
3. Navigate to the **Pages &** **Content** tab → **Public pages** → **Sign-up page**:
 4. Toggle to enable the approval form for new partners:
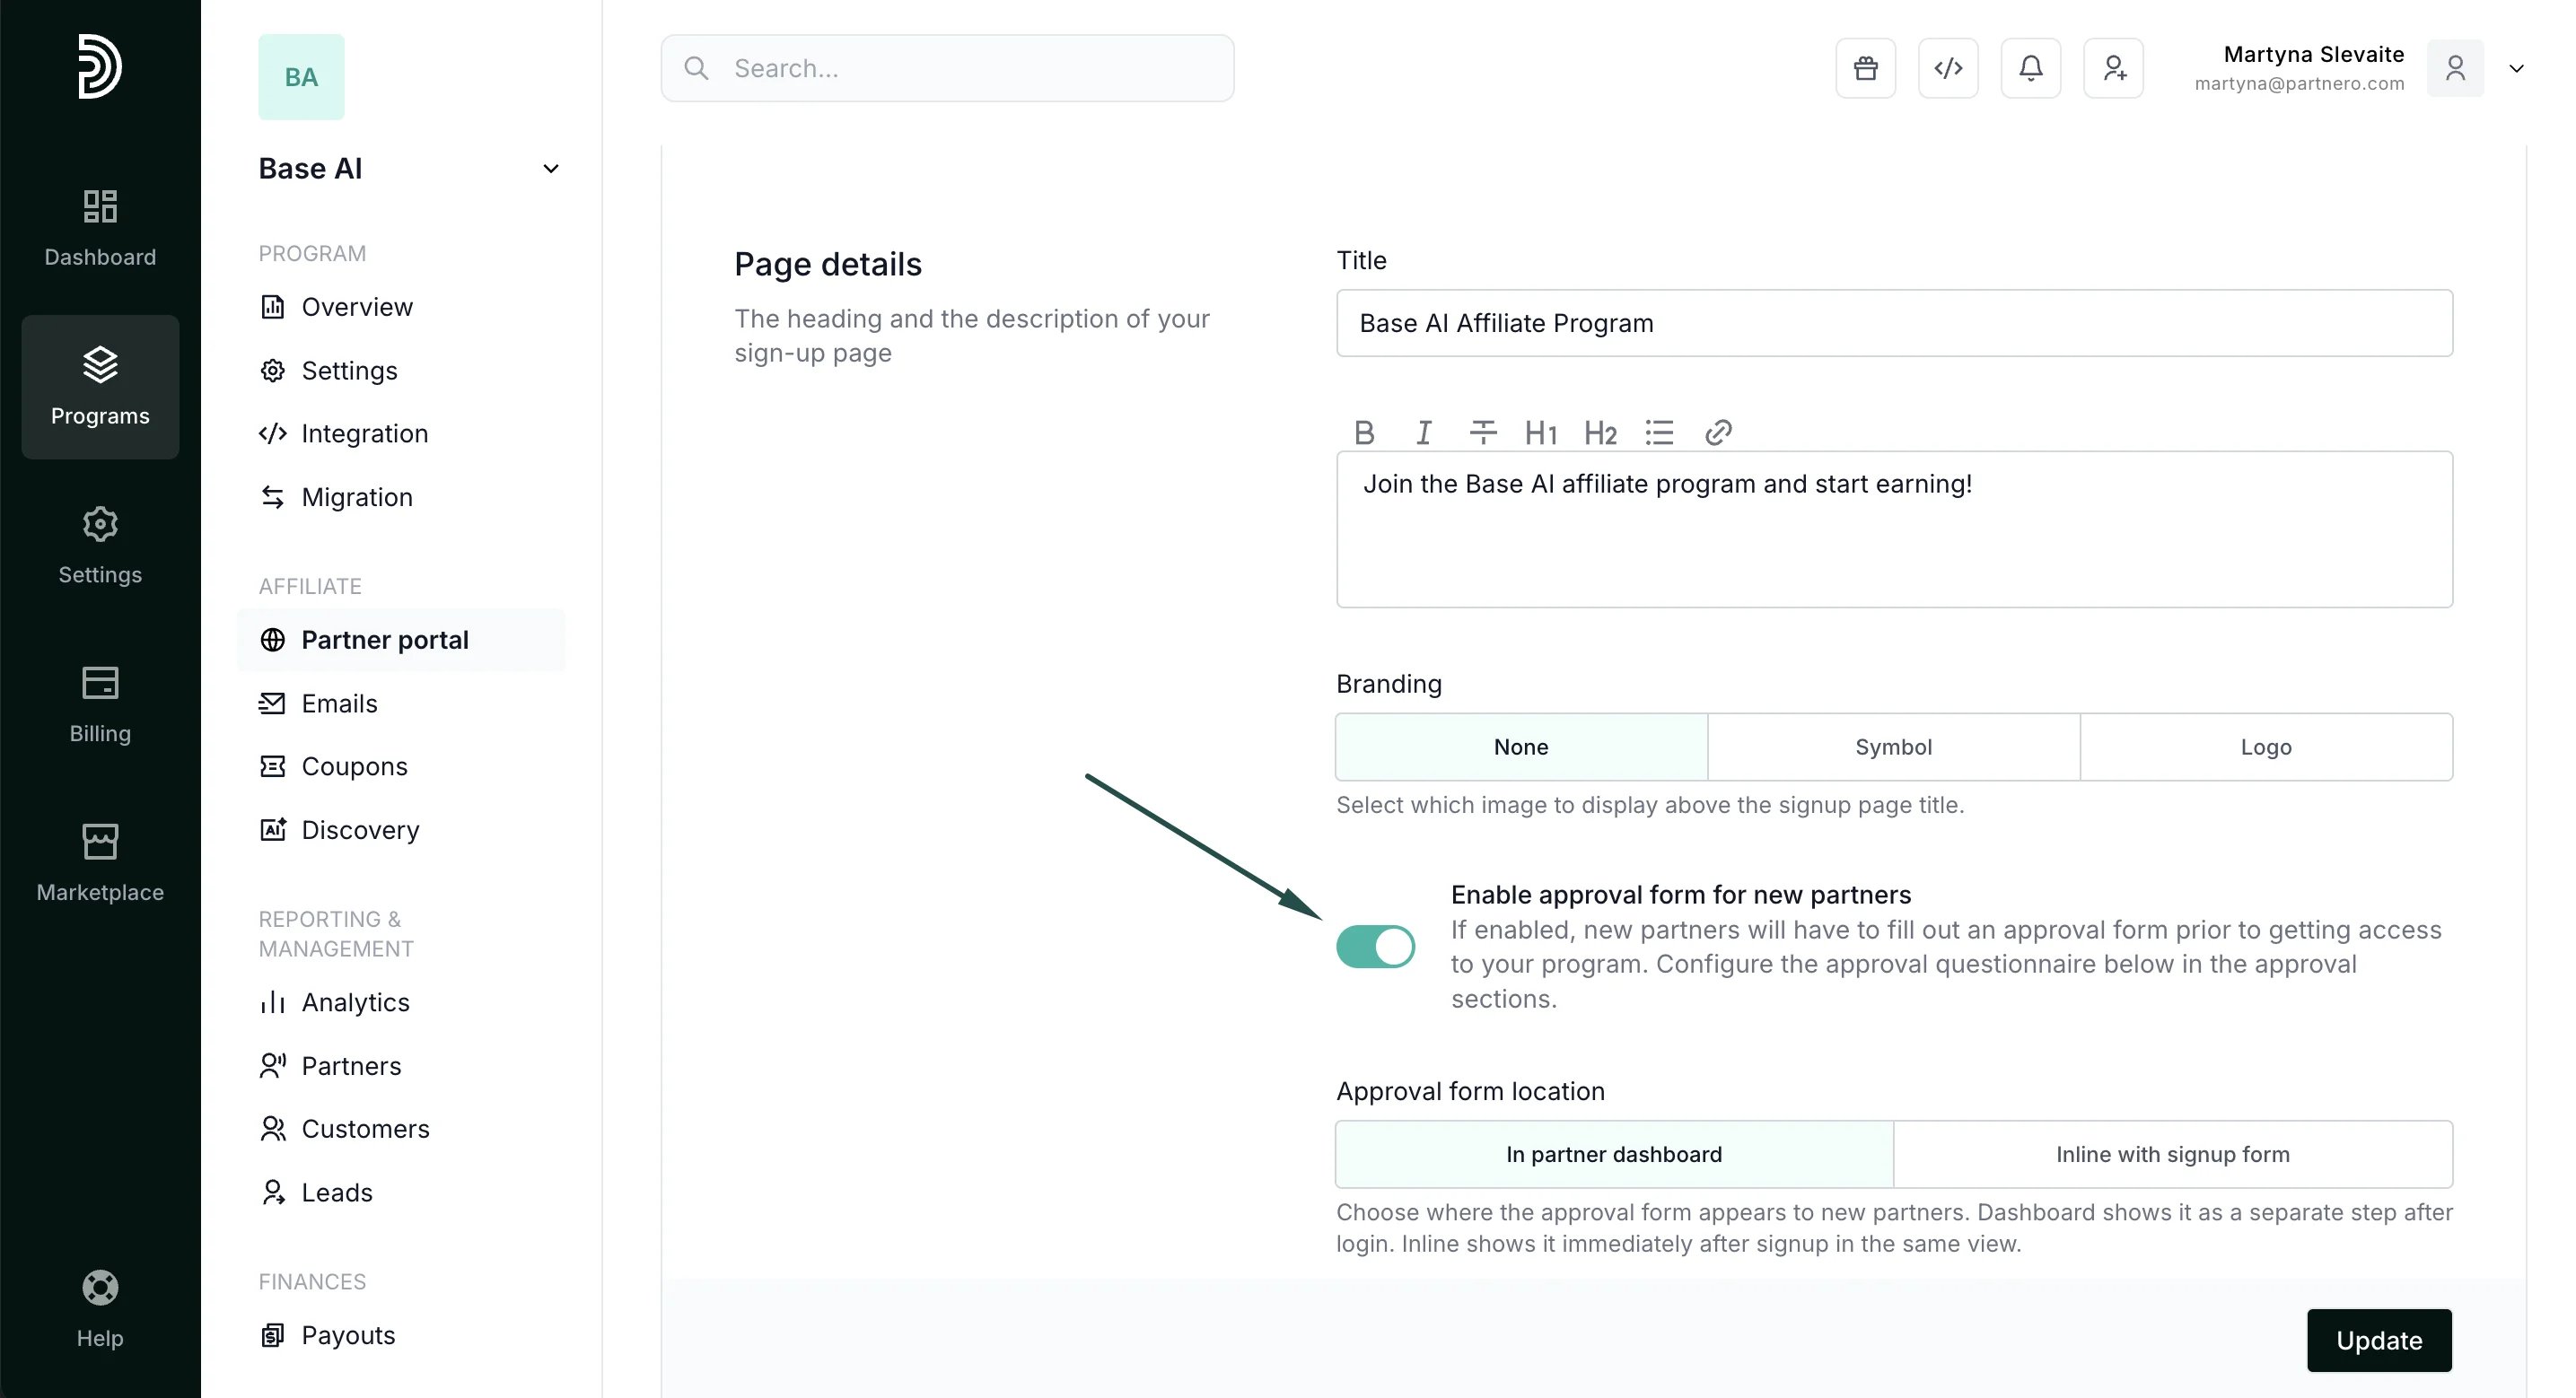 *Alternatively, the approval can be enabled under **Program** → **Settings** → **Other***. *Enabling in one location is sufficient.*
5. Click **Update** to save changes.
#### Approval form placement
You can choose between two approval form placements:
*Alternatively, the approval can be enabled under **Program** → **Settings** → **Other***. *Enabling in one location is sufficient.*
5. Click **Update** to save changes.
#### Approval form placement
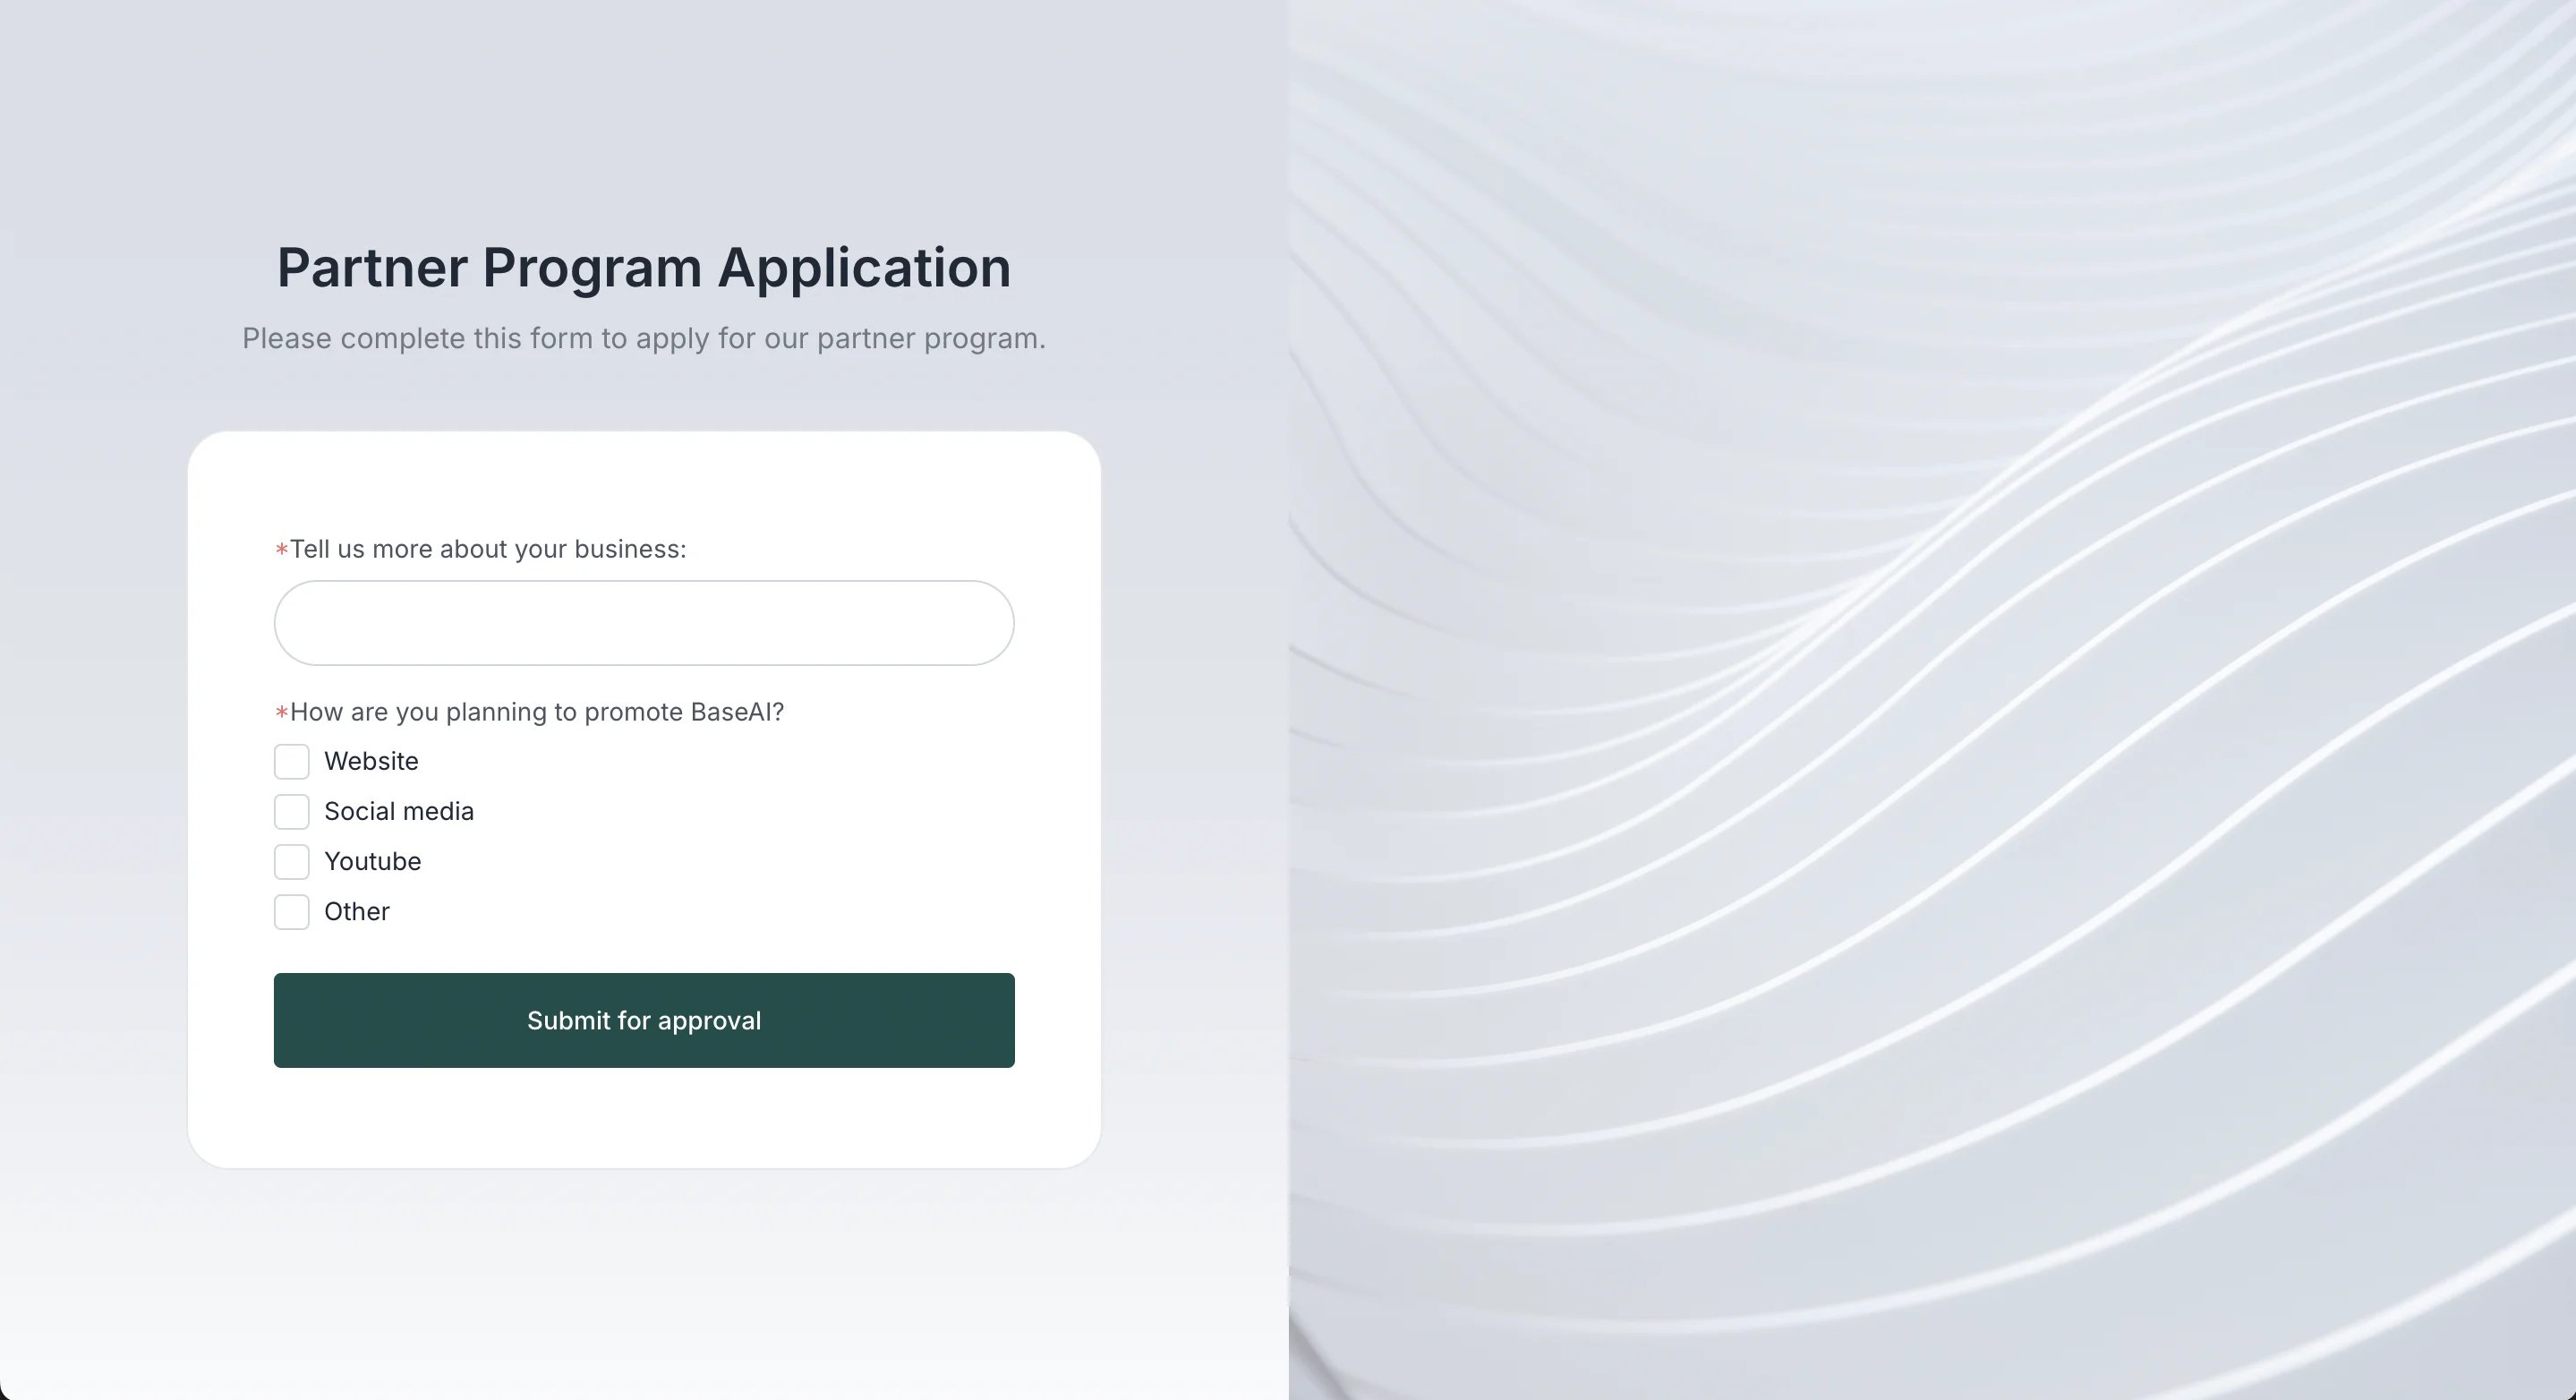
You can choose between two approval form placements: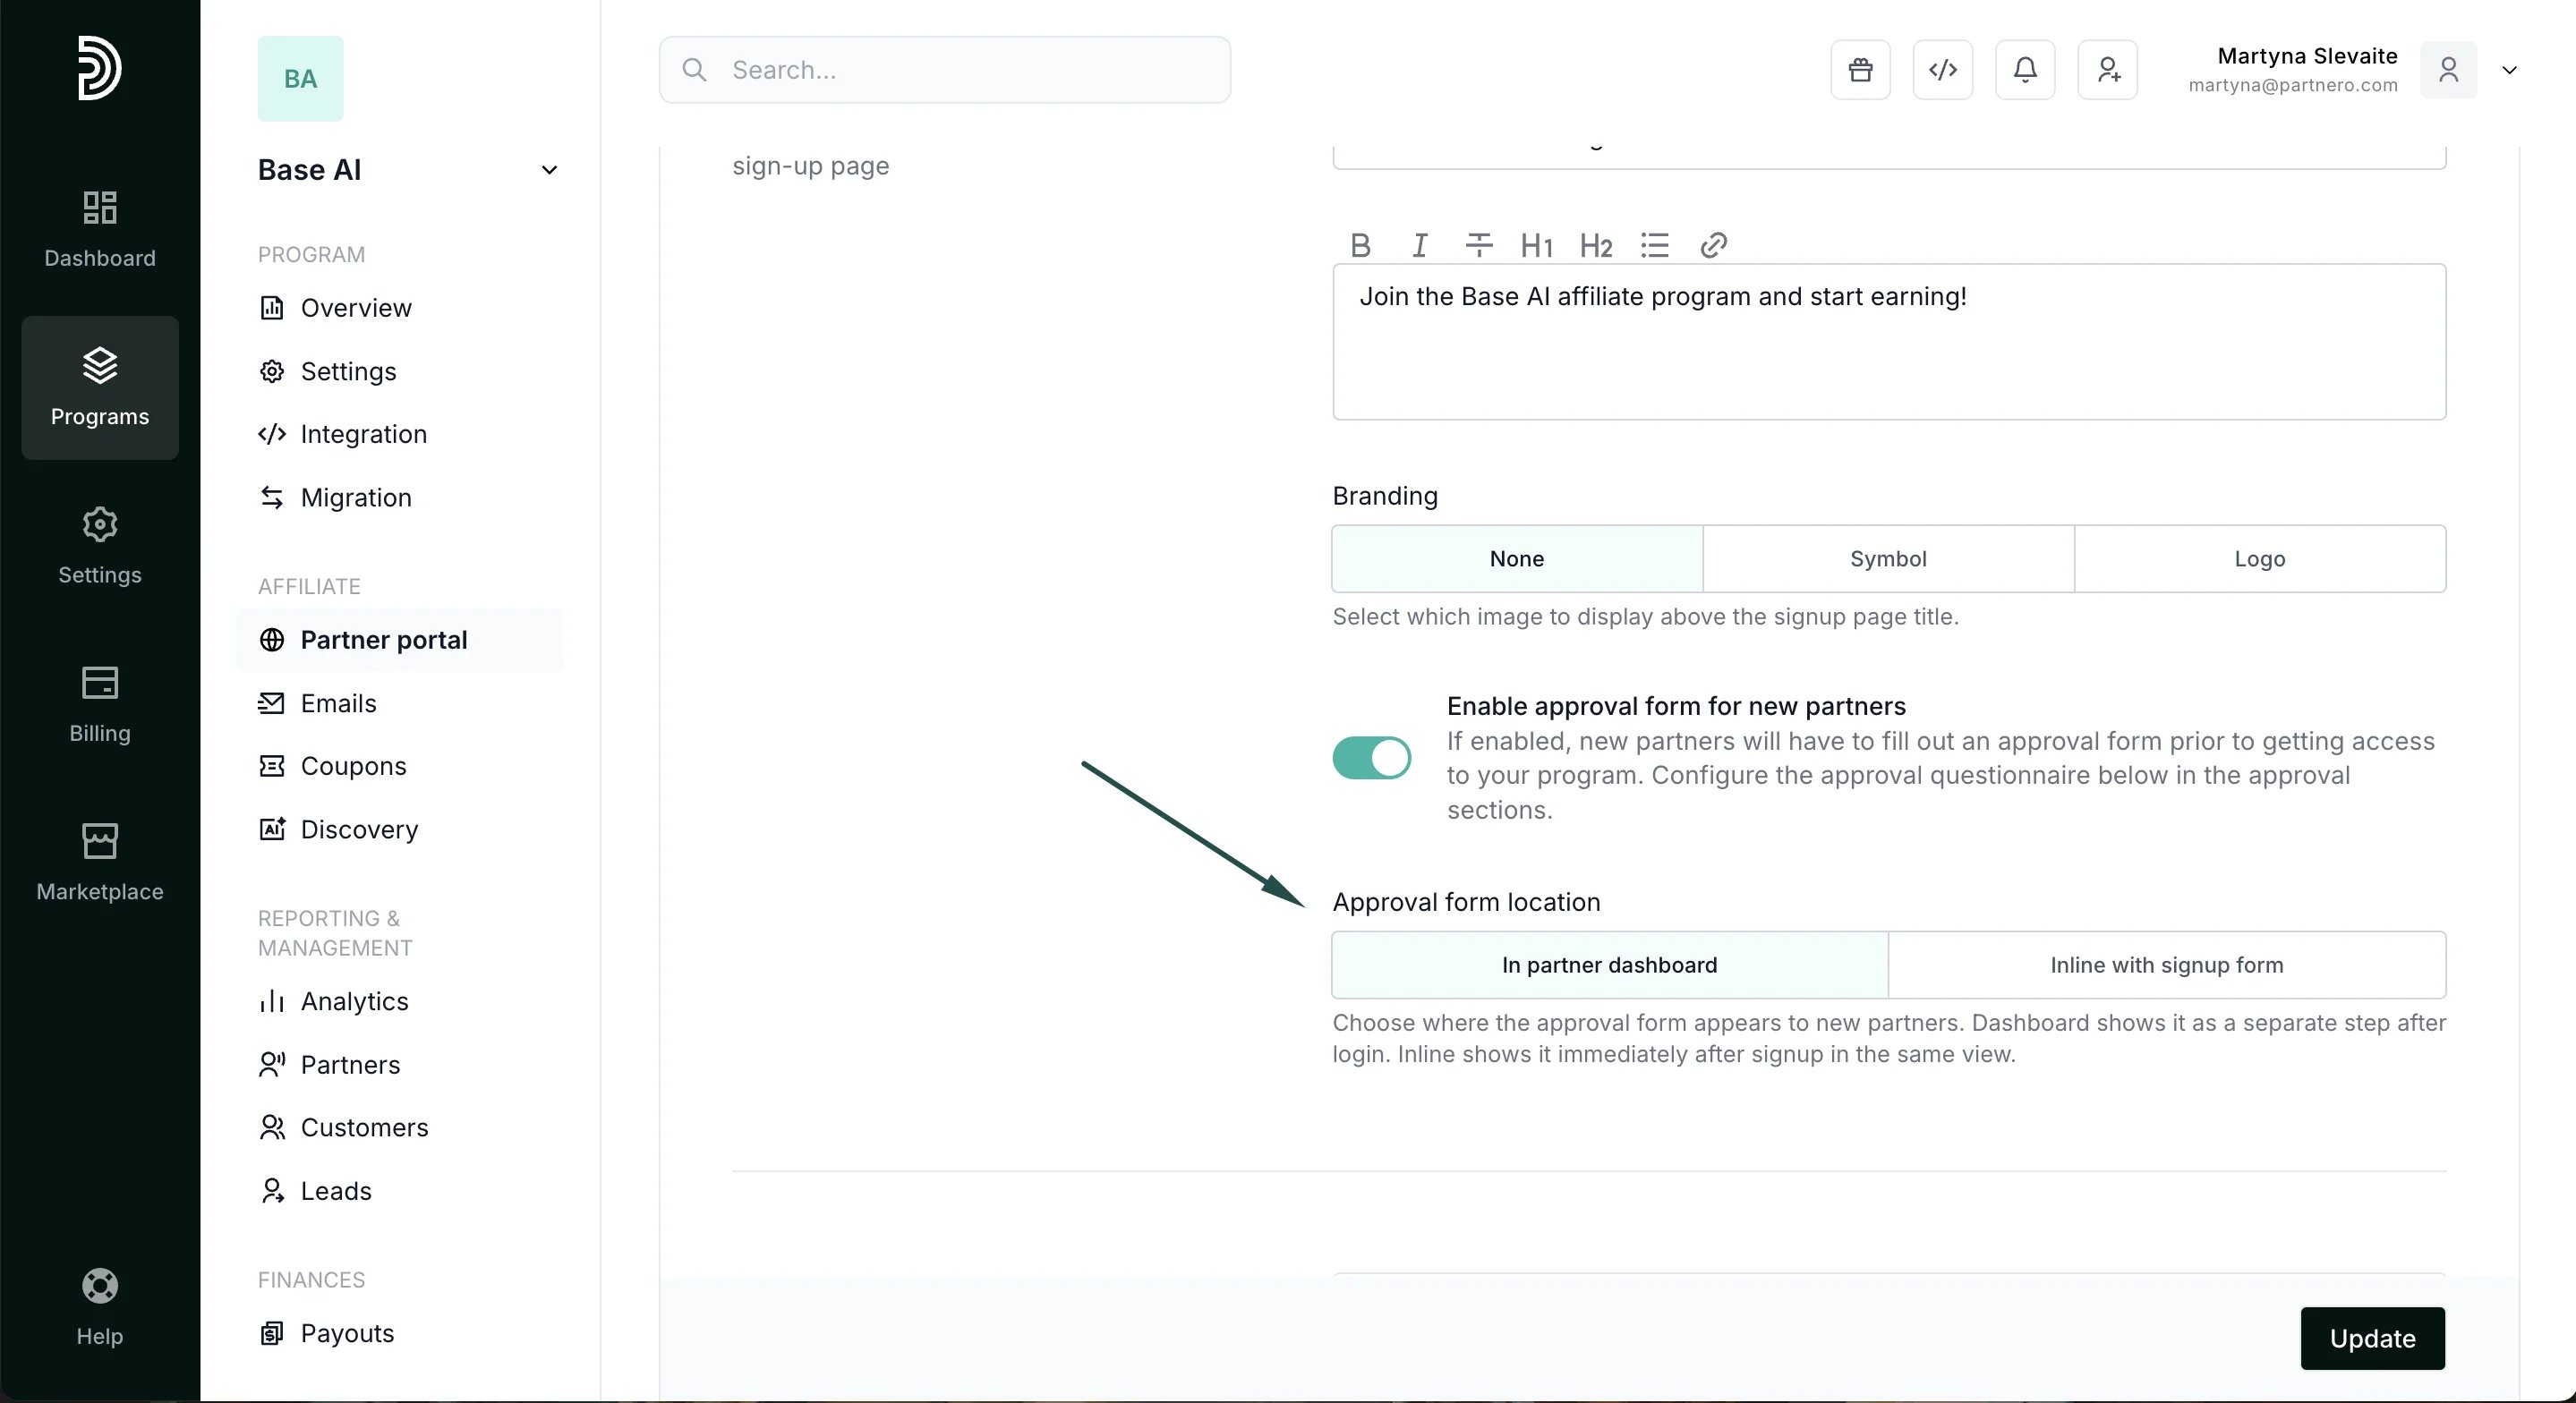 * **In partner dashboard** – the form appears inside the partner dashboard after a user signs up.
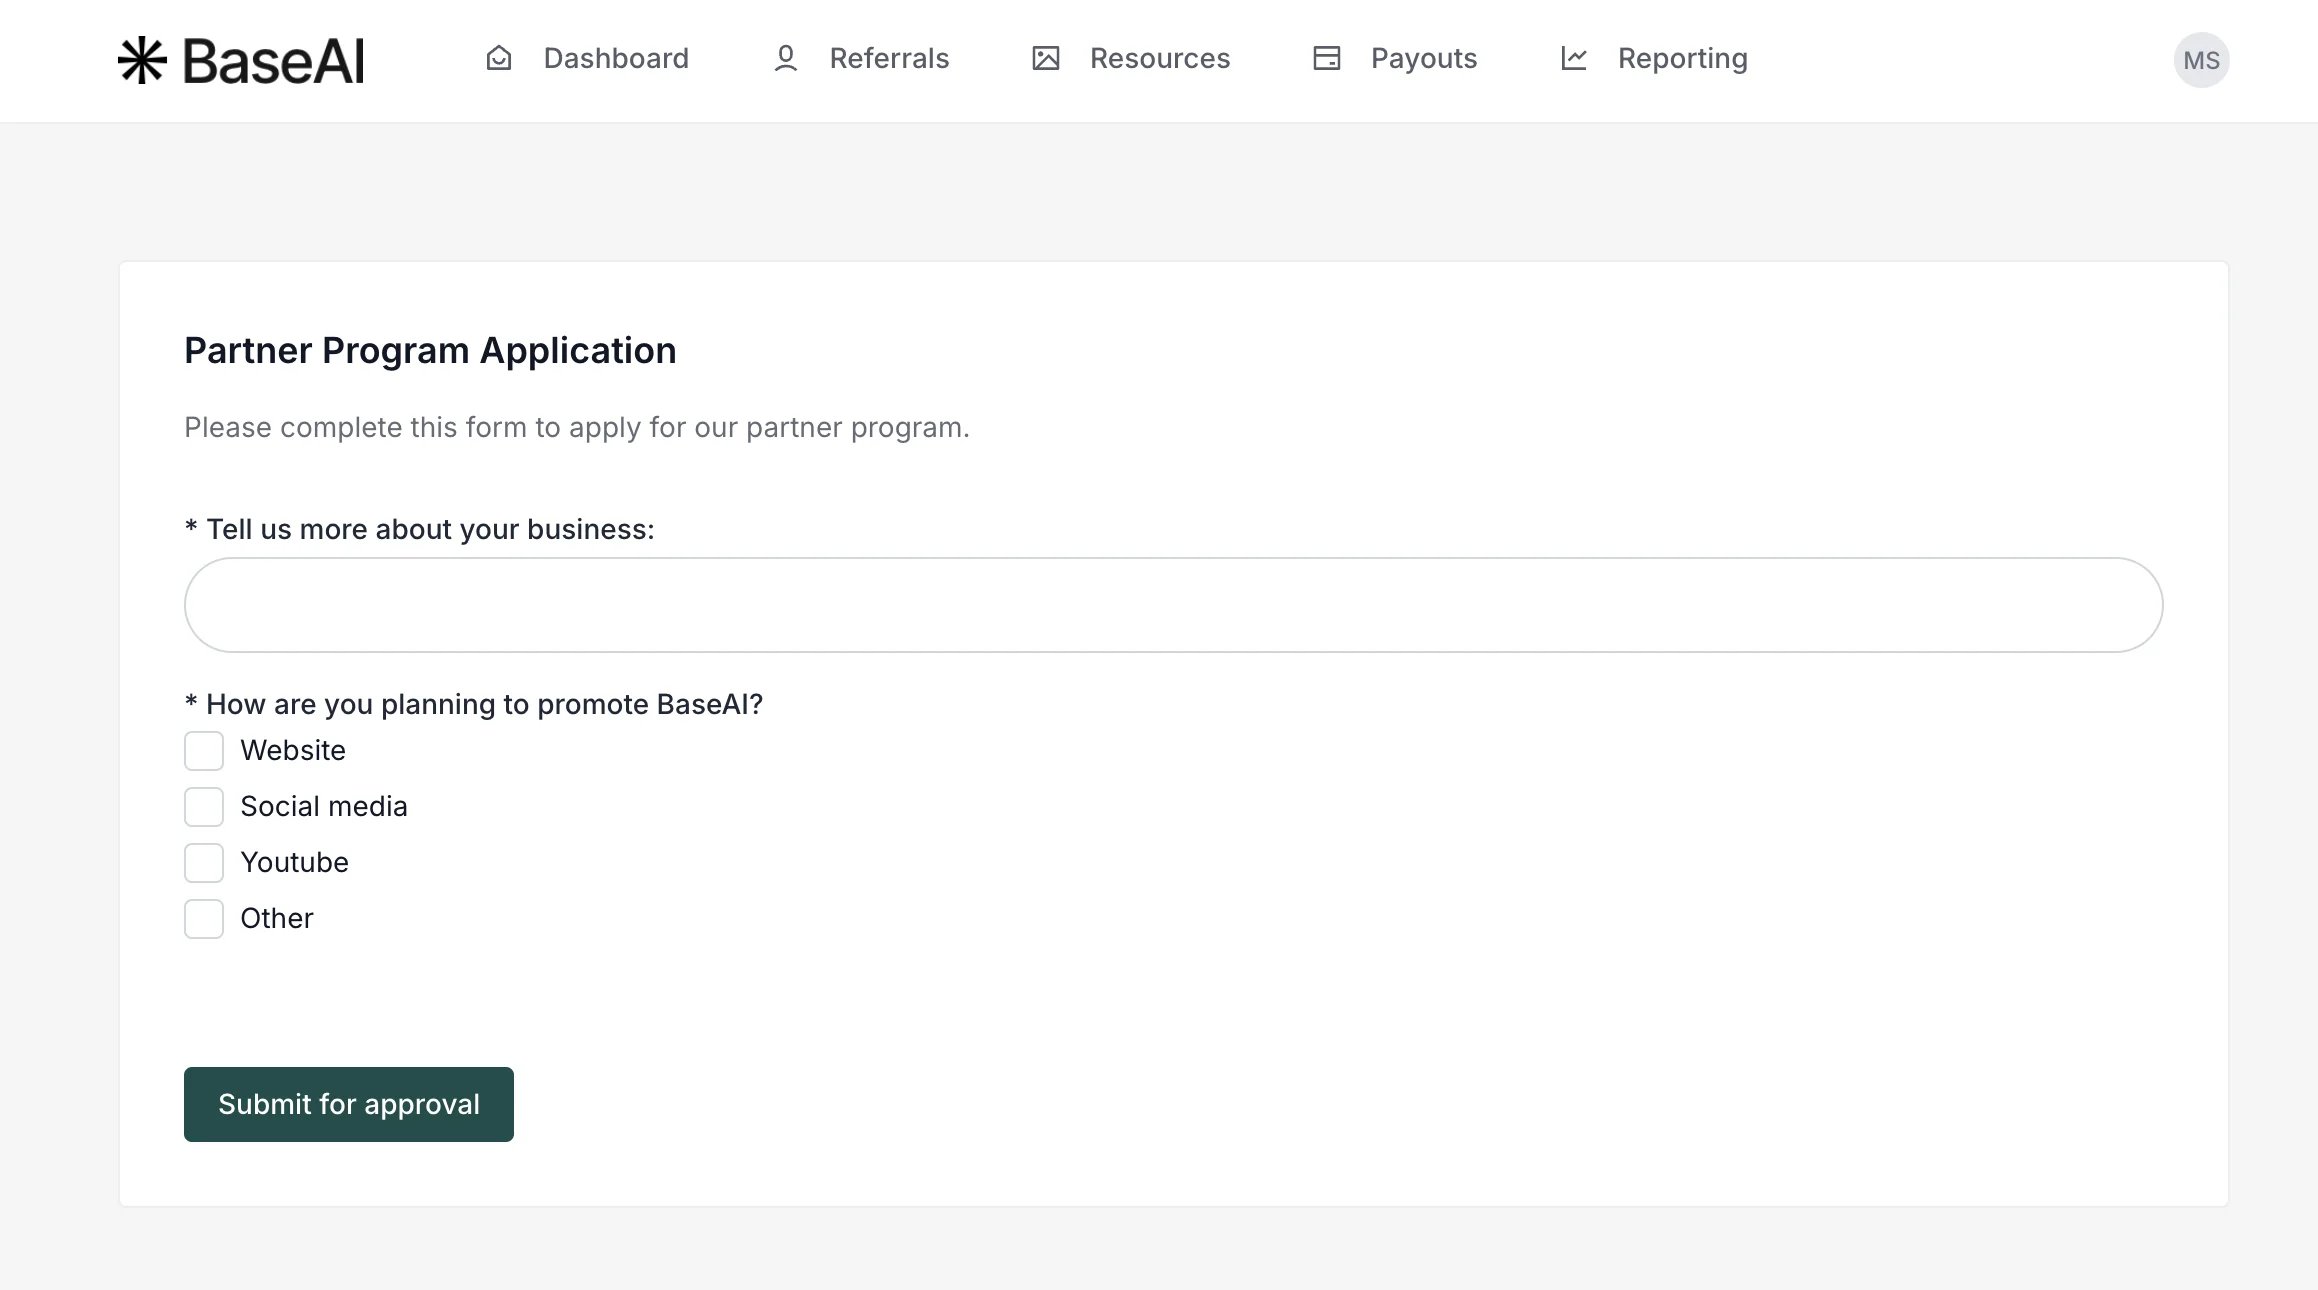 * **Inline** **with signup form** – the form appears directly on the sign-up page as part of the registration process:
 ***
### Approval form content & messaging
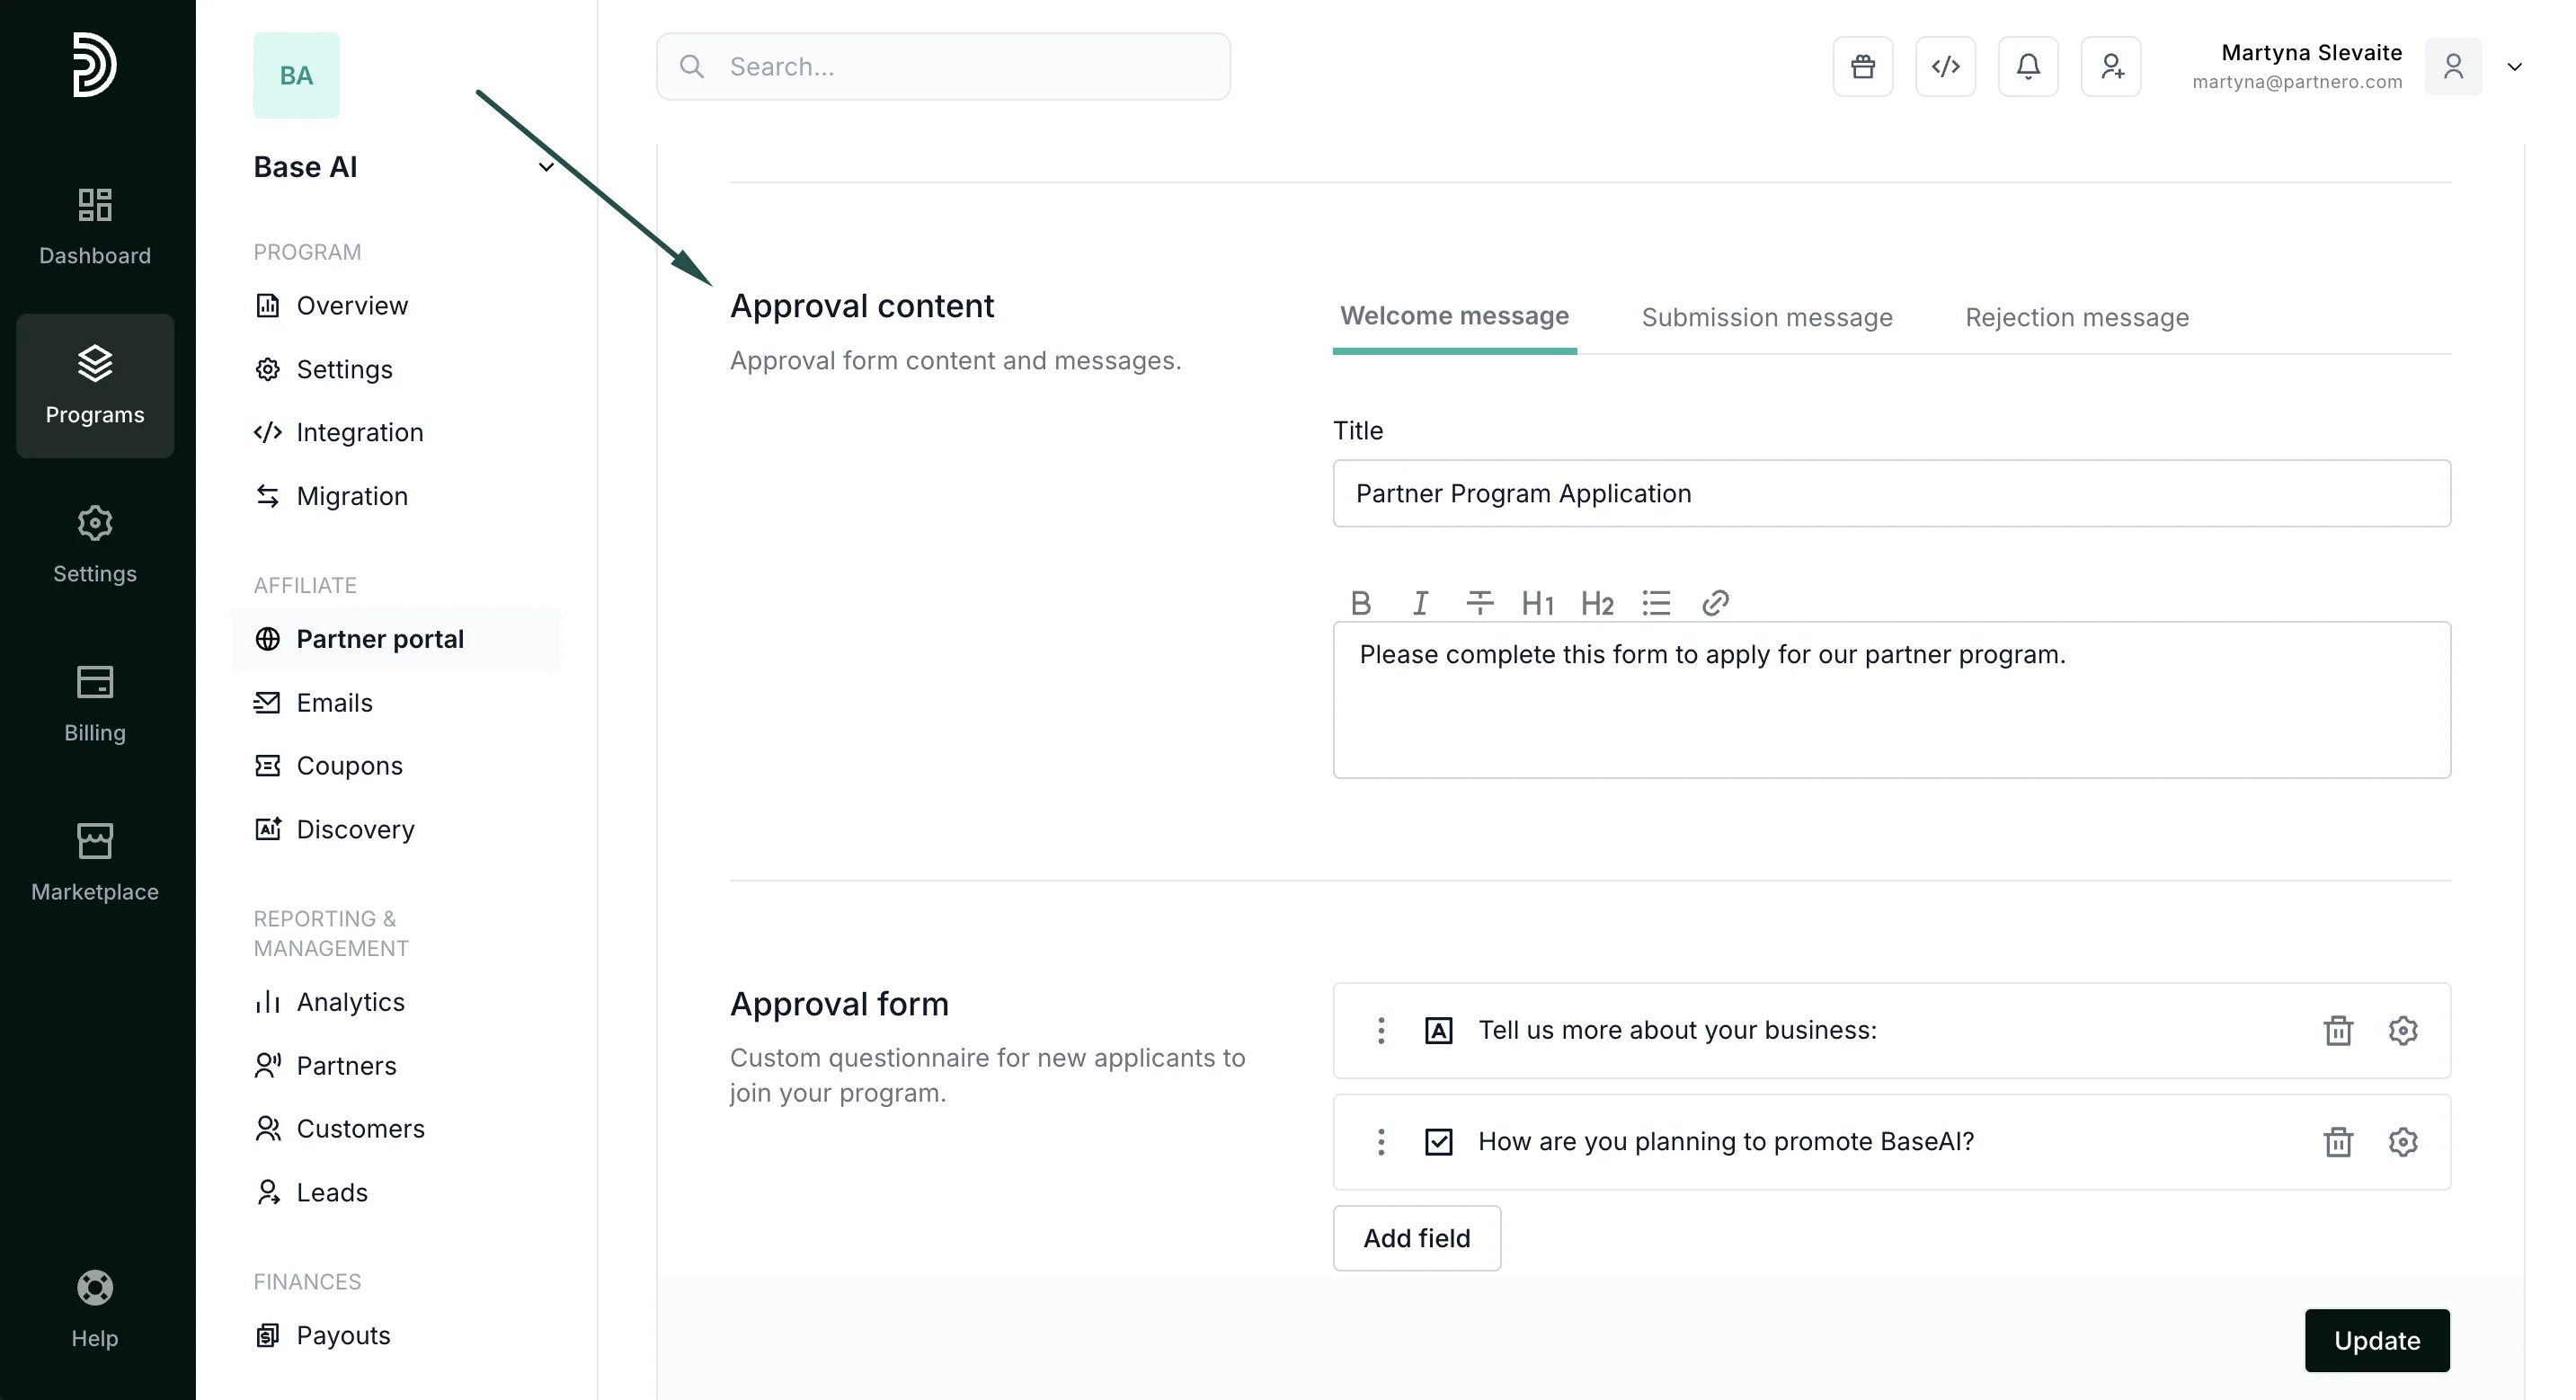
You can customize the messages shown to candidates before and after they complete the approval form.
To edit these messages:
1. Go to **Partner portal** → **Pages & Content** tab → **Public pages** → **Sign-up page**.
2. Scroll down to the **Approval content** section.
3. Switch between the tabs to customize the following messages:
* **Welcome message** – displayed before a candidate starts the form.
* **Submission message** – displayed after the form has been submitted.
* **Rejection message** – displayed if the candidate’s application is rejected.
***
### Approval form content & messaging
You can customize the messages shown to candidates before and after they complete the approval form.
To edit these messages:
1. Go to **Partner portal** → **Pages & Content** tab → **Public pages** → **Sign-up page**.
2. Scroll down to the **Approval content** section.
3. Switch between the tabs to customize the following messages:
* **Welcome message** – displayed before a candidate starts the form.
* **Submission message** – displayed after the form has been submitted.
* **Rejection message** – displayed if the candidate’s application is rejected.
 ***
### Approval form questionnaire
Lastly, you can create a custom questionnaire that candidates must complete.
To create questions
1. Go to **Partner portal** → **Pages & Content** tab → **Public pages** → **Sign-up page**.
2. Scroll down to the **Approval form** section.
3. Click **Add field** and select the question type:
***
### Approval form questionnaire
Lastly, you can create a custom questionnaire that candidates must complete.
To create questions
1. Go to **Partner portal** → **Pages & Content** tab → **Public pages** → **Sign-up page**.
2. Scroll down to the **Approval form** section.
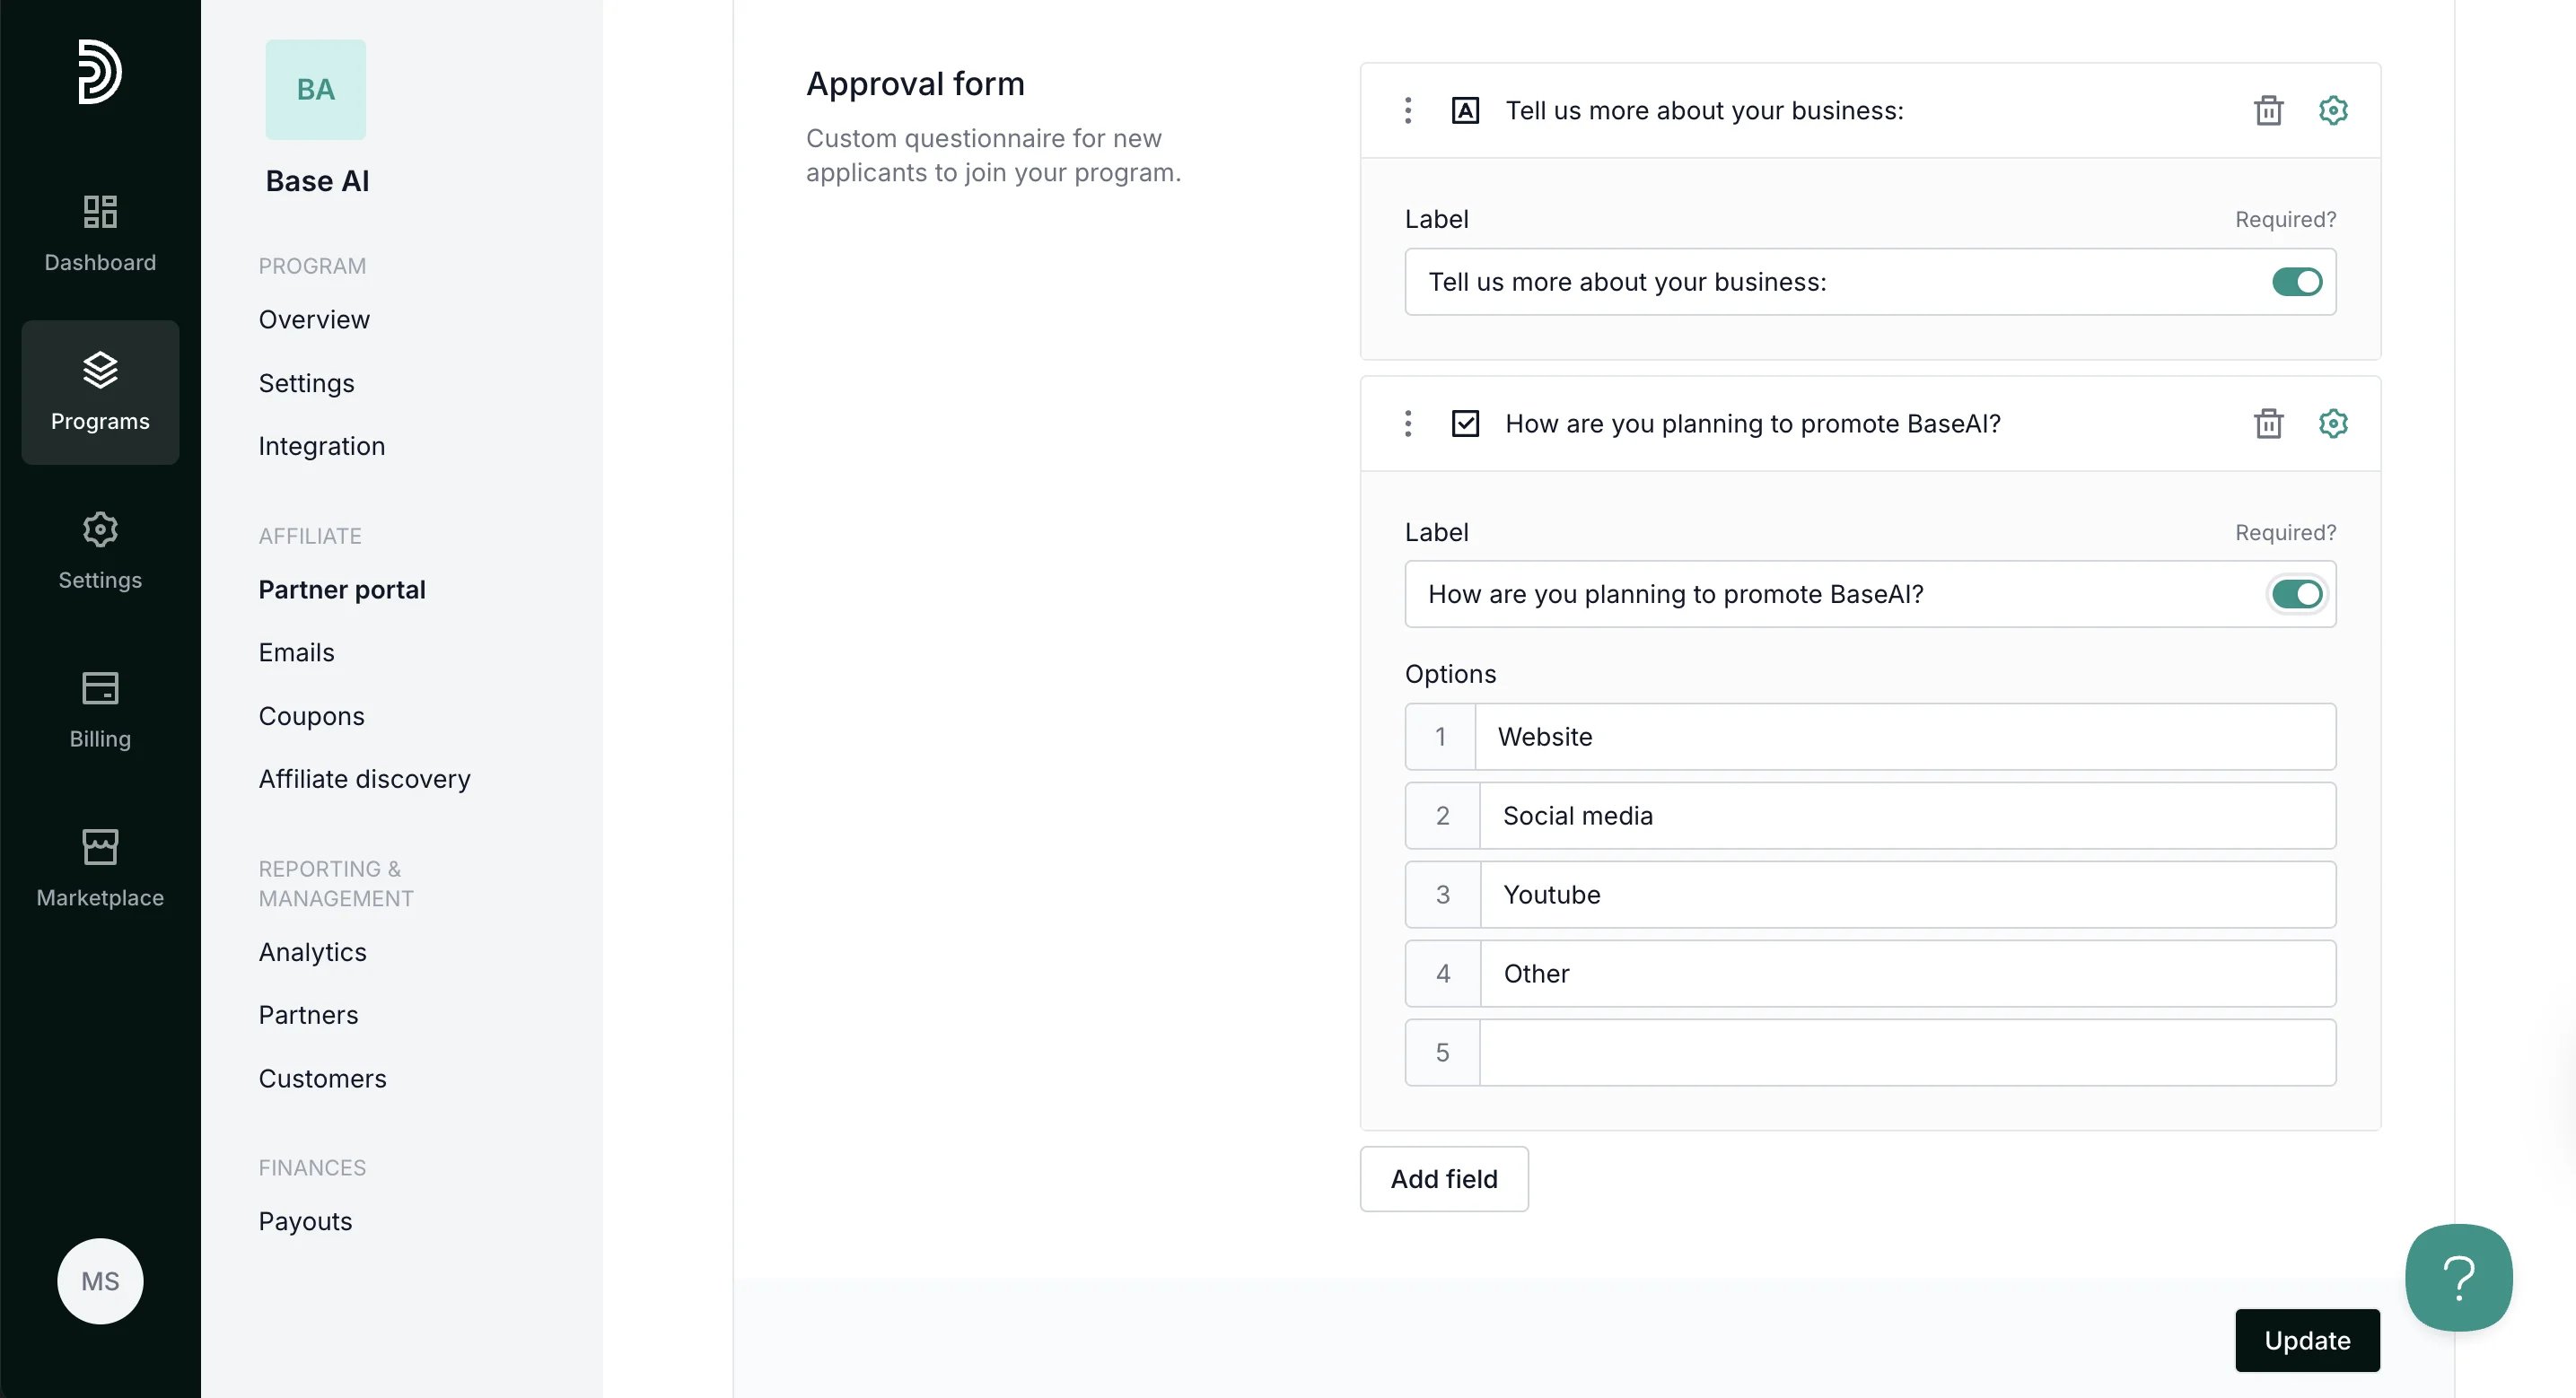
3. Click **Add field** and select the question type: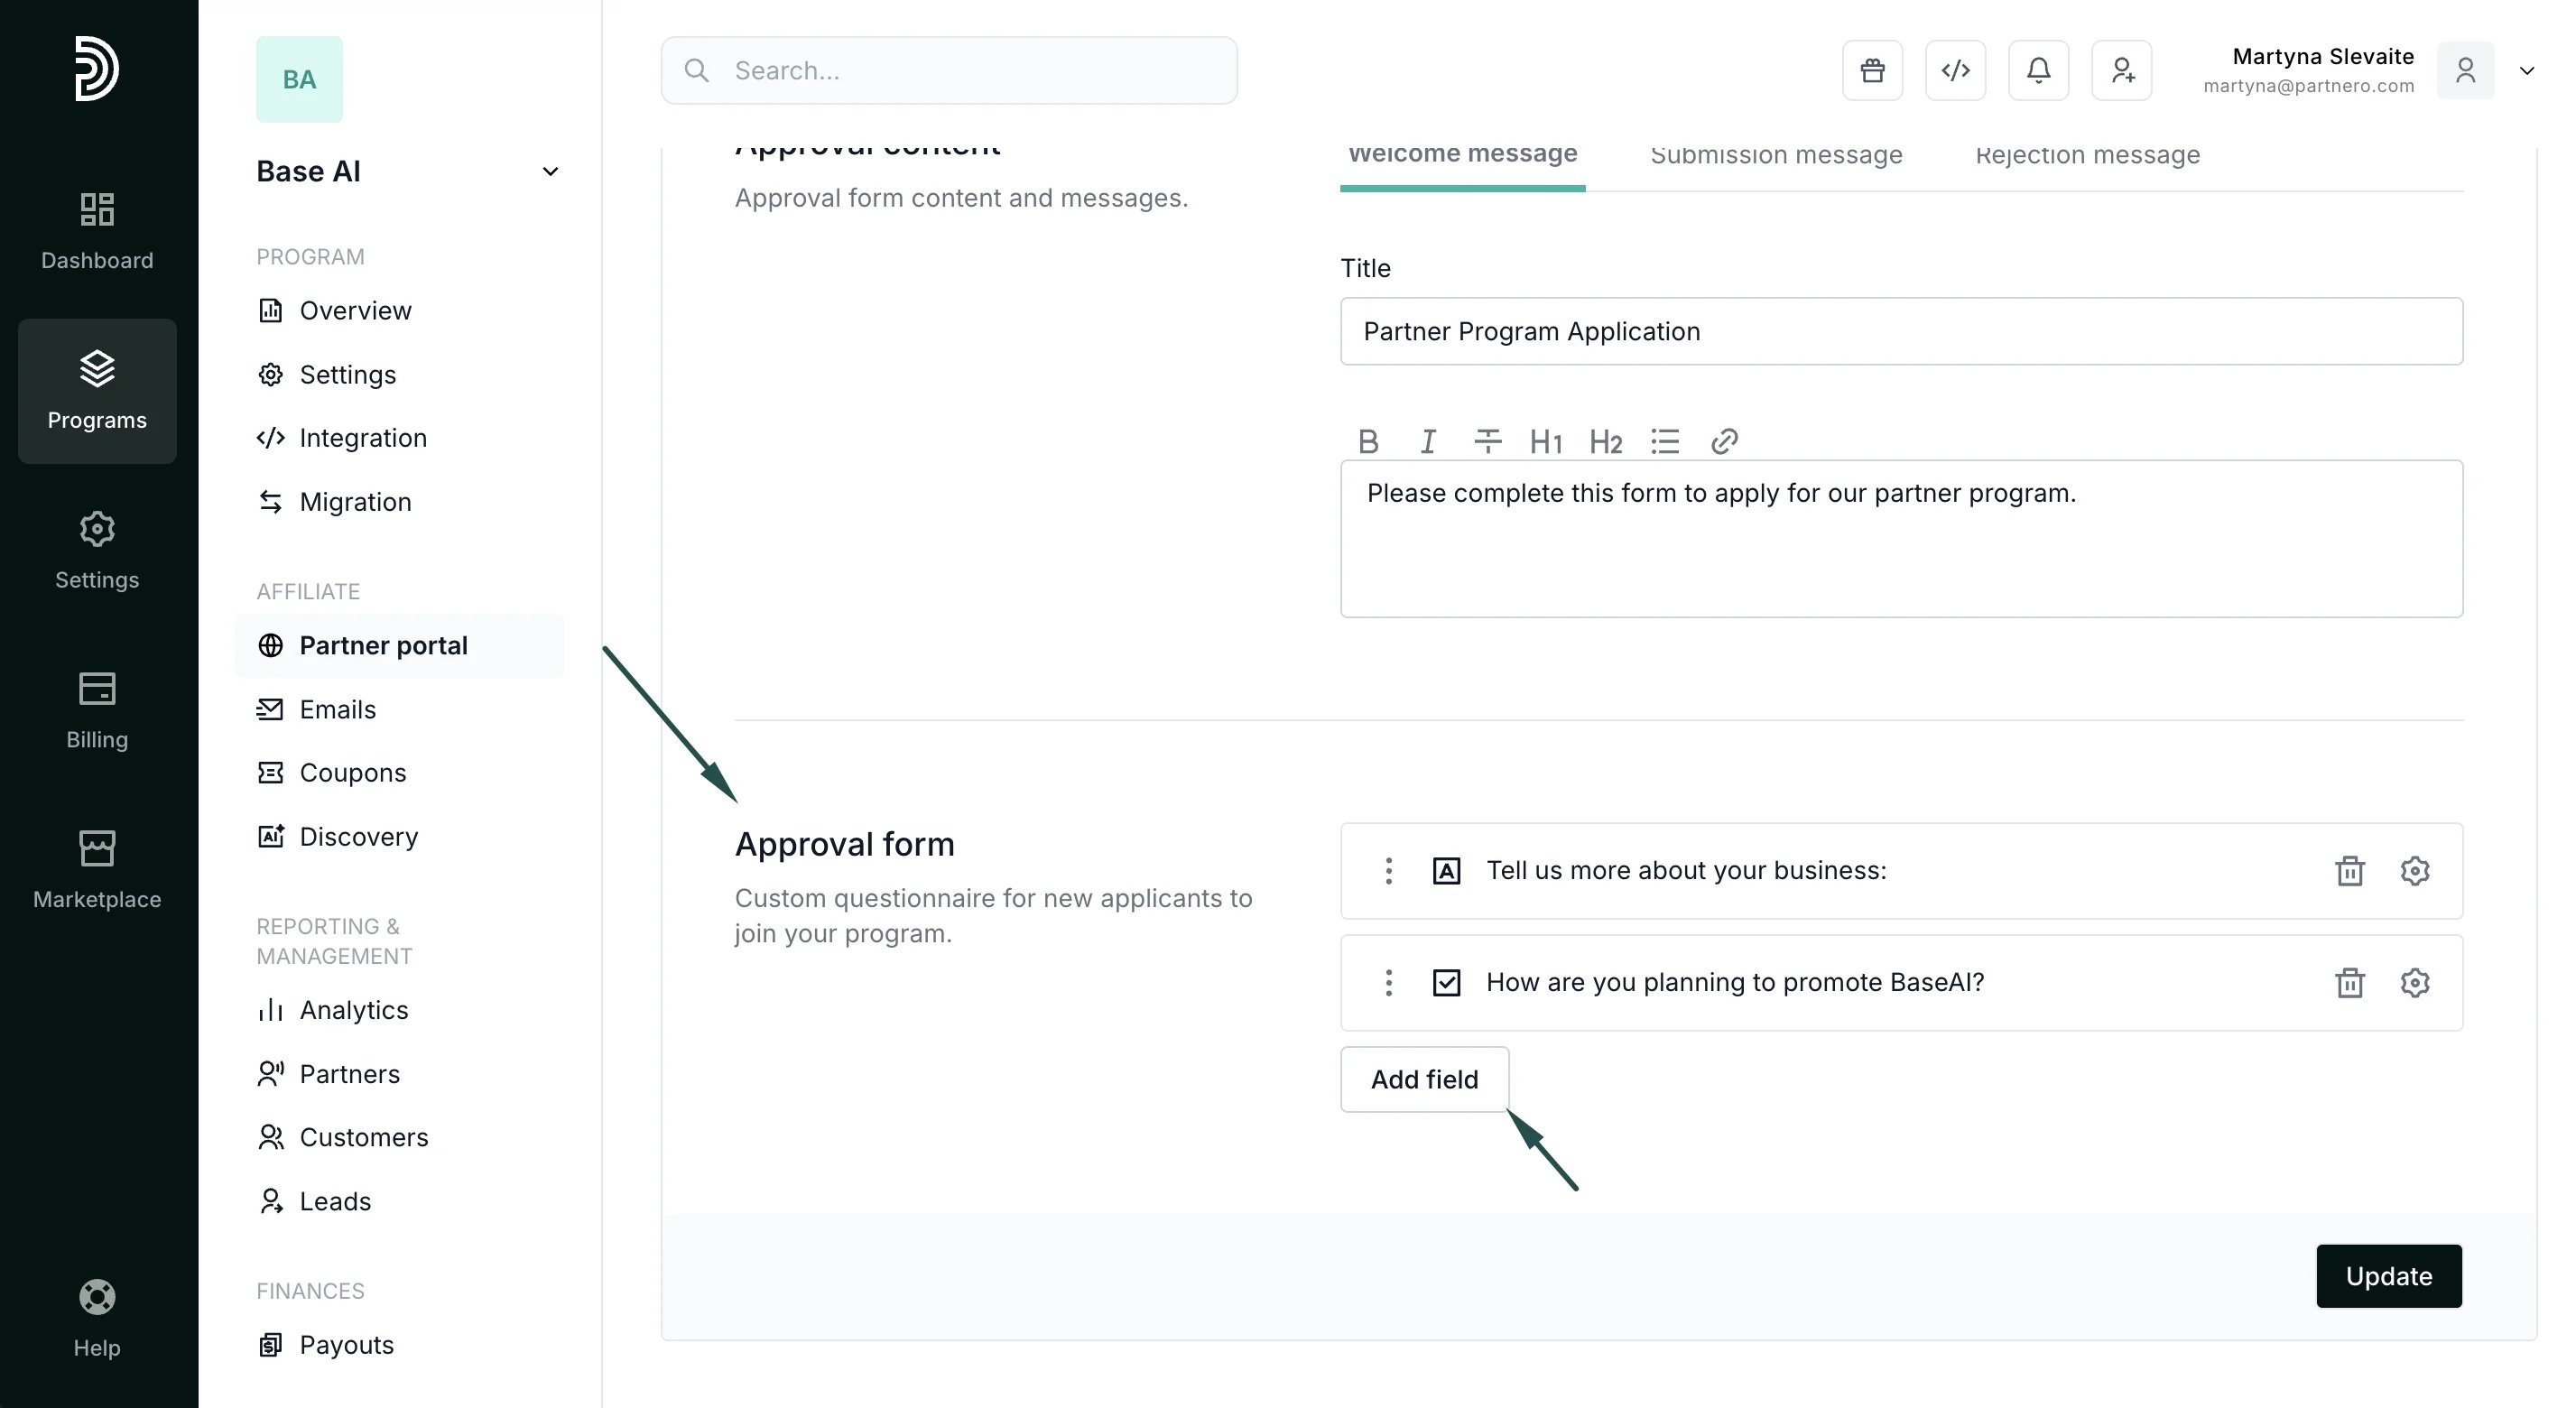 4. Add as many questions as you need. Toggle 'Required?' to make the answer mandatory:
 5. Click **Update** to save your changes.
***
### Approval form question types
You can add the following field types:
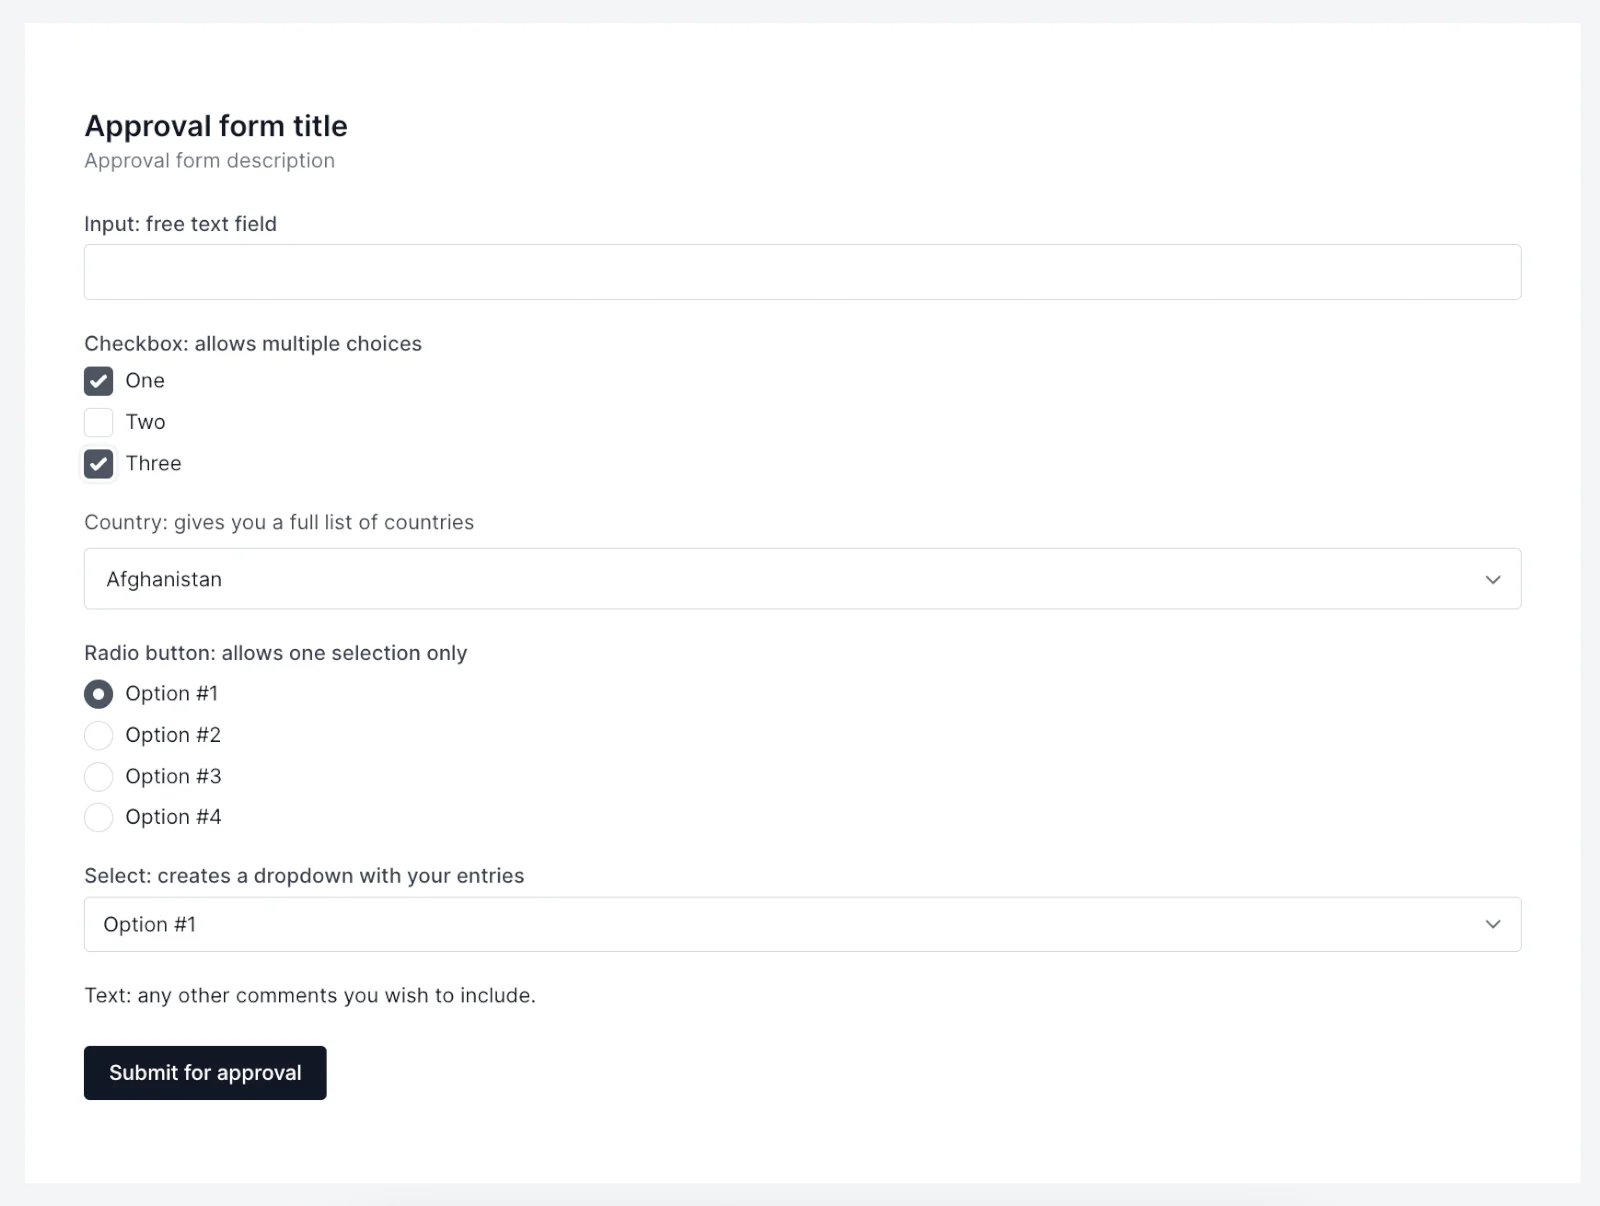
| Input | Creates a free-text field for a partner to type in their answer. Question example: “Tell us more about your business.” |
| - | - |
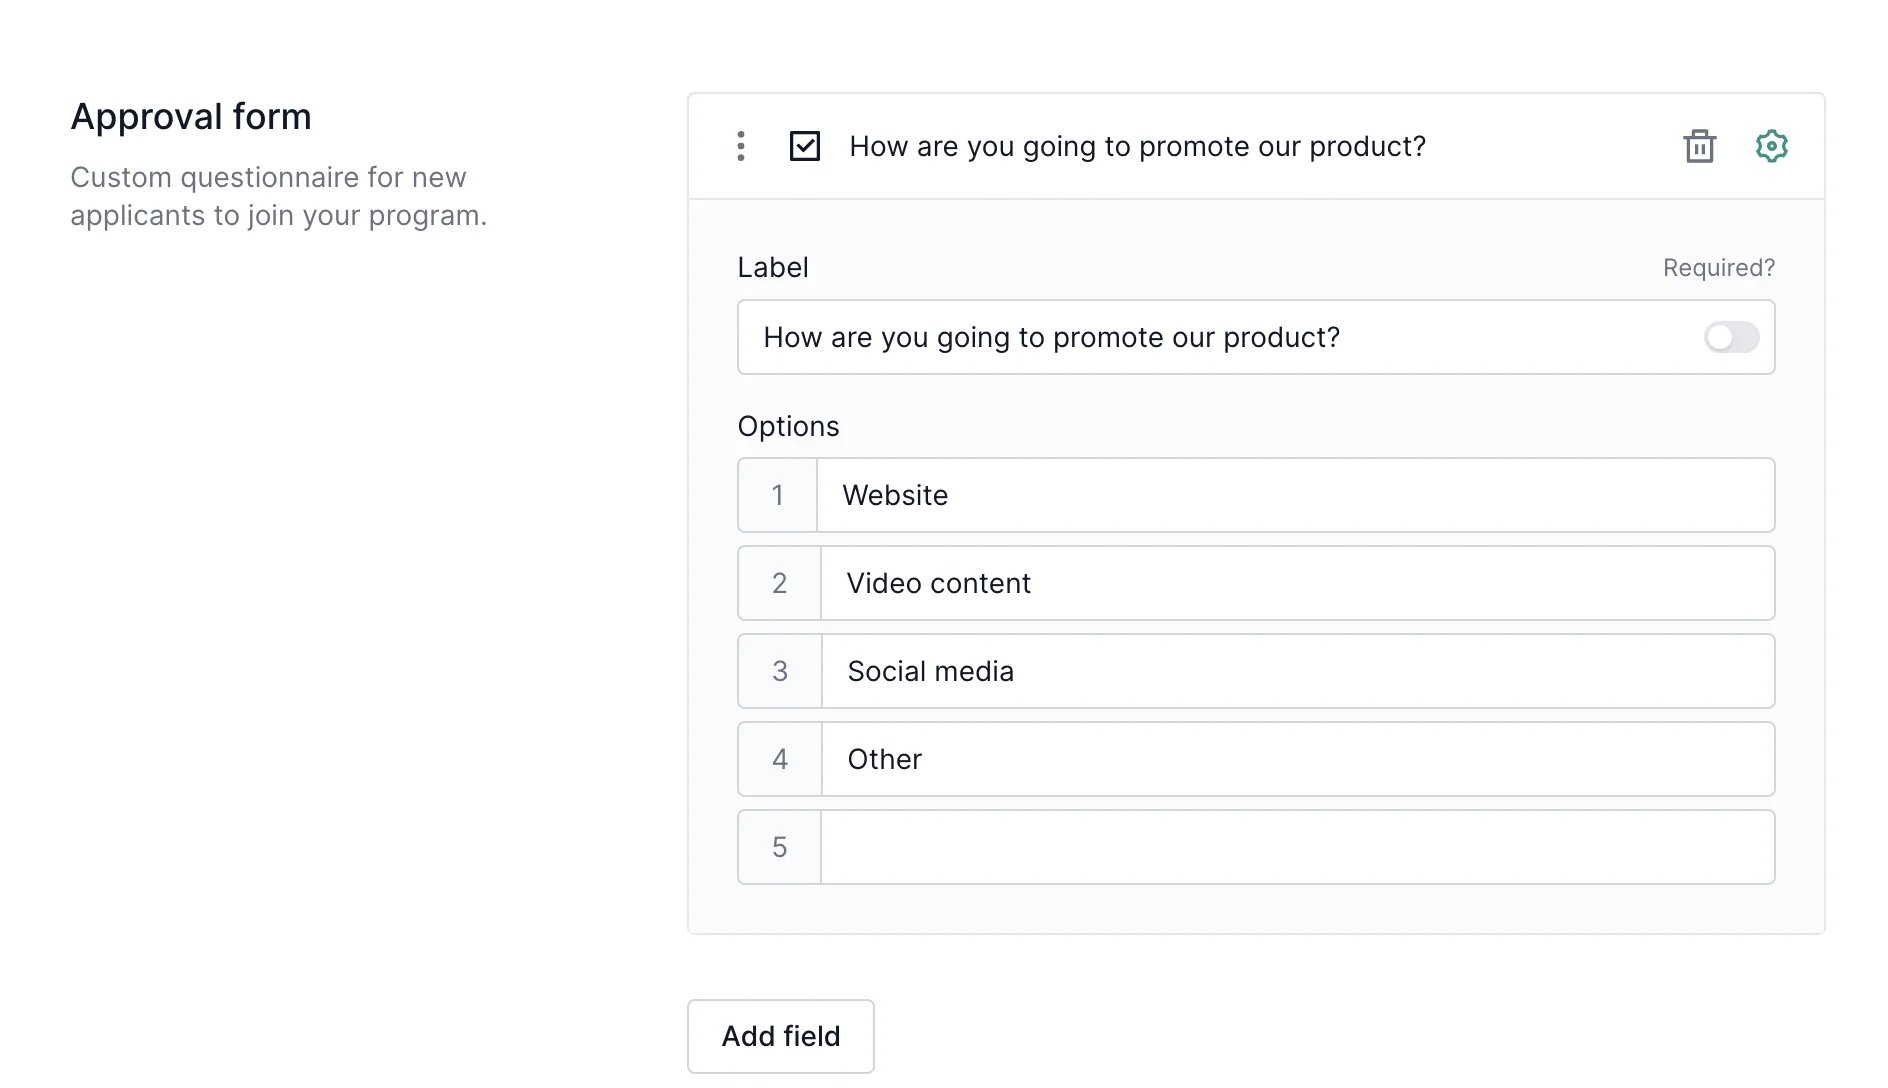
| Checkbox | Allows creating predefined options that the partner can choose from. They will be able to select **multiple** options. Question example: “How are you going to promote our product?”; checkbox options: website, social media, video content, other. |
| Radio | Allows creating predefined options that the partner can choose from. Partners will be able to choose a **single** option. |
| Select | Creates a dropdown with pre-defined options. |
| Countries | Includes a dropdown countries list. |
| Text | Adds a note or additional text in between questions. It does not require an answer. |
| | |
####
***
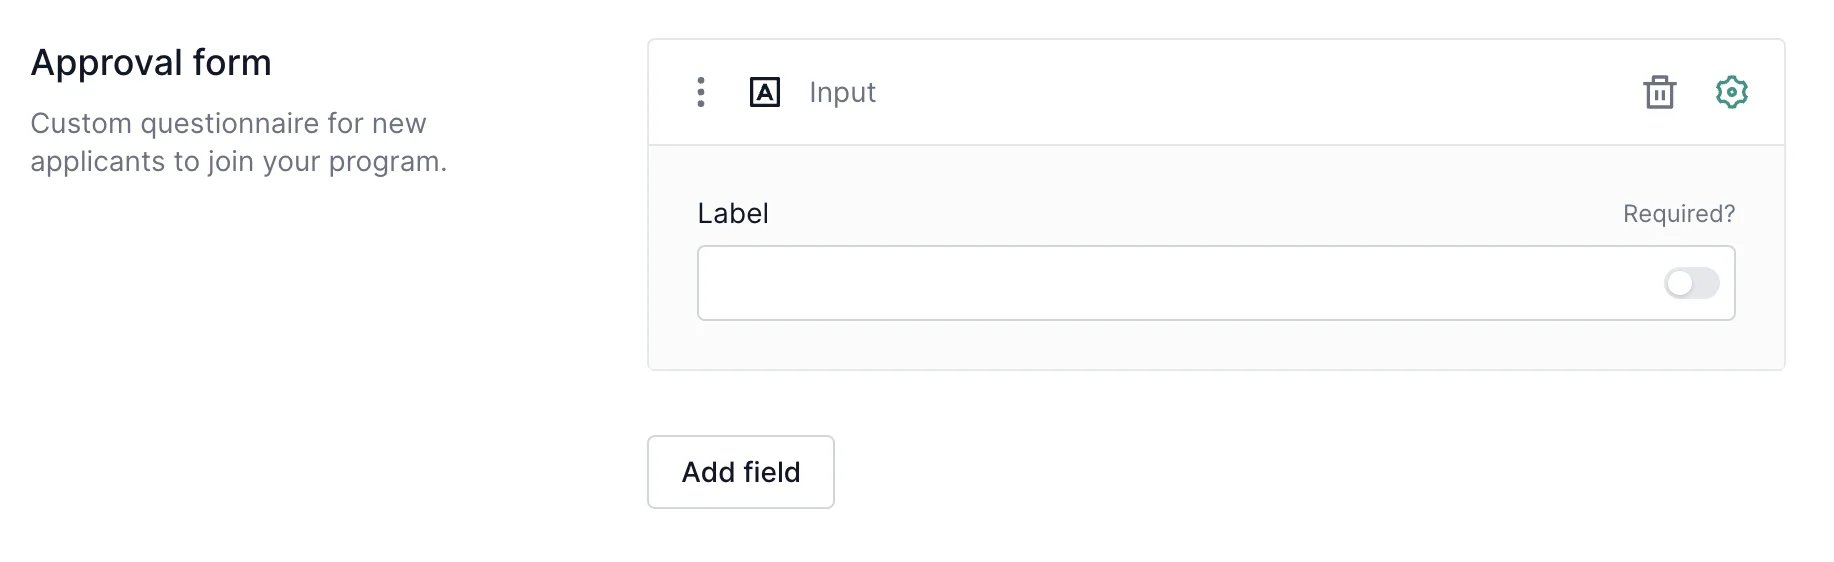
#### To add a free-text input option:
1. Click **Add field**, and then select **Input**.
2. Type your question in the **Label field** and toggle the **Required** option if you wish to make this question mandatory.
3. Click **Update.**
5. Click **Update** to save your changes.
***
### Approval form question types
You can add the following field types:
| Input | Creates a free-text field for a partner to type in their answer. Question example: “Tell us more about your business.” |
| - | - |
| Checkbox | Allows creating predefined options that the partner can choose from. They will be able to select **multiple** options. Question example: “How are you going to promote our product?”; checkbox options: website, social media, video content, other. |
| Radio | Allows creating predefined options that the partner can choose from. Partners will be able to choose a **single** option. |
| Select | Creates a dropdown with pre-defined options. |
| Countries | Includes a dropdown countries list. |
| Text | Adds a note or additional text in between questions. It does not require an answer. |
| | |
####
***
#### To add a free-text input option:
1. Click **Add field**, and then select **Input**.
2. Type your question in the **Label field** and toggle the **Required** option if you wish to make this question mandatory.
3. Click **Update.**
 #### To add checkboxes:
1. Click **Add field**, and then select **Checkbox**.
2. Type your question in the **Label field**.
3. List the checkbox options in the **Options** field.
4. Click **Update**.
#### To add checkboxes:
1. Click **Add field**, and then select **Checkbox**.
2. Type your question in the **Label field**.
3. List the checkbox options in the **Options** field.
4. Click **Update**.
 Below is an example of how the form and each approval question type look on the Partner portal:
 Don't forget to click **Update** after you make any changes!
This documentation is built and hosted on [Mintlify](https://mintlify.com), a developer documentation platform.
Don't forget to click **Update** after you make any changes!
This documentation is built and hosted on [Mintlify](https://mintlify.com), a developer documentation platform.