> ## Documentation Index
> Fetch the complete documentation index at: https://docs.partnero.com/llms.txt
> Use this file to discover all available pages before exploring further.
# Build a resources page
### What are resources?
Resources are various marketing materials the program owners provide for their partners to promote their products successfully. Standard resources include:
* company logos and icons,
* product descriptions of various lengths,
* product images,
* promotional banners,
* comparison articles,
* marketing messages,
* overview videos.
With Partnero, you can build a custom resources page by uploading various files. The resources page will be accessible to your partners on their partner portal, Resources tab.
Supported resource file types include .zip, .png, .pdf, .jpeg, and links, with a limit of 20MB per file.
***
### How to add resources
To start building your resources page:
1. Open the program you’d like to work with.
2. On the left sidebar, click on **Partner Portal** under **Affiliate**. Select the **Partner dashboard** tab: 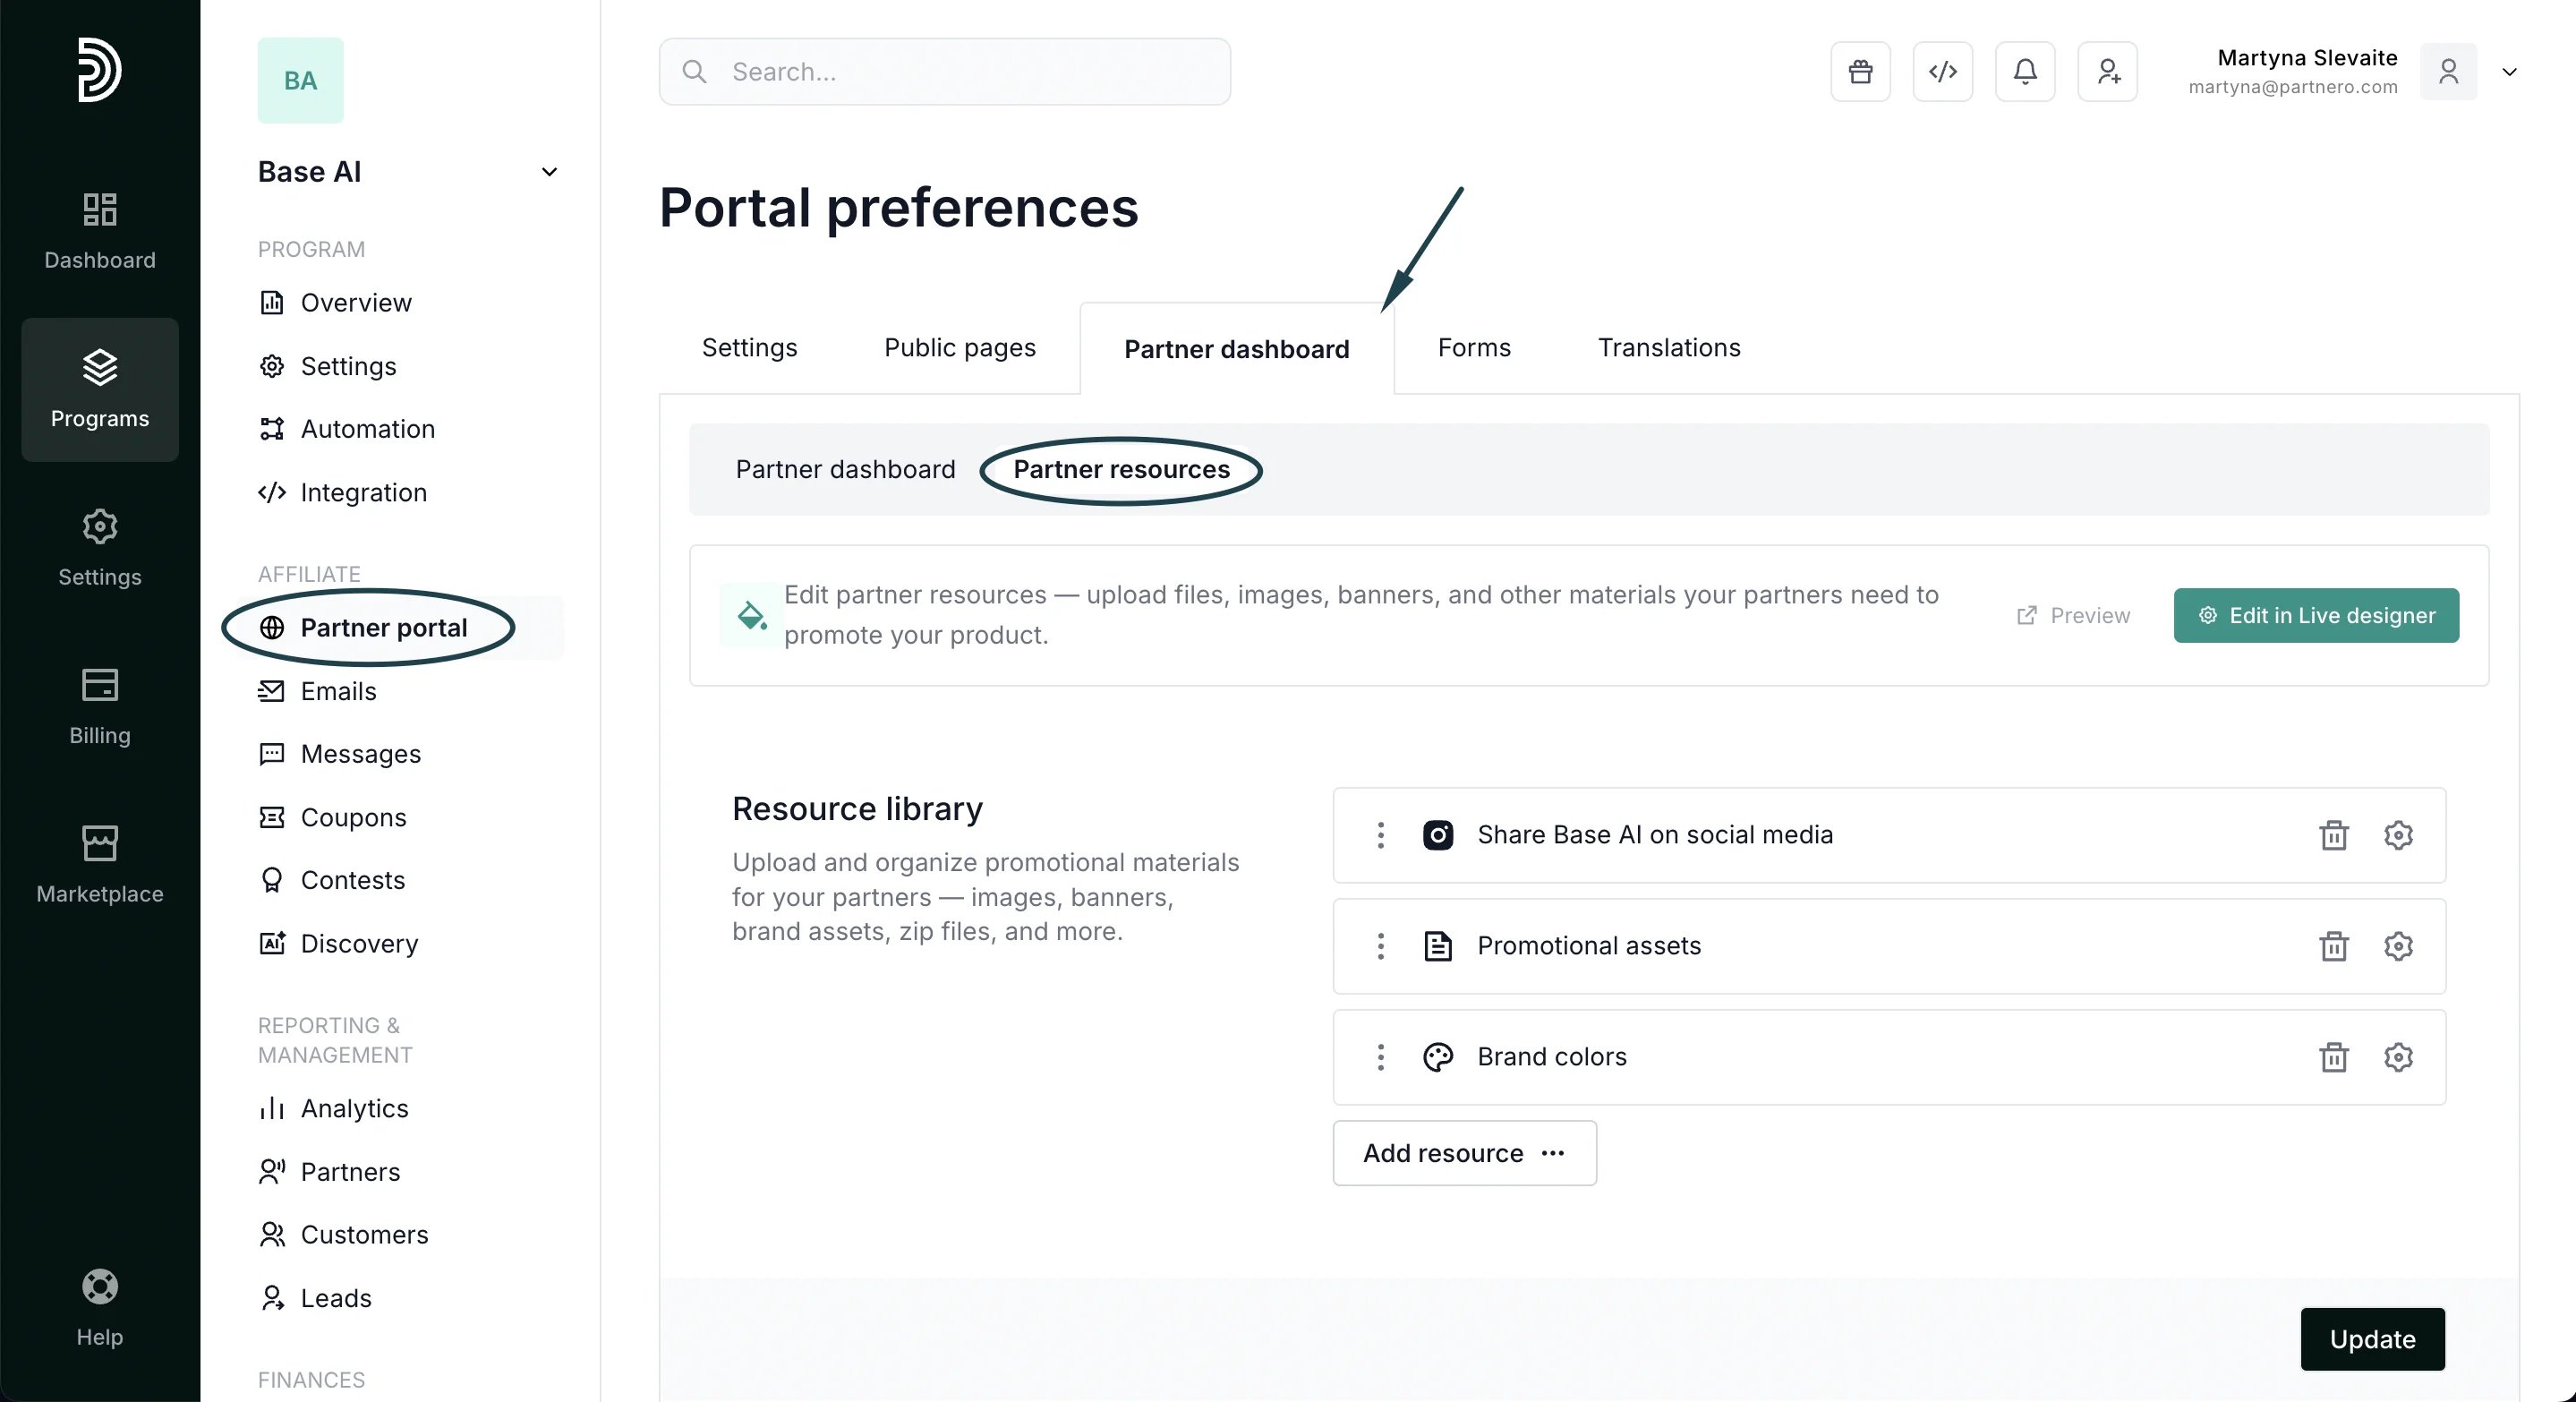 3. Click **Add Resource**.
You can choose from the following content block options:
| Assets | Upload .zip, .png, .pdf, and .jpeg files for your partners to download. |
| - | - |
| Banners | Upload .zip files with HTML code. |
| Colors | Add your company colors by using color codes. |
| Accordion | Add short messages that can be expanded and collapsed for review. |
| Links | Add links to share documents, product comparison pages, and other online materials. |
| Video | Insert videos. |
| Social media templates | Insert social media templates. [Read more](/knowledge-base/partner-portal/social-media-templates). |
| Embed code | Insert HTML or JavaScript code. |
| | |
For each content block, you can:
* add Title and Description (optional),
* upload multiple pieces of content.
***
### Resources page layout and visibility
When building your Resources page, there are a few important layout and visibility settings to keep in mind:
1. The page can be edited using the [Live designer](/knowledge-base/program-management/live-designer-overview) option:
3. Click **Add Resource**.
You can choose from the following content block options:
| Assets | Upload .zip, .png, .pdf, and .jpeg files for your partners to download. |
| - | - |
| Banners | Upload .zip files with HTML code. |
| Colors | Add your company colors by using color codes. |
| Accordion | Add short messages that can be expanded and collapsed for review. |
| Links | Add links to share documents, product comparison pages, and other online materials. |
| Video | Insert videos. |
| Social media templates | Insert social media templates. [Read more](/knowledge-base/partner-portal/social-media-templates). |
| Embed code | Insert HTML or JavaScript code. |
| | |
For each content block, you can:
* add Title and Description (optional),
* upload multiple pieces of content.
***
### Resources page layout and visibility
When building your Resources page, there are a few important layout and visibility settings to keep in mind:
1. The page can be edited using the [Live designer](/knowledge-base/program-management/live-designer-overview) option: 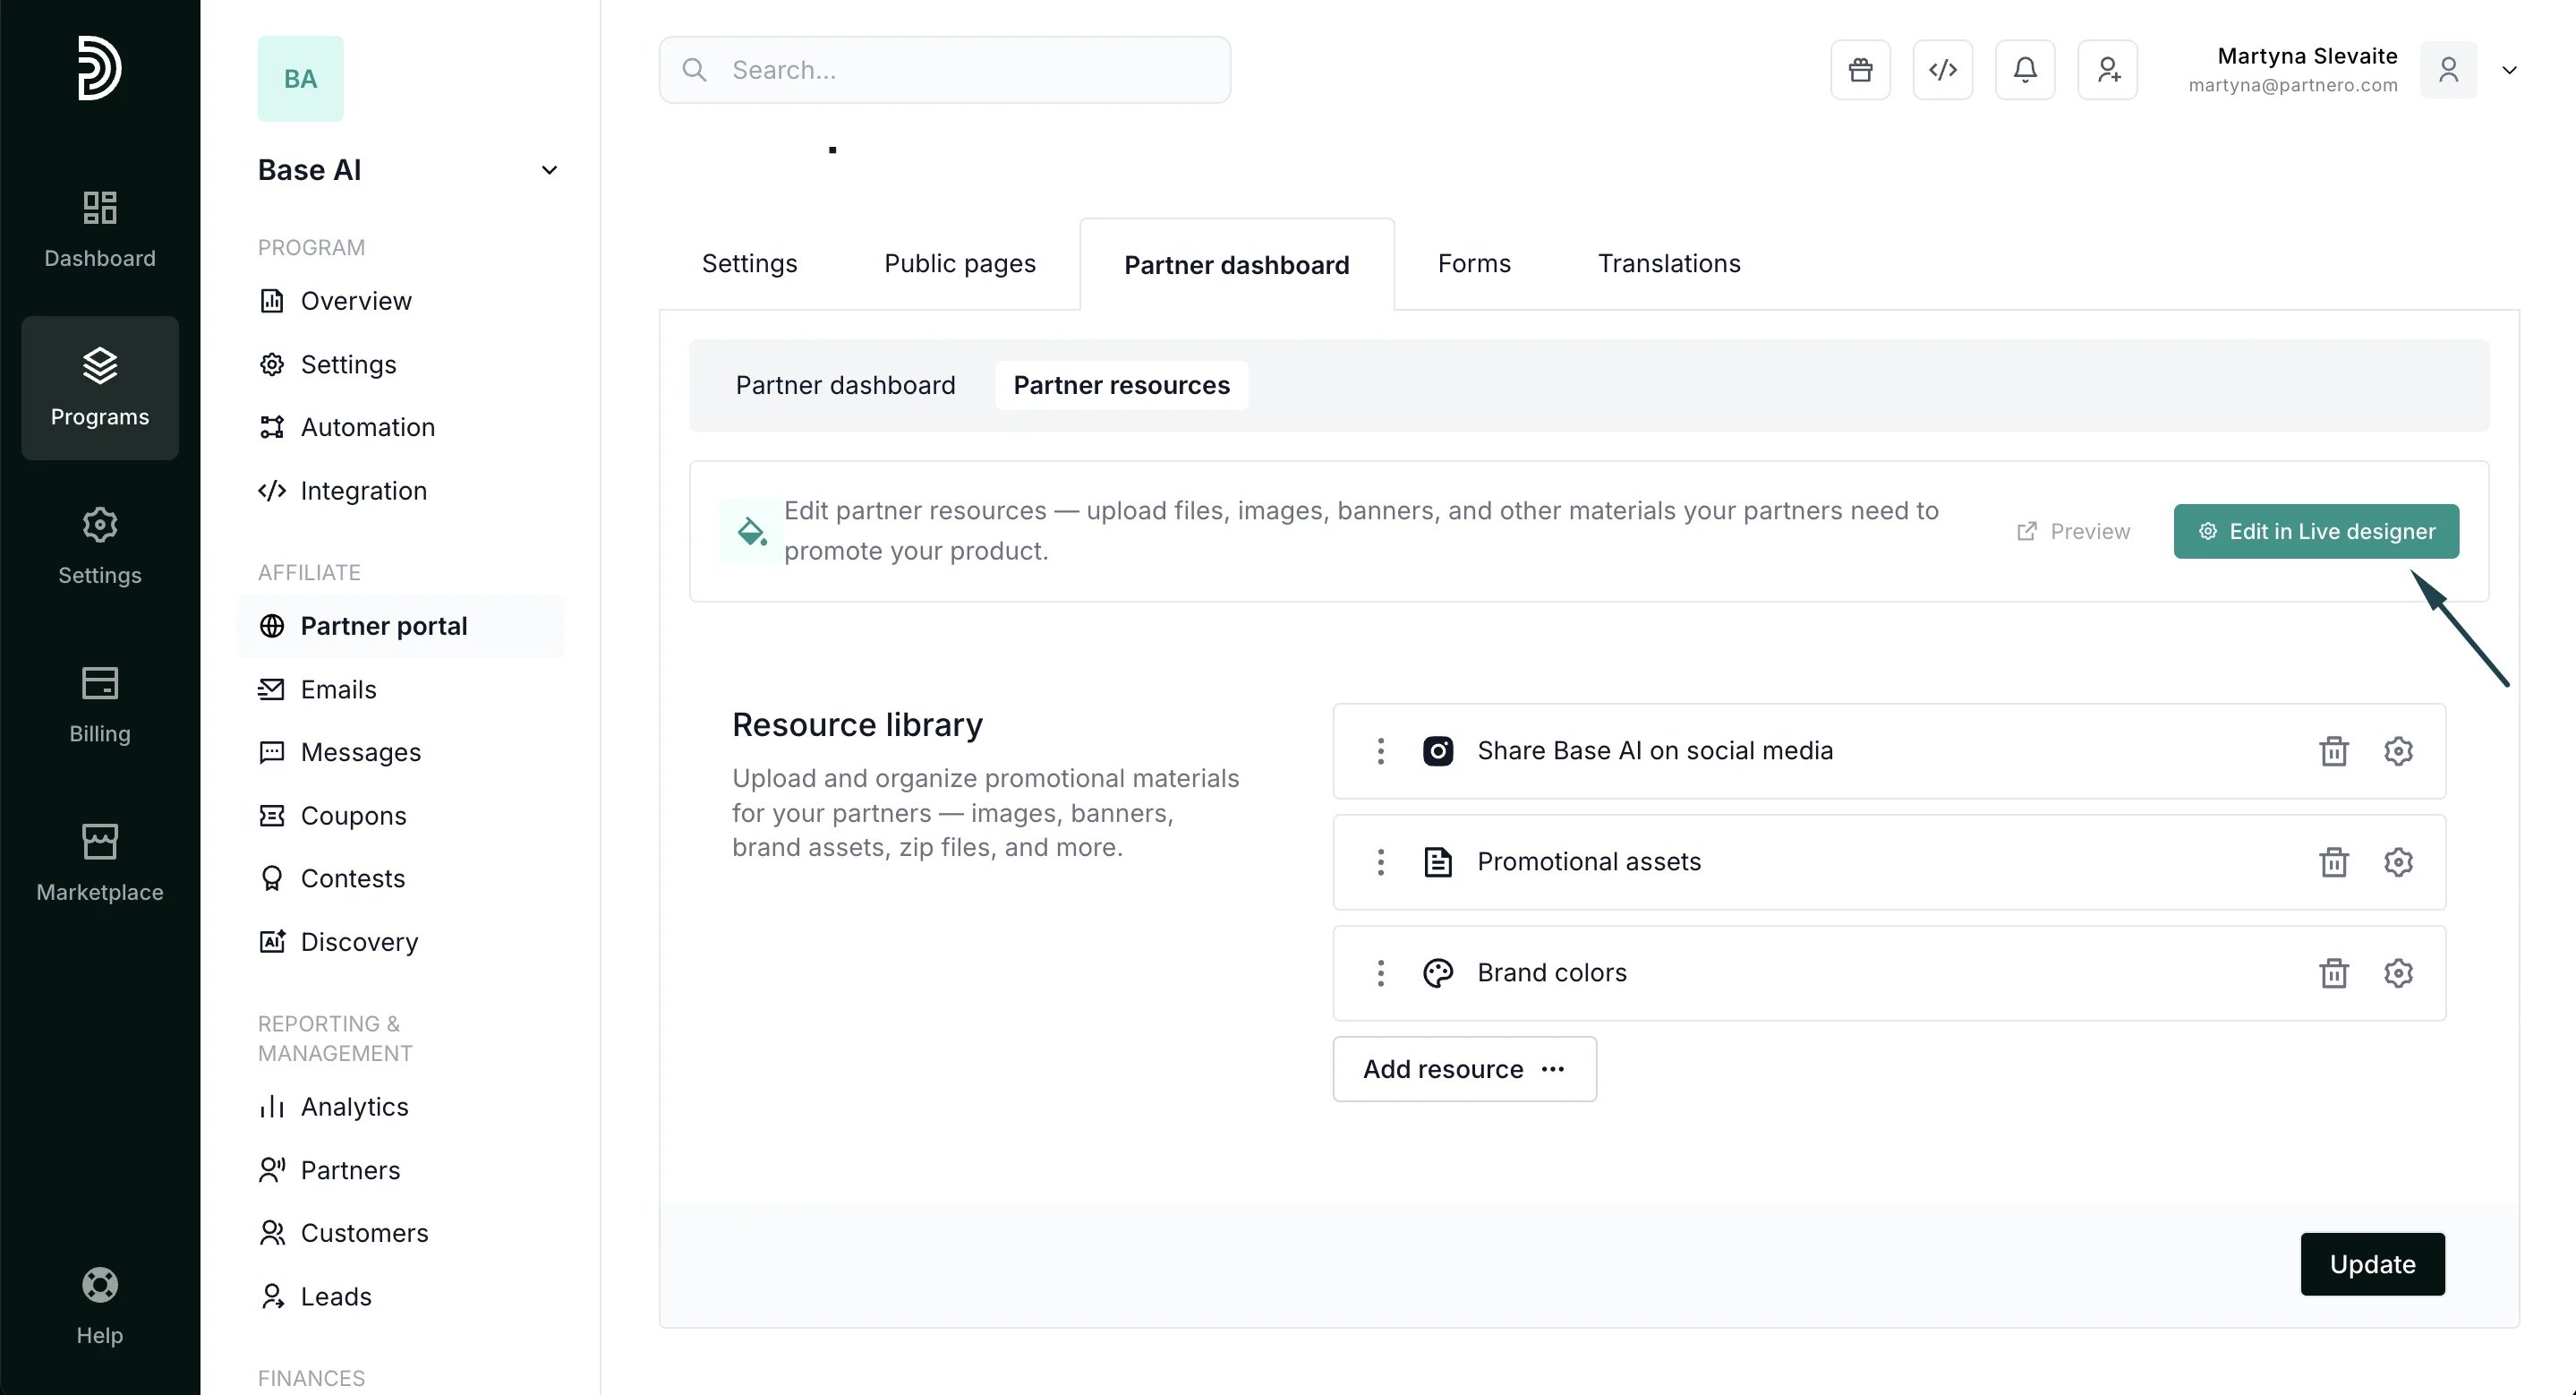 2. You can use tag-based visibility to show or hide resources for specific partner groups. [Click here to read more](/knowledge-base/partner-portal/resource-visibility-by-tags).
3. You can re-order assets by clicking on the three dots and dragging an asset to a required position:
2. You can use tag-based visibility to show or hide resources for specific partner groups. [Click here to read more](/knowledge-base/partner-portal/resource-visibility-by-tags).
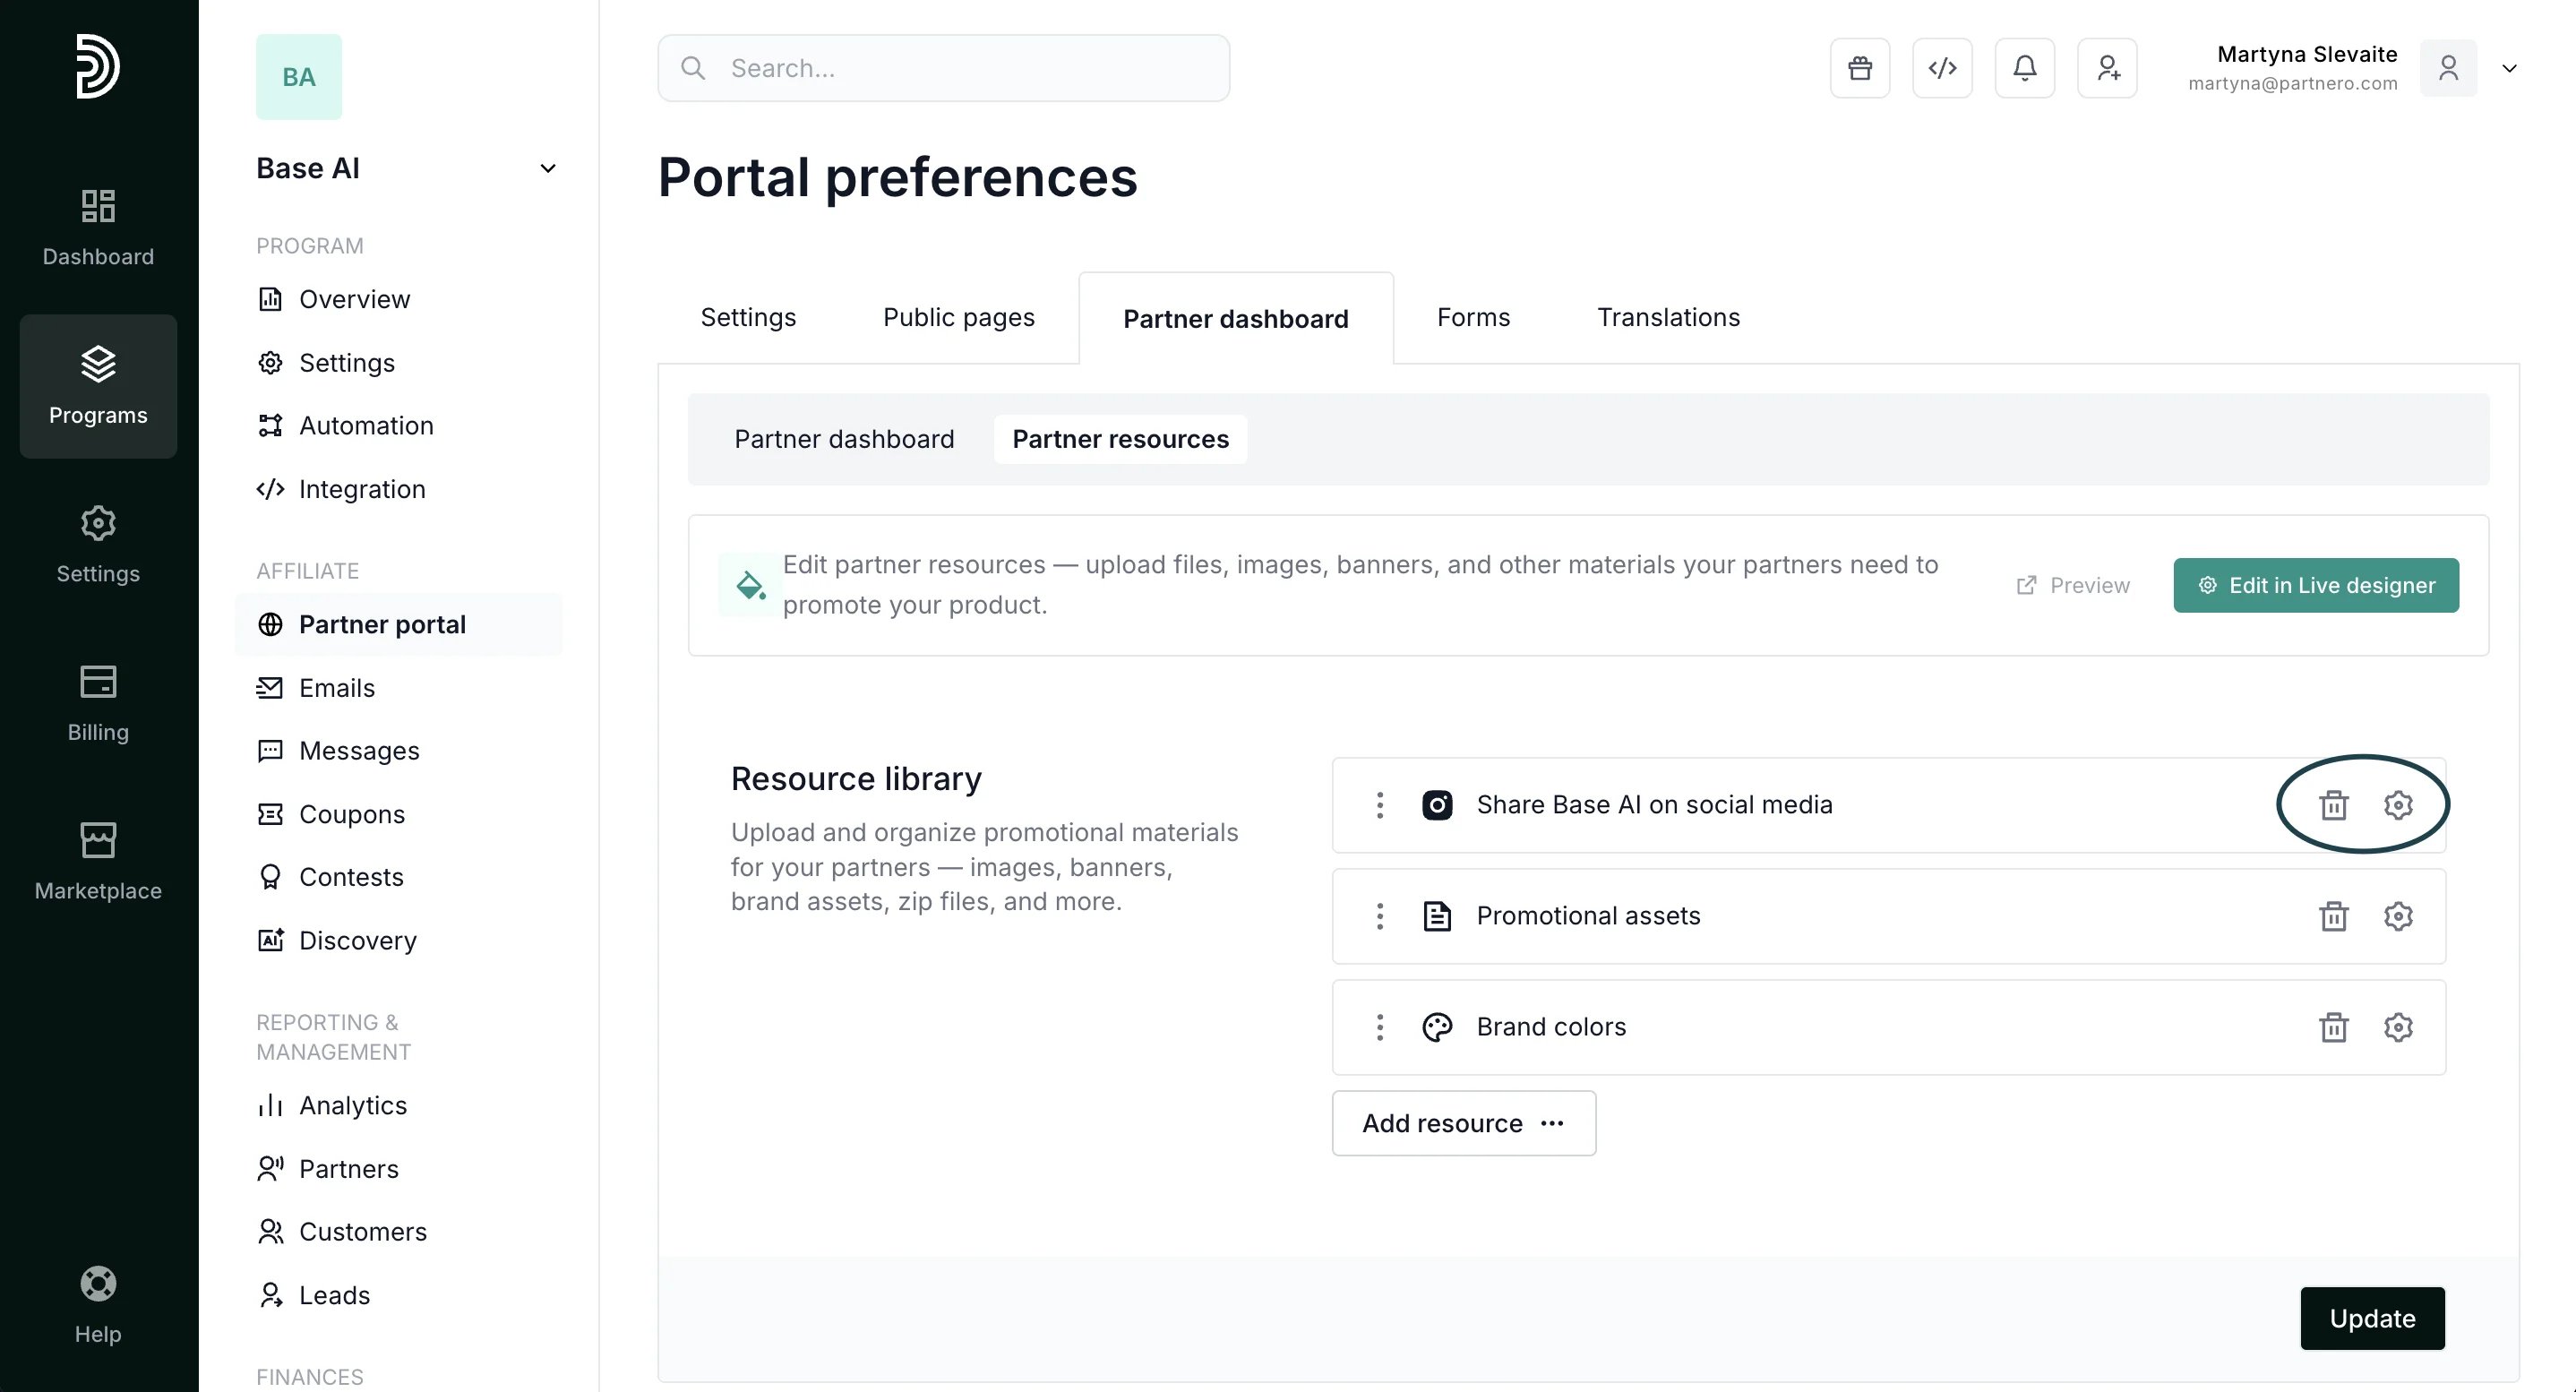
3. You can re-order assets by clicking on the three dots and dragging an asset to a required position: 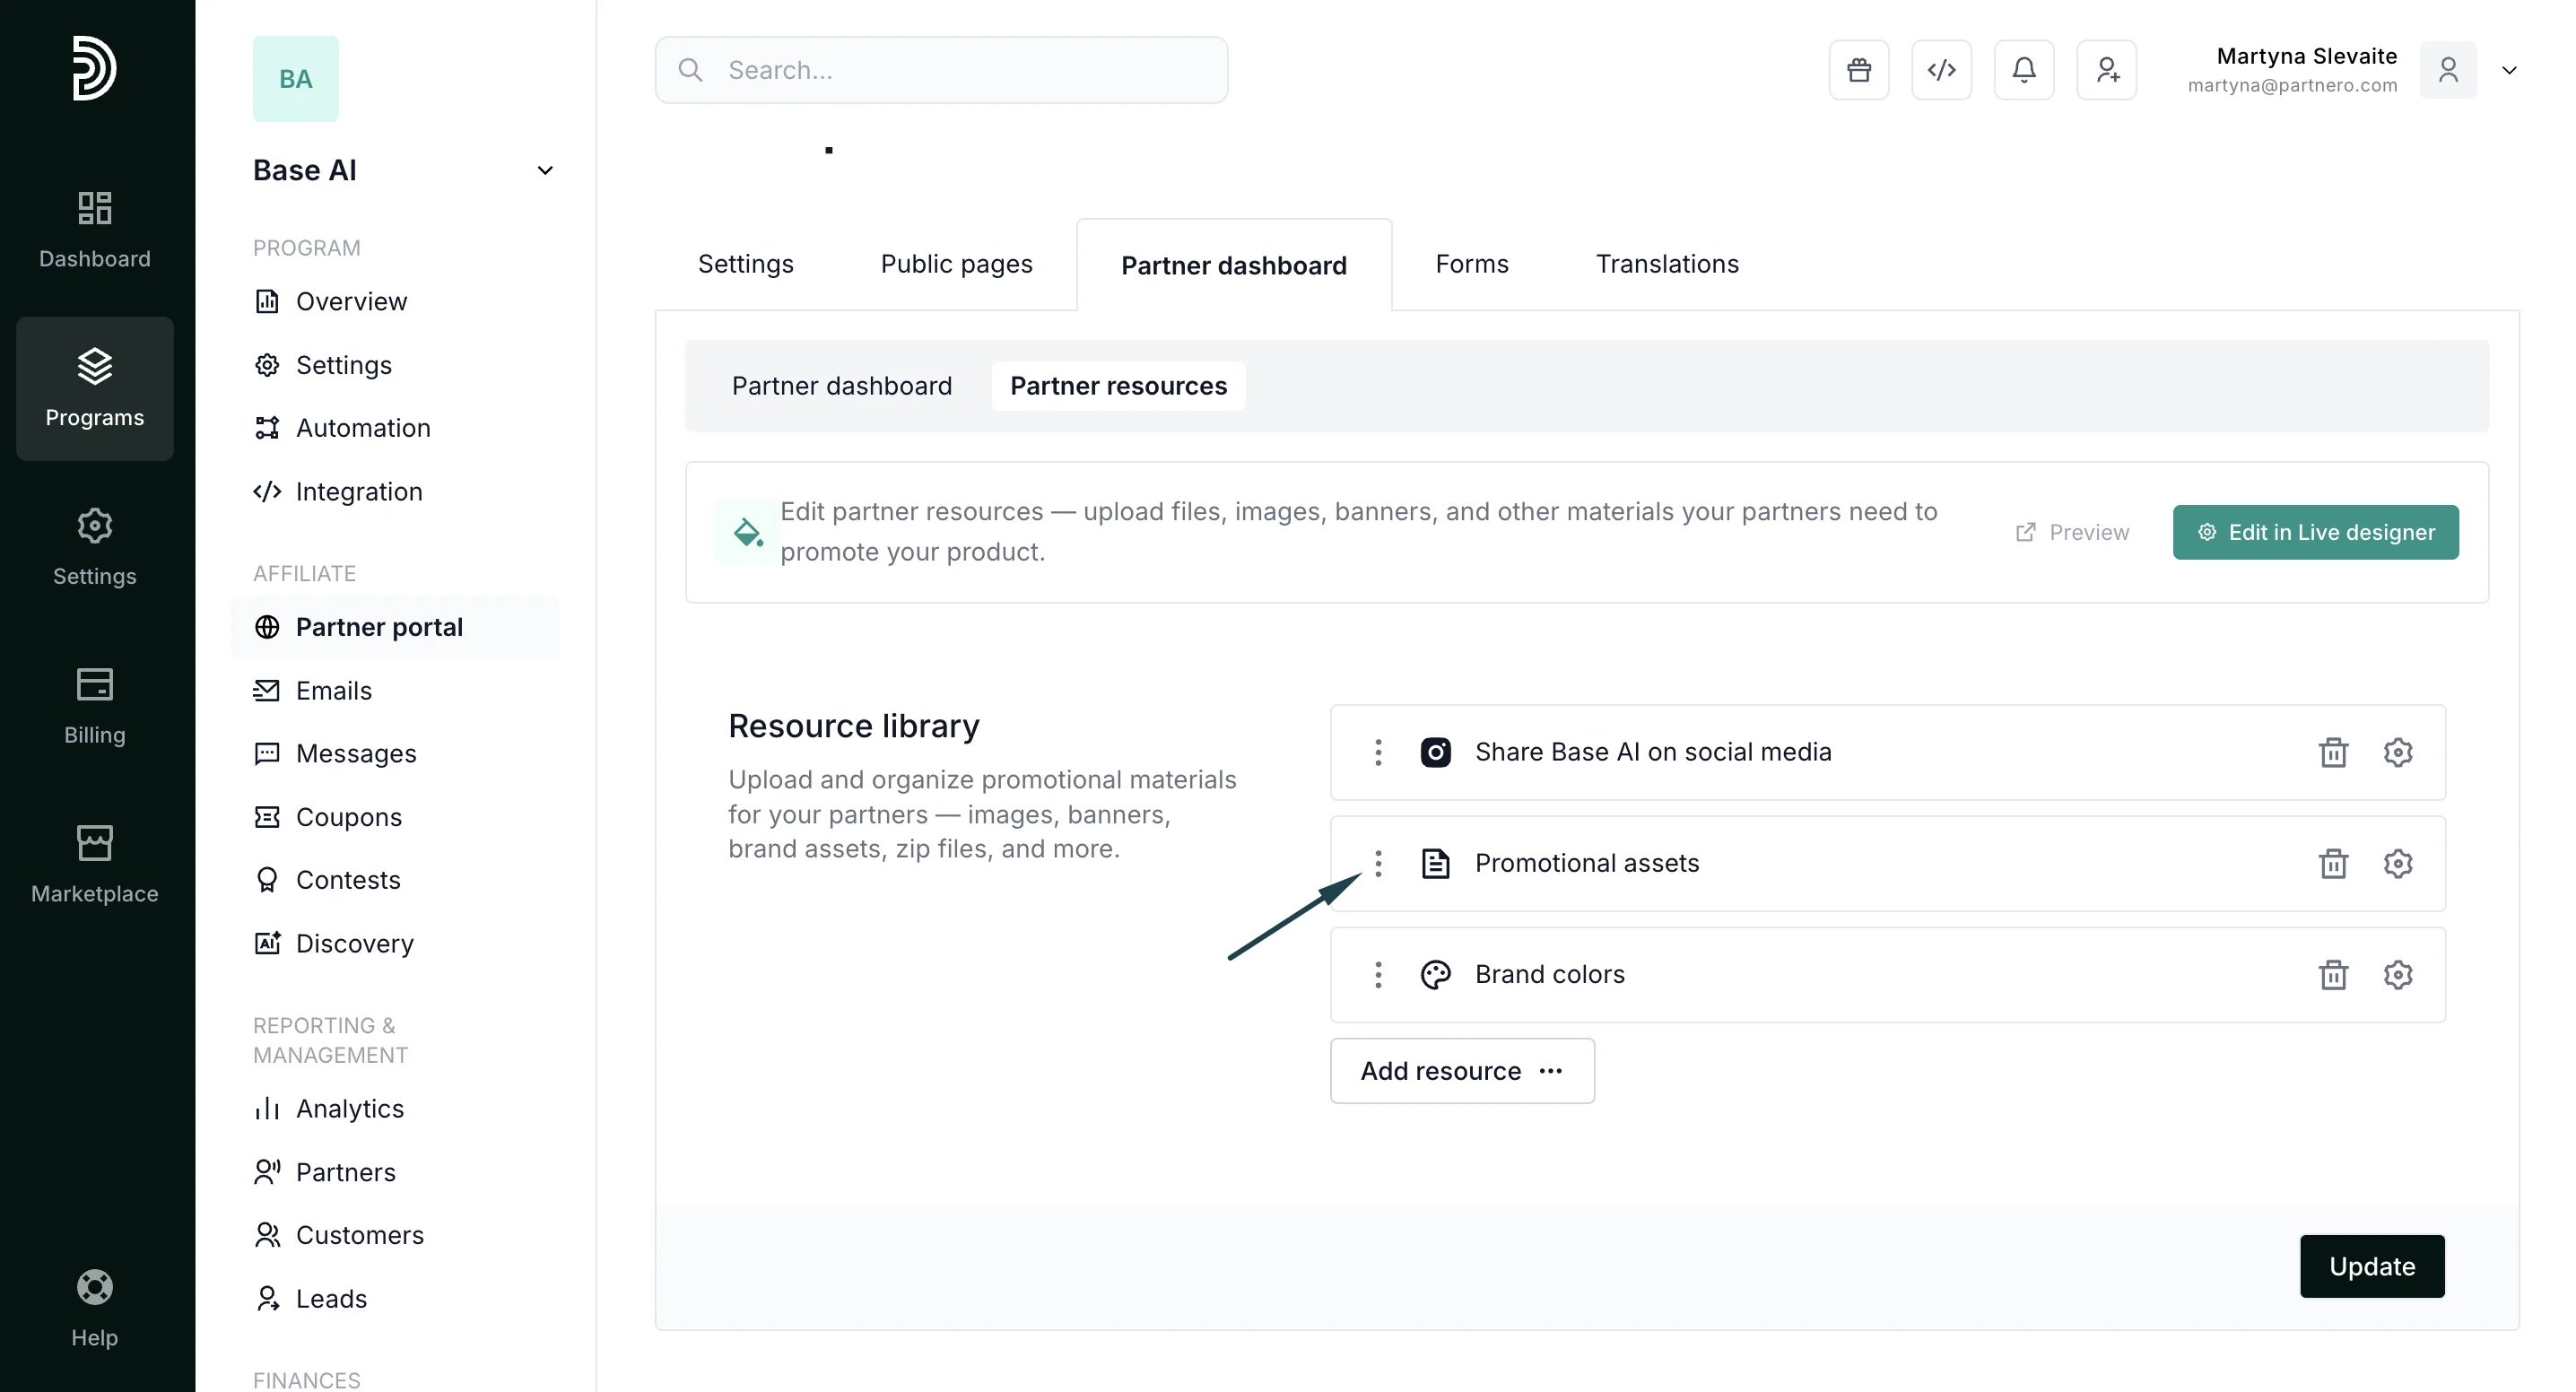 4. To edit or delete existing assets, use the settings and bin icons:
  Below, we'll share a few examples of how to add different types of resources.
***
#### Add an Asset
1. Click **Add Resource** and select **Assets**:
Below, we'll share a few examples of how to add different types of resources.
***
#### Add an Asset
1. Click **Add Resource** and select **Assets**:
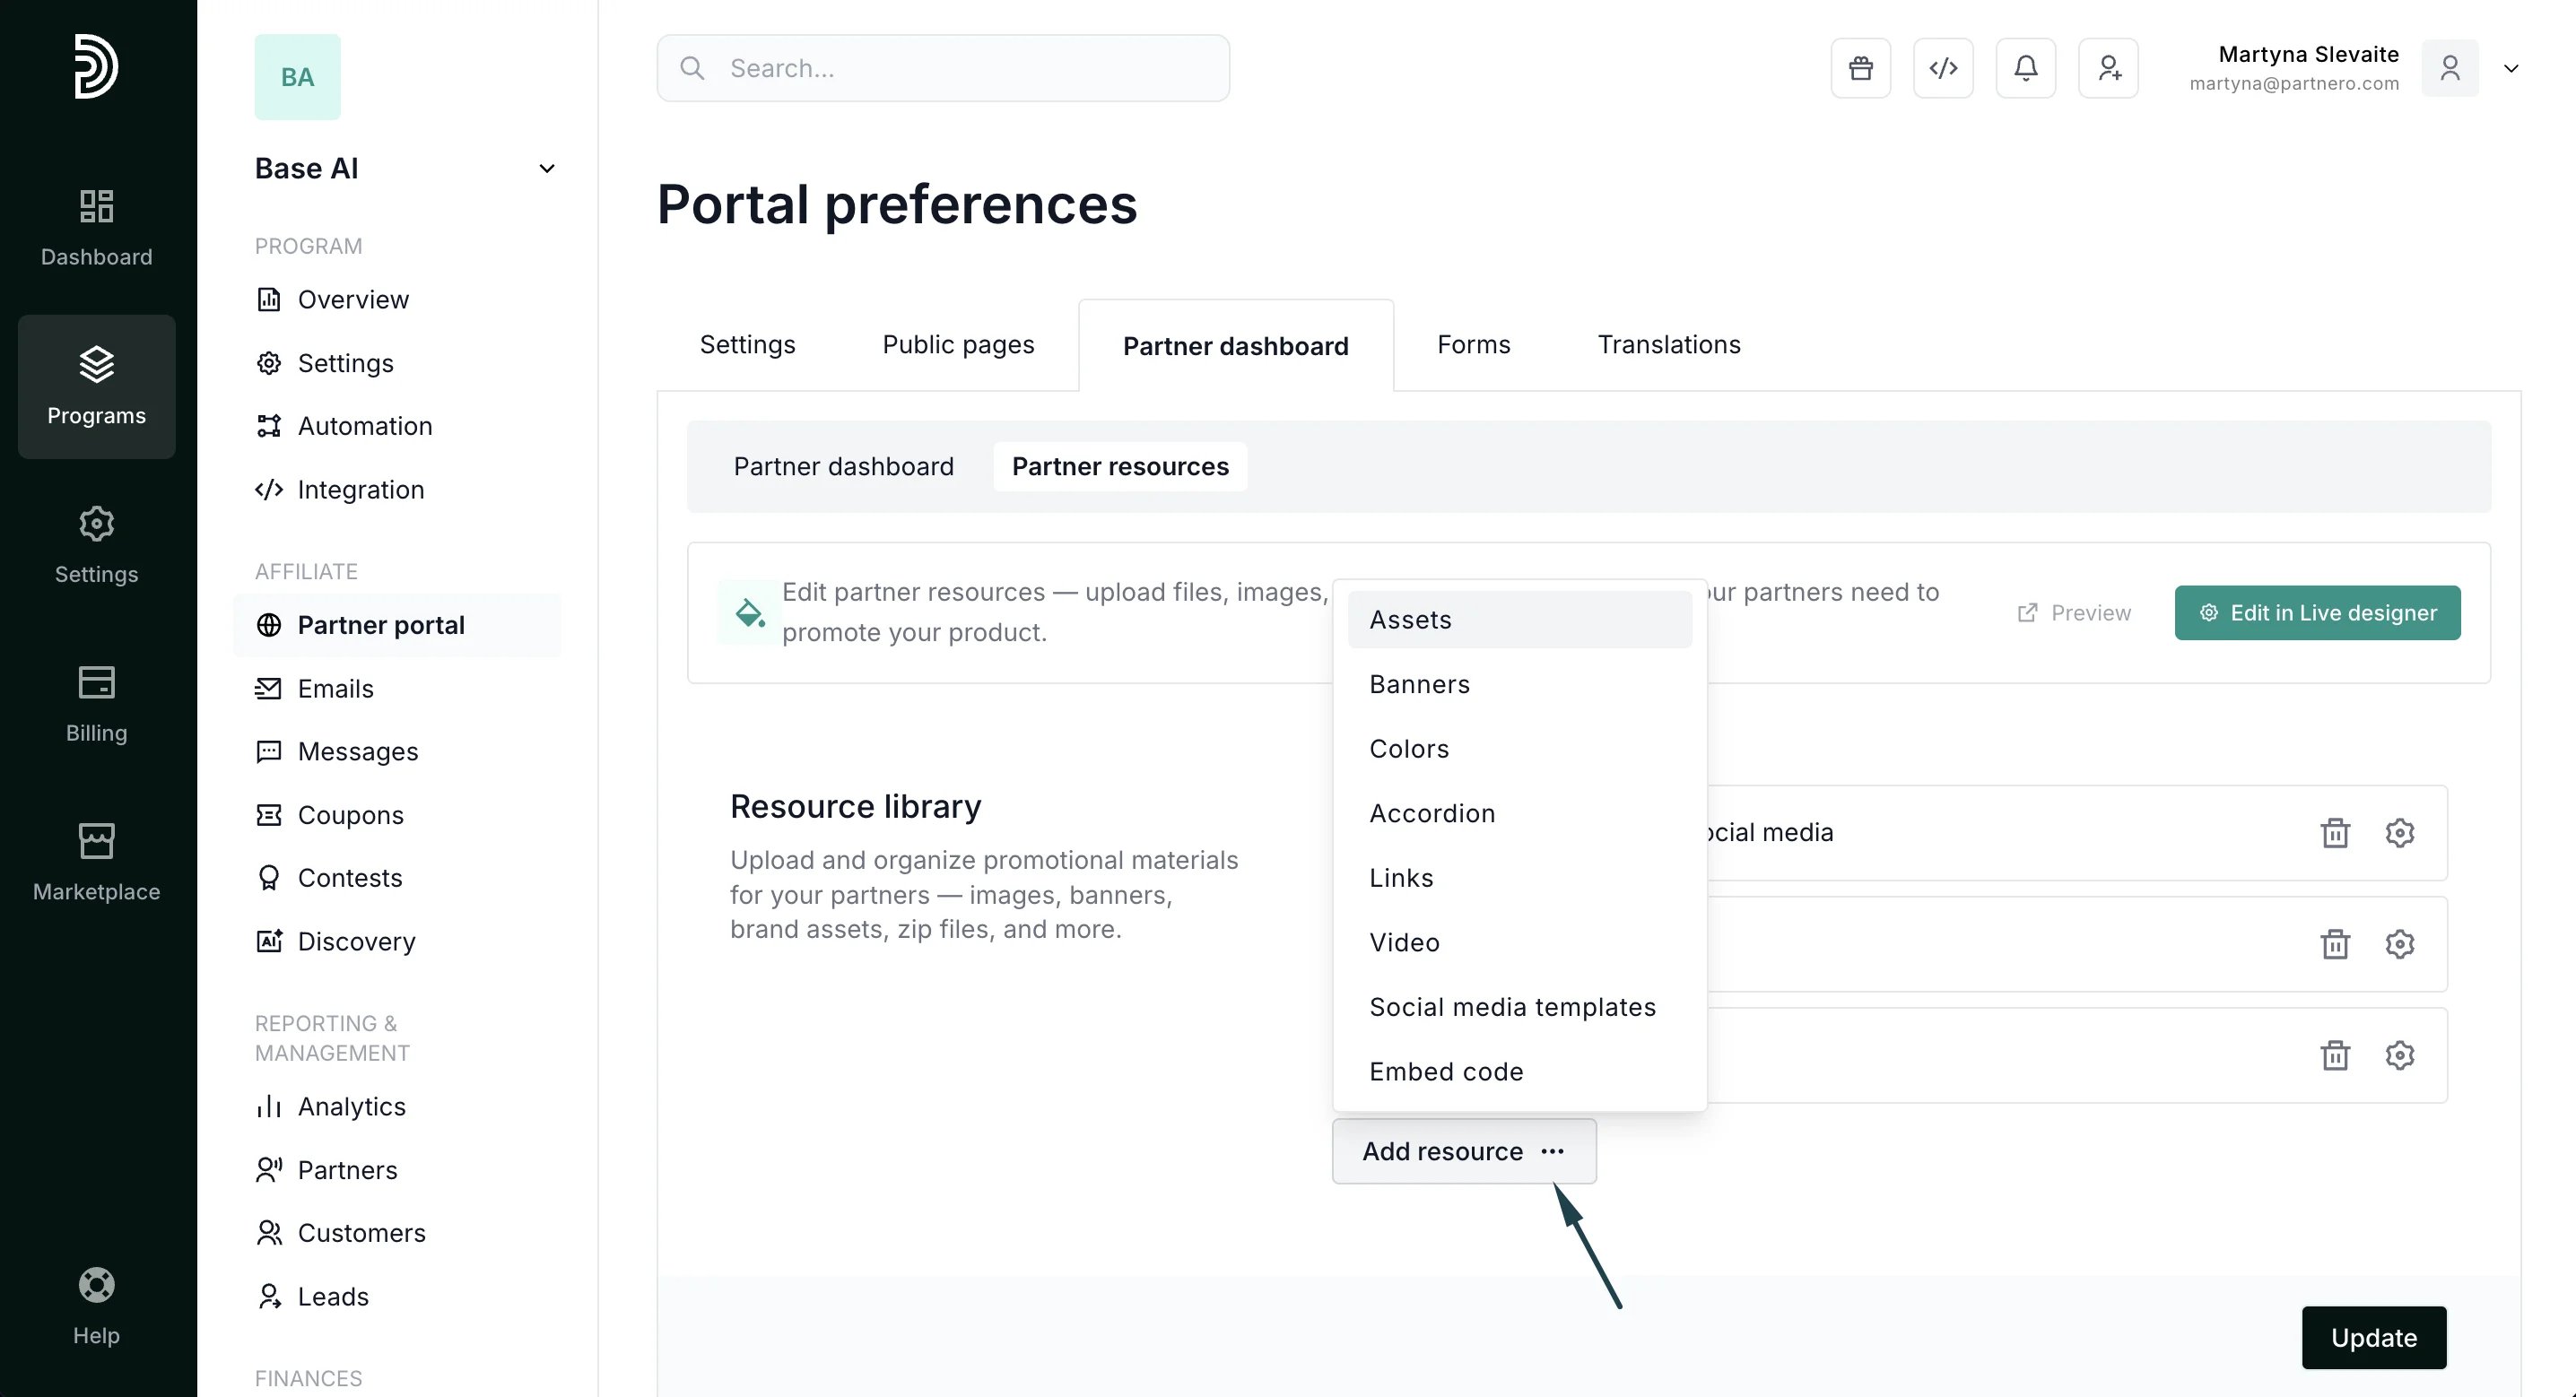 2. Enter the **Title** and **Description** for the assets that will be shared (optional).
3. Under **Content**, click **Add asset**. Note: you can group multiple assets.
2. Enter the **Title** and **Description** for the assets that will be shared (optional).
3. Under **Content**, click **Add asset**. Note: you can group multiple assets. 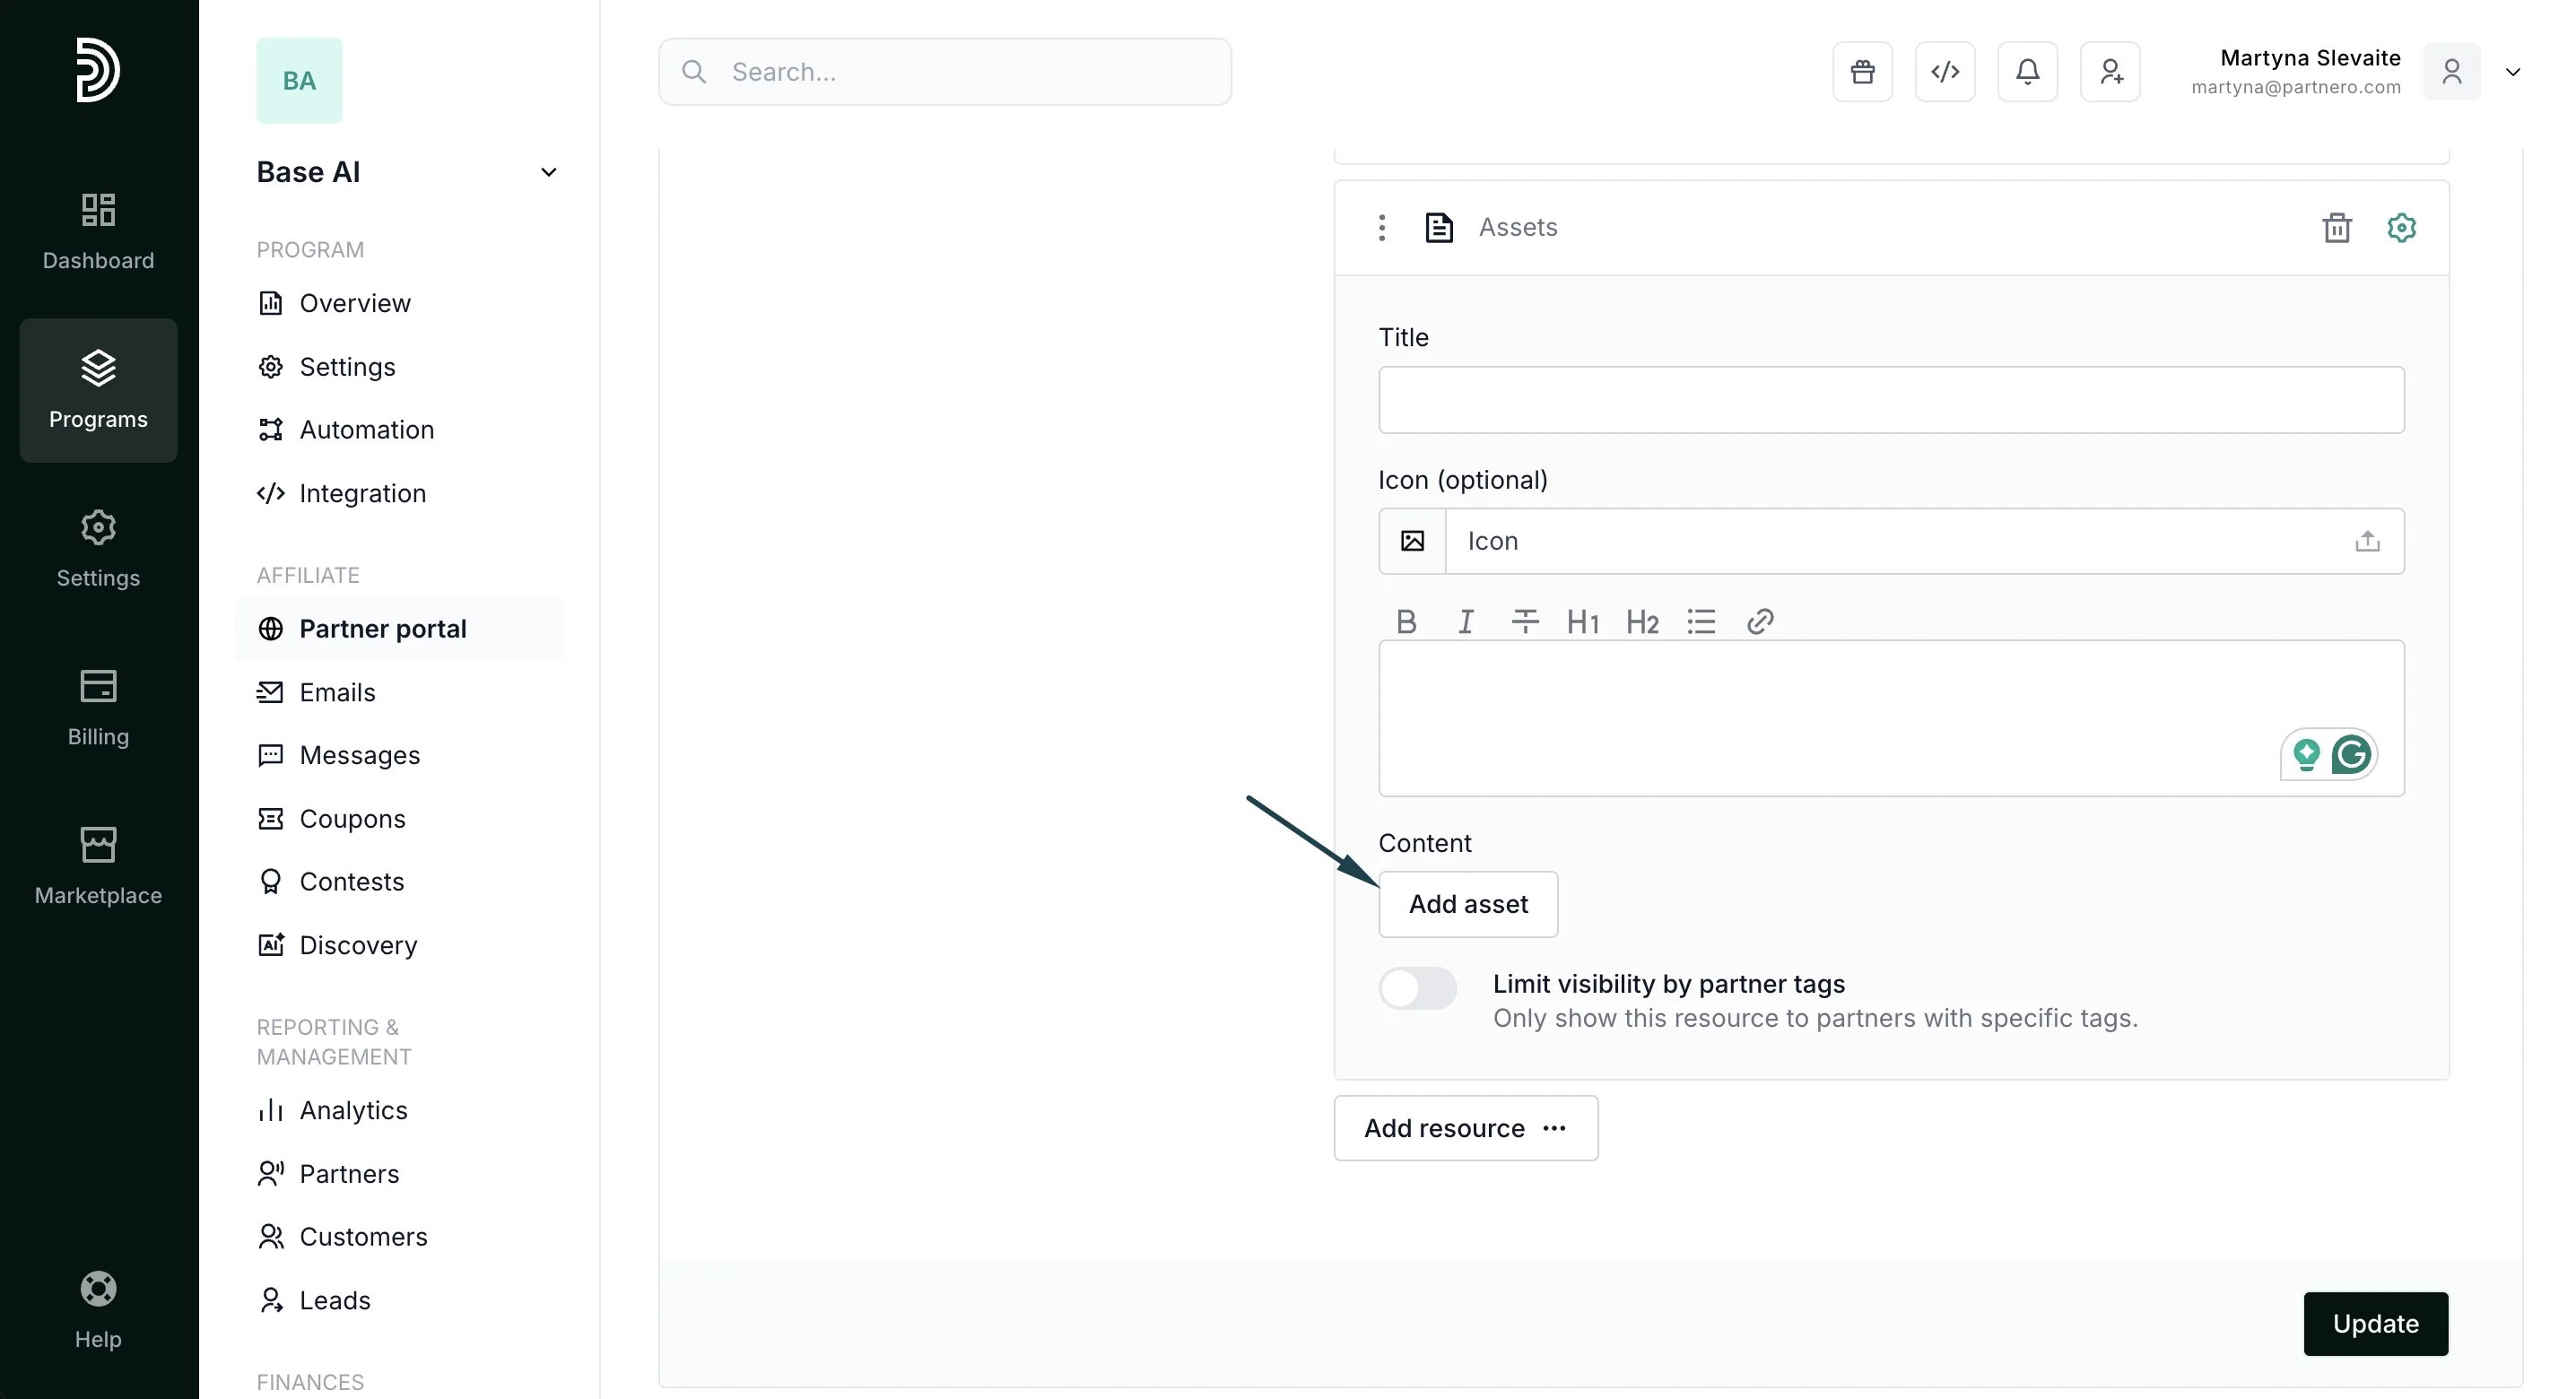 4. Upload a cover image and a zip file with the assets. You can also add a **Title** and **Description** (optional) and make the image downloadable.
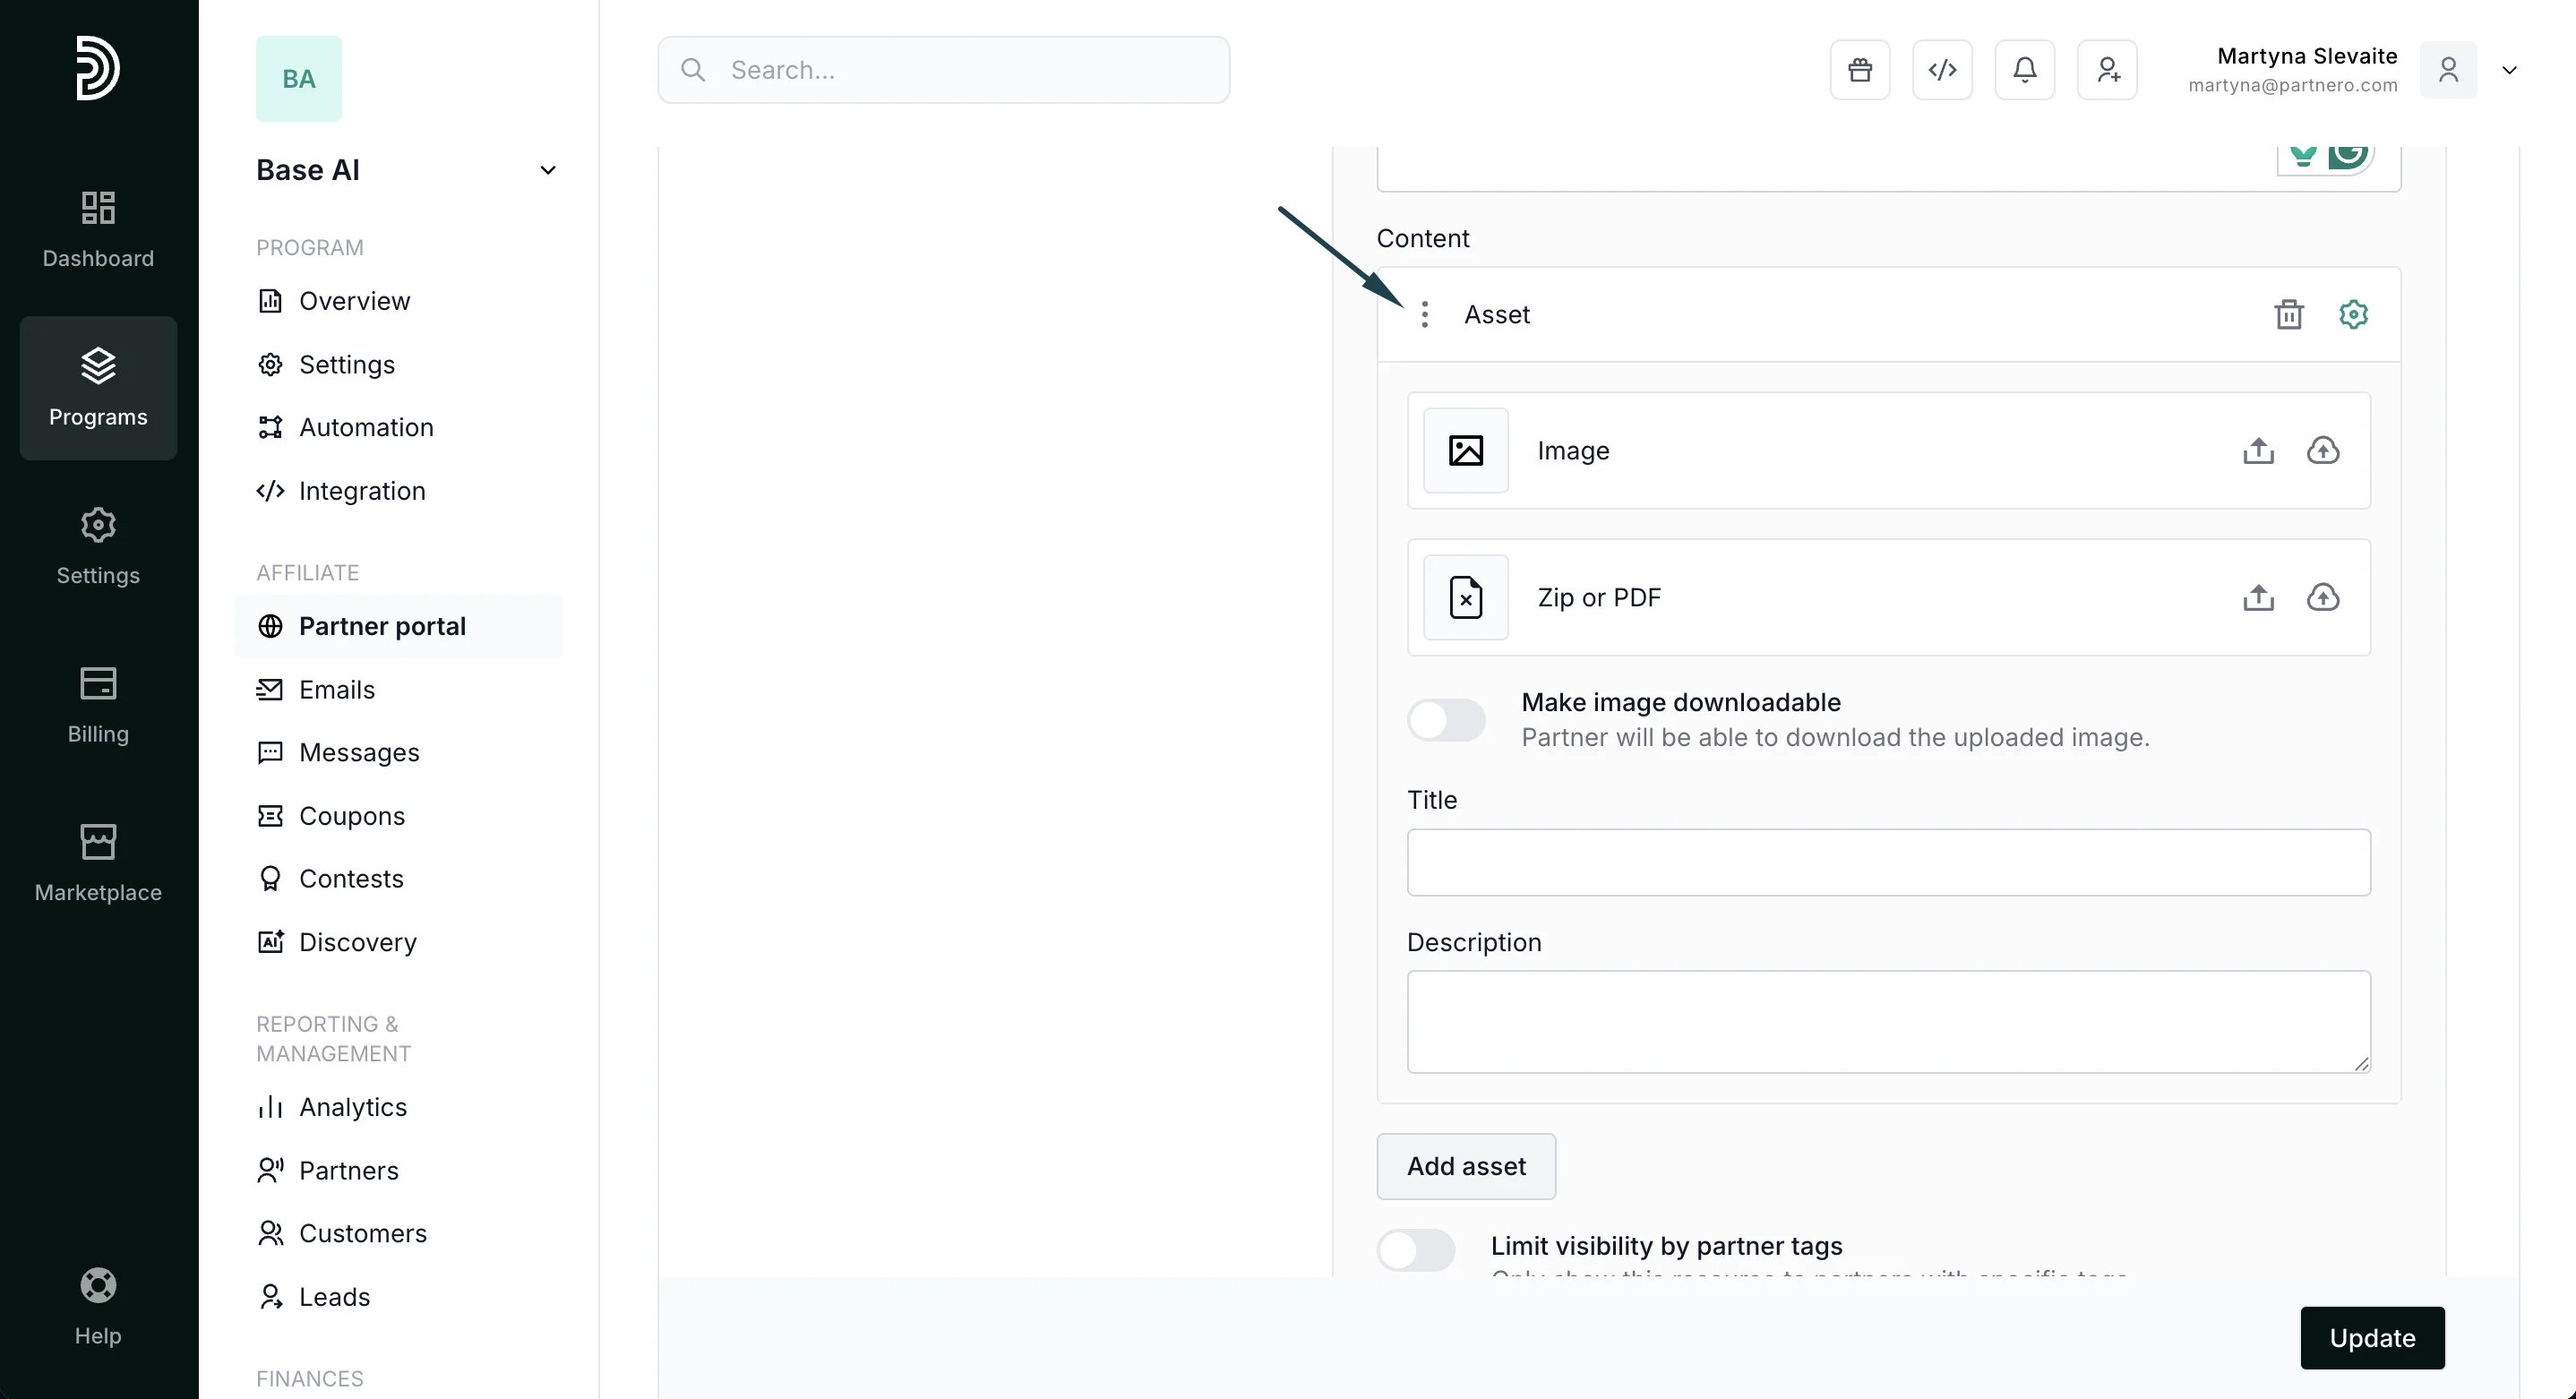 Both the Image and the ZIP or PDF can be uploaded as files for your computer or through external links:
 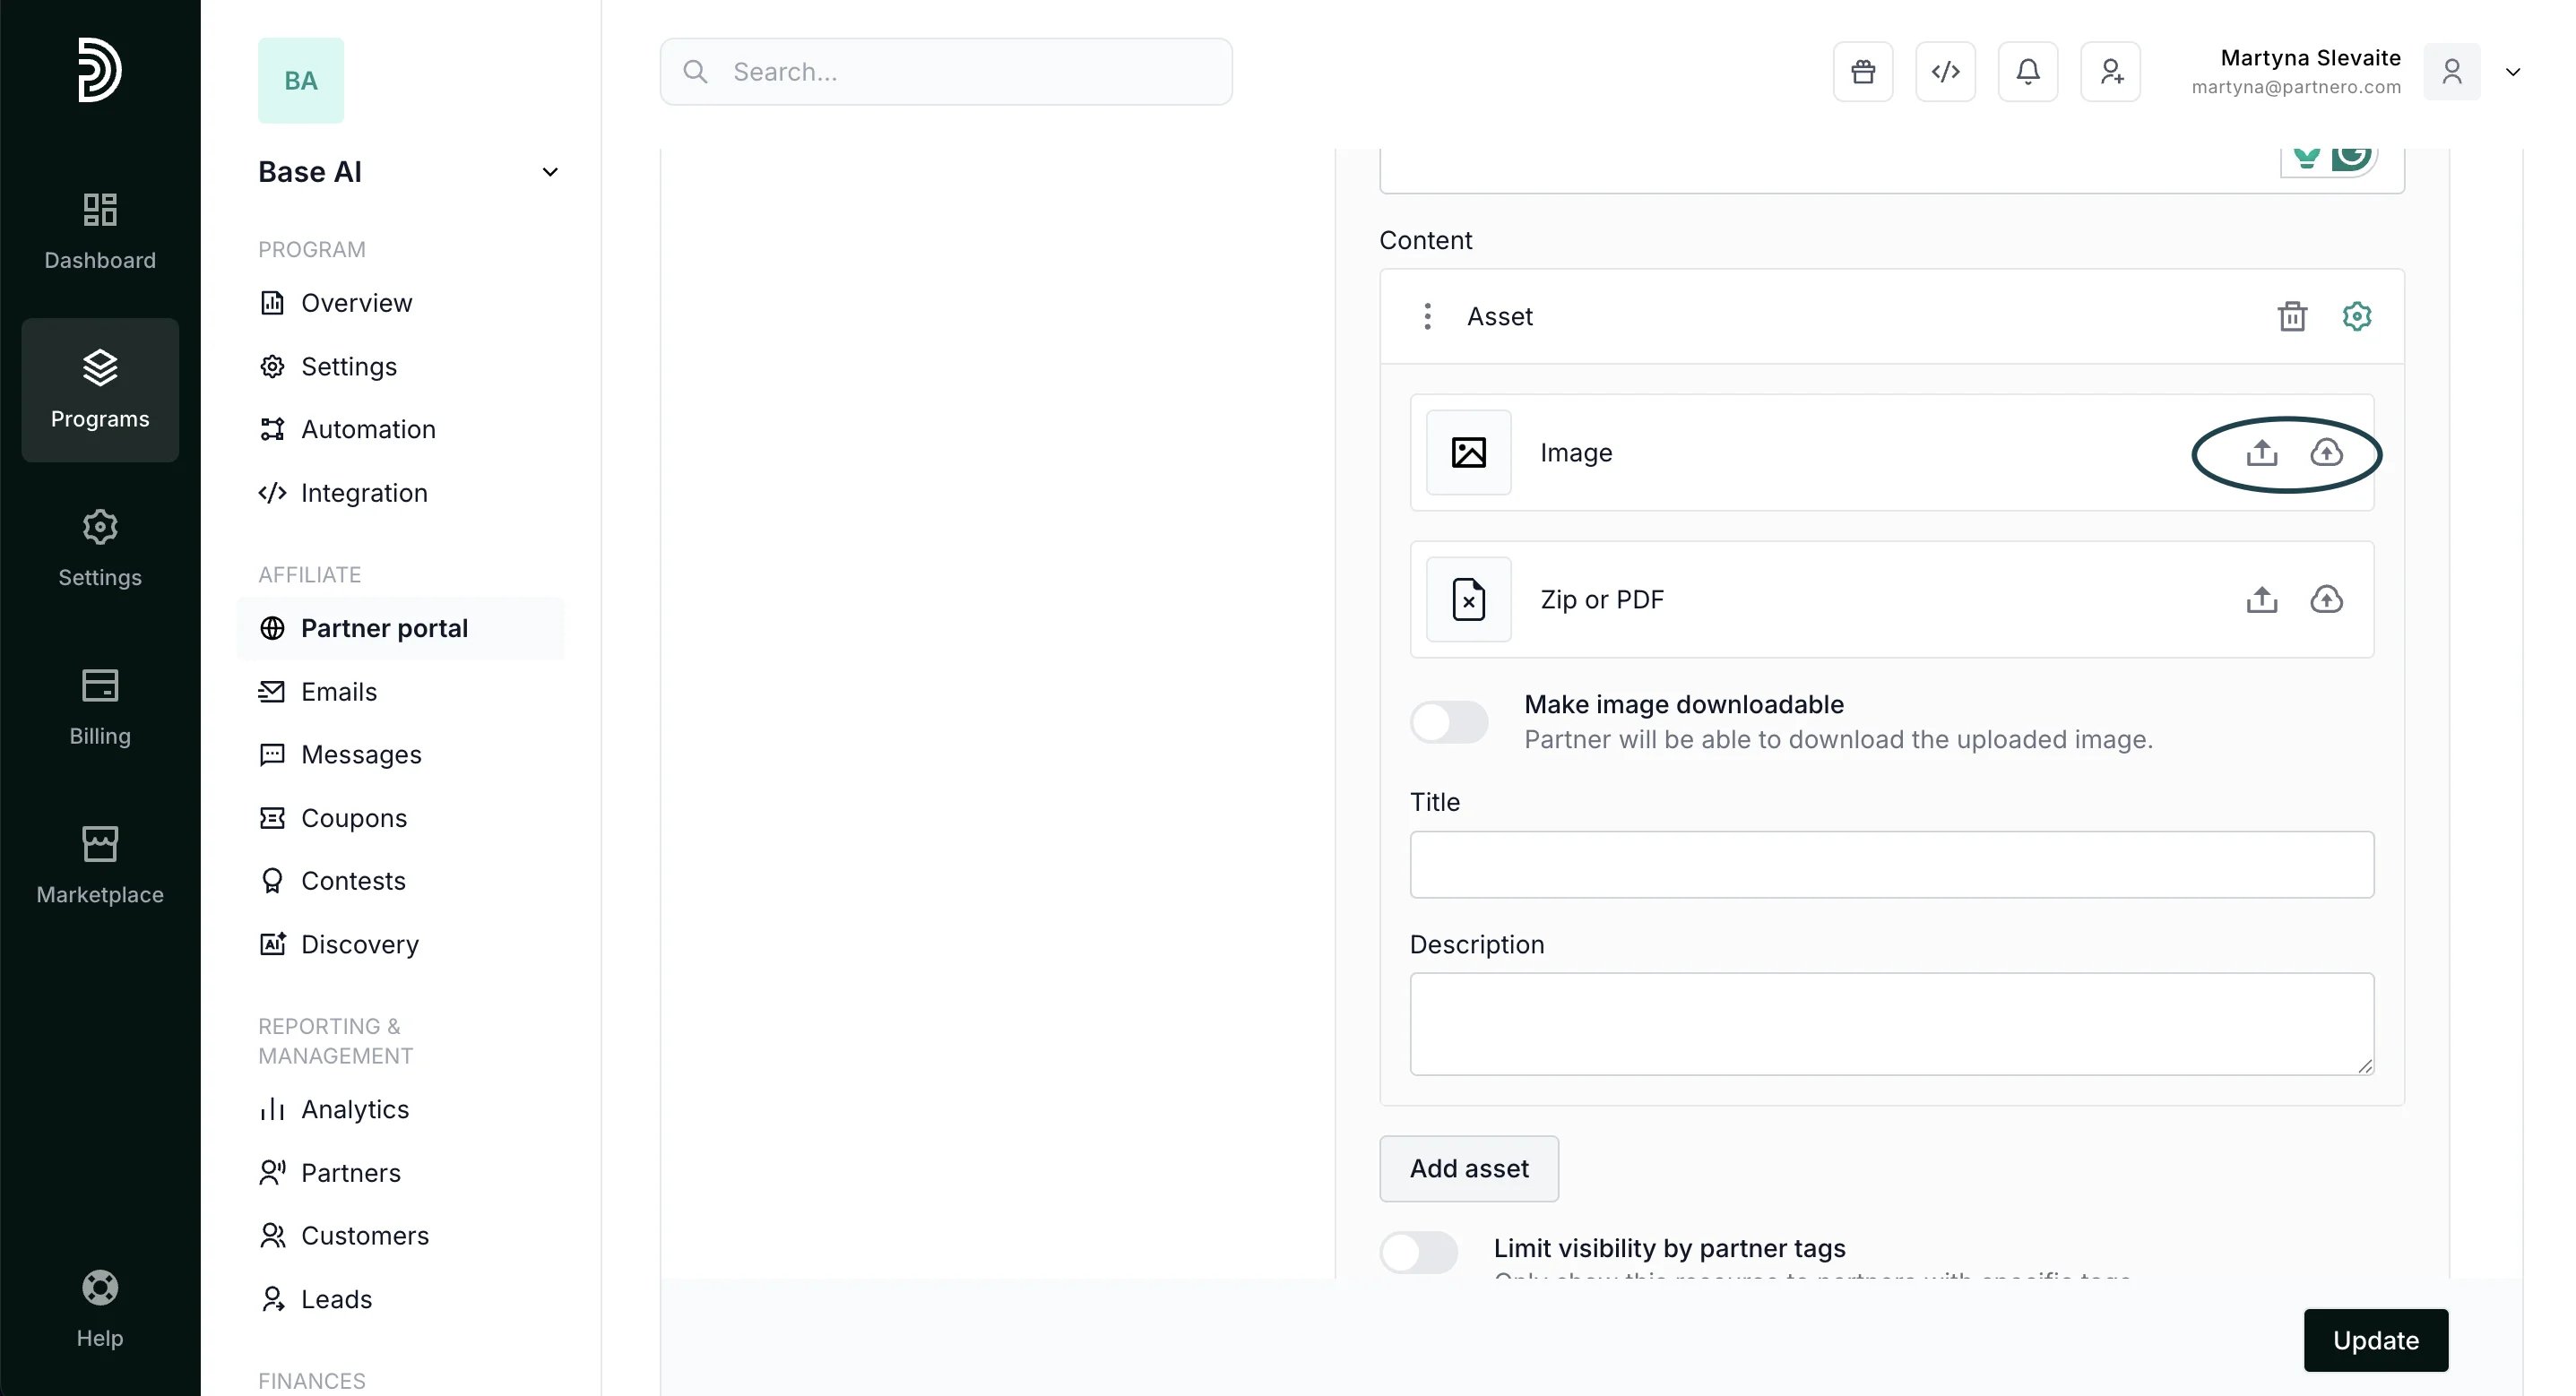 If you're offering downloadable files, we recommend using the external link option and uploading files hosted on your website. This way, the asset download link will have your website URL.
5. Upload additional content, if needed, by clicking **Add Asset**.
6. Click **Update** to save your changes.
> Tip! While building the Resources page, have your Partner portal open in a separate tab. Every time you click **Update** on Partnero, refresh the Partner portal to see the changes reflected immediately. Explore all options and find what you like.
#### Example from a Partner portal
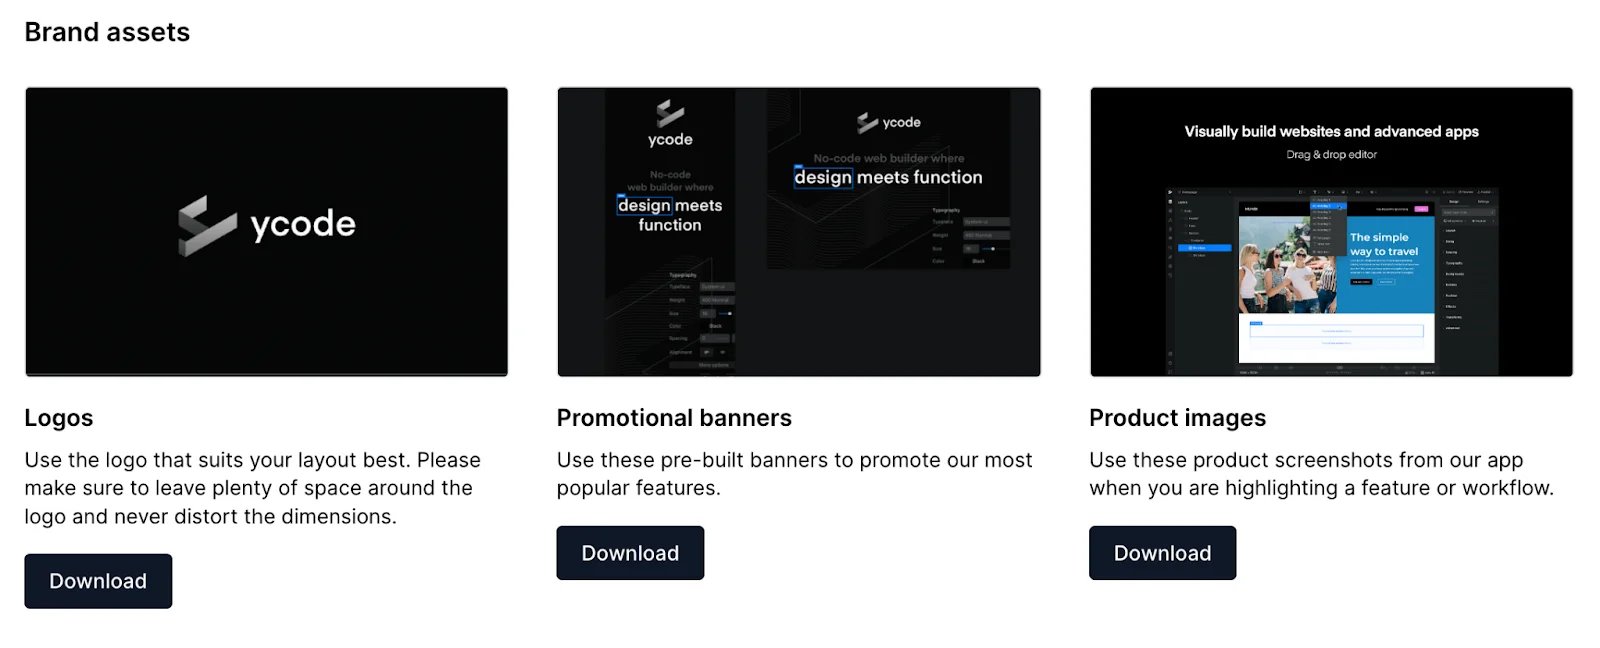
Asset block titled “Brand Assets,” no description added. The block has three separate content pieces uploaded, each with a Title and Description (Logos, Promotional Banners, and Product Images):
If you're offering downloadable files, we recommend using the external link option and uploading files hosted on your website. This way, the asset download link will have your website URL.
5. Upload additional content, if needed, by clicking **Add Asset**.
6. Click **Update** to save your changes.
> Tip! While building the Resources page, have your Partner portal open in a separate tab. Every time you click **Update** on Partnero, refresh the Partner portal to see the changes reflected immediately. Explore all options and find what you like.
#### Example from a Partner portal
Asset block titled “Brand Assets,” no description added. The block has three separate content pieces uploaded, each with a Title and Description (Logos, Promotional Banners, and Product Images):
 #####
***
#### Add Colors
1. Click **Add Resource** and select **Colors**:
#####
***
#### Add Colors
1. Click **Add Resource** and select **Colors**: 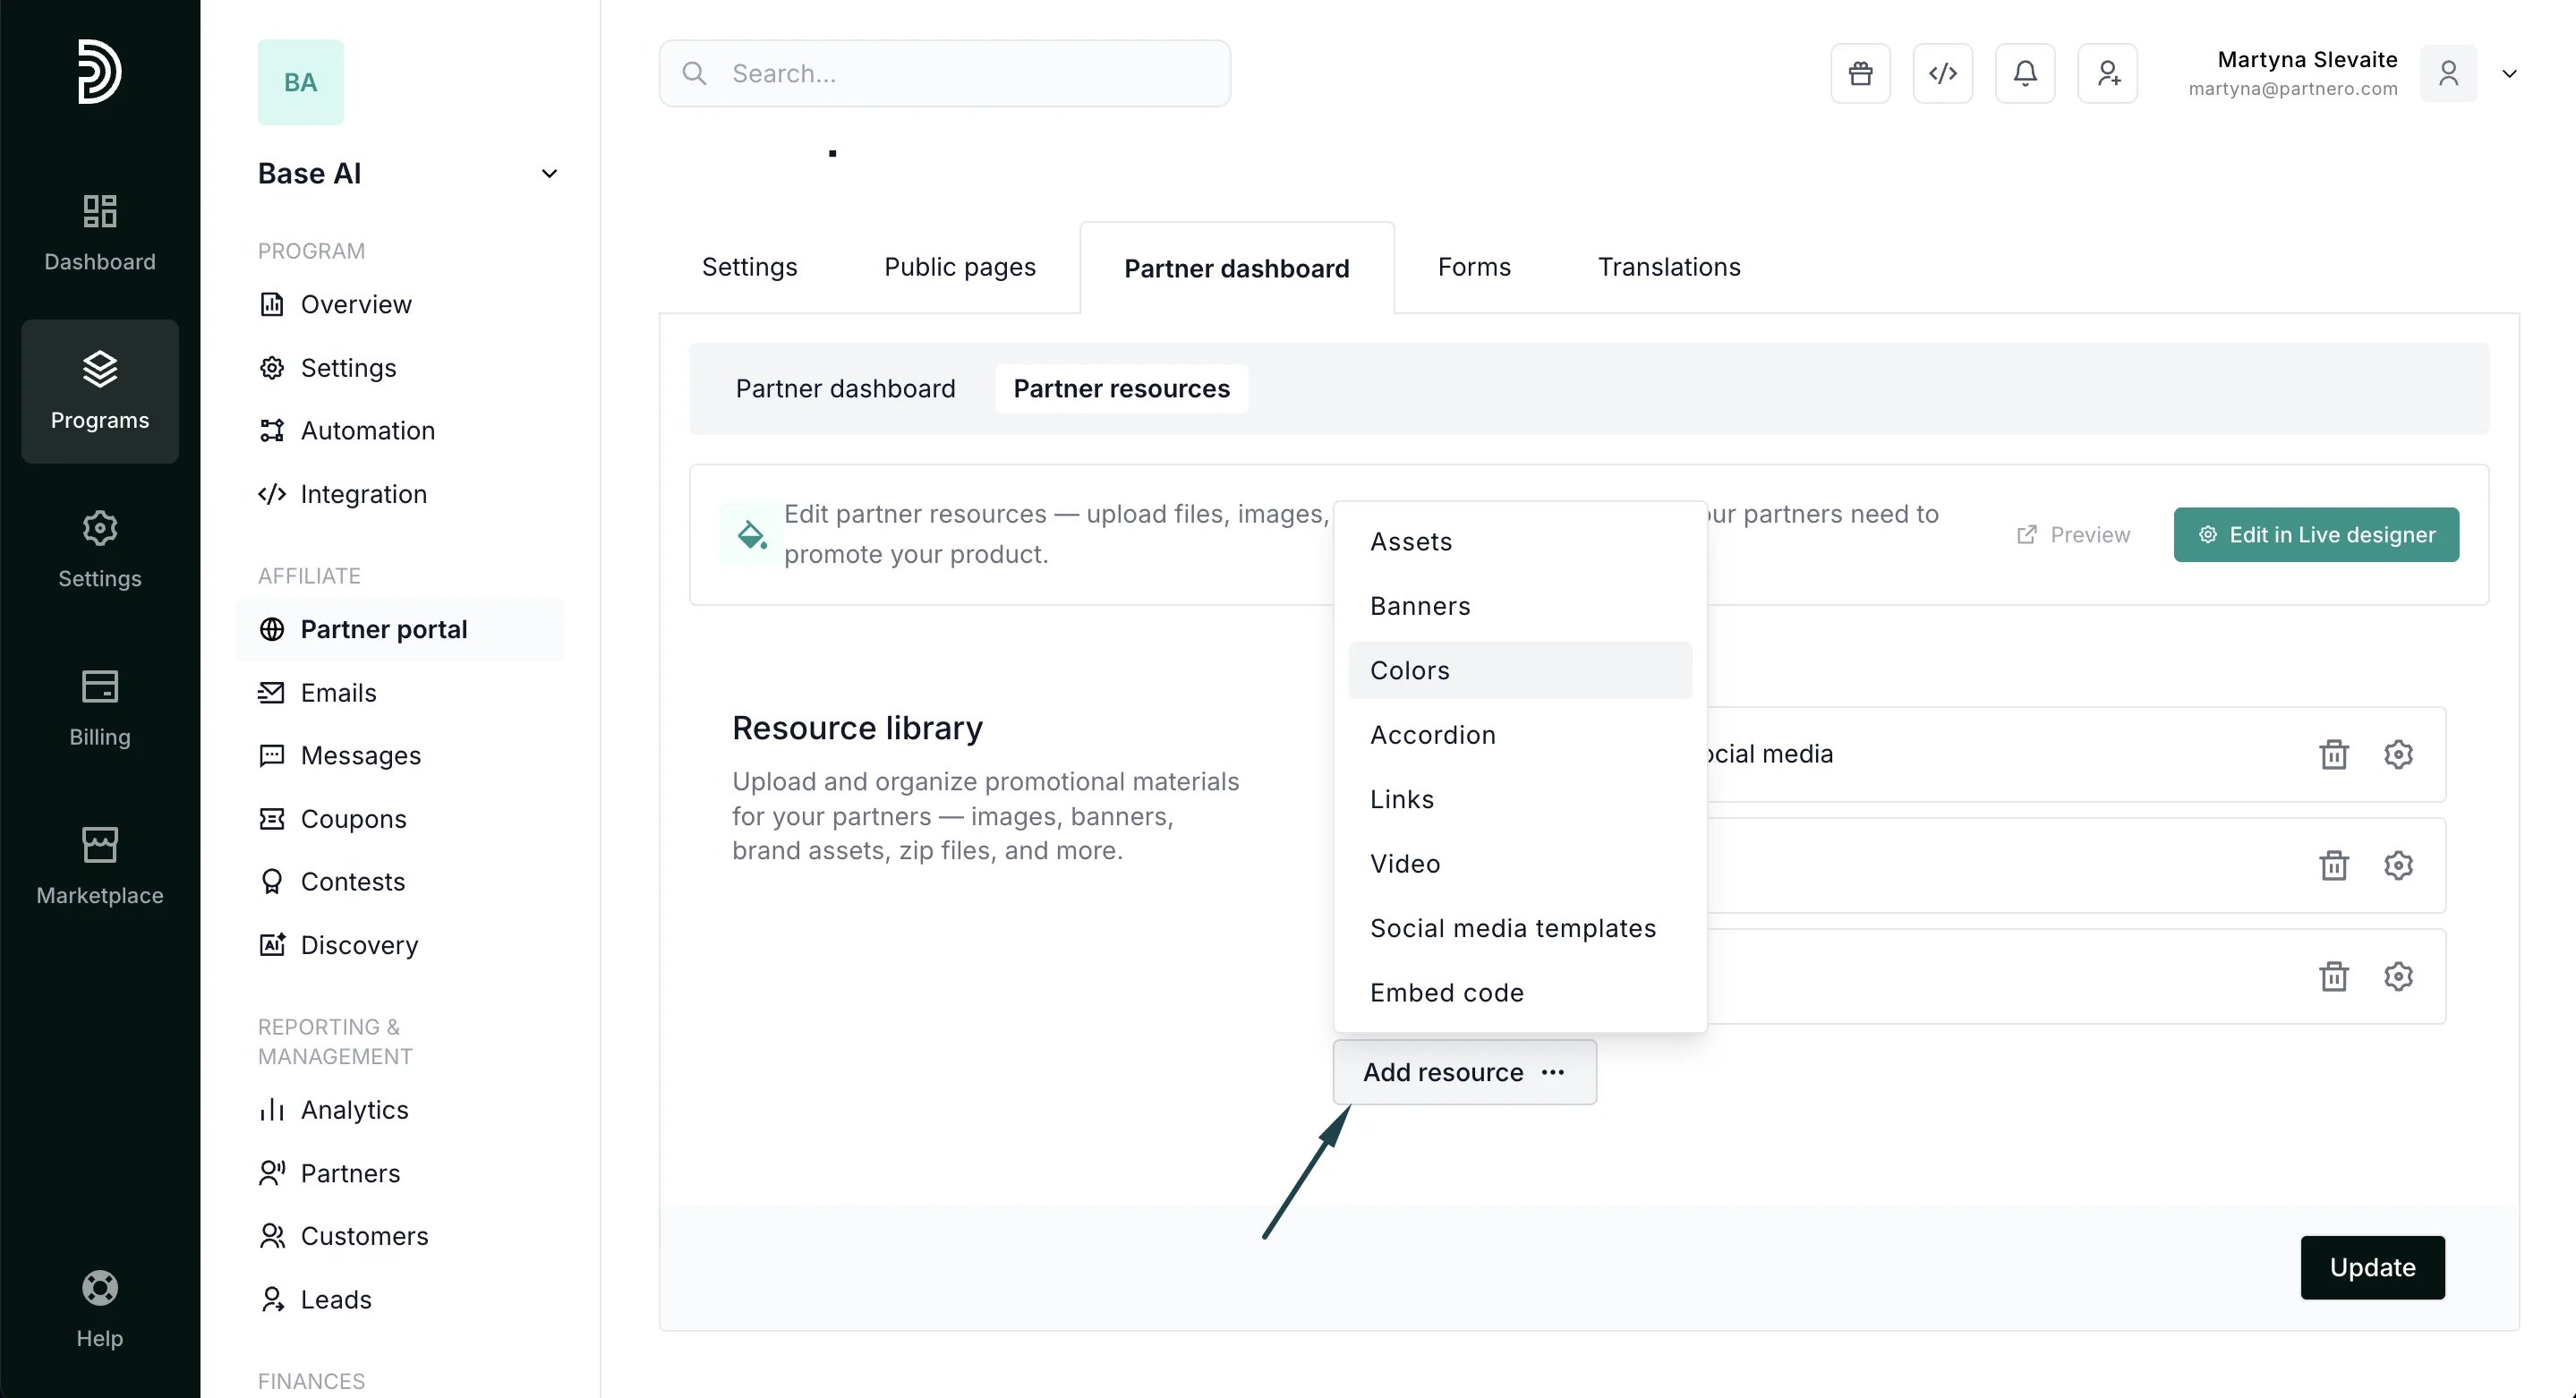 2. Enter **Title** and **Description.**
3. Under **Content**, click **Add Color**. Add a **Color code** and **Description** (optional):
2. Enter **Title** and **Description.**
3. Under **Content**, click **Add Color**. Add a **Color code** and **Description** (optional): 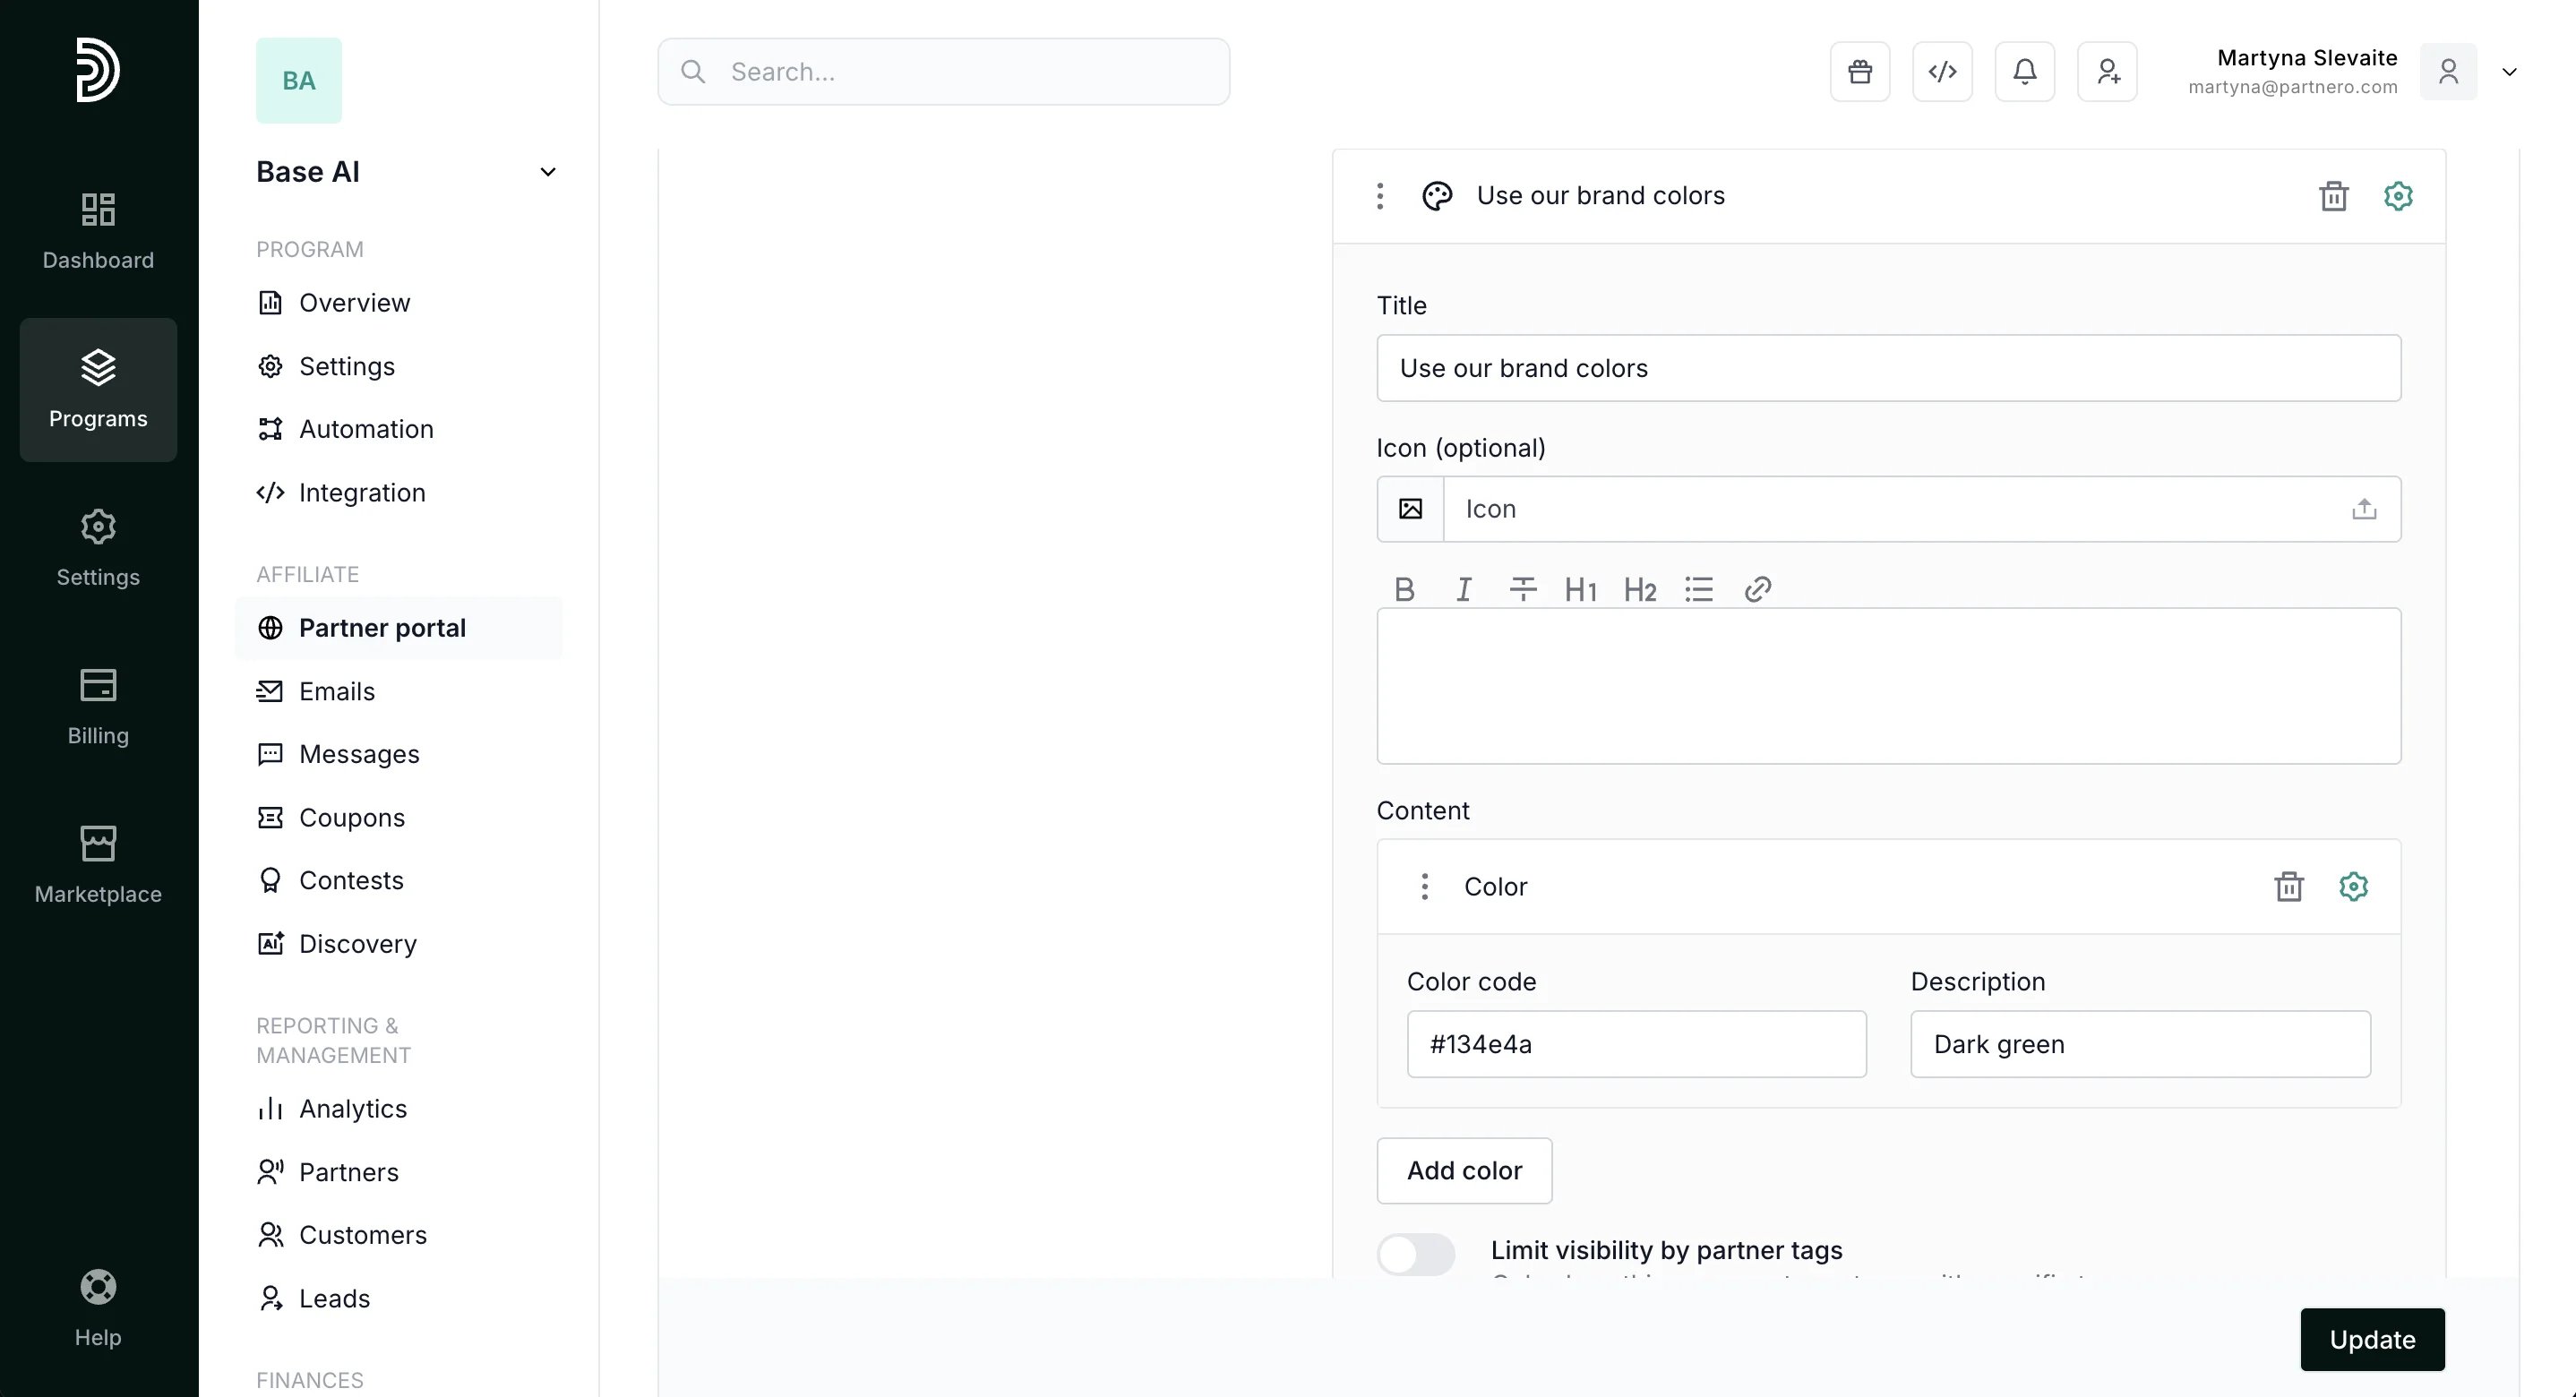 4. Click **Update**.
#### Example from a Partner portal
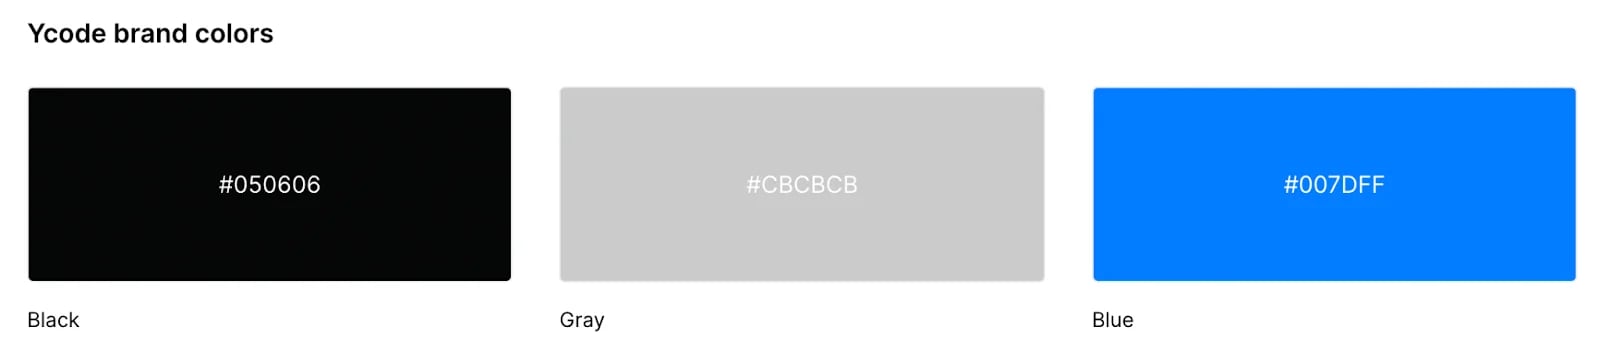
Here’s an example of the Color block with three brand colors added:
4. Click **Update**.
#### Example from a Partner portal
Here’s an example of the Color block with three brand colors added:
 ***
This documentation is built and hosted on [Mintlify](https://mintlify.com), a developer documentation platform.
***
This documentation is built and hosted on [Mintlify](https://mintlify.com), a developer documentation platform.