Enabling partner sub-accounts
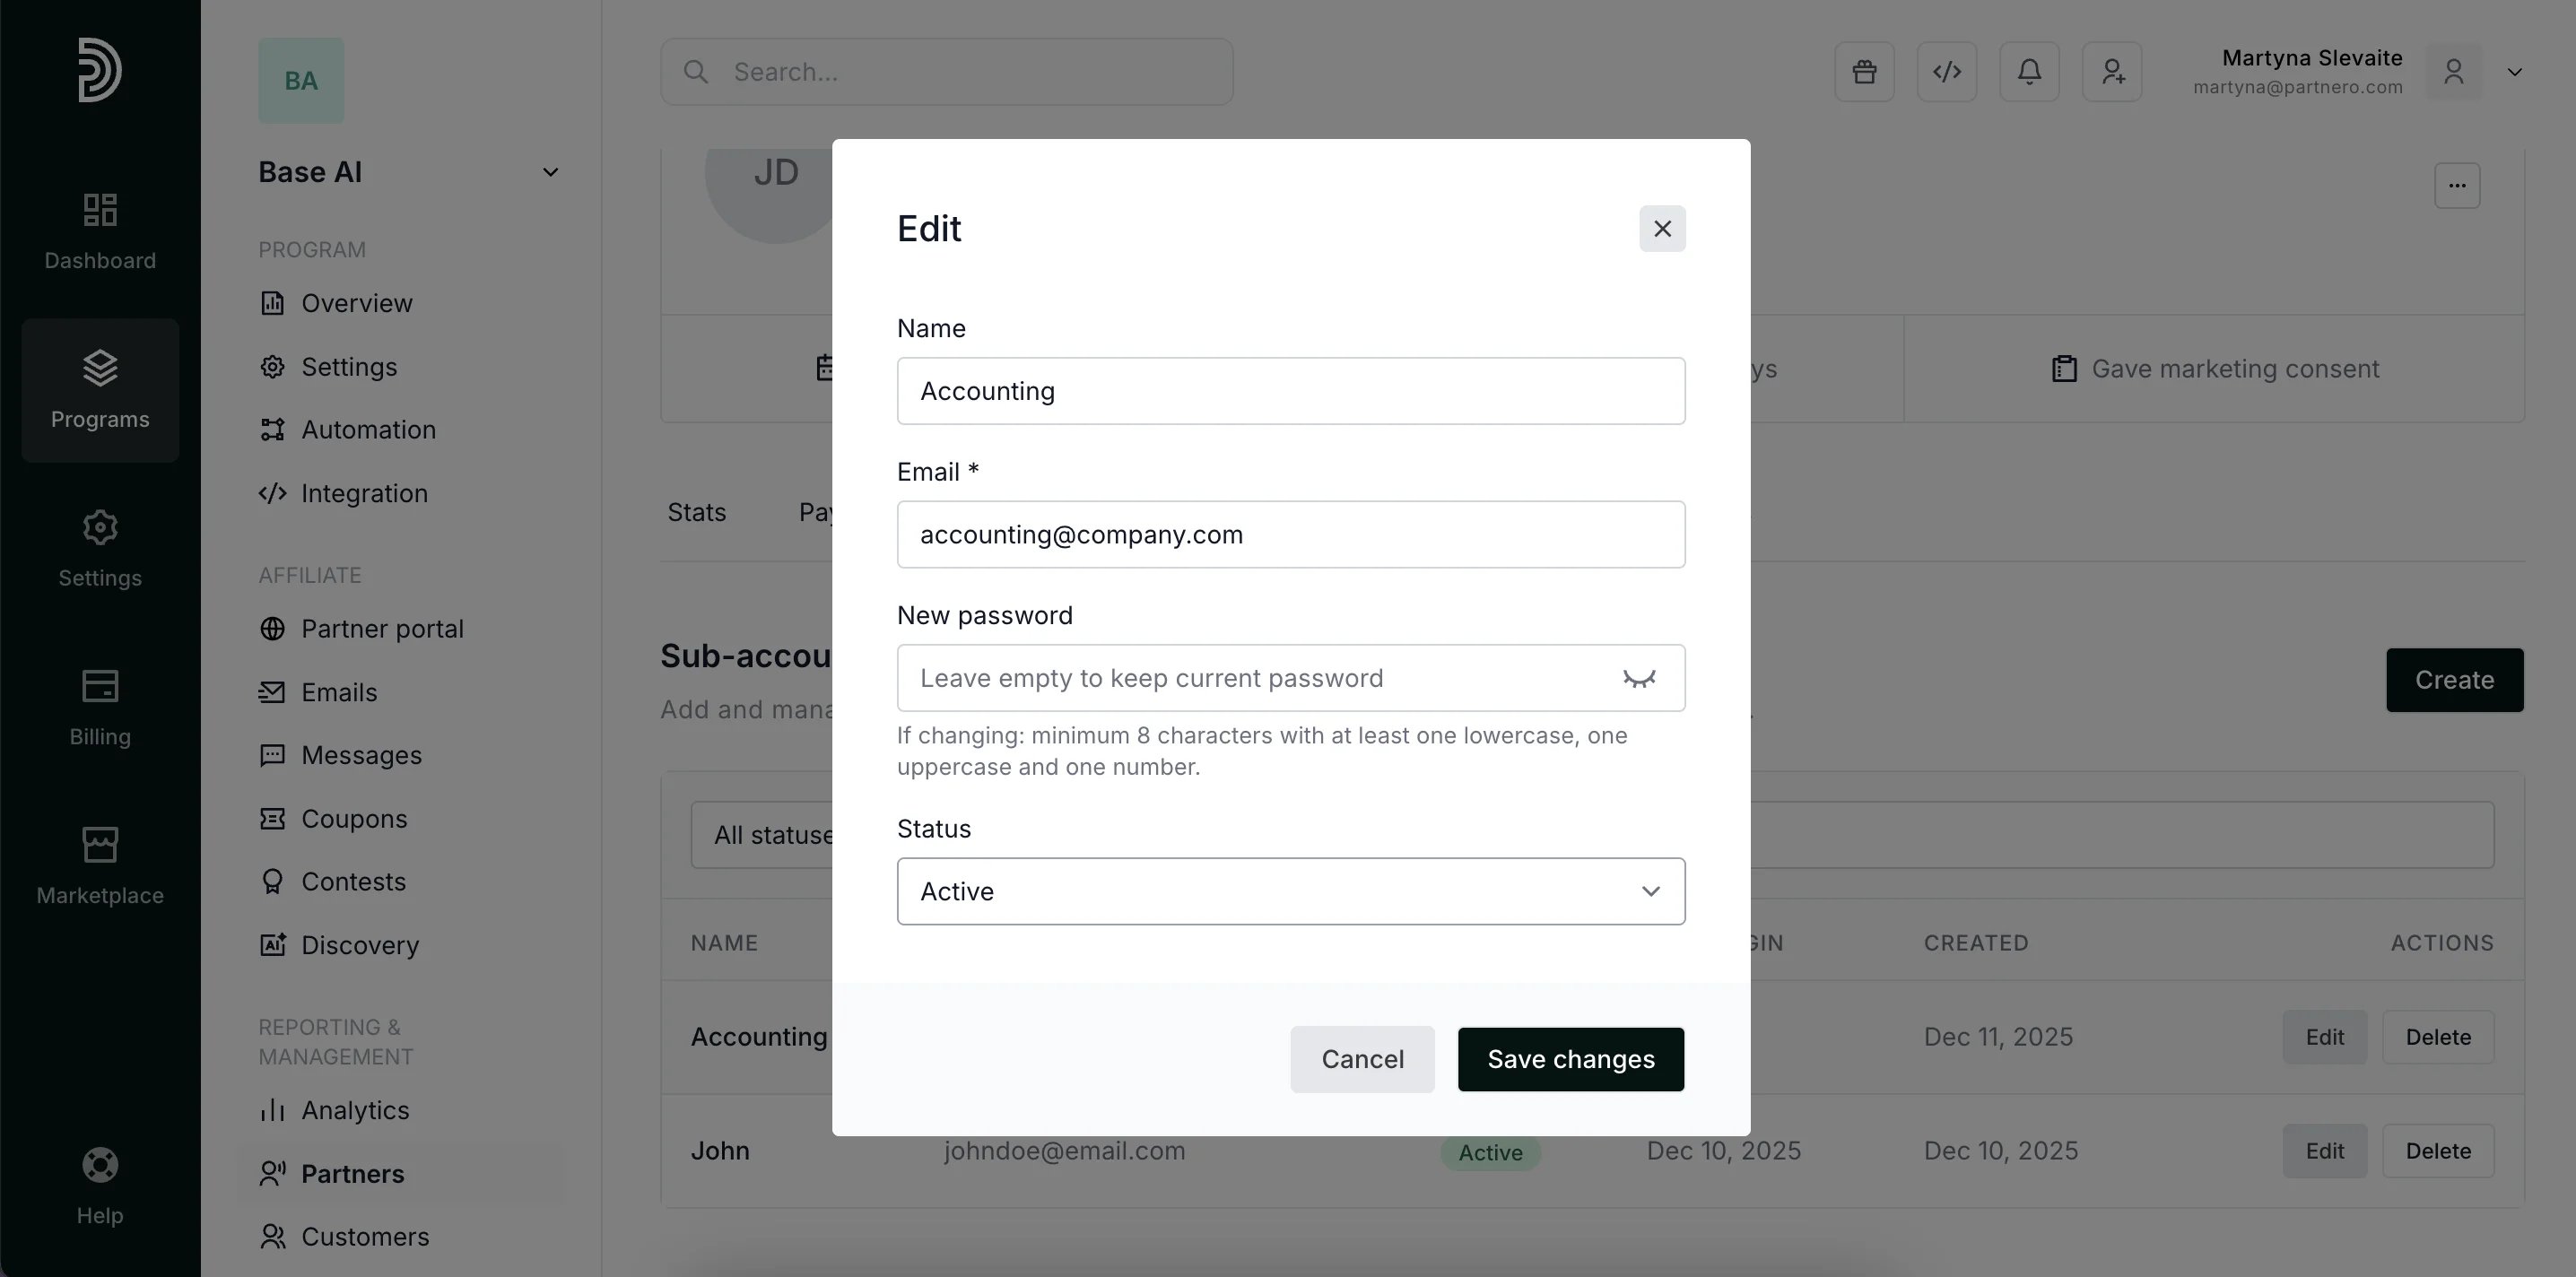
Before your partners can use sub-accounts, the feature must be enabled for your program. To turn it on:- Open your program and navigate to Partner Portal under Affiliate.
- In the Settings → General tab, scroll down to the Behaviour section.
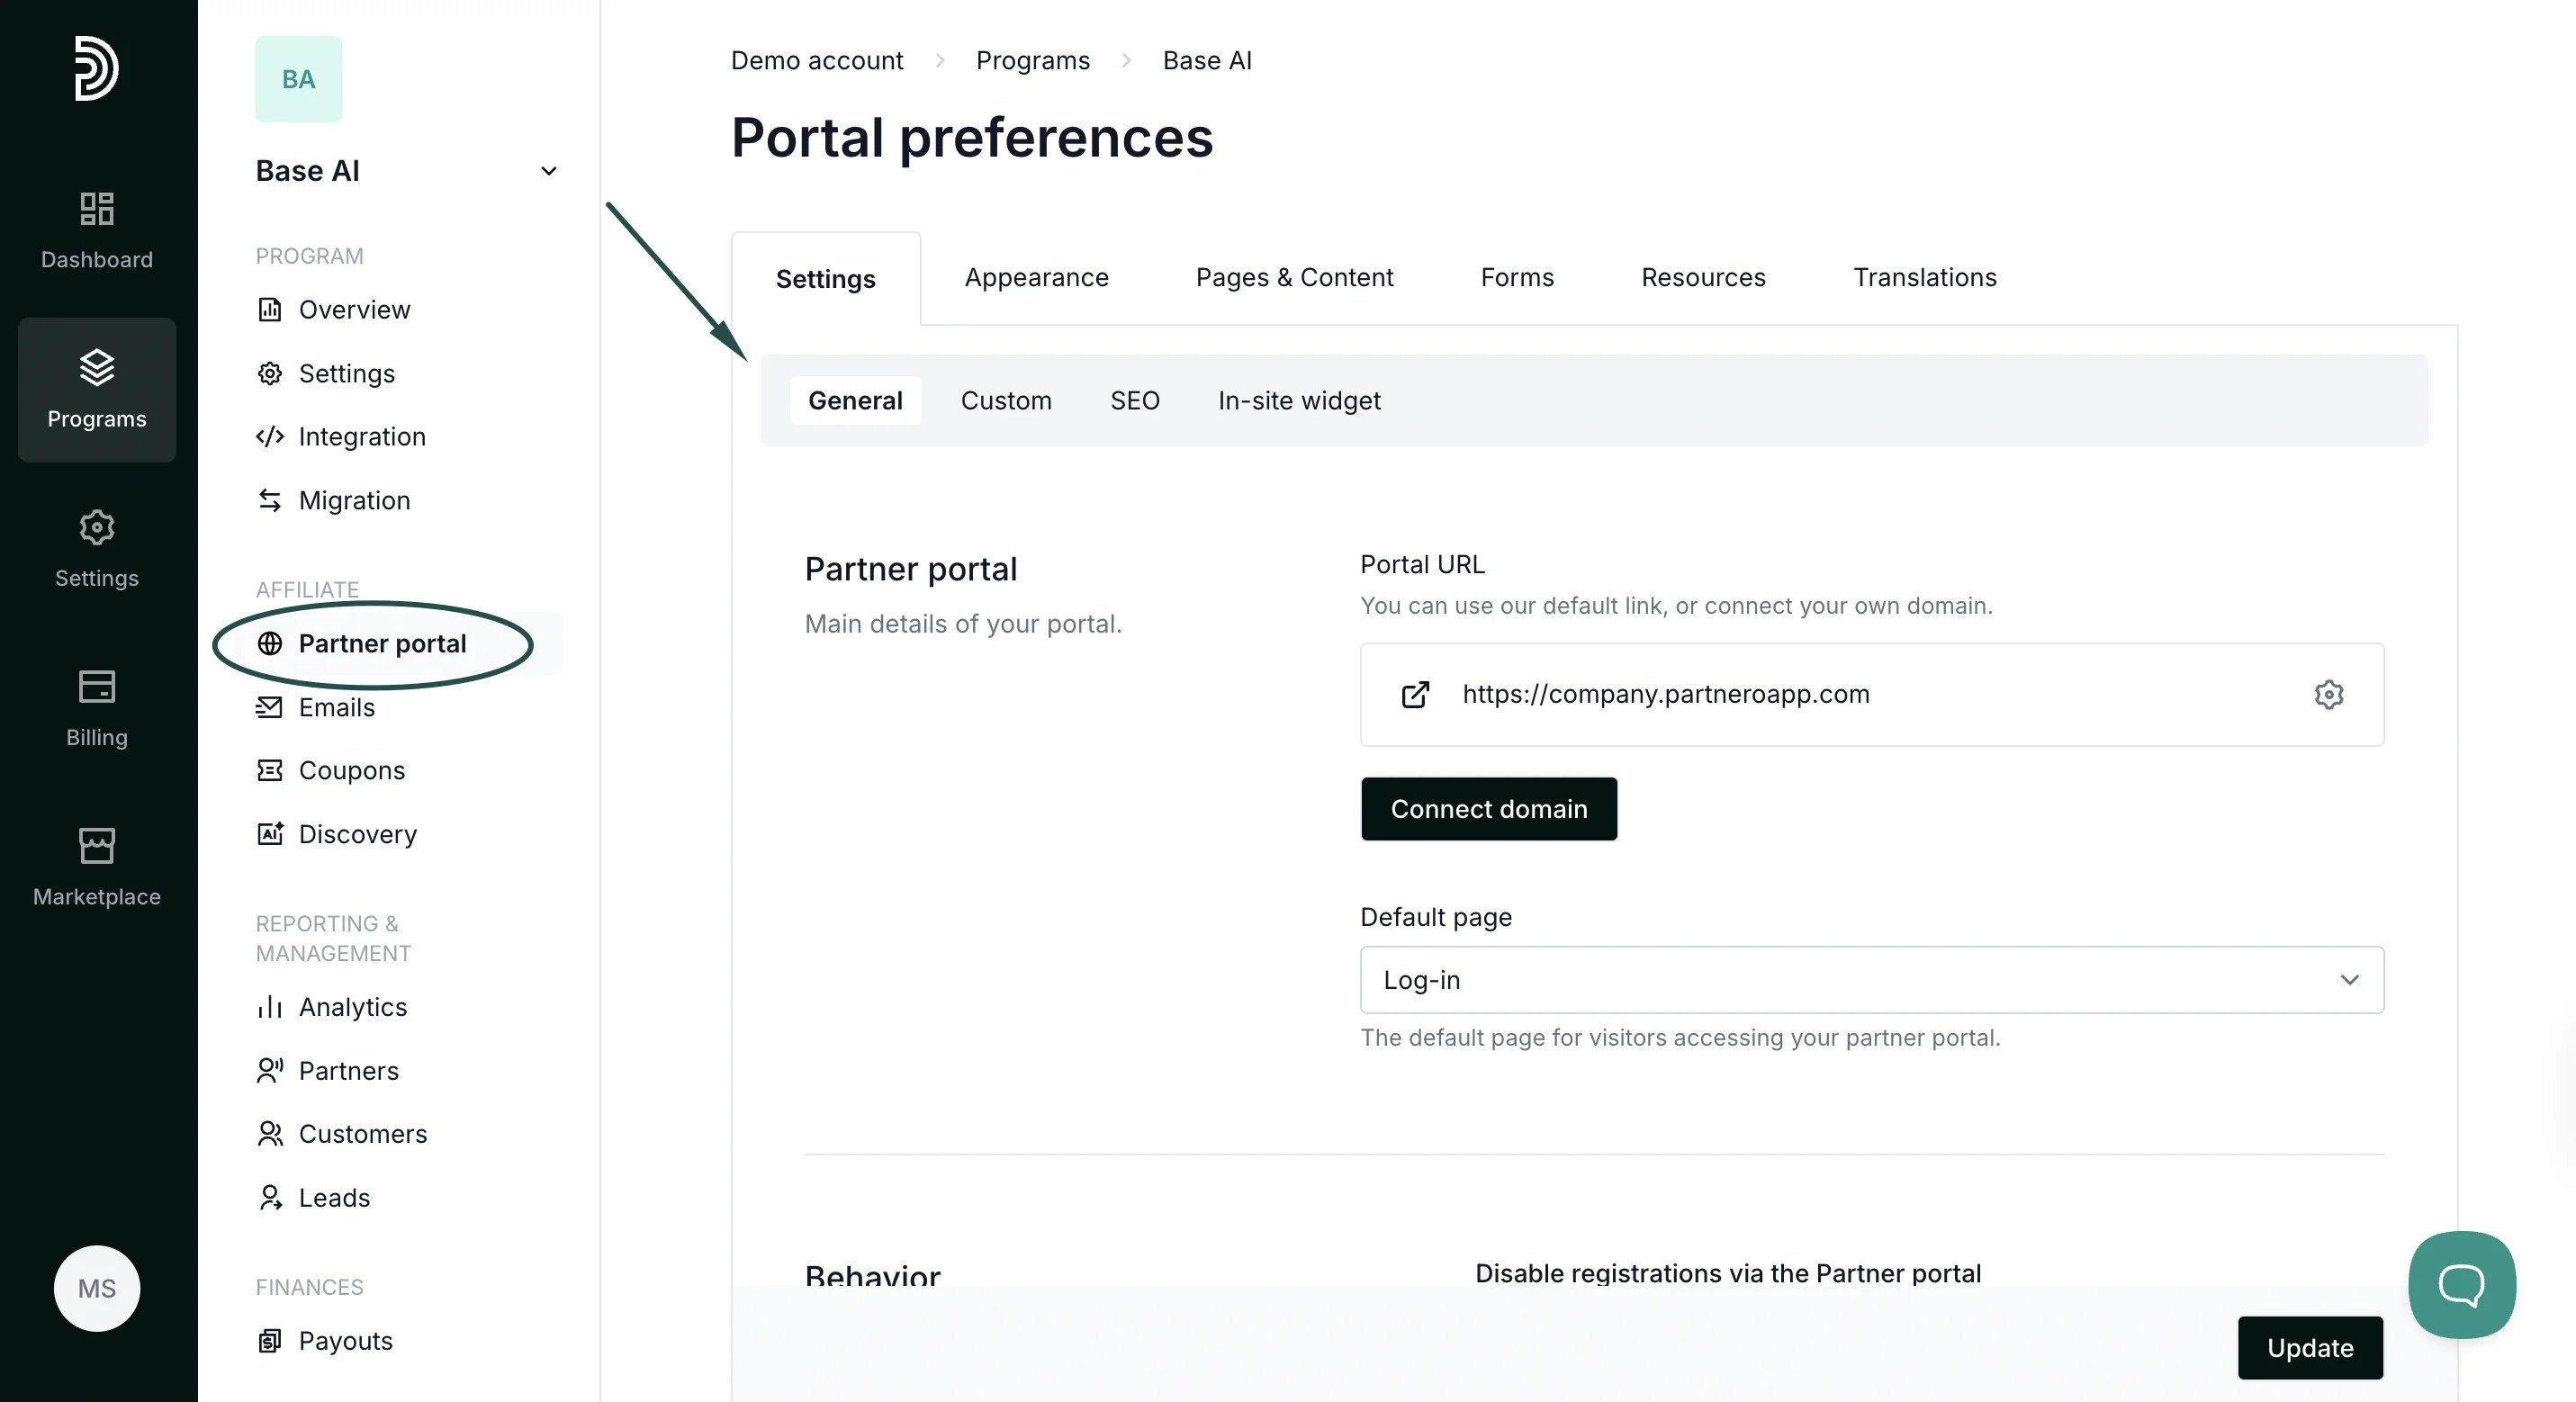
- Toggle Partner Sub-Accounts to enable the feature.
- Click Update to save your changes.
Managing sub-accounts as a partner
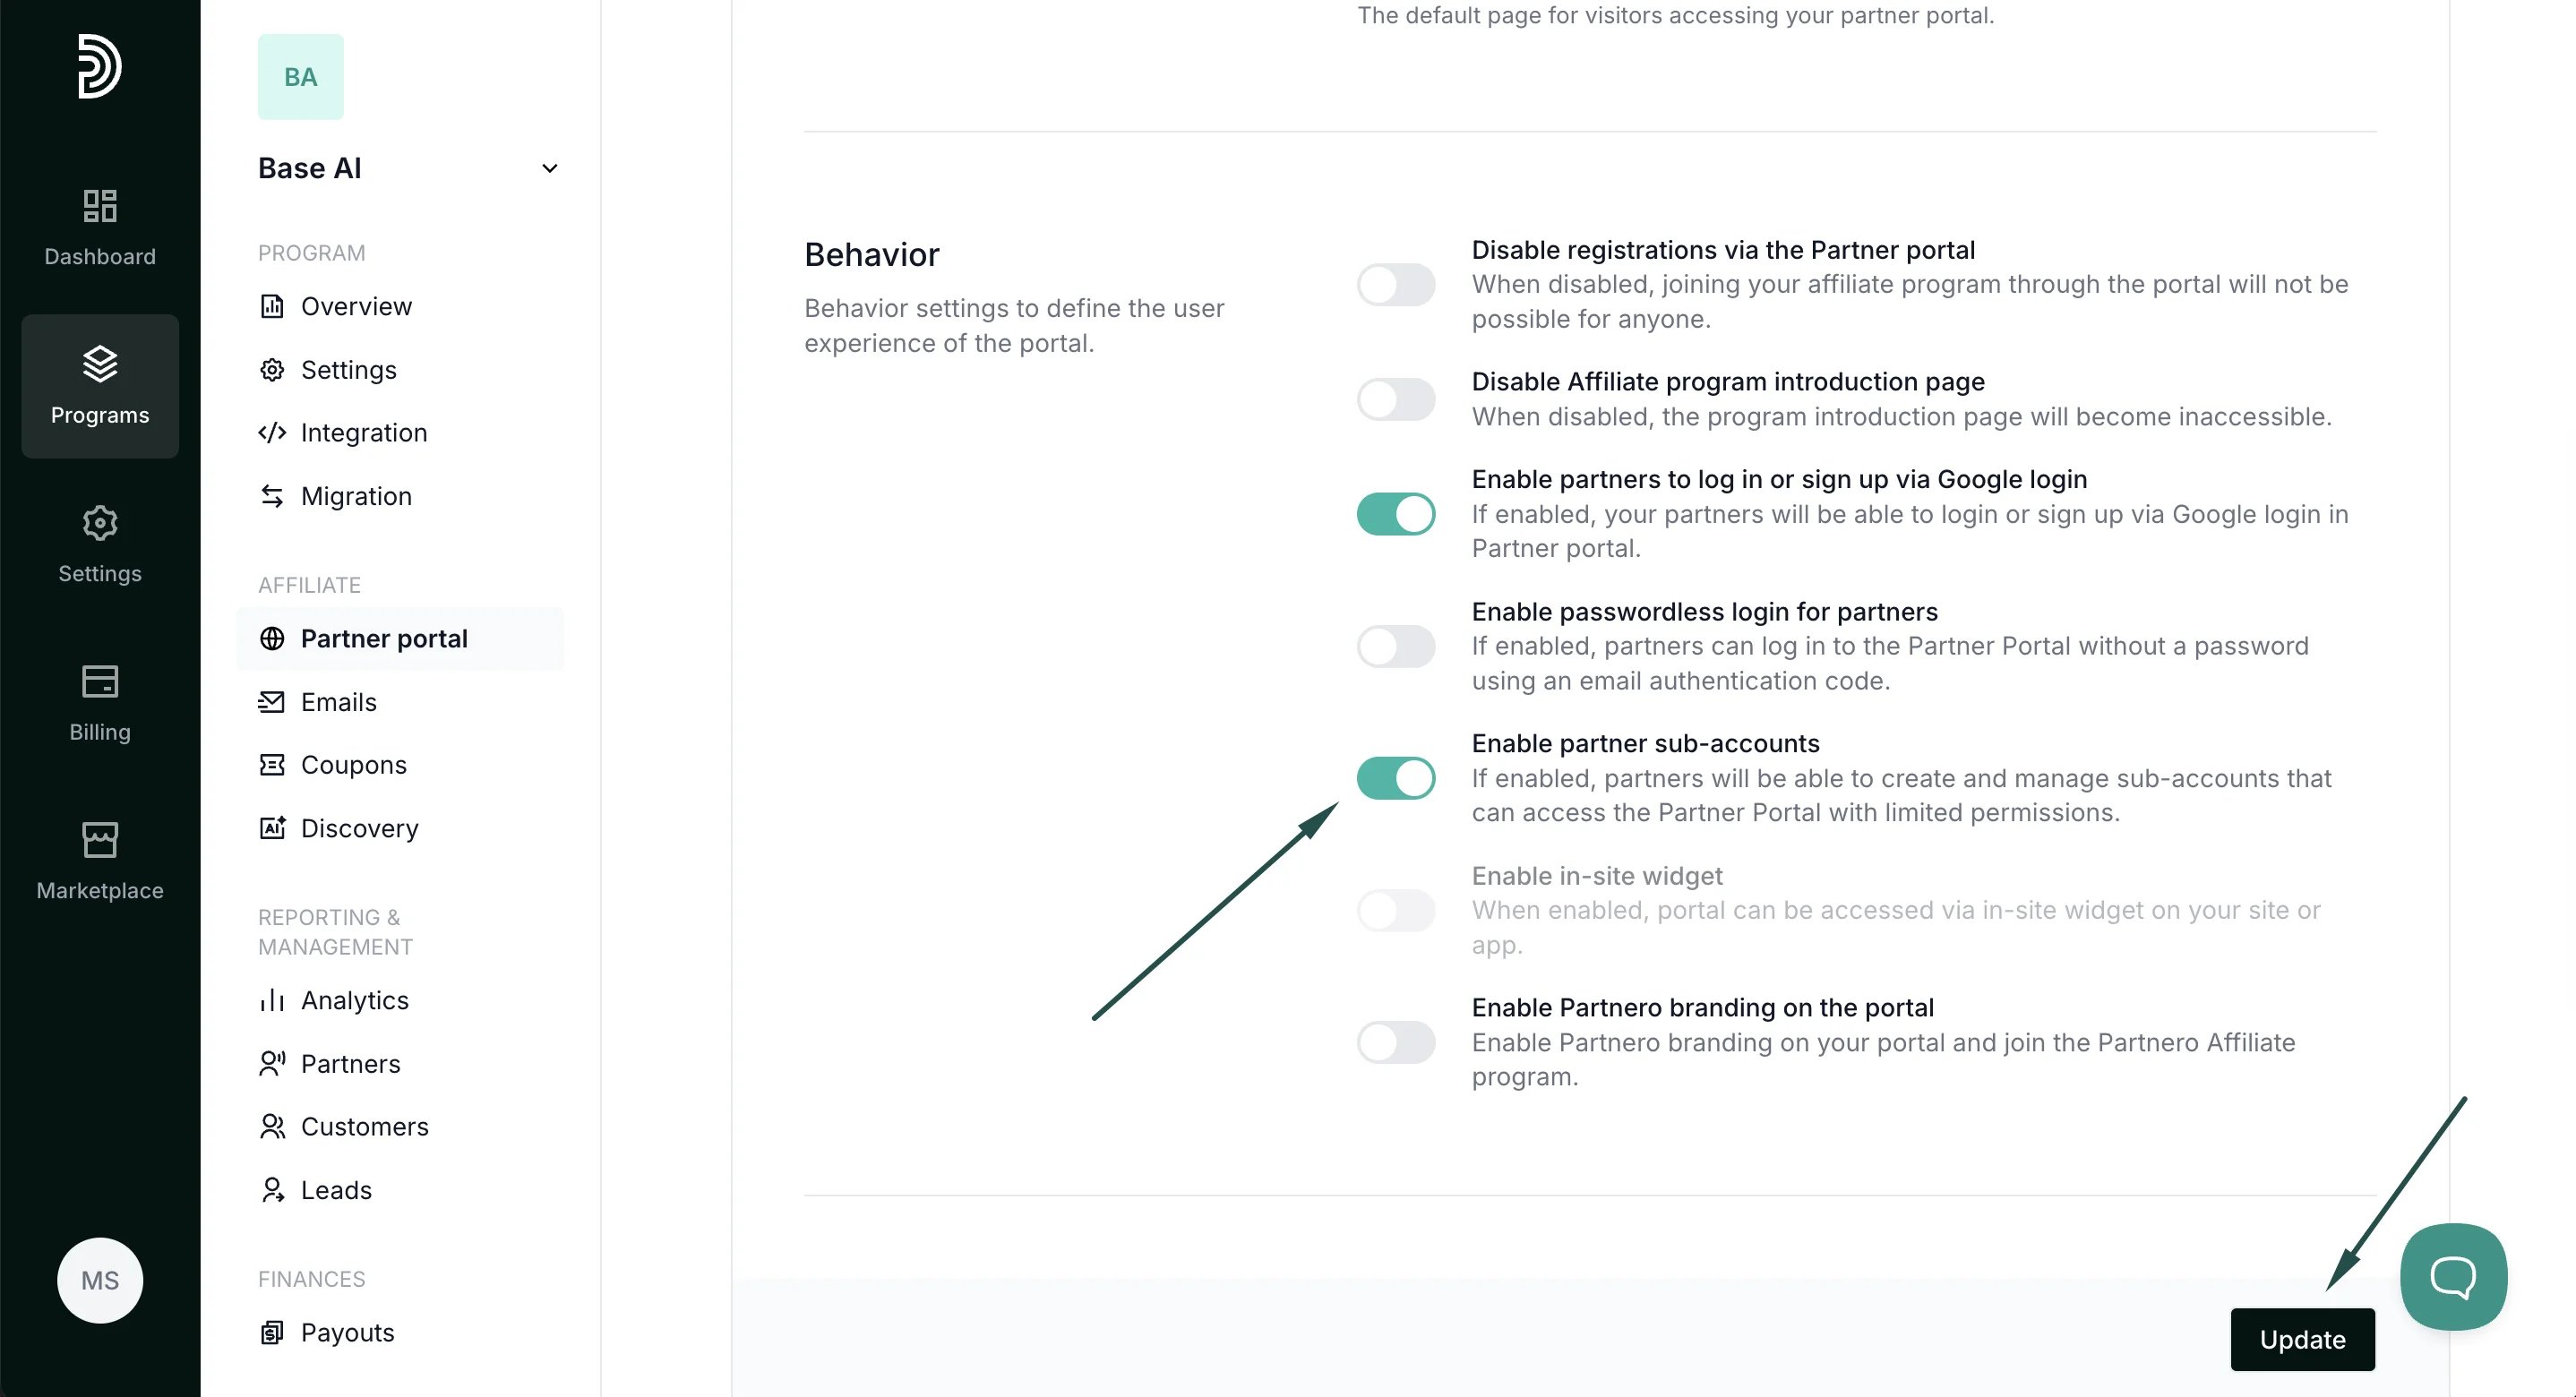
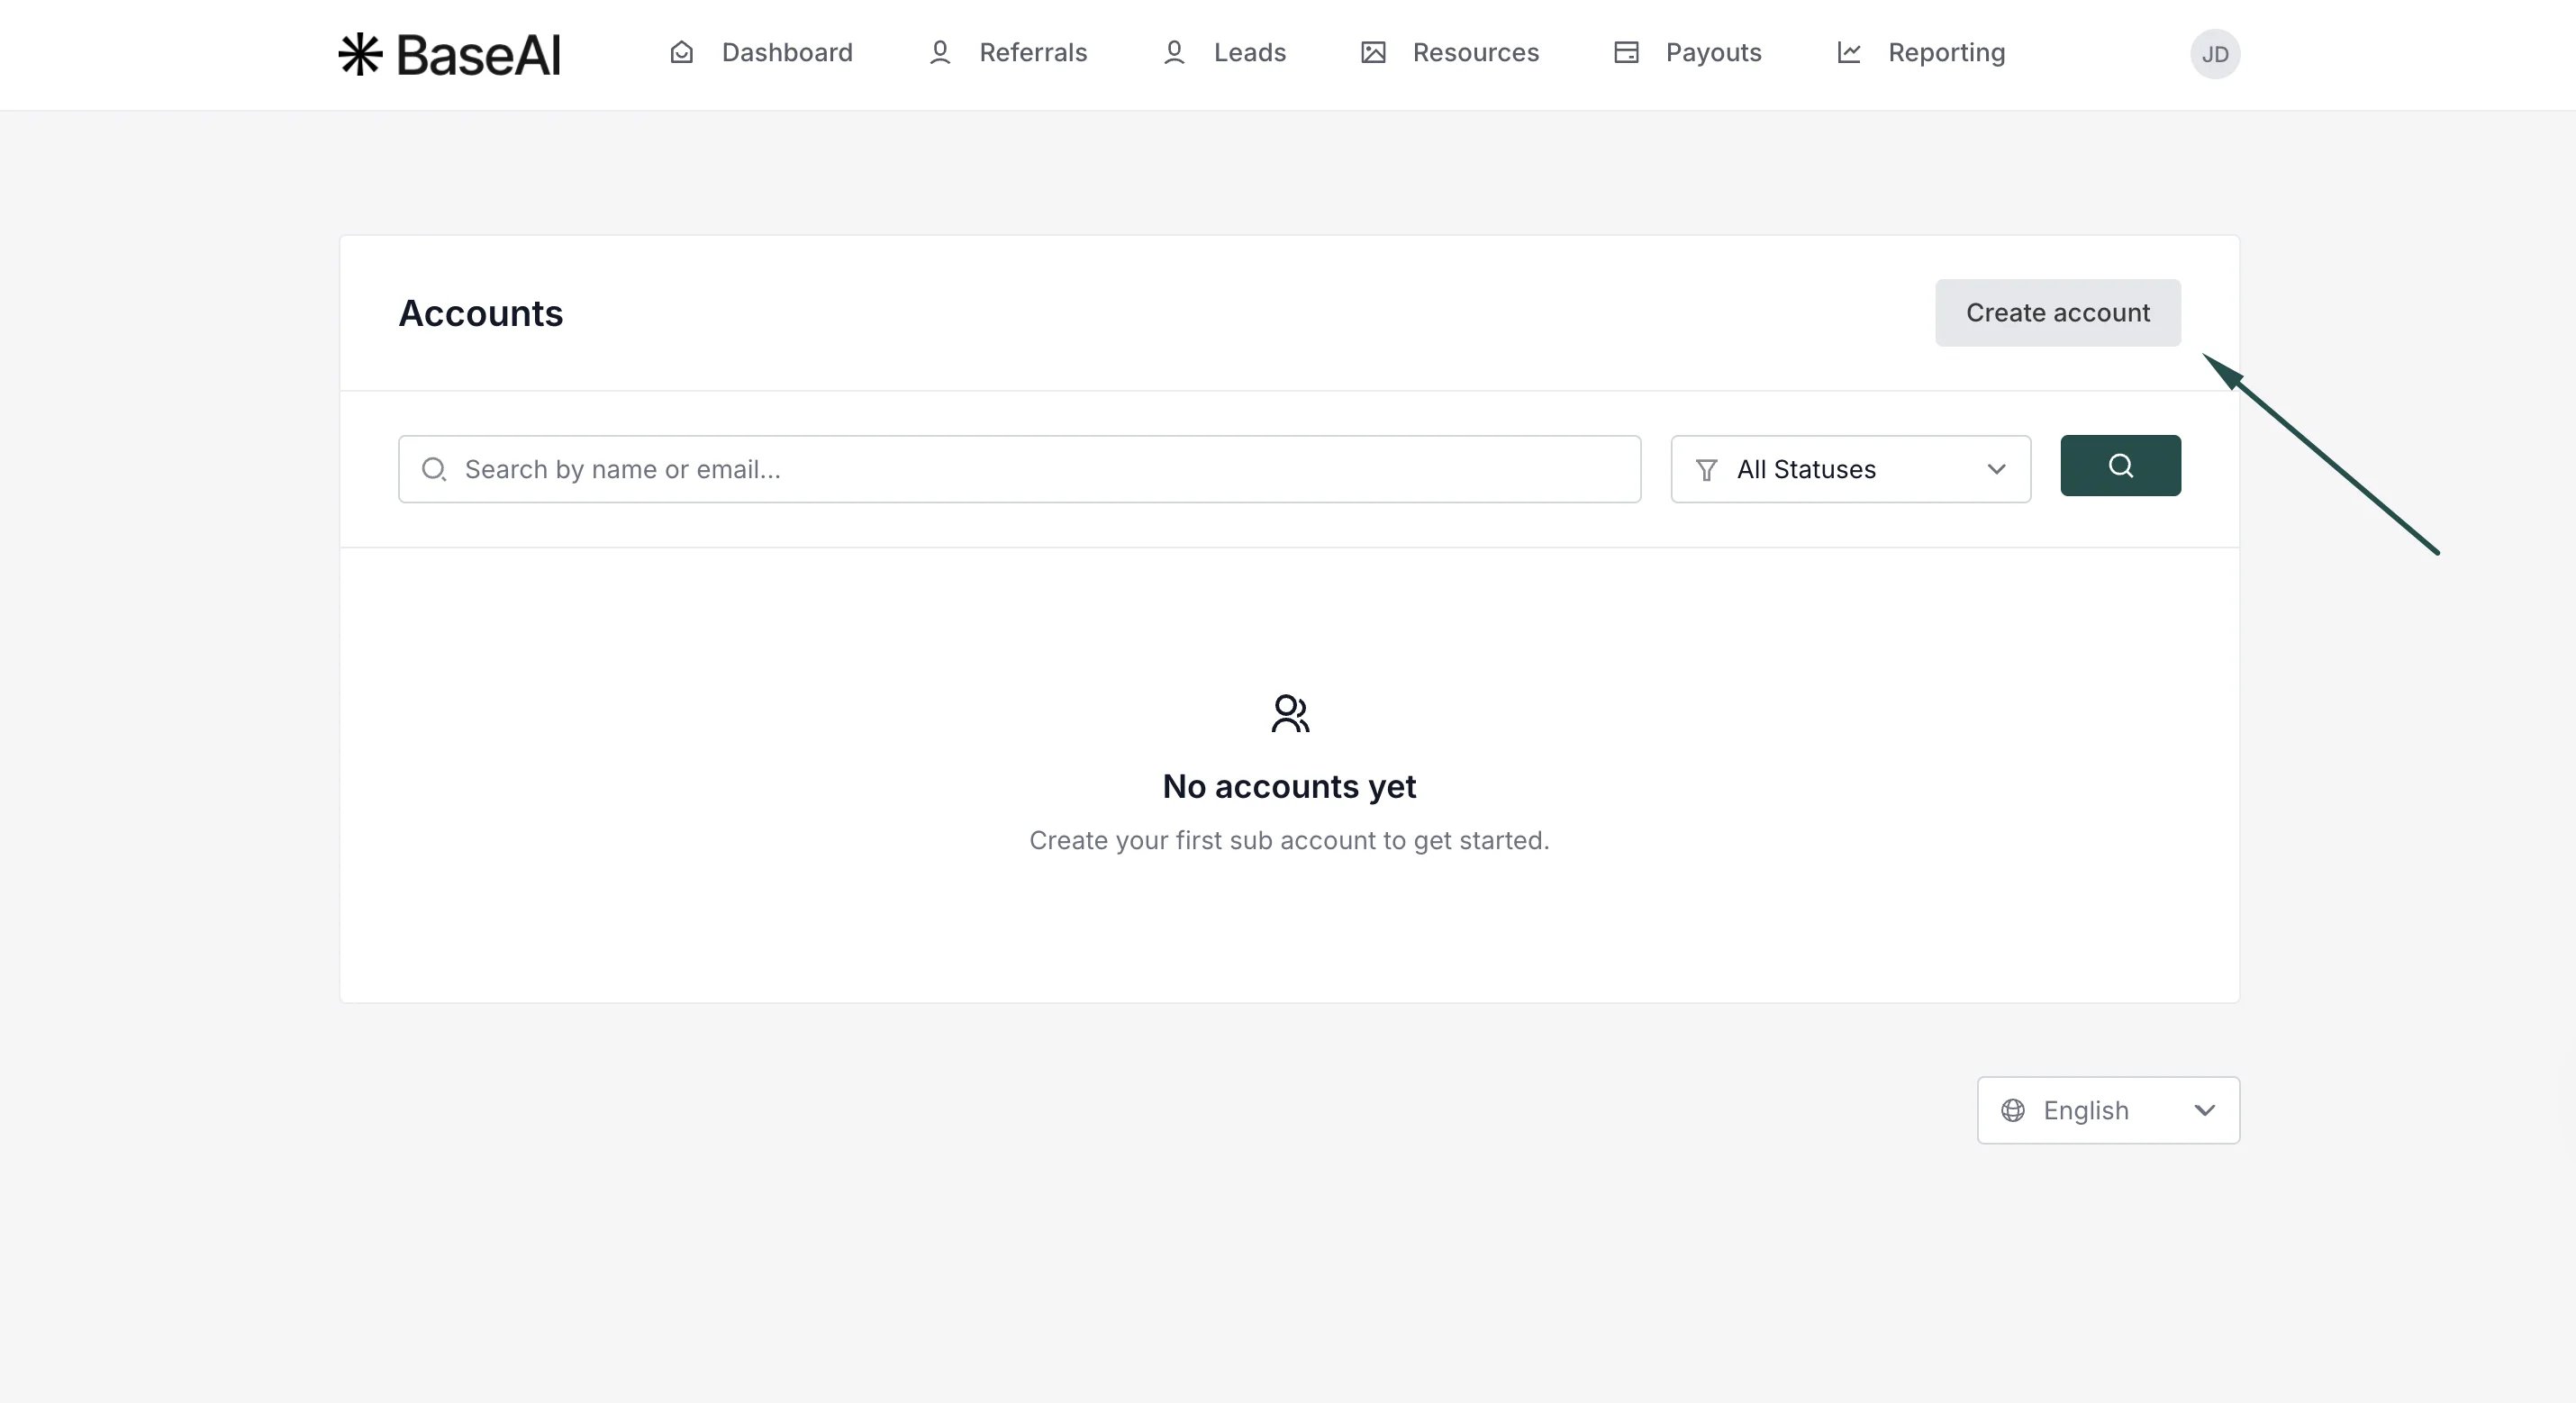
Once enabled, partners will see a new Accounts section in the Partner Portal where they can invite and manage sub-users. To invite a new user:- Click on your profile, then select Accounts.
- Click Create Account.
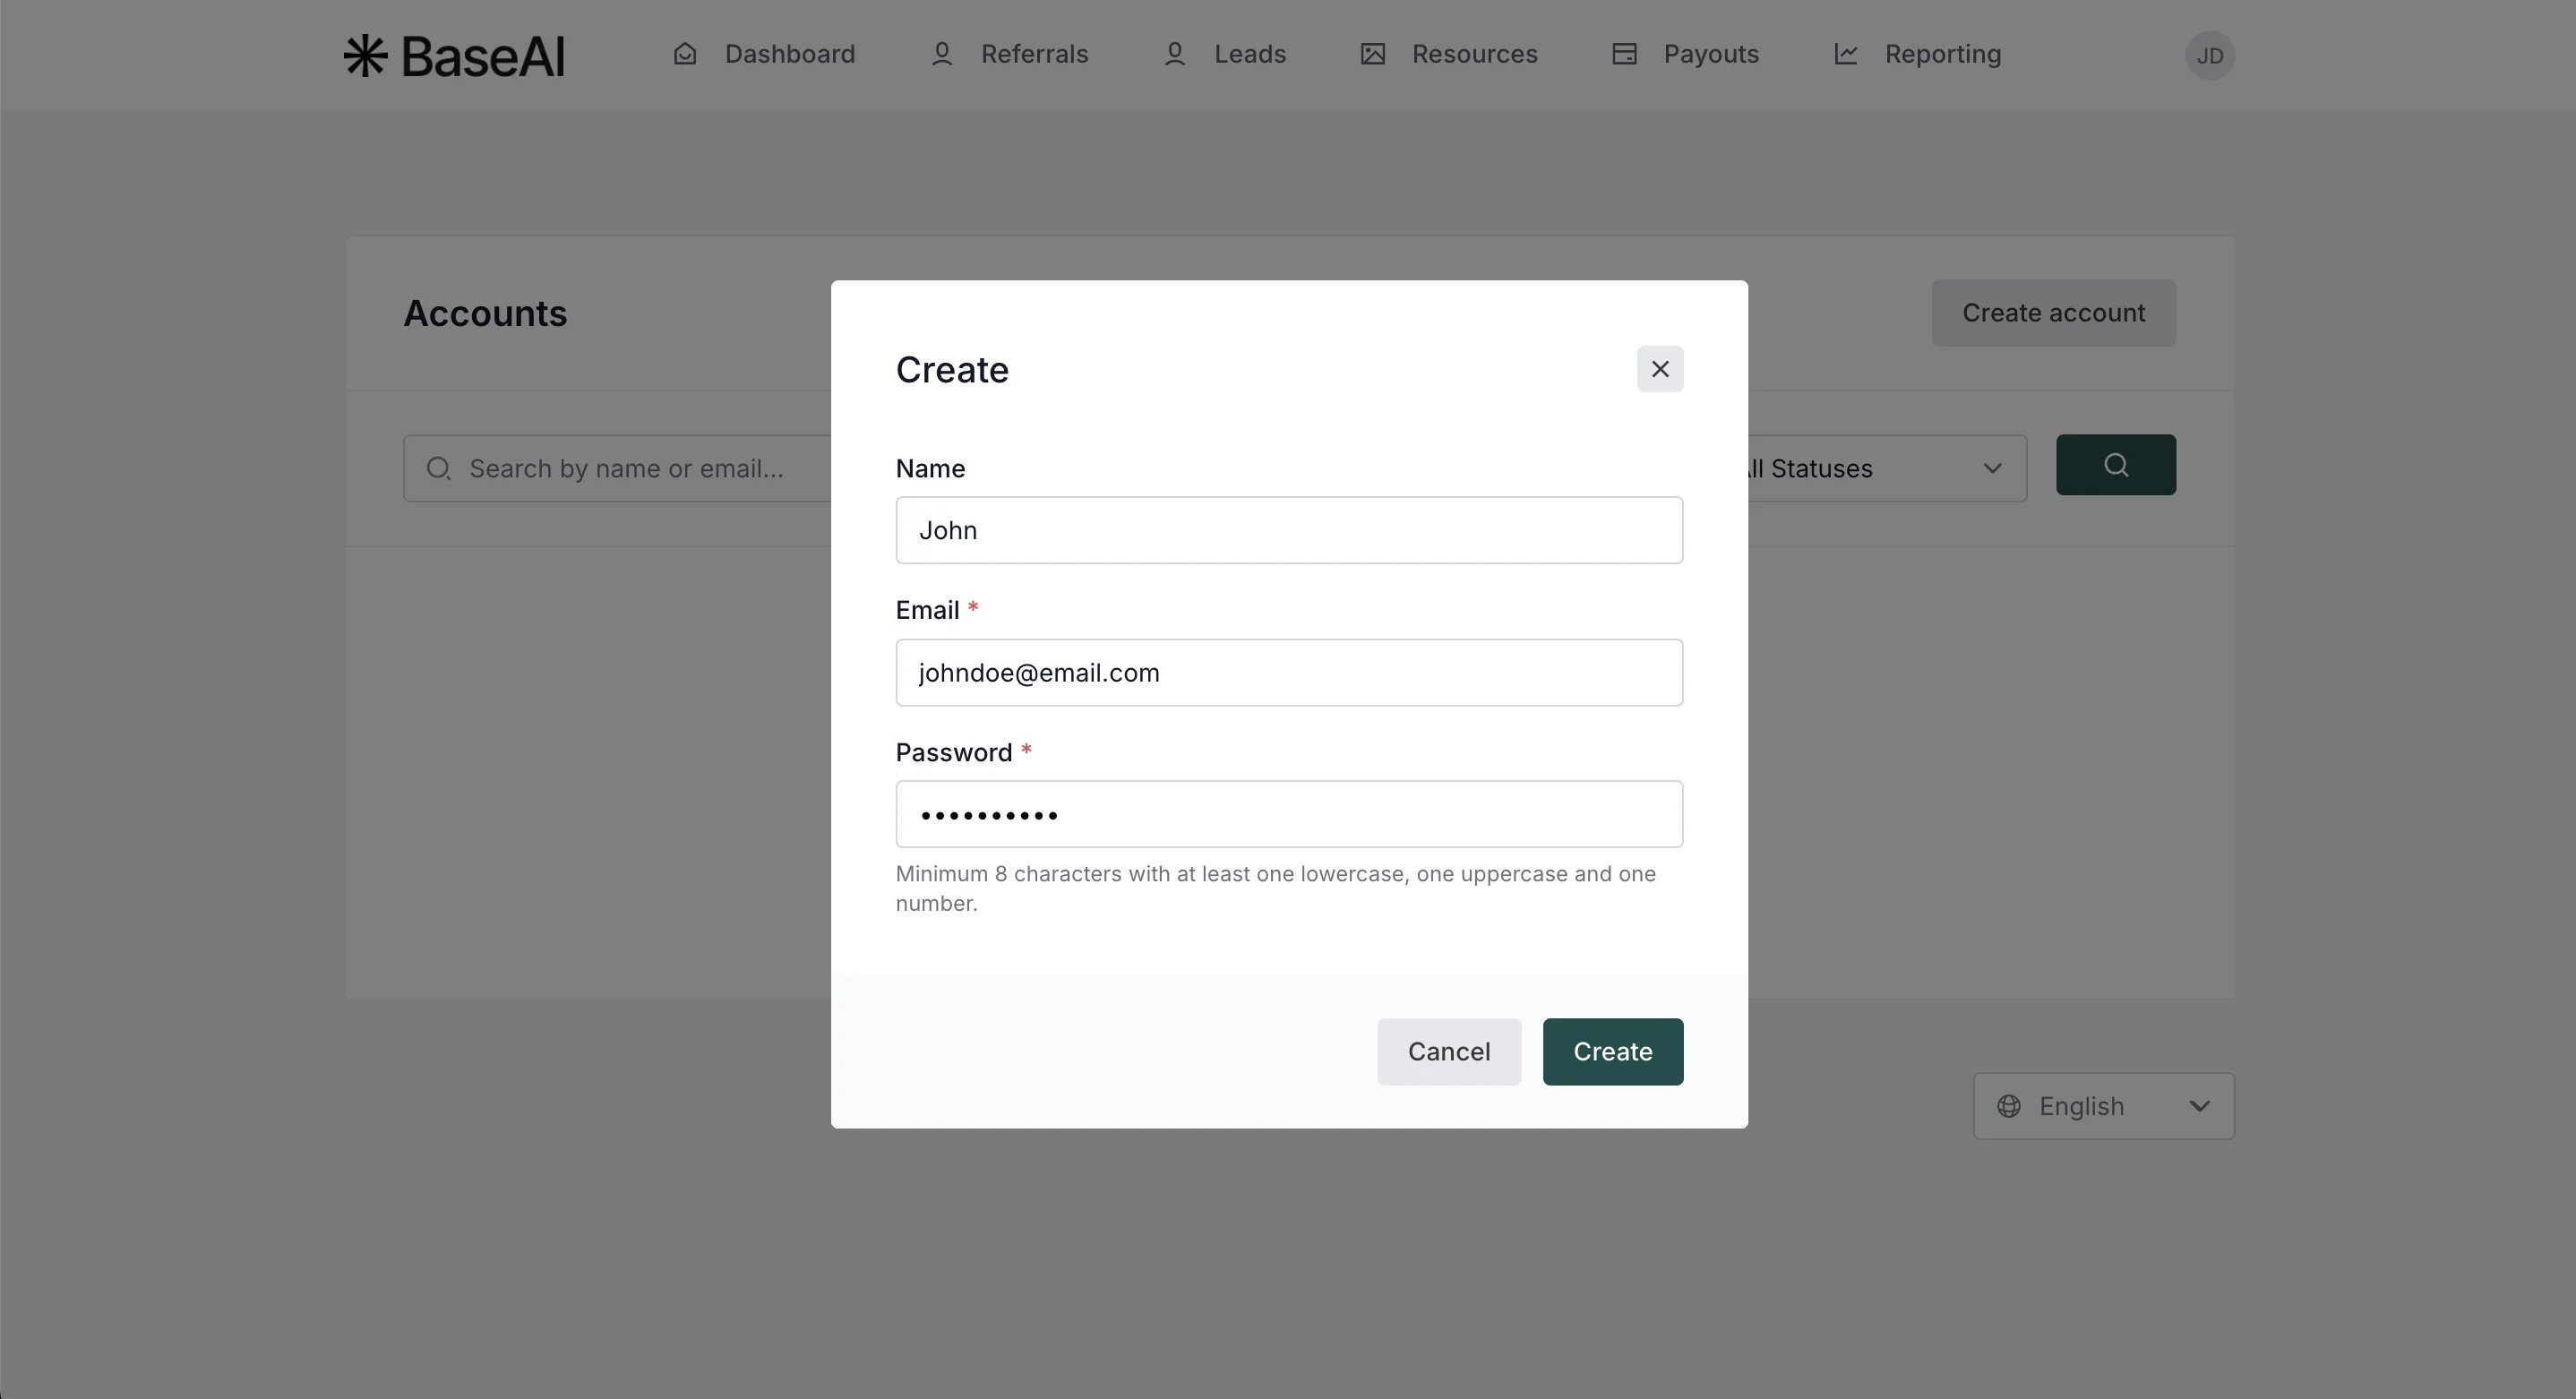
- Enter the name (optional), email address and password. Click Create.
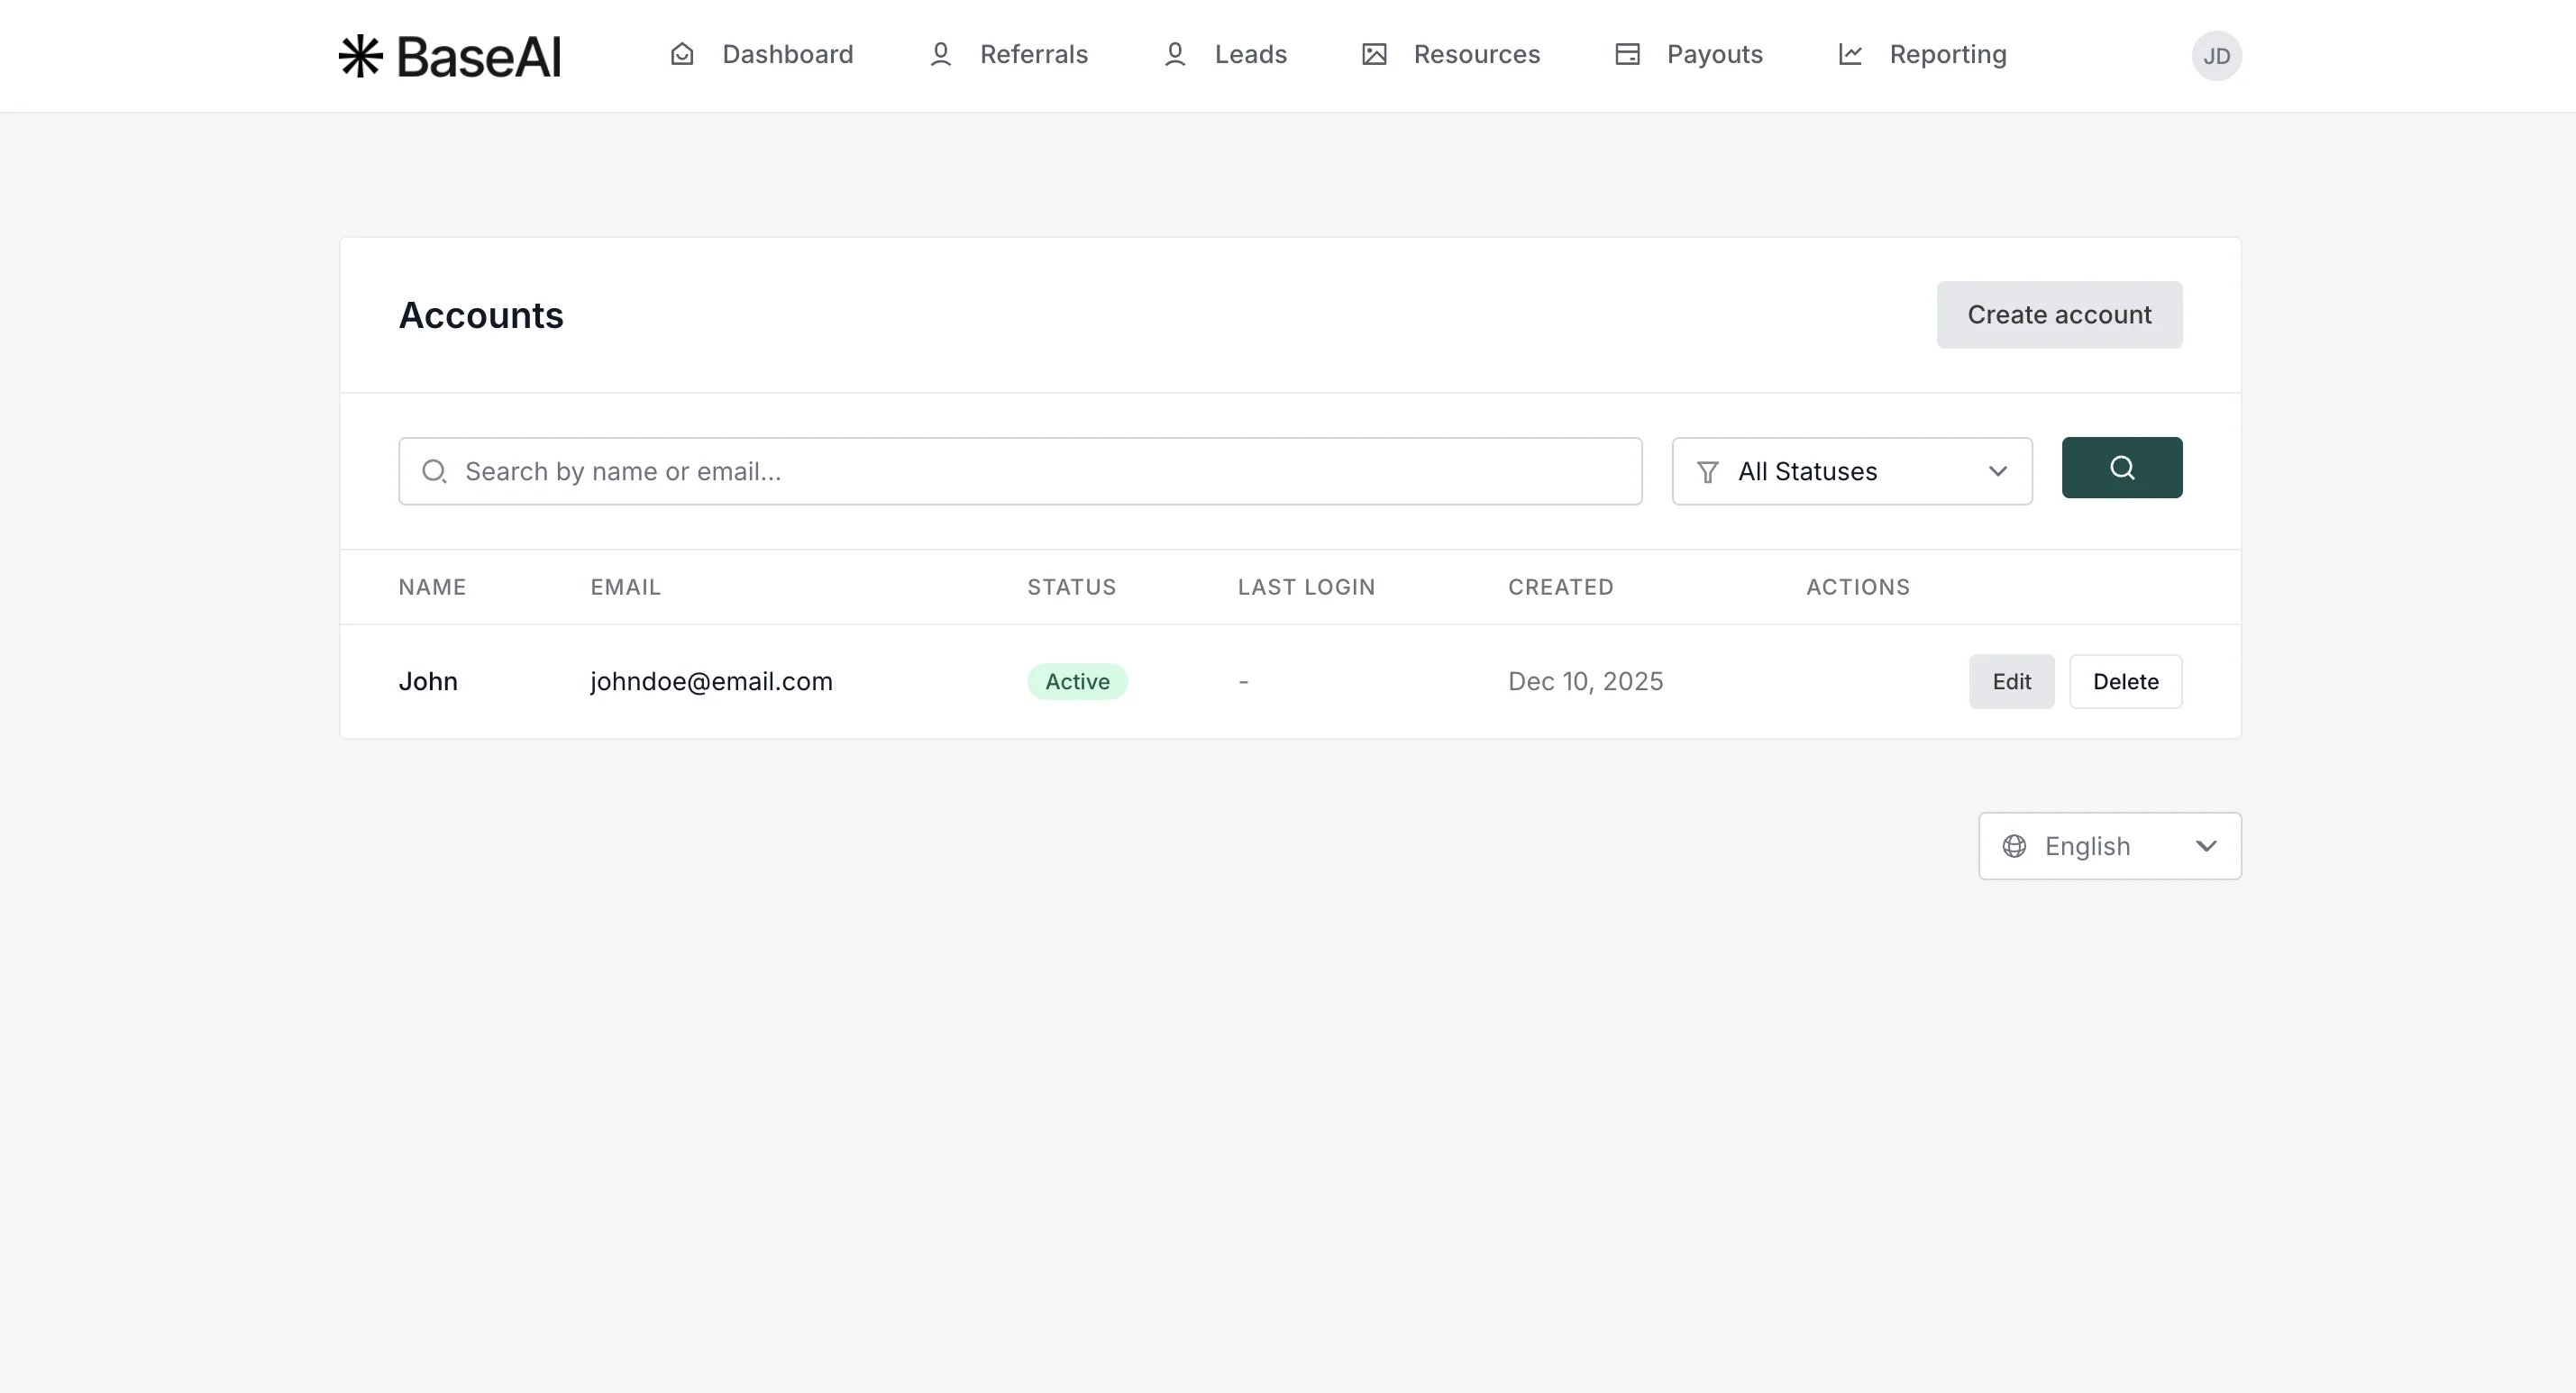
- You’ll see the newly created sub-account. You can edit the details, suspend, or delete the subaccount here.
Sub-account user login
Sub-account users will have a separate login page, that is accessible through the main partner portal login: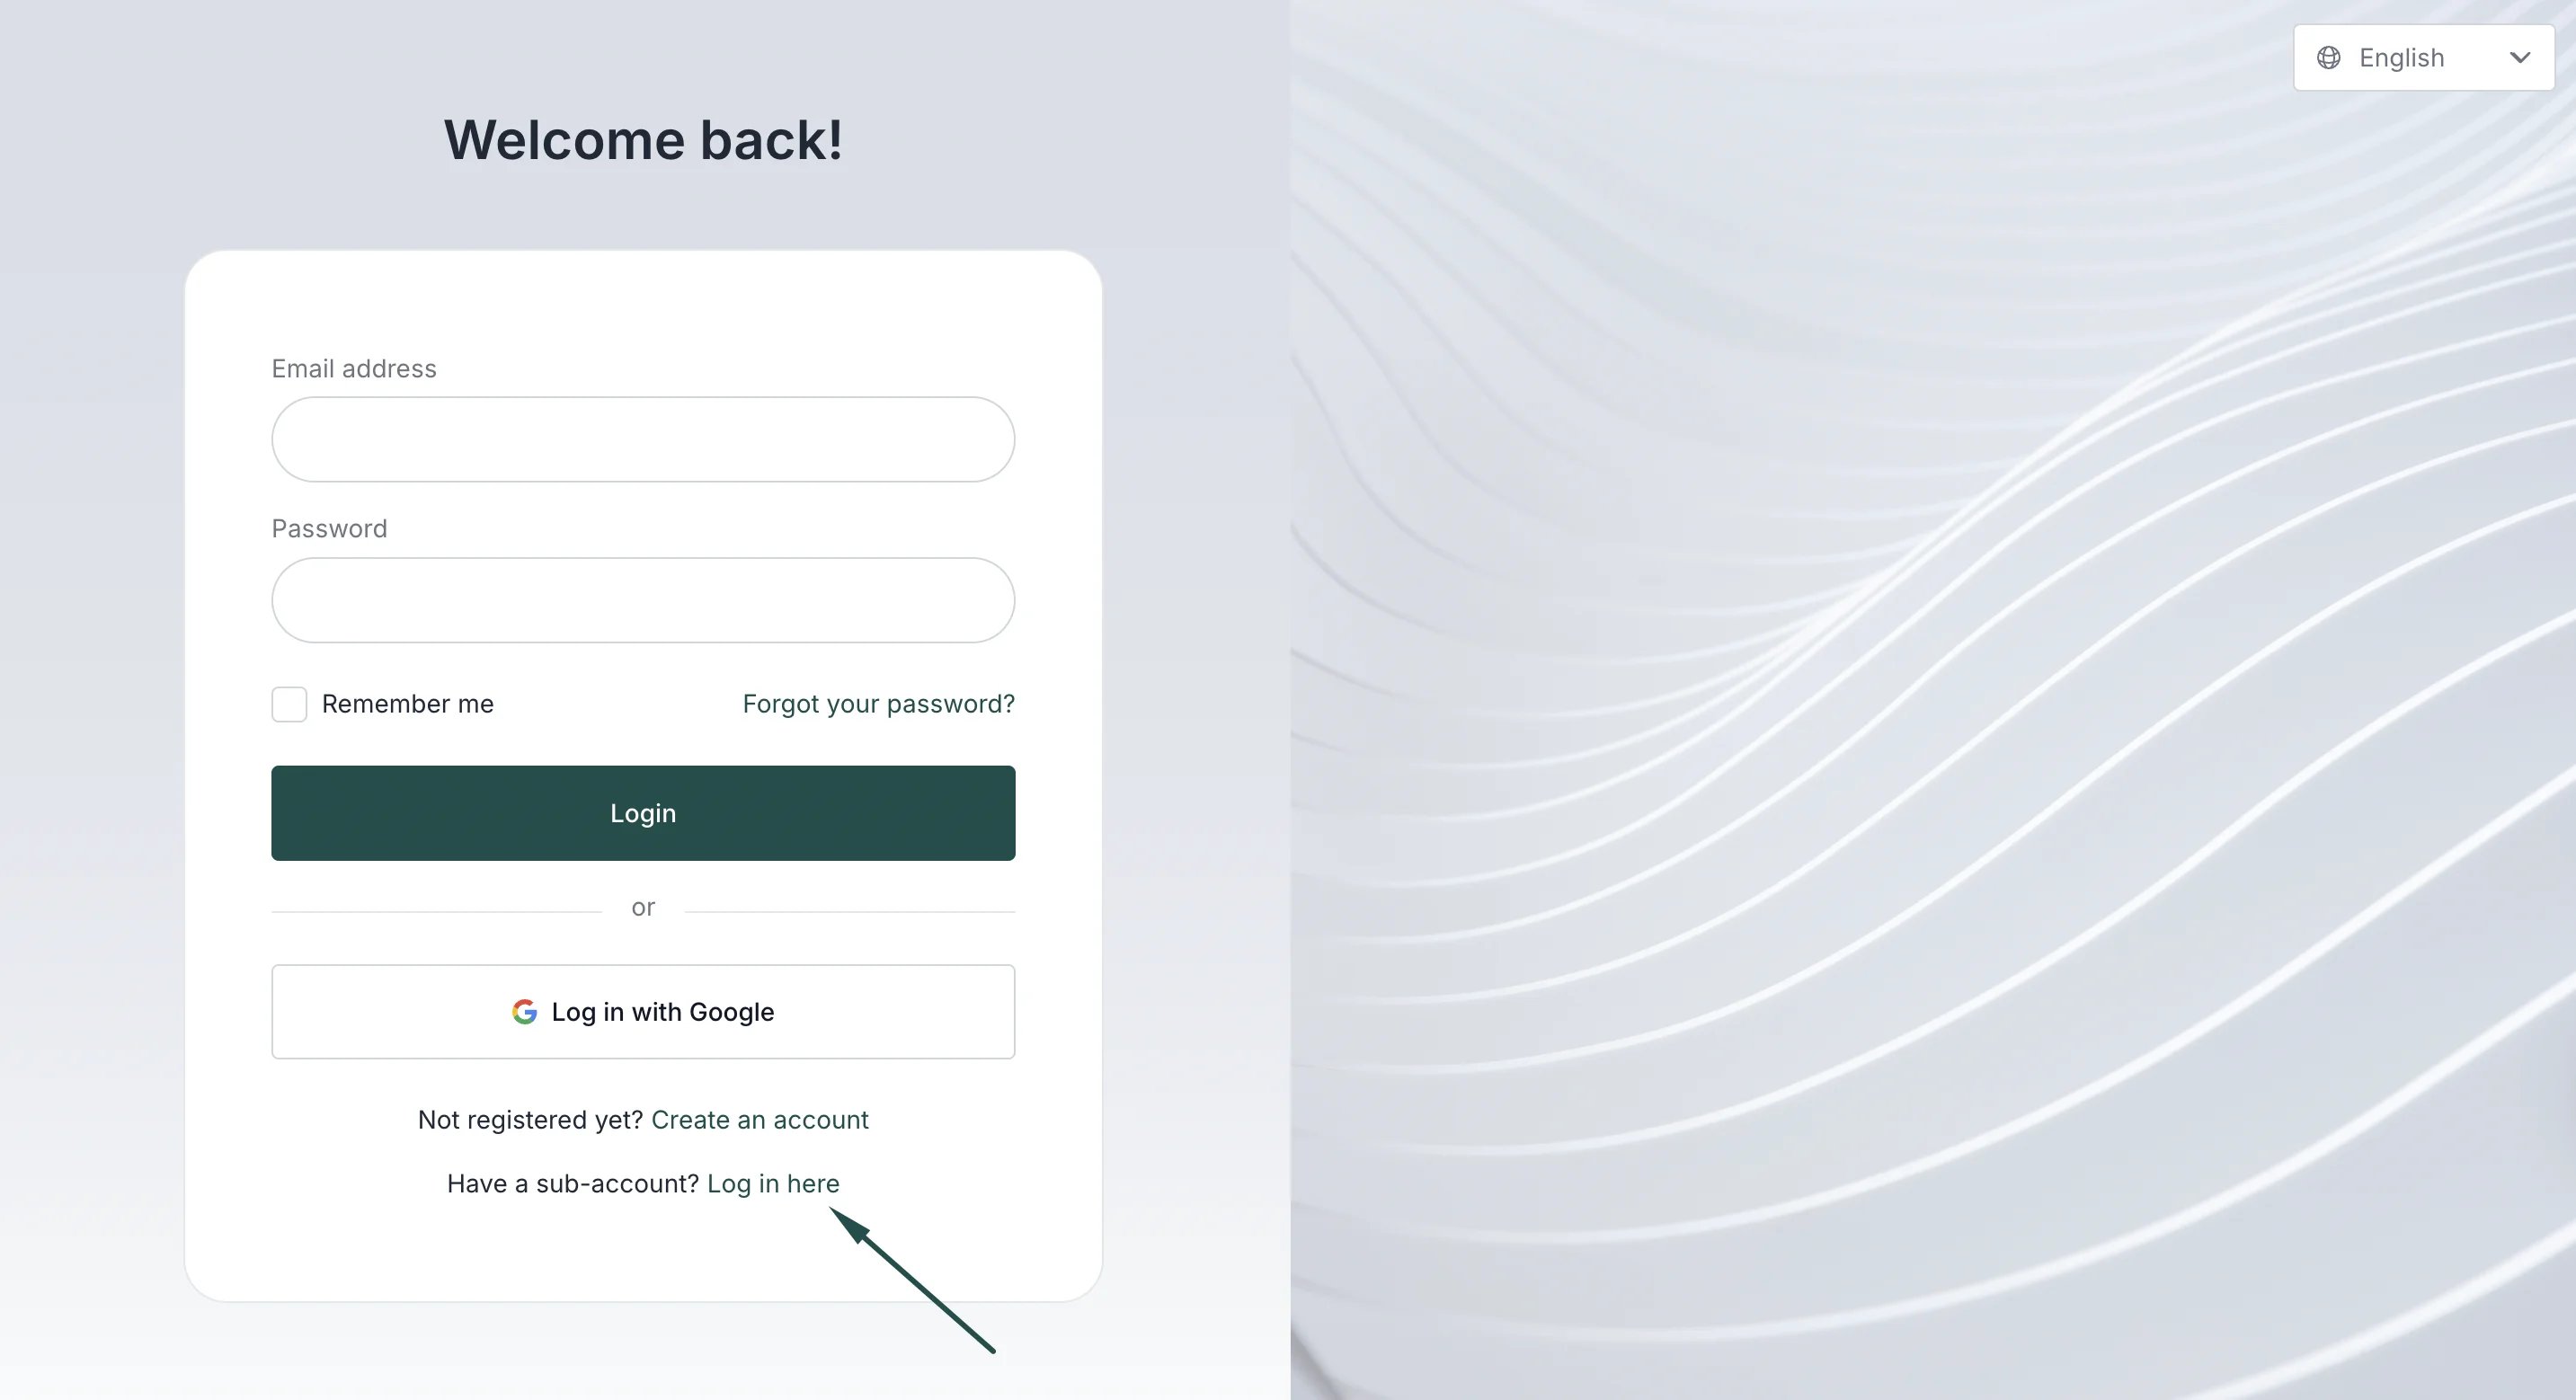
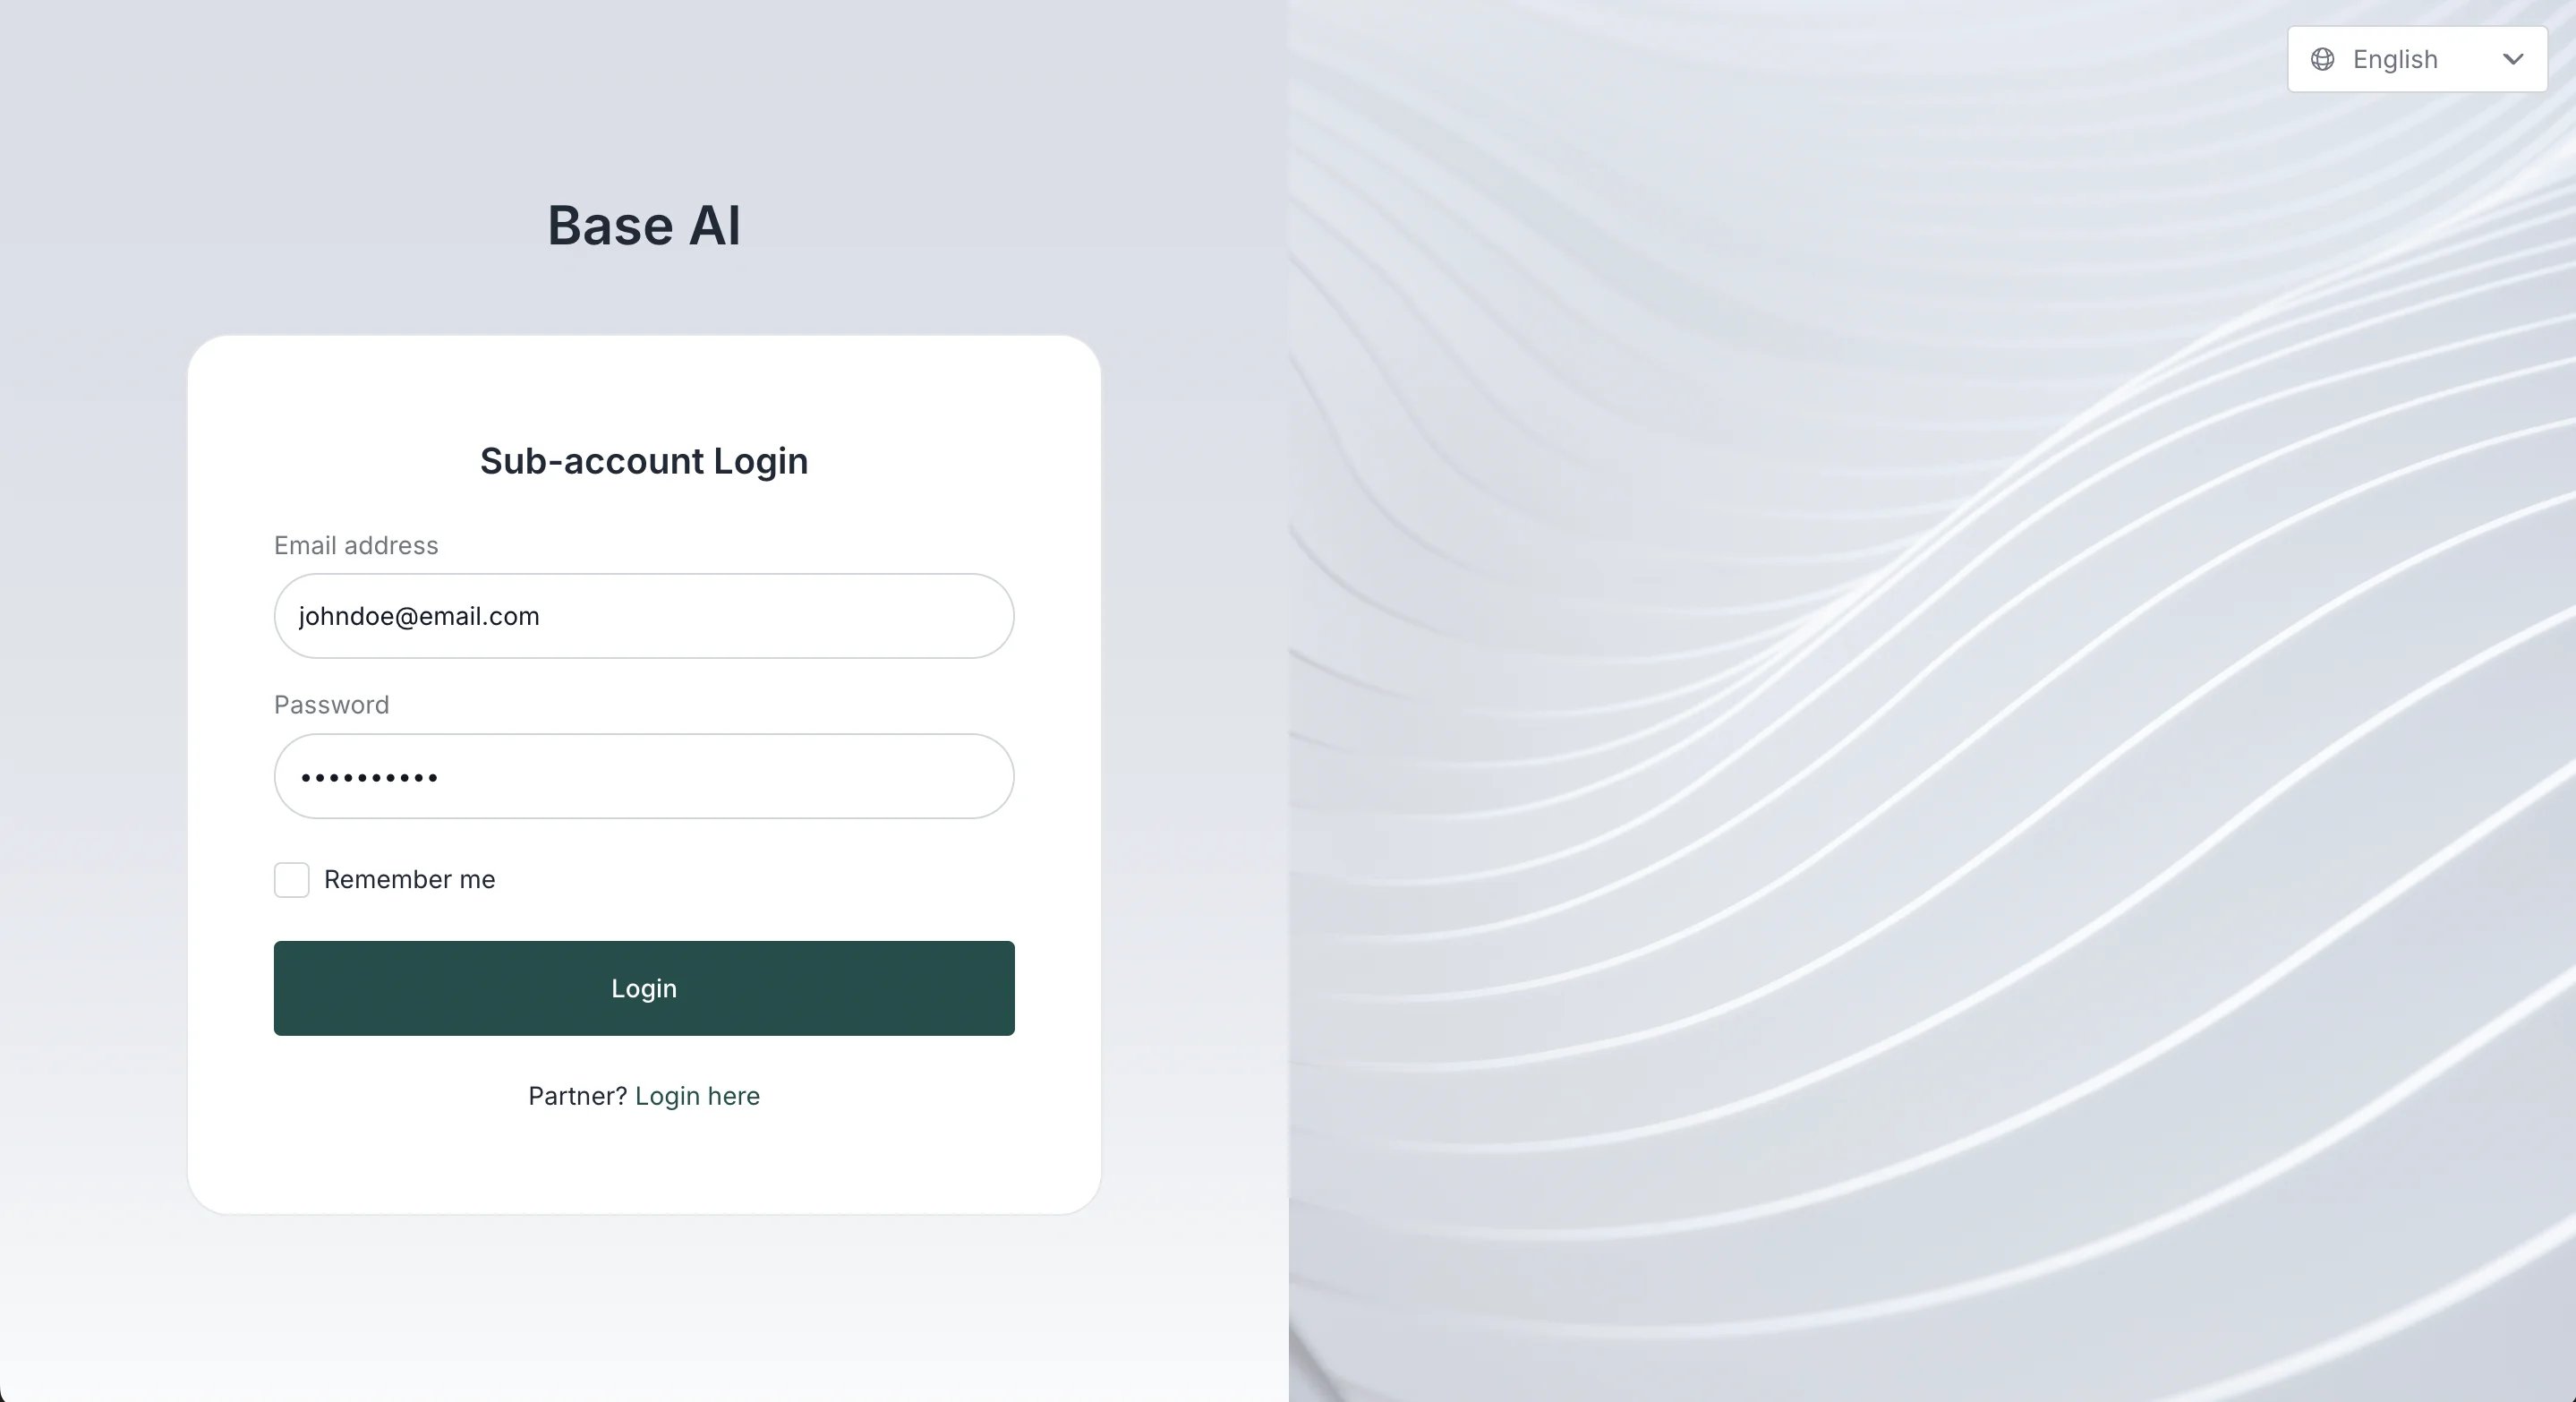
Sub-account users will not be able to:
- Add new sub-accounts to the partner portal
- Delete the partner account.
Managing sub-accounts as the program owner
As the program owner, you can view and manage existing sub-accounts via the partner profile:- Find the partner in your partner list:
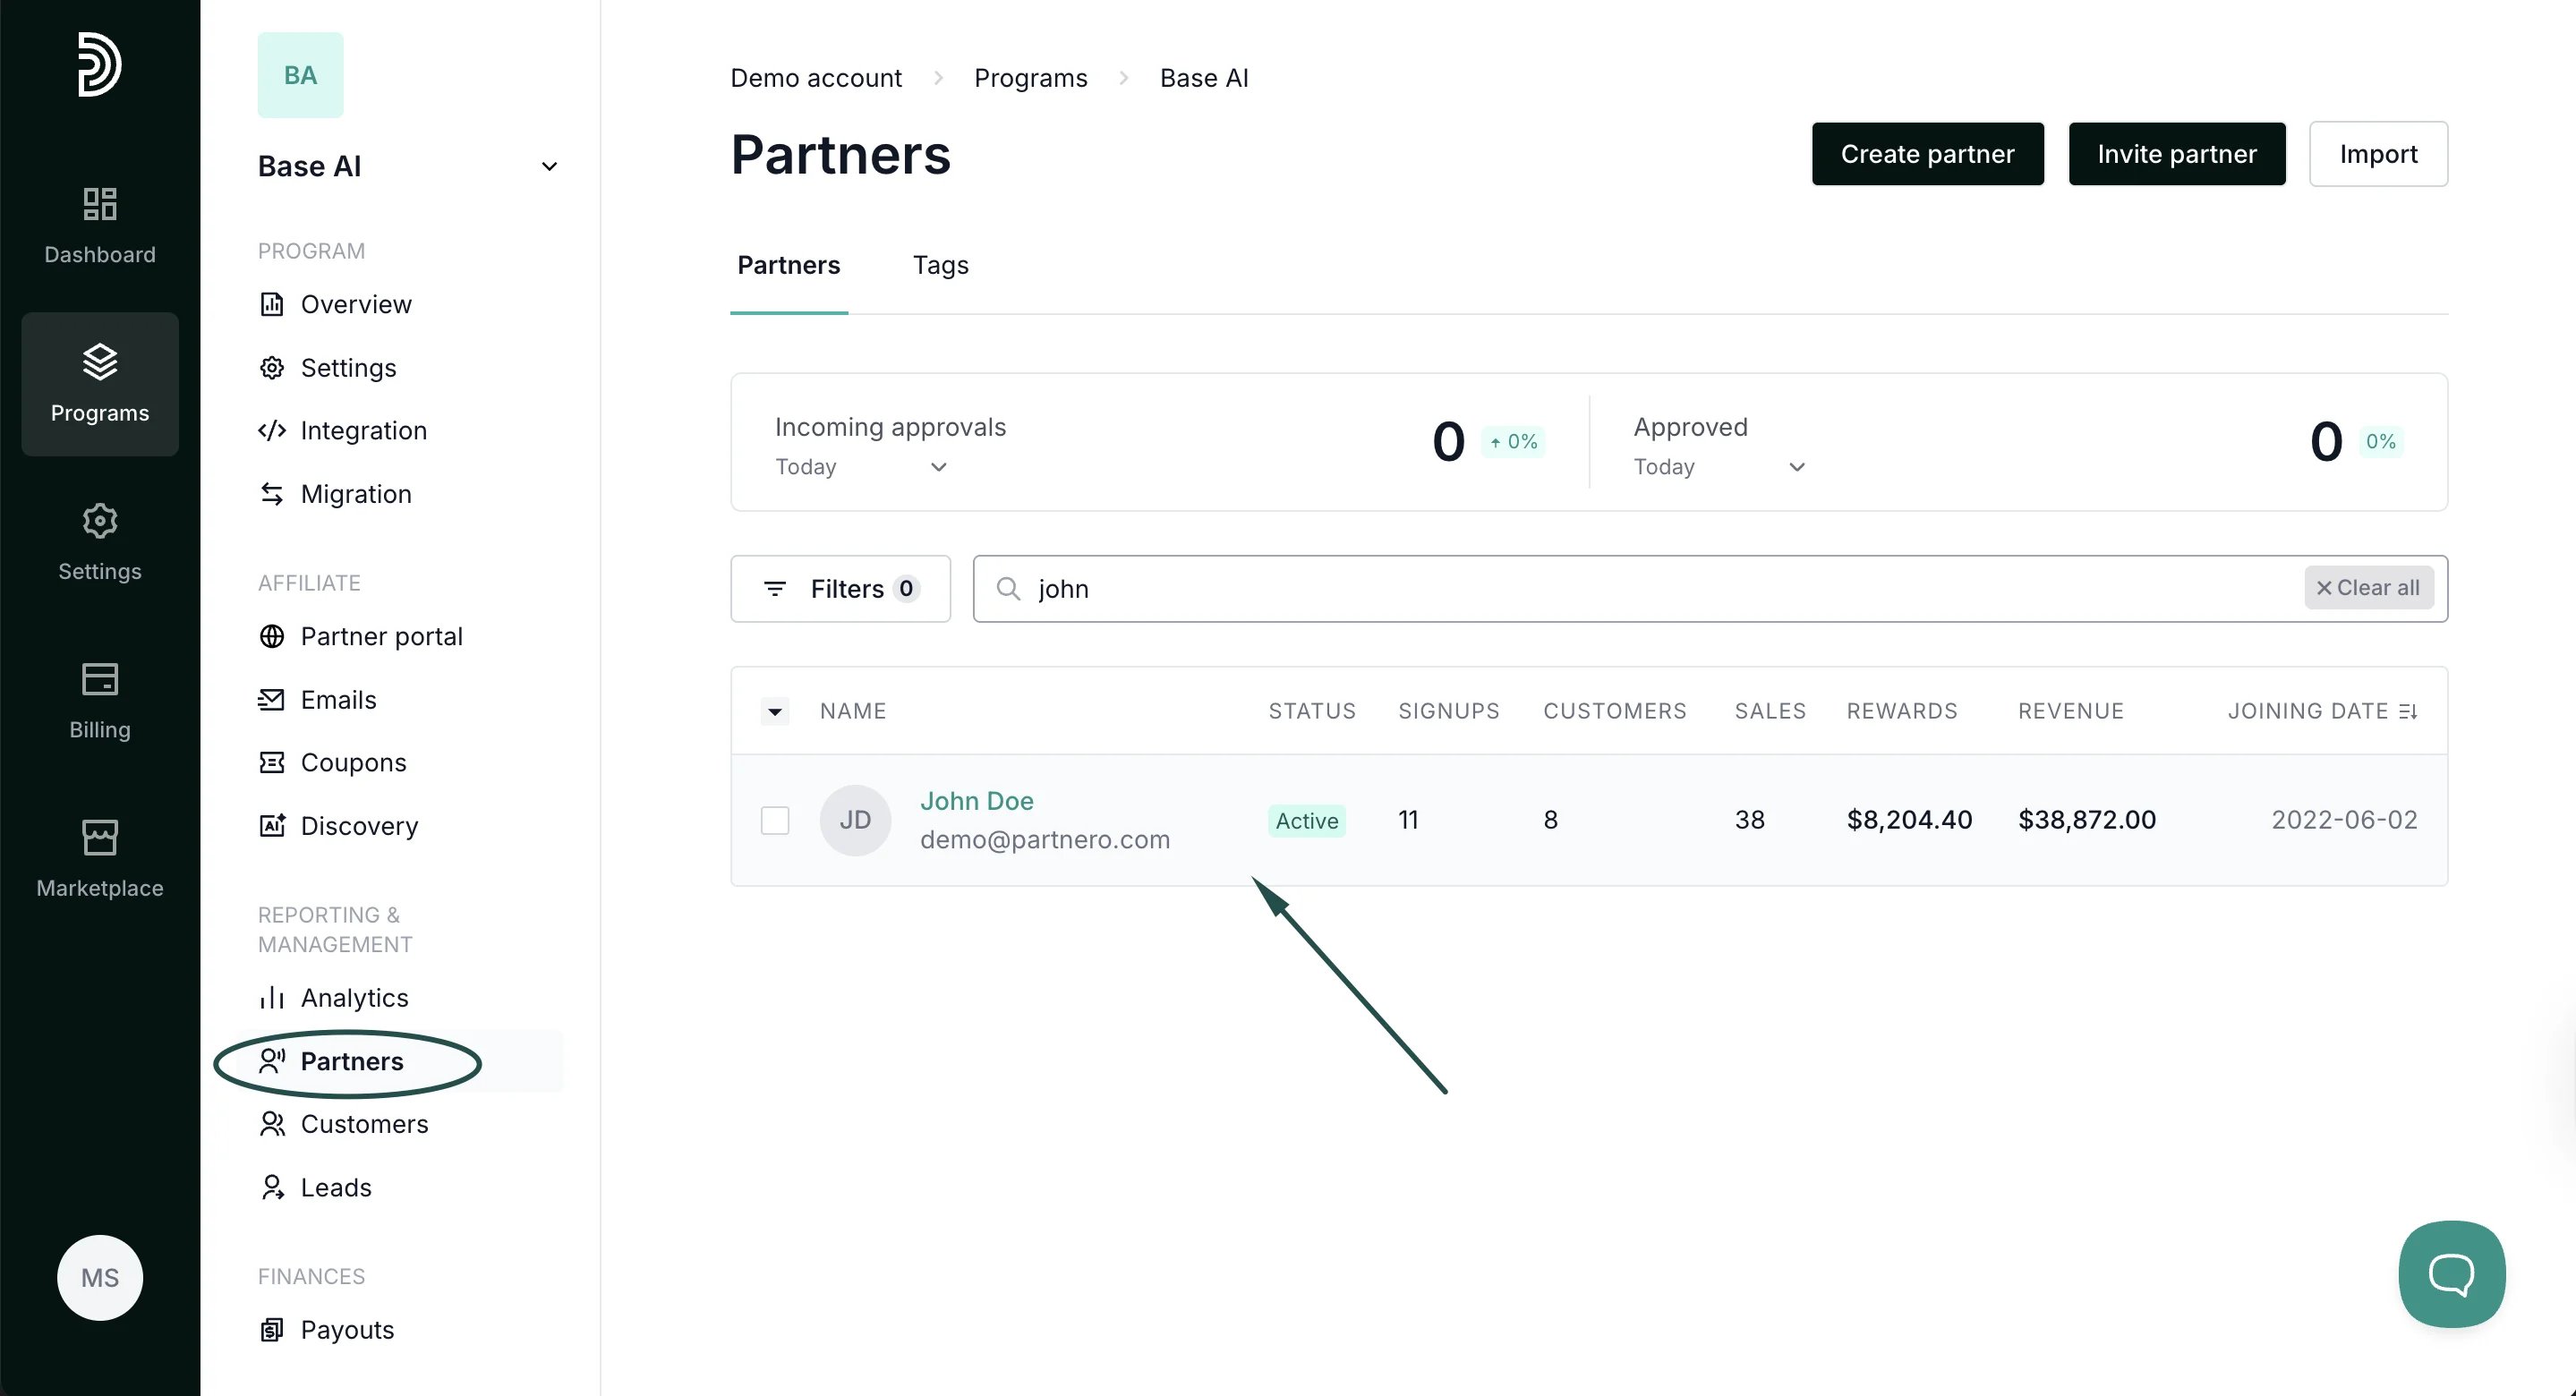
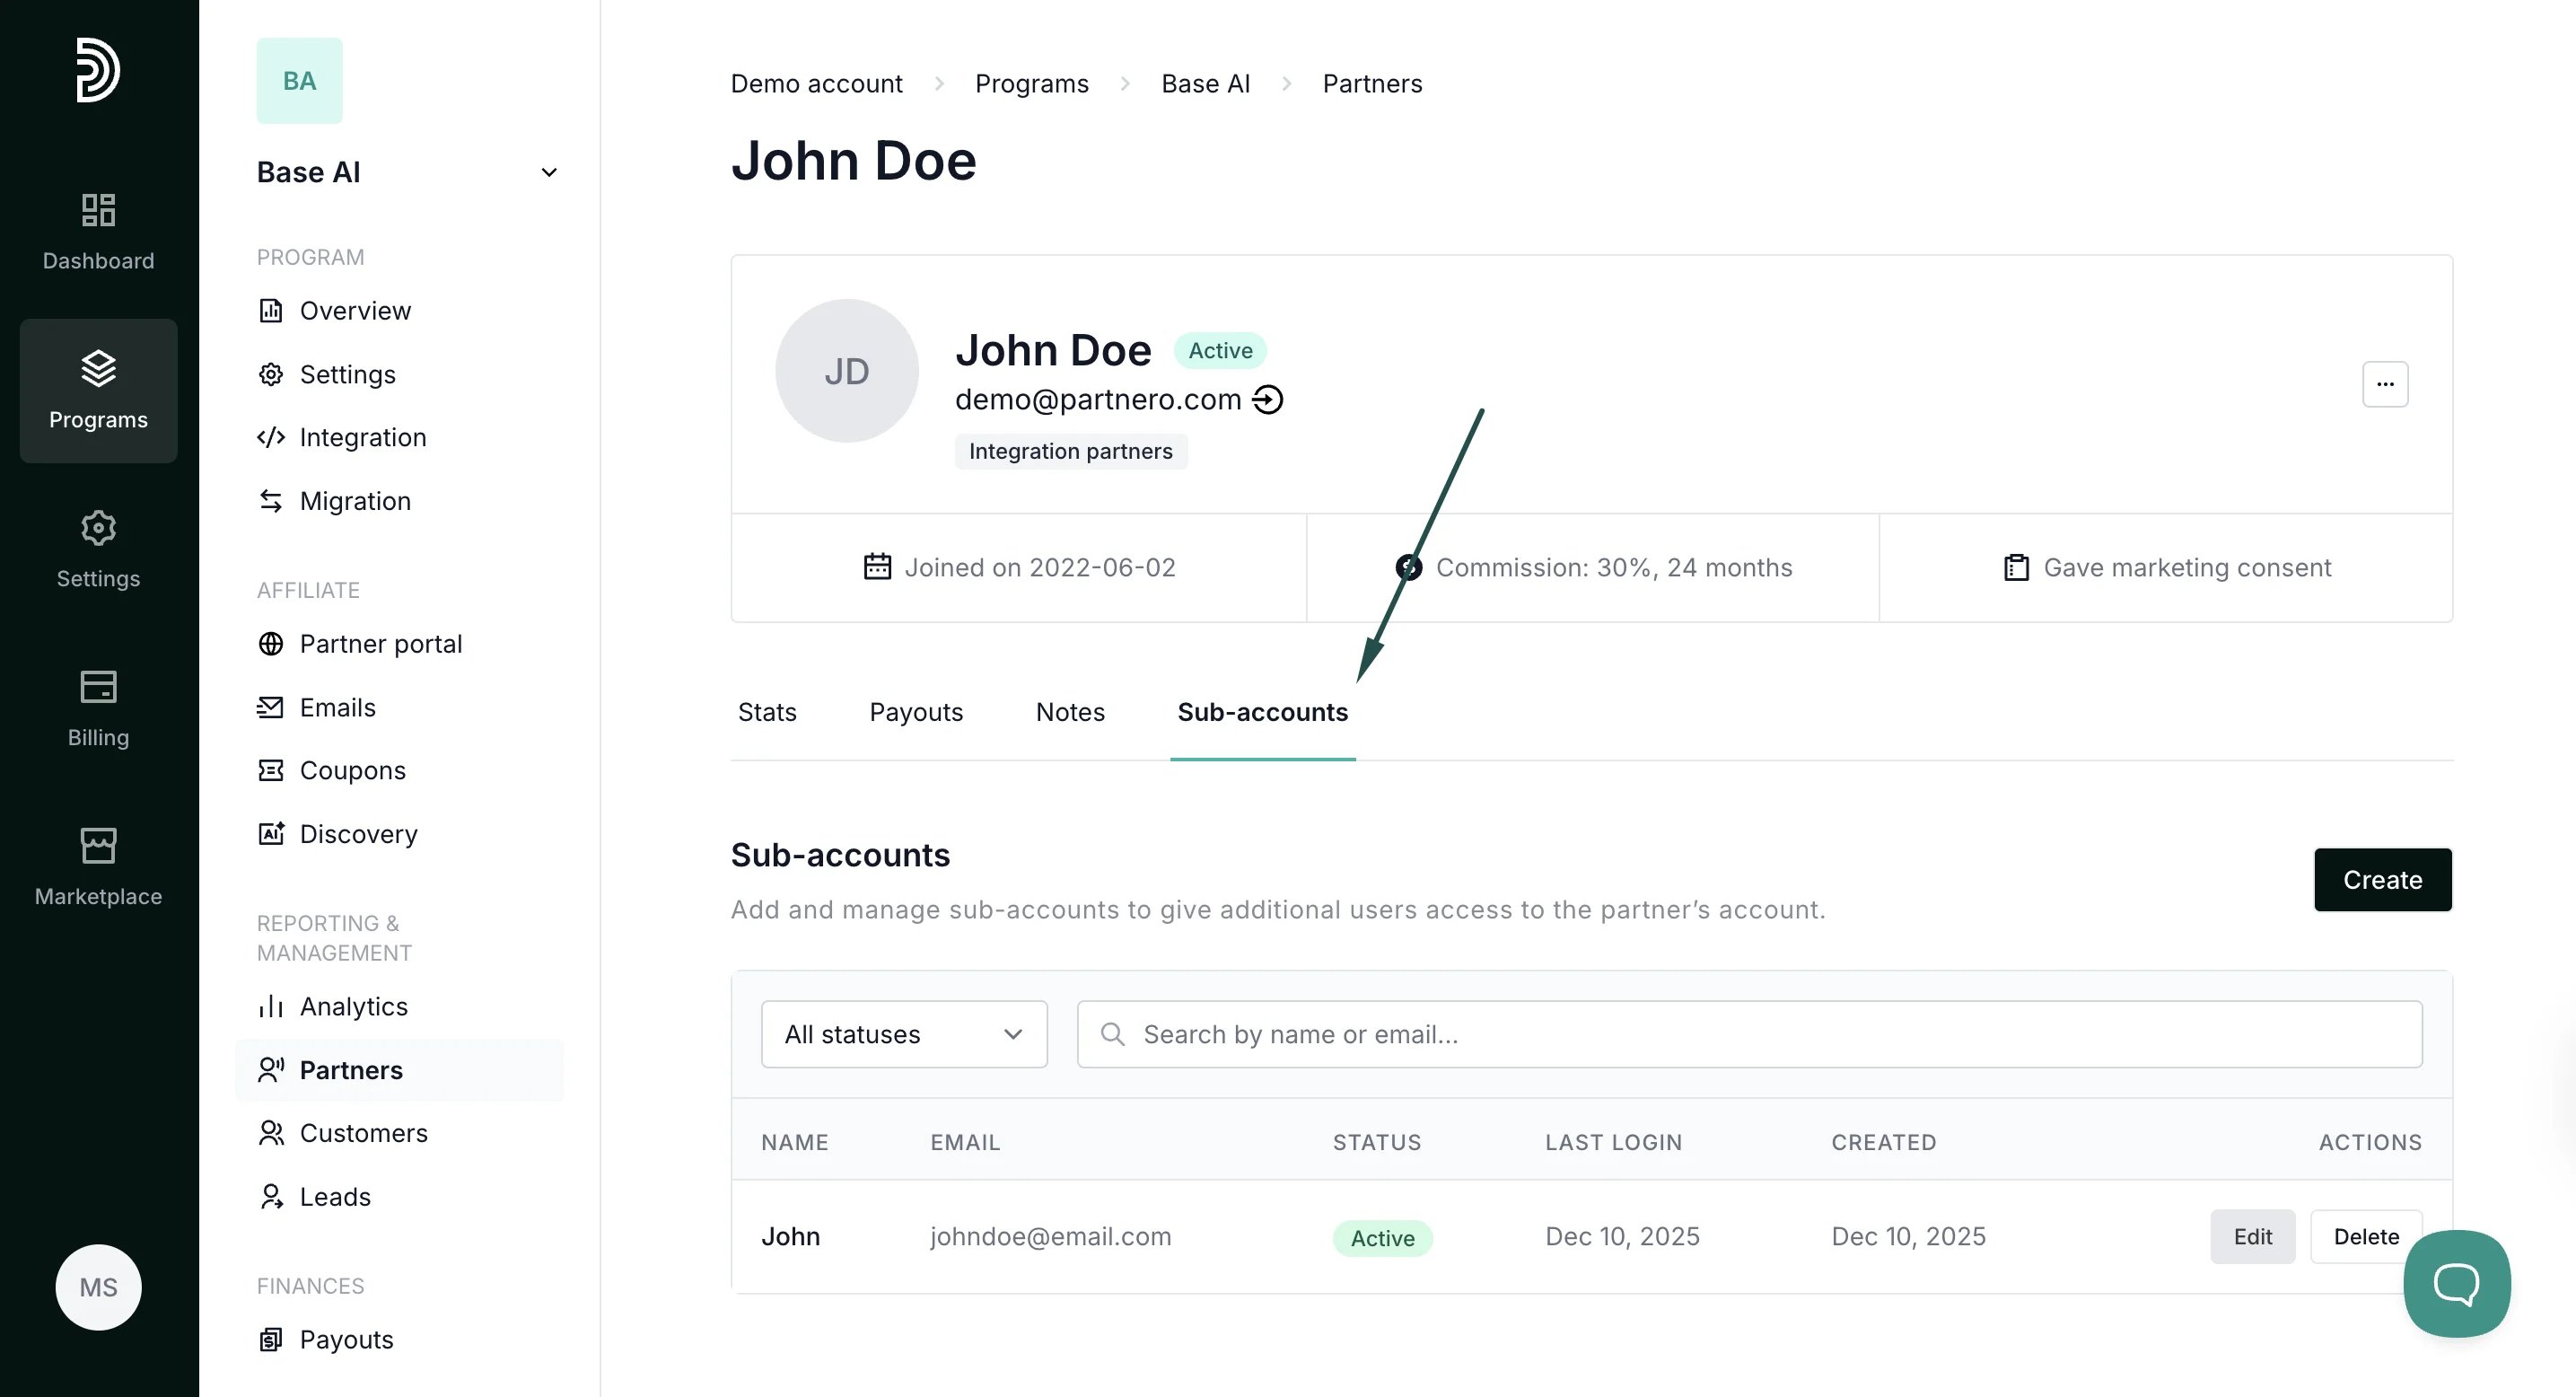
- Open their profile and switch to the Sub-accounts tab:
- Here, you can Create new and Edit or Delete existing sub-accounts:
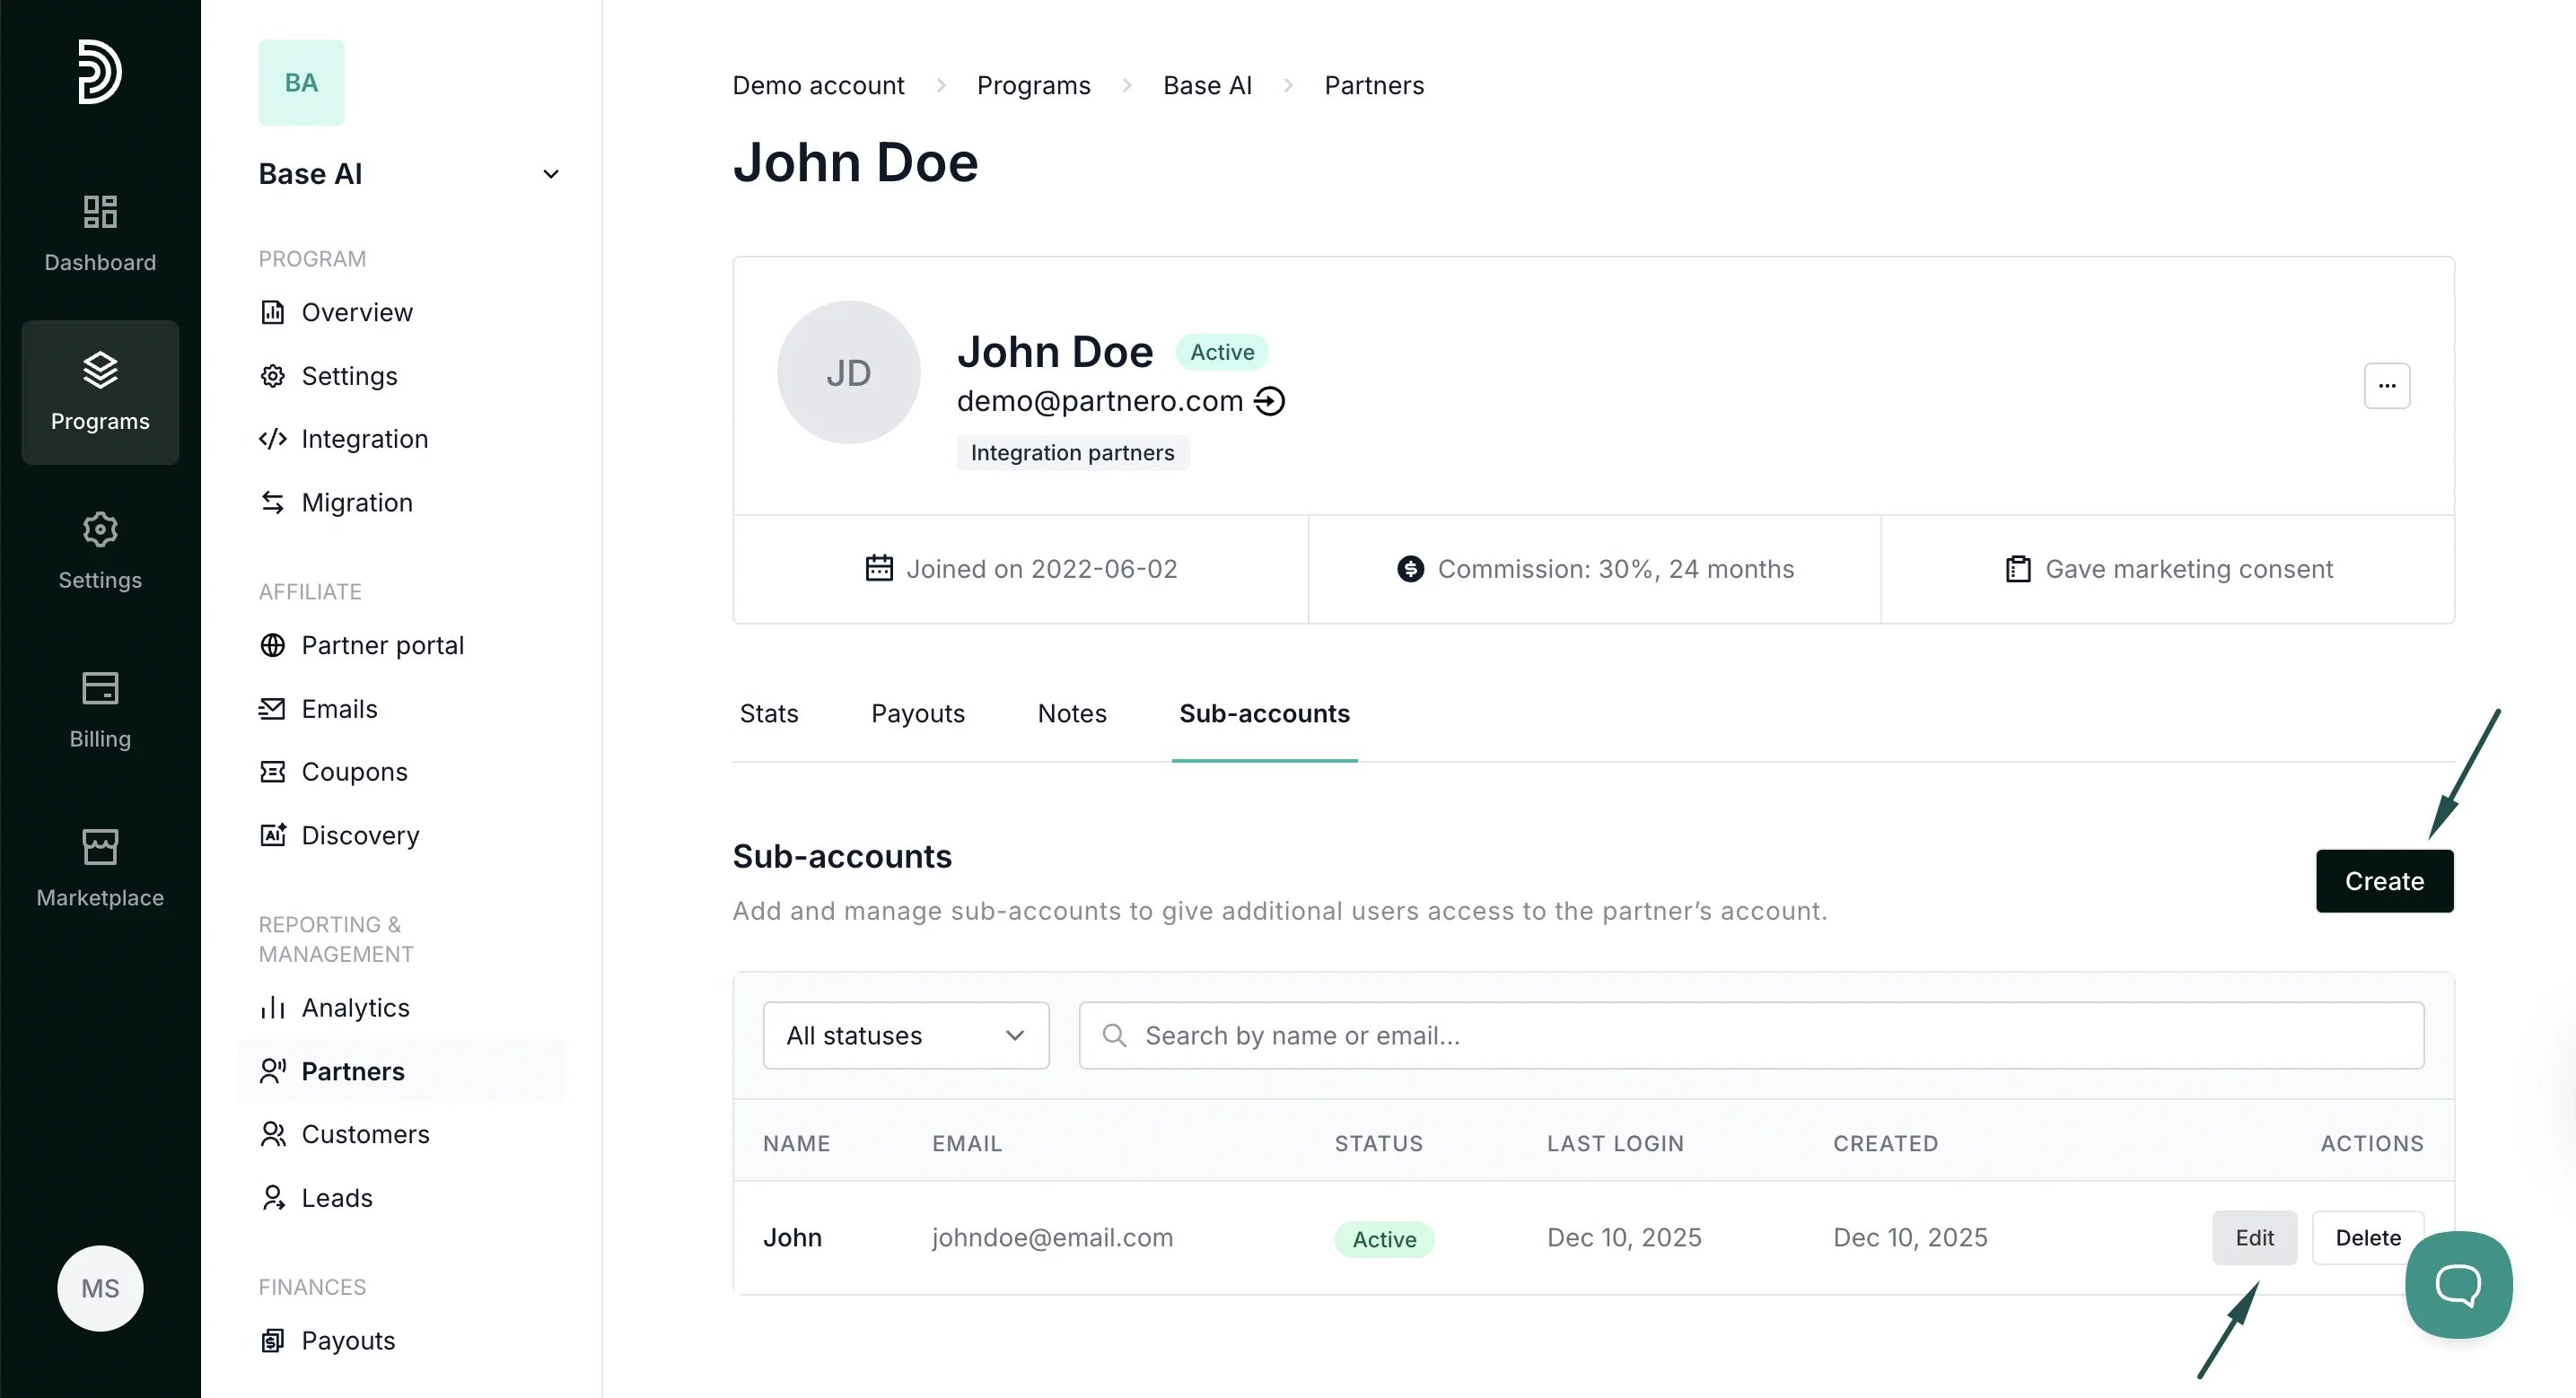
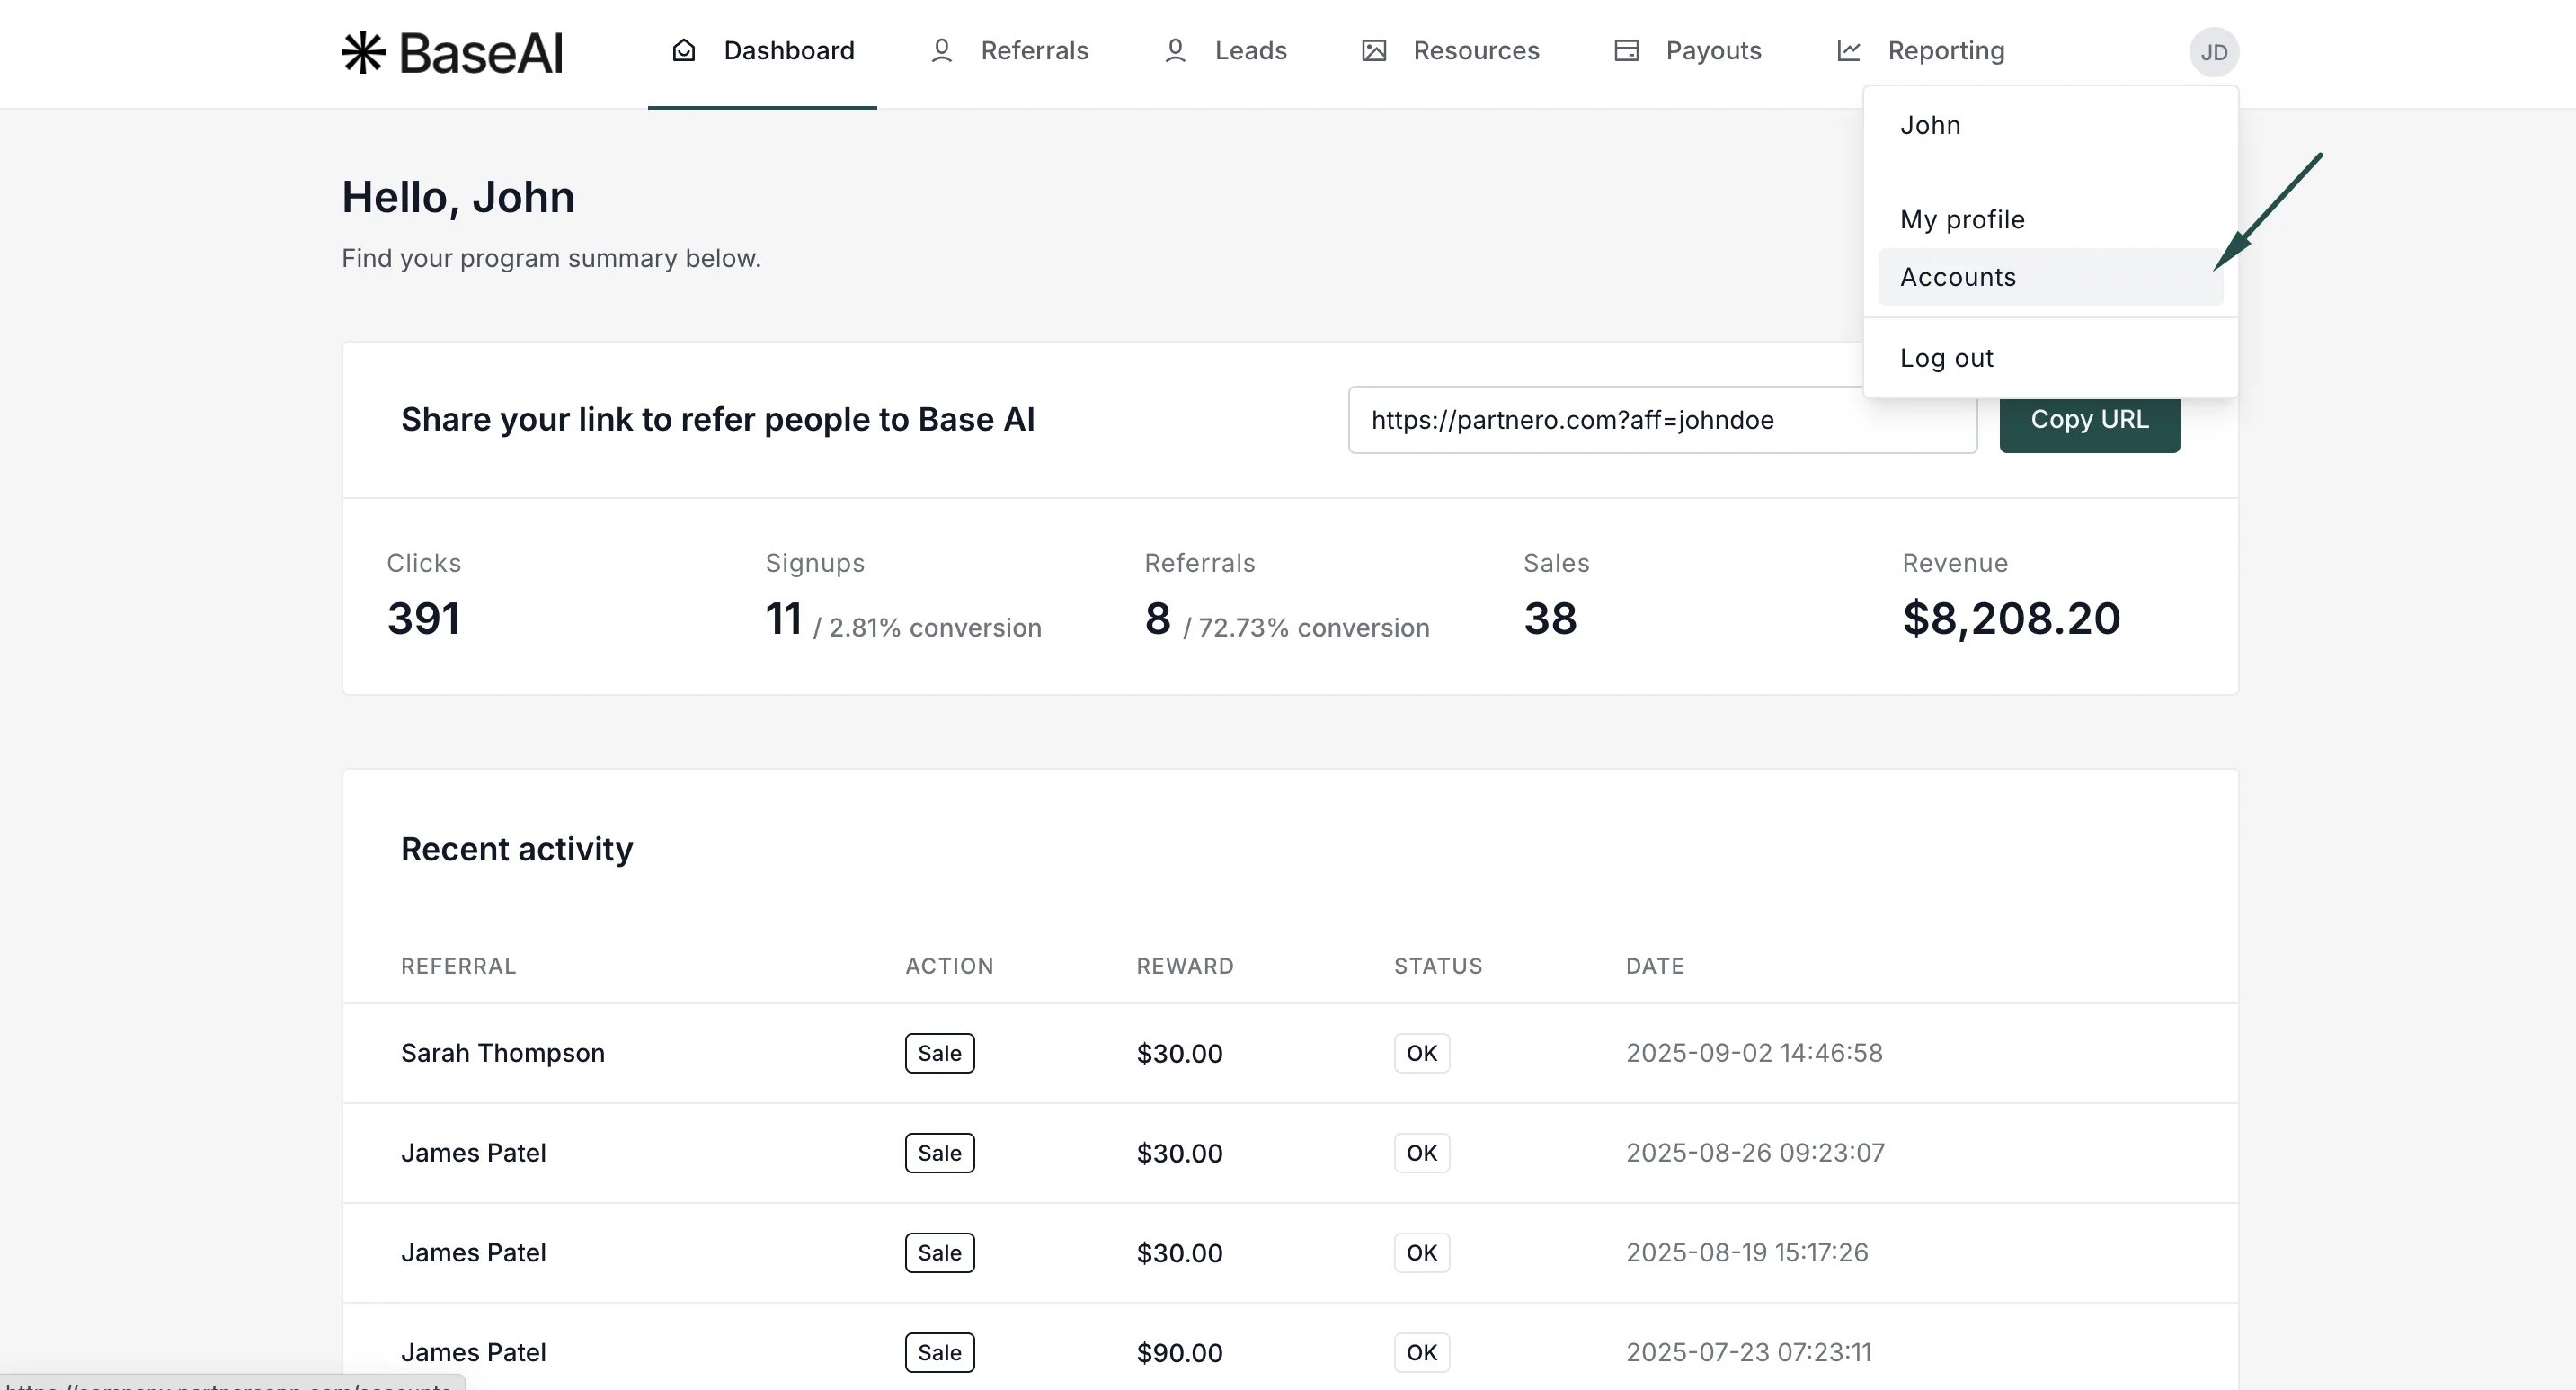
- Click Edit to view and update account name, password, and status (Active or Suspended):