

What’s included in the revenue count
Recurring revenue milestones now count rewards that have already been earned or are earned but still in their review period. This means a partner can reach a milestone as soon as the revenue is recorded, without waiting for the review period to end. If you offer a 14-day money-back guarantee and use a 14-day review period, for example, partners do not have to wait two weeks for the automation to fire.Count from the start of the month
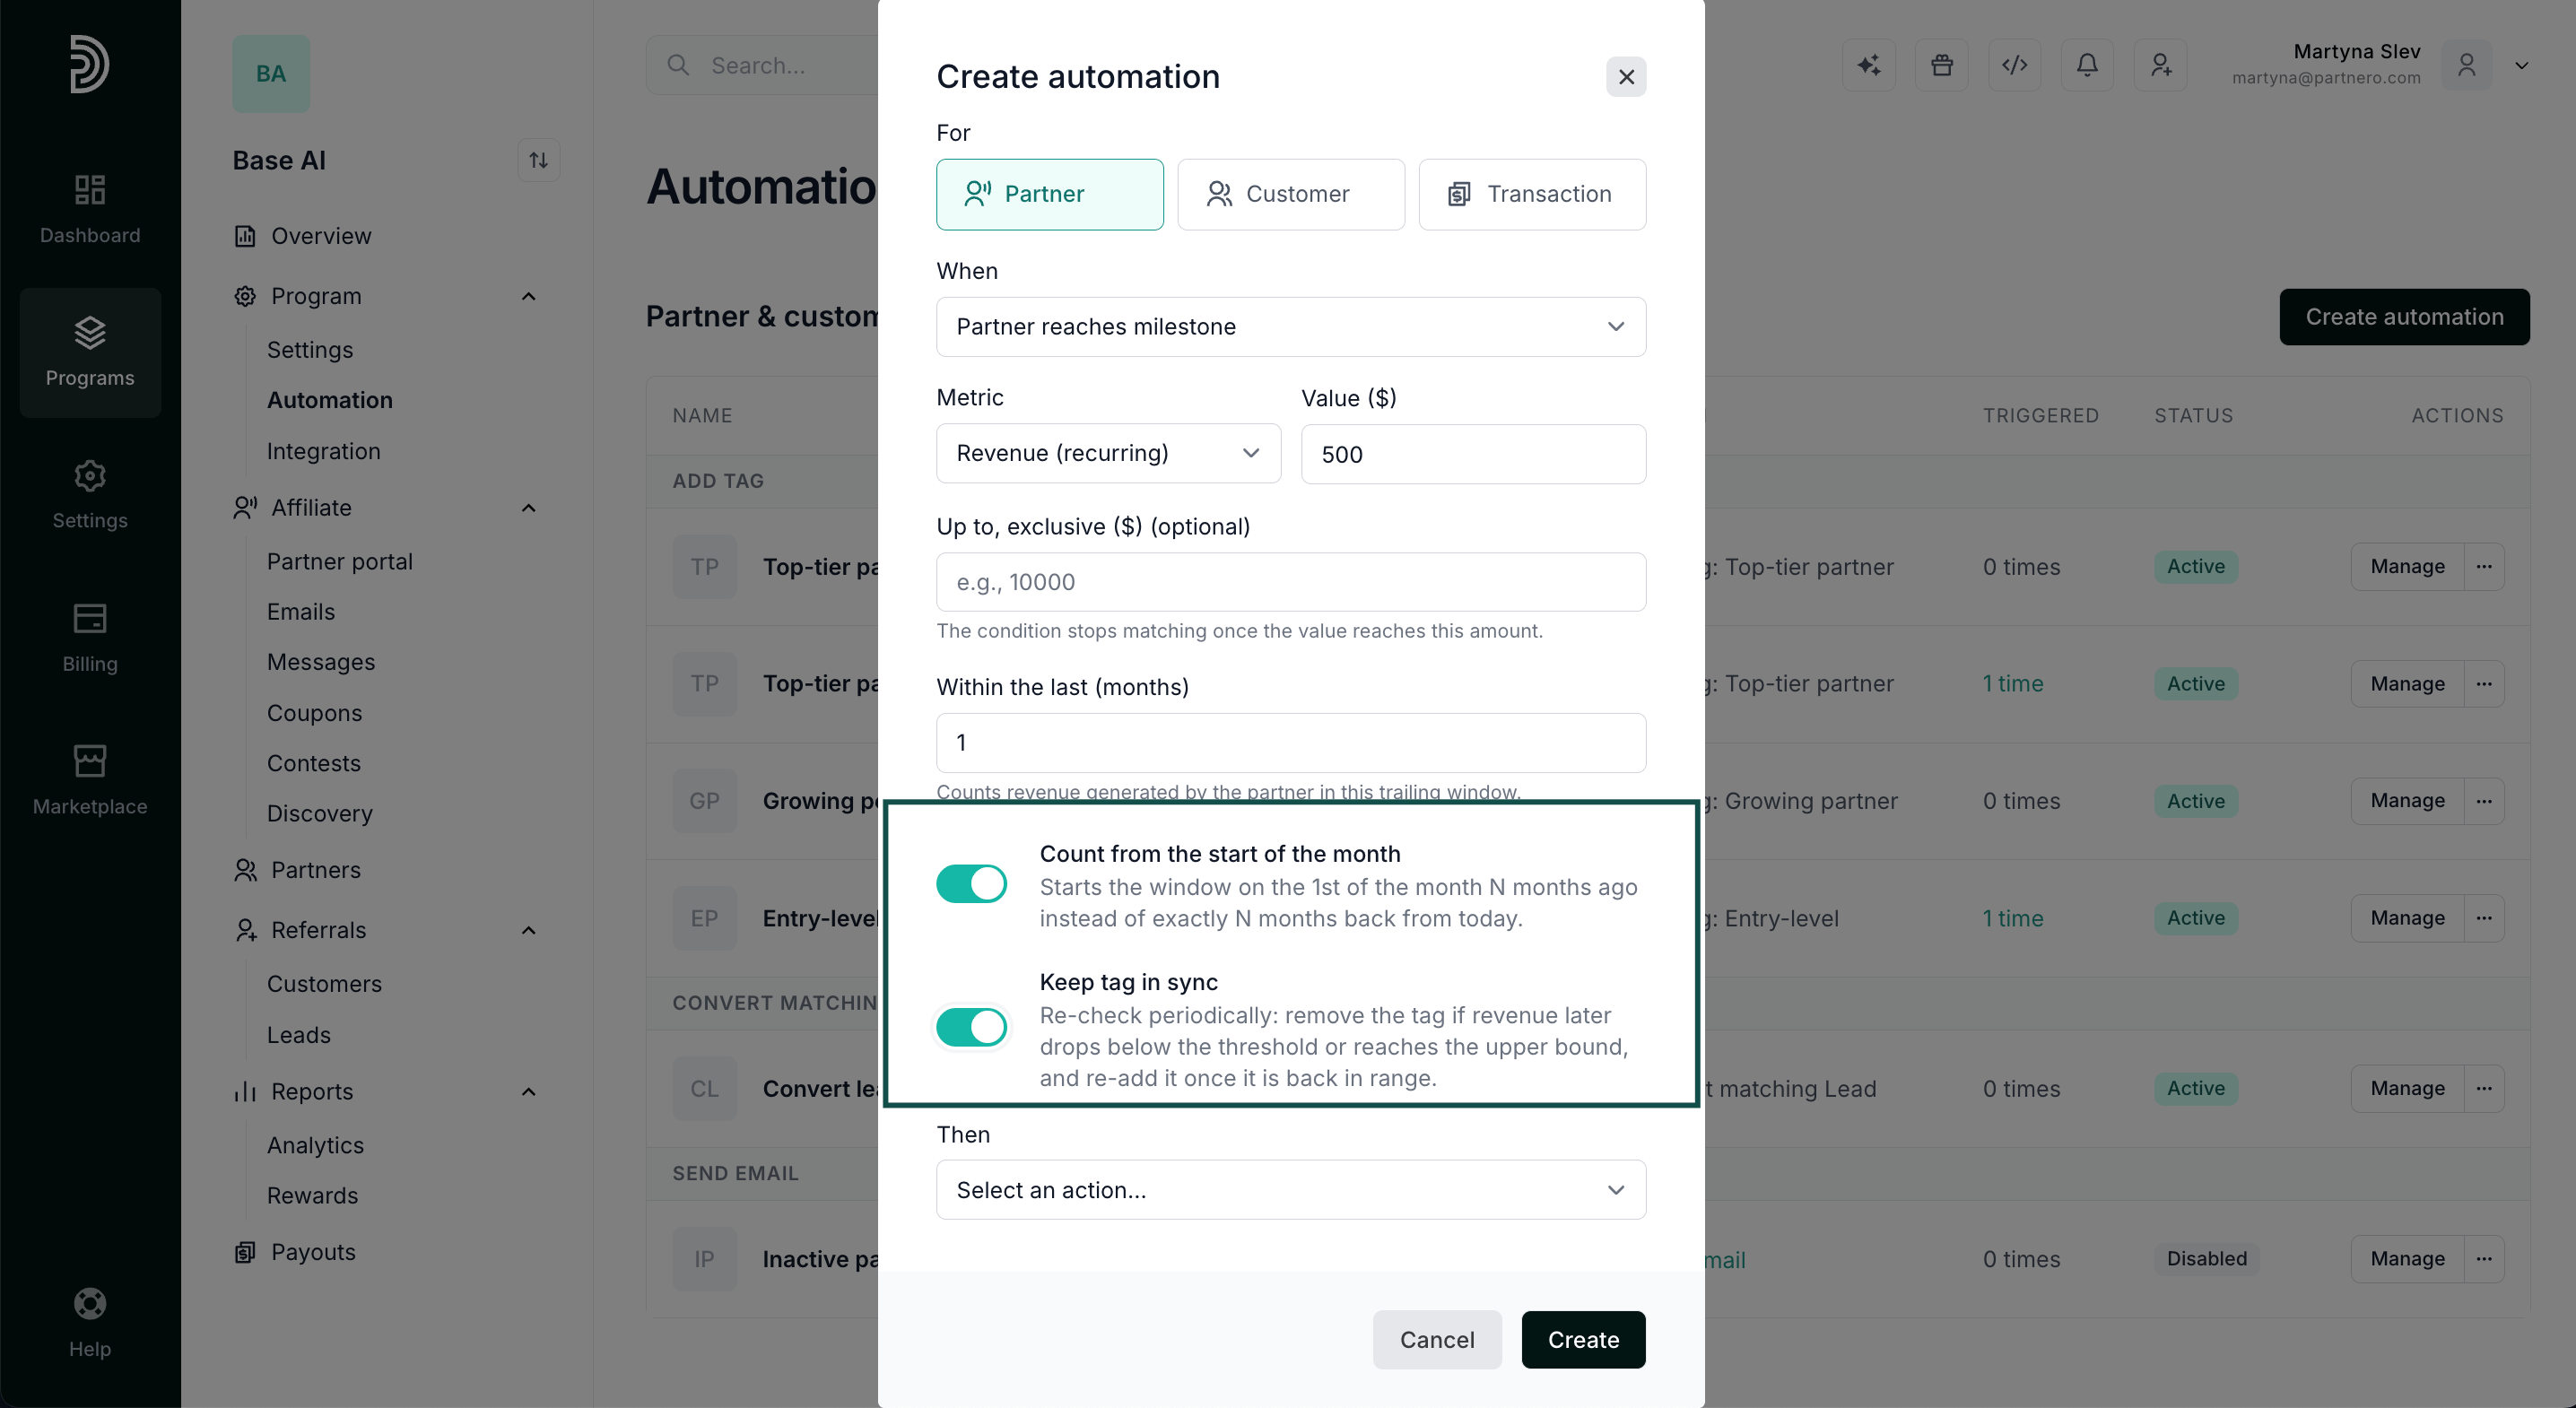
A recurring revenue milestone checks a partner’s MRR over the last 1 or more months (you can set any number of months). By default, the period is counted back from the day the automation runs. When Count from the start of the month is turned on, the period is counted from the first day of the month instead. Use it to measure partners against calendar months rather than a rolling period.Revenue upper bound
A revenue milestone normally has a lower value: the automation fires once the partner reaches at least that amount. An upper bound adds a limit at the top, so the automation applies only to partners whose revenue falls between the two values. This is useful for building tiers, because each automation can target one band without overlapping the next. For example:
The last tier has no upper bound, so it applies to every partner above the lower value.
How to set up a recurring revenue milestone automation
To set up the automation:- In your program, navigate to Automation under Program.
- Click Create automation.
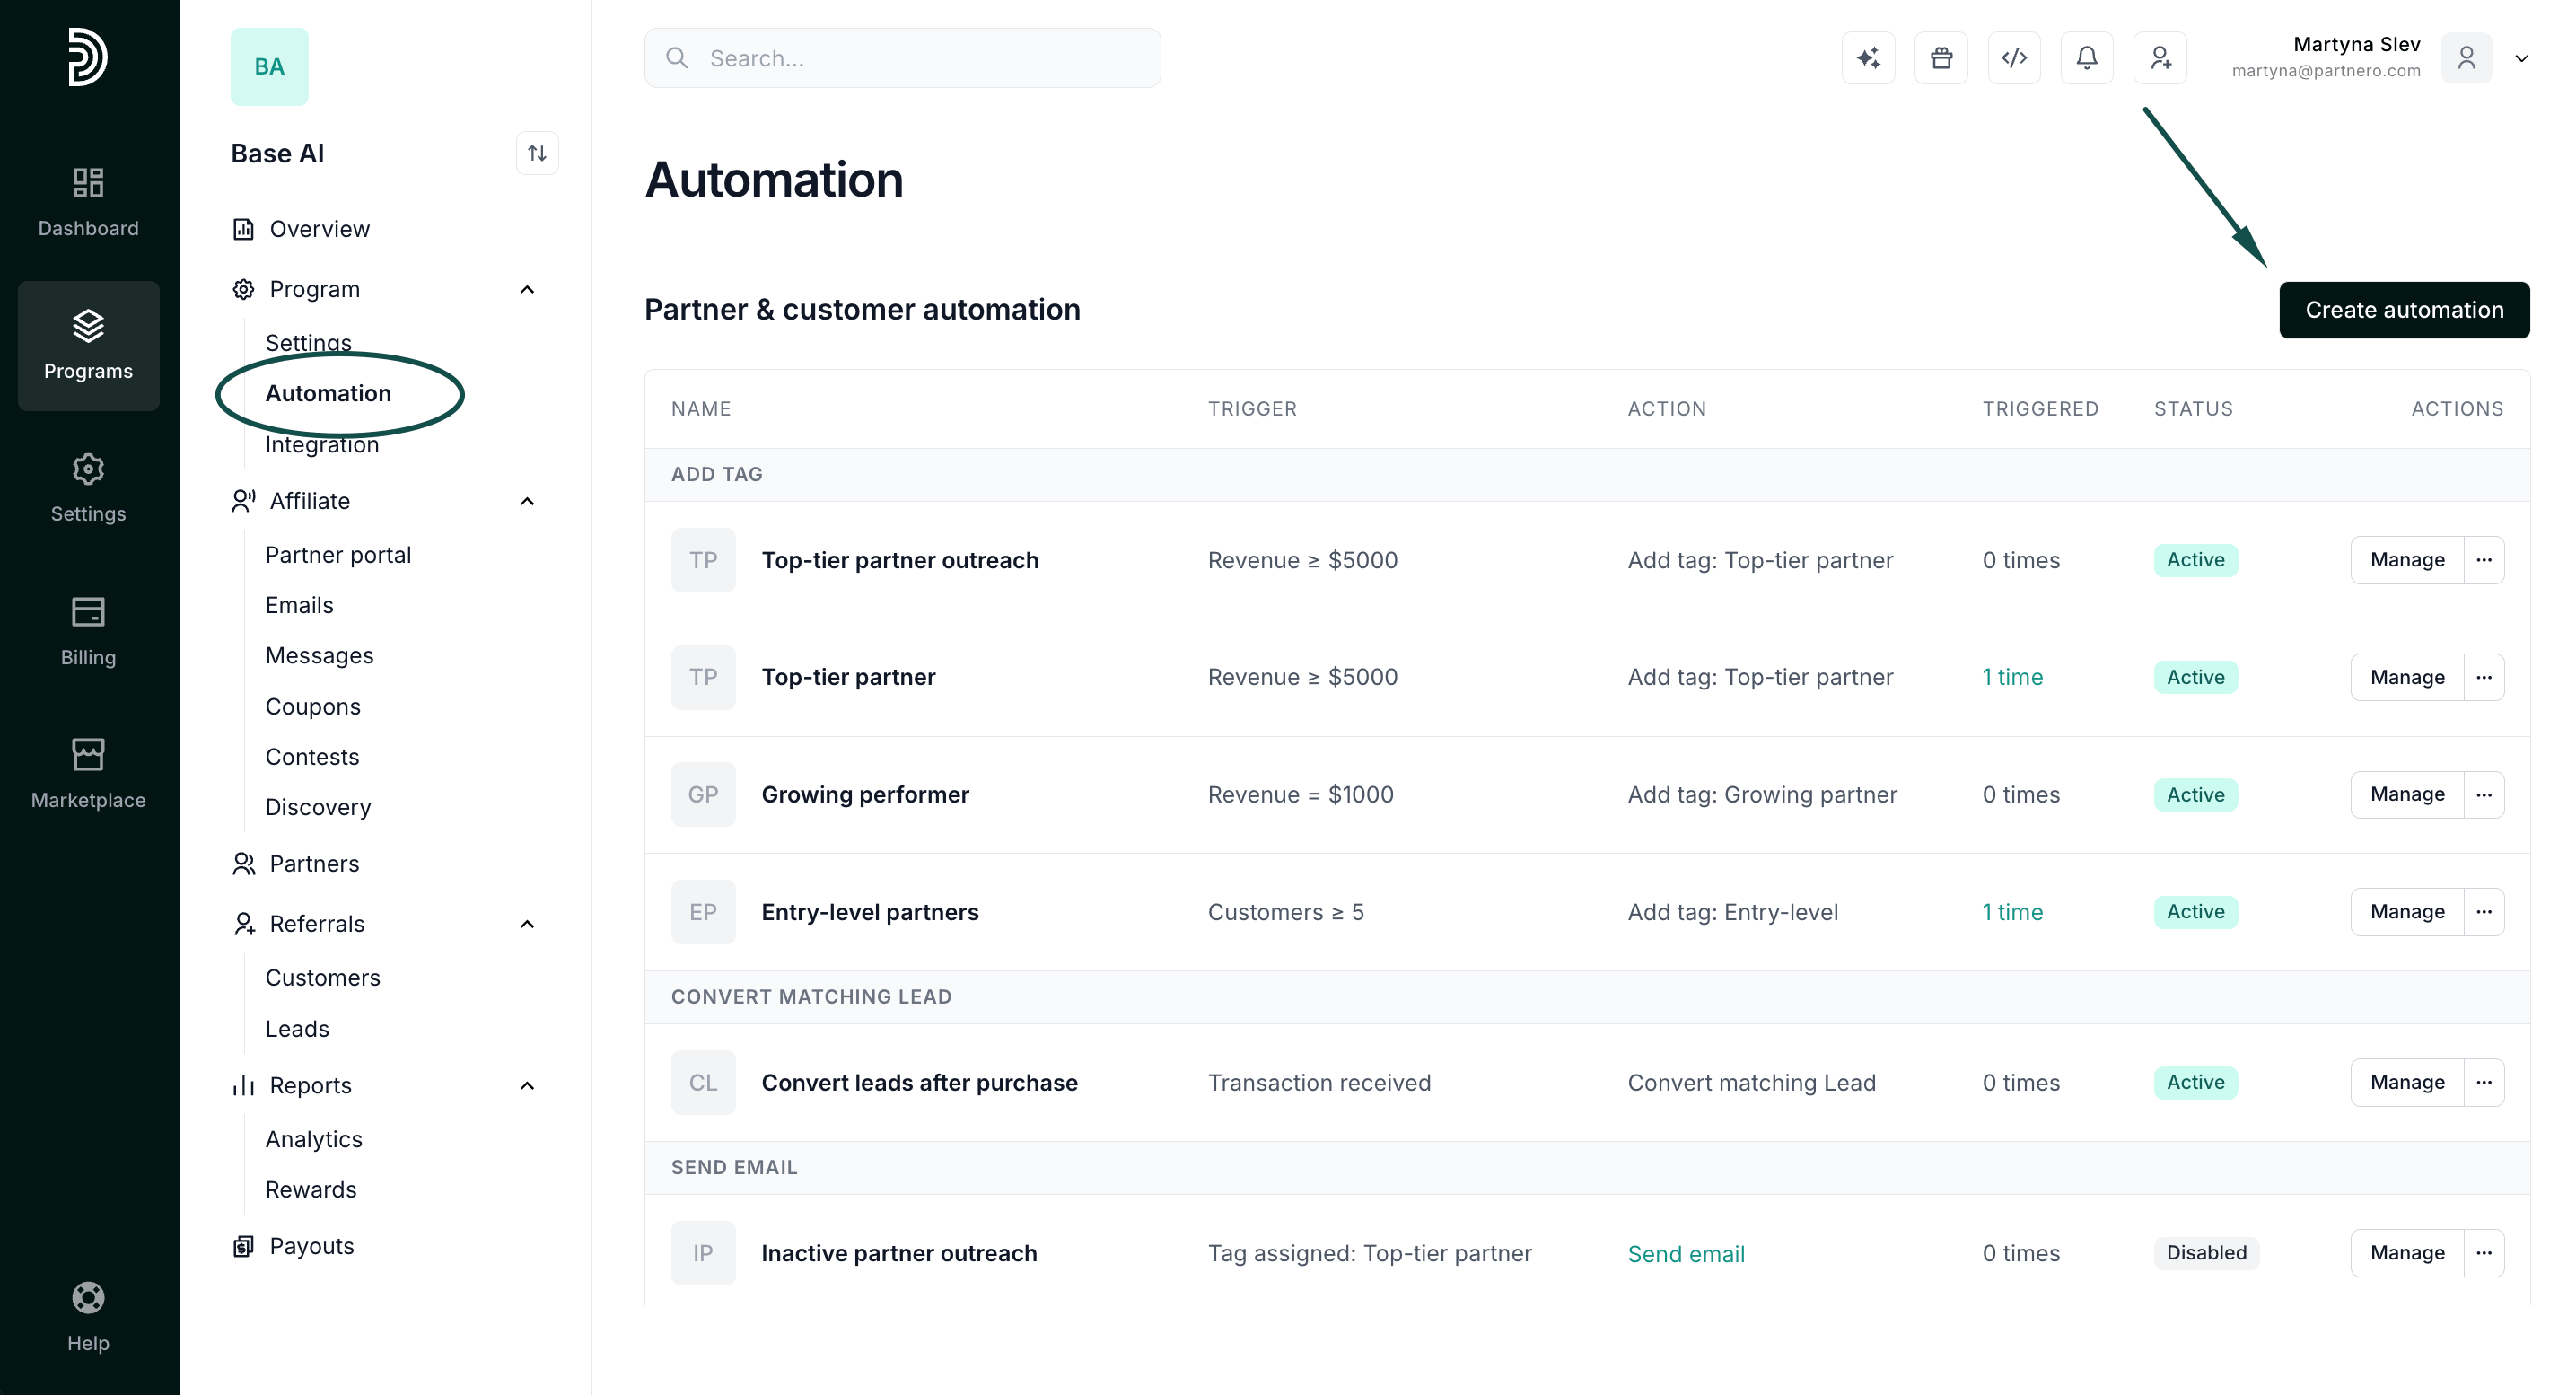
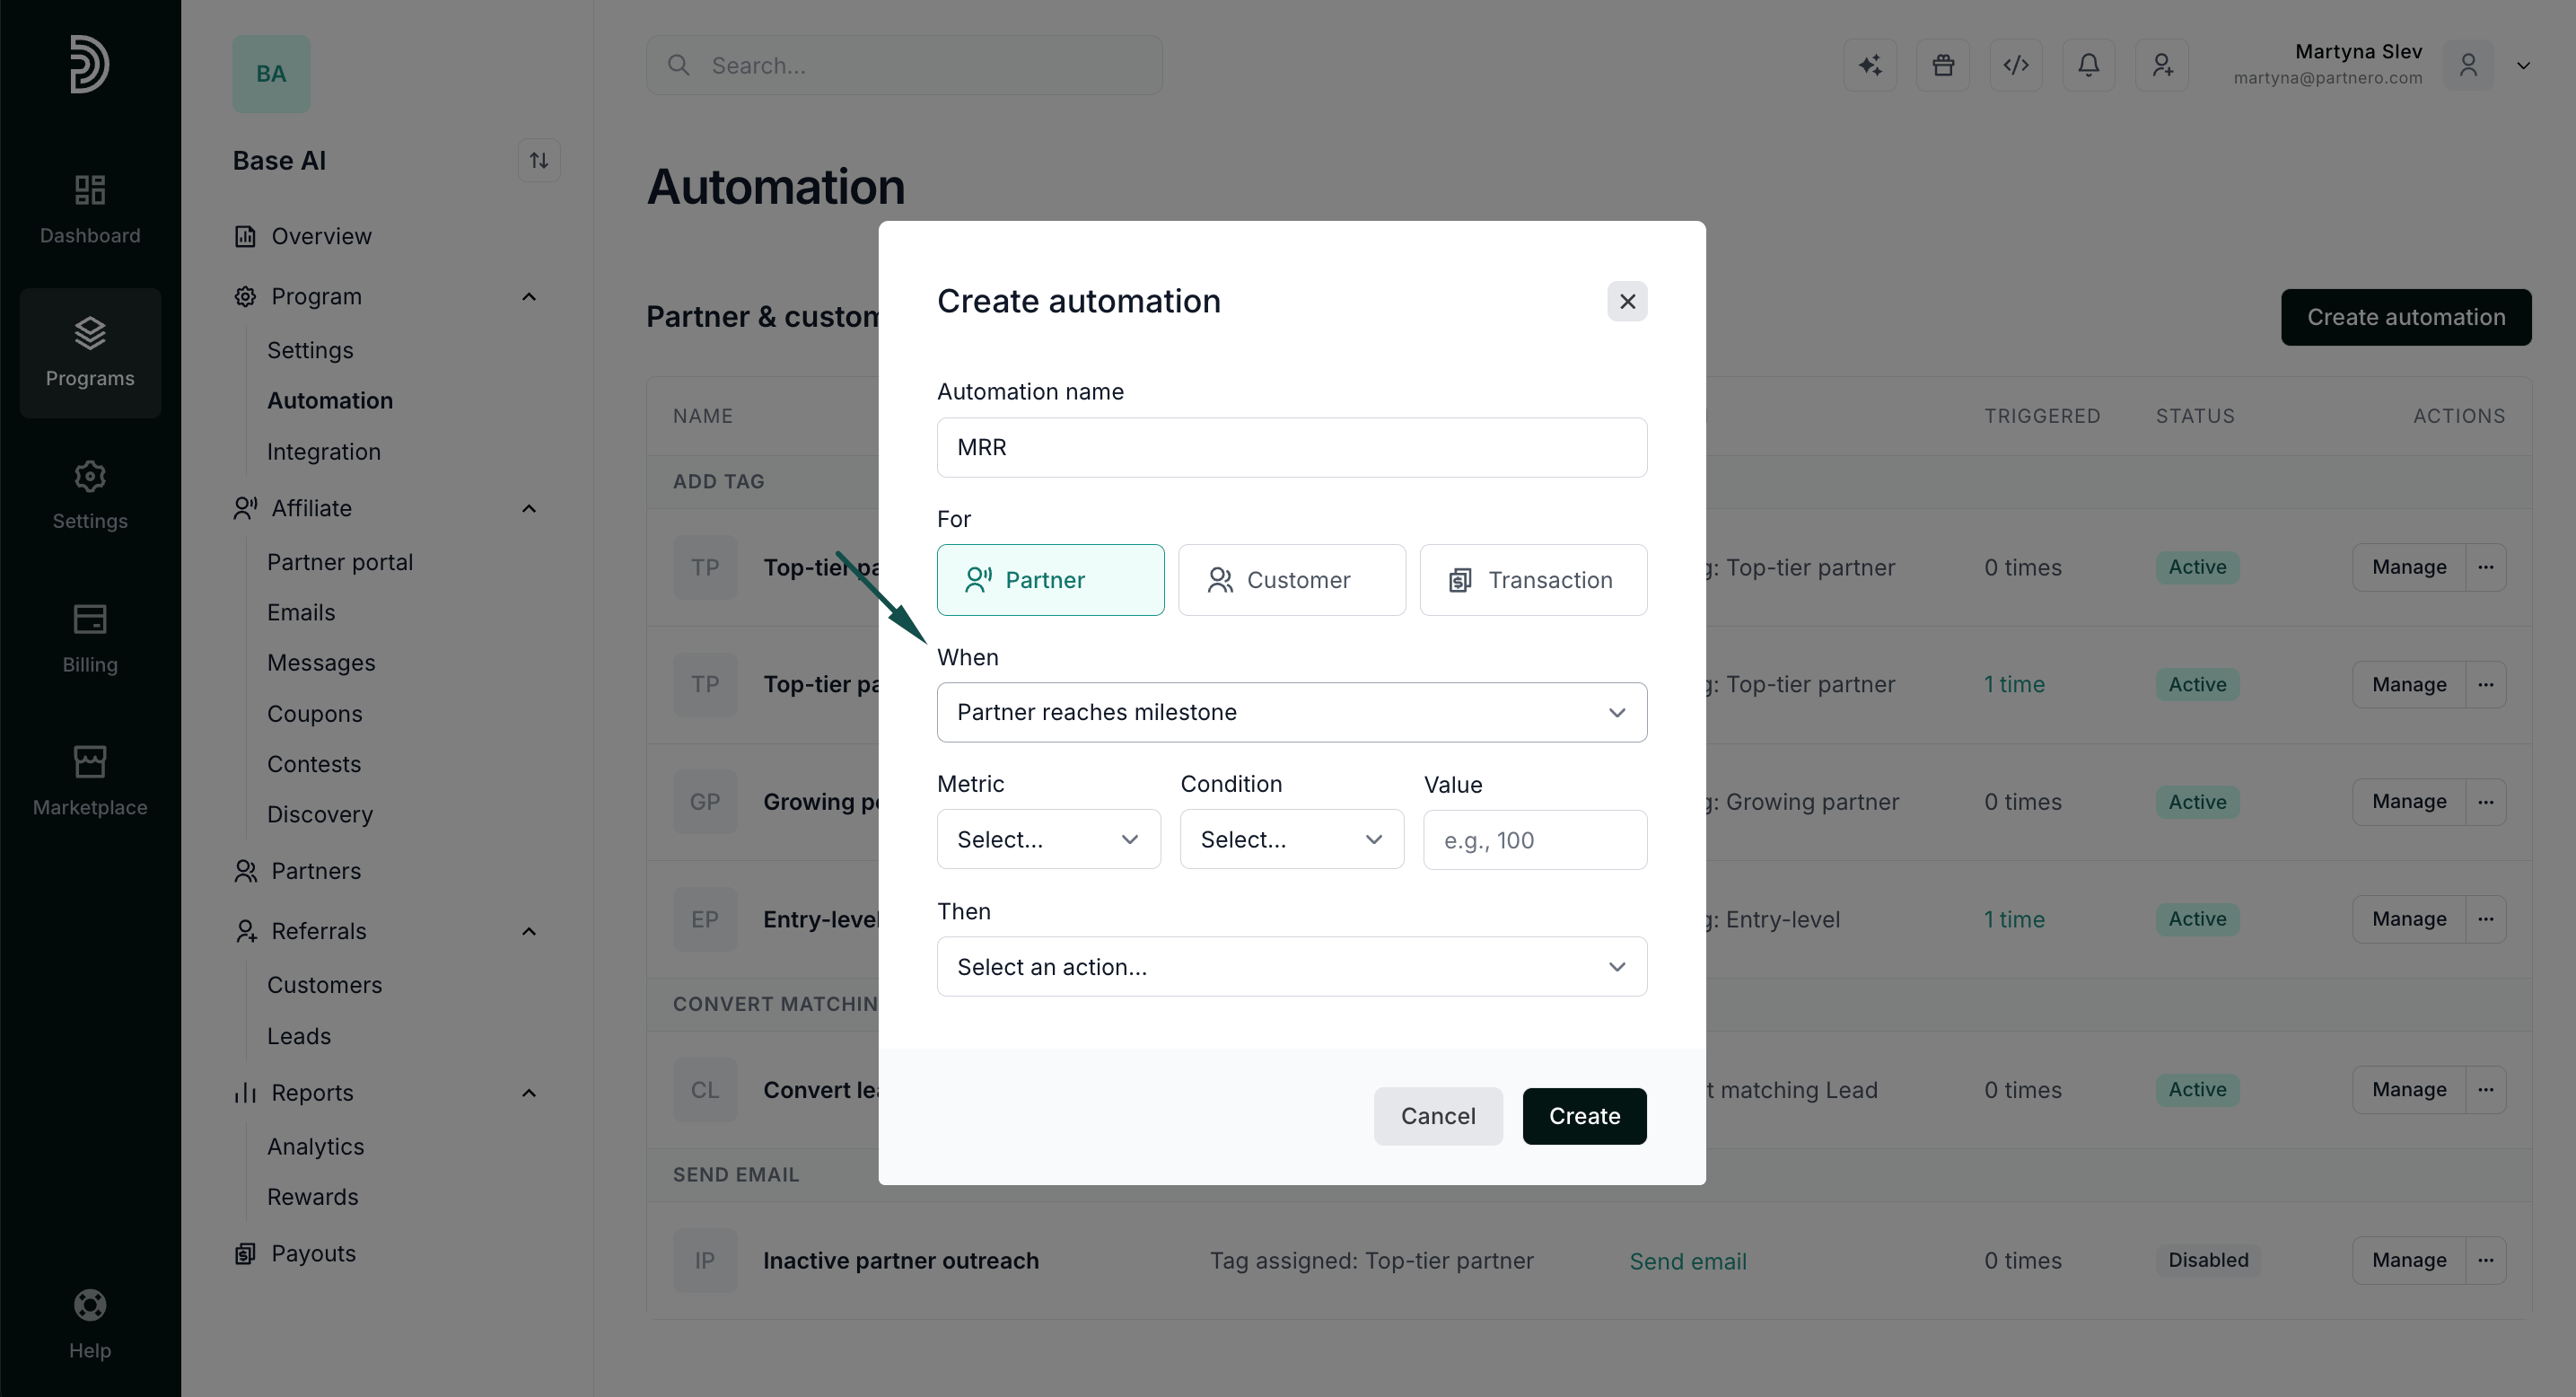
- Add the automation name and select Partners as the audience.
- In the When field, select Partner reaches milestone.
- Select Revenue (Recurring) as the metric and enter the revenue amount ($500 in our example). Add a revenue upper bound if you want the automation to apply only to partners within a specific range (optional).
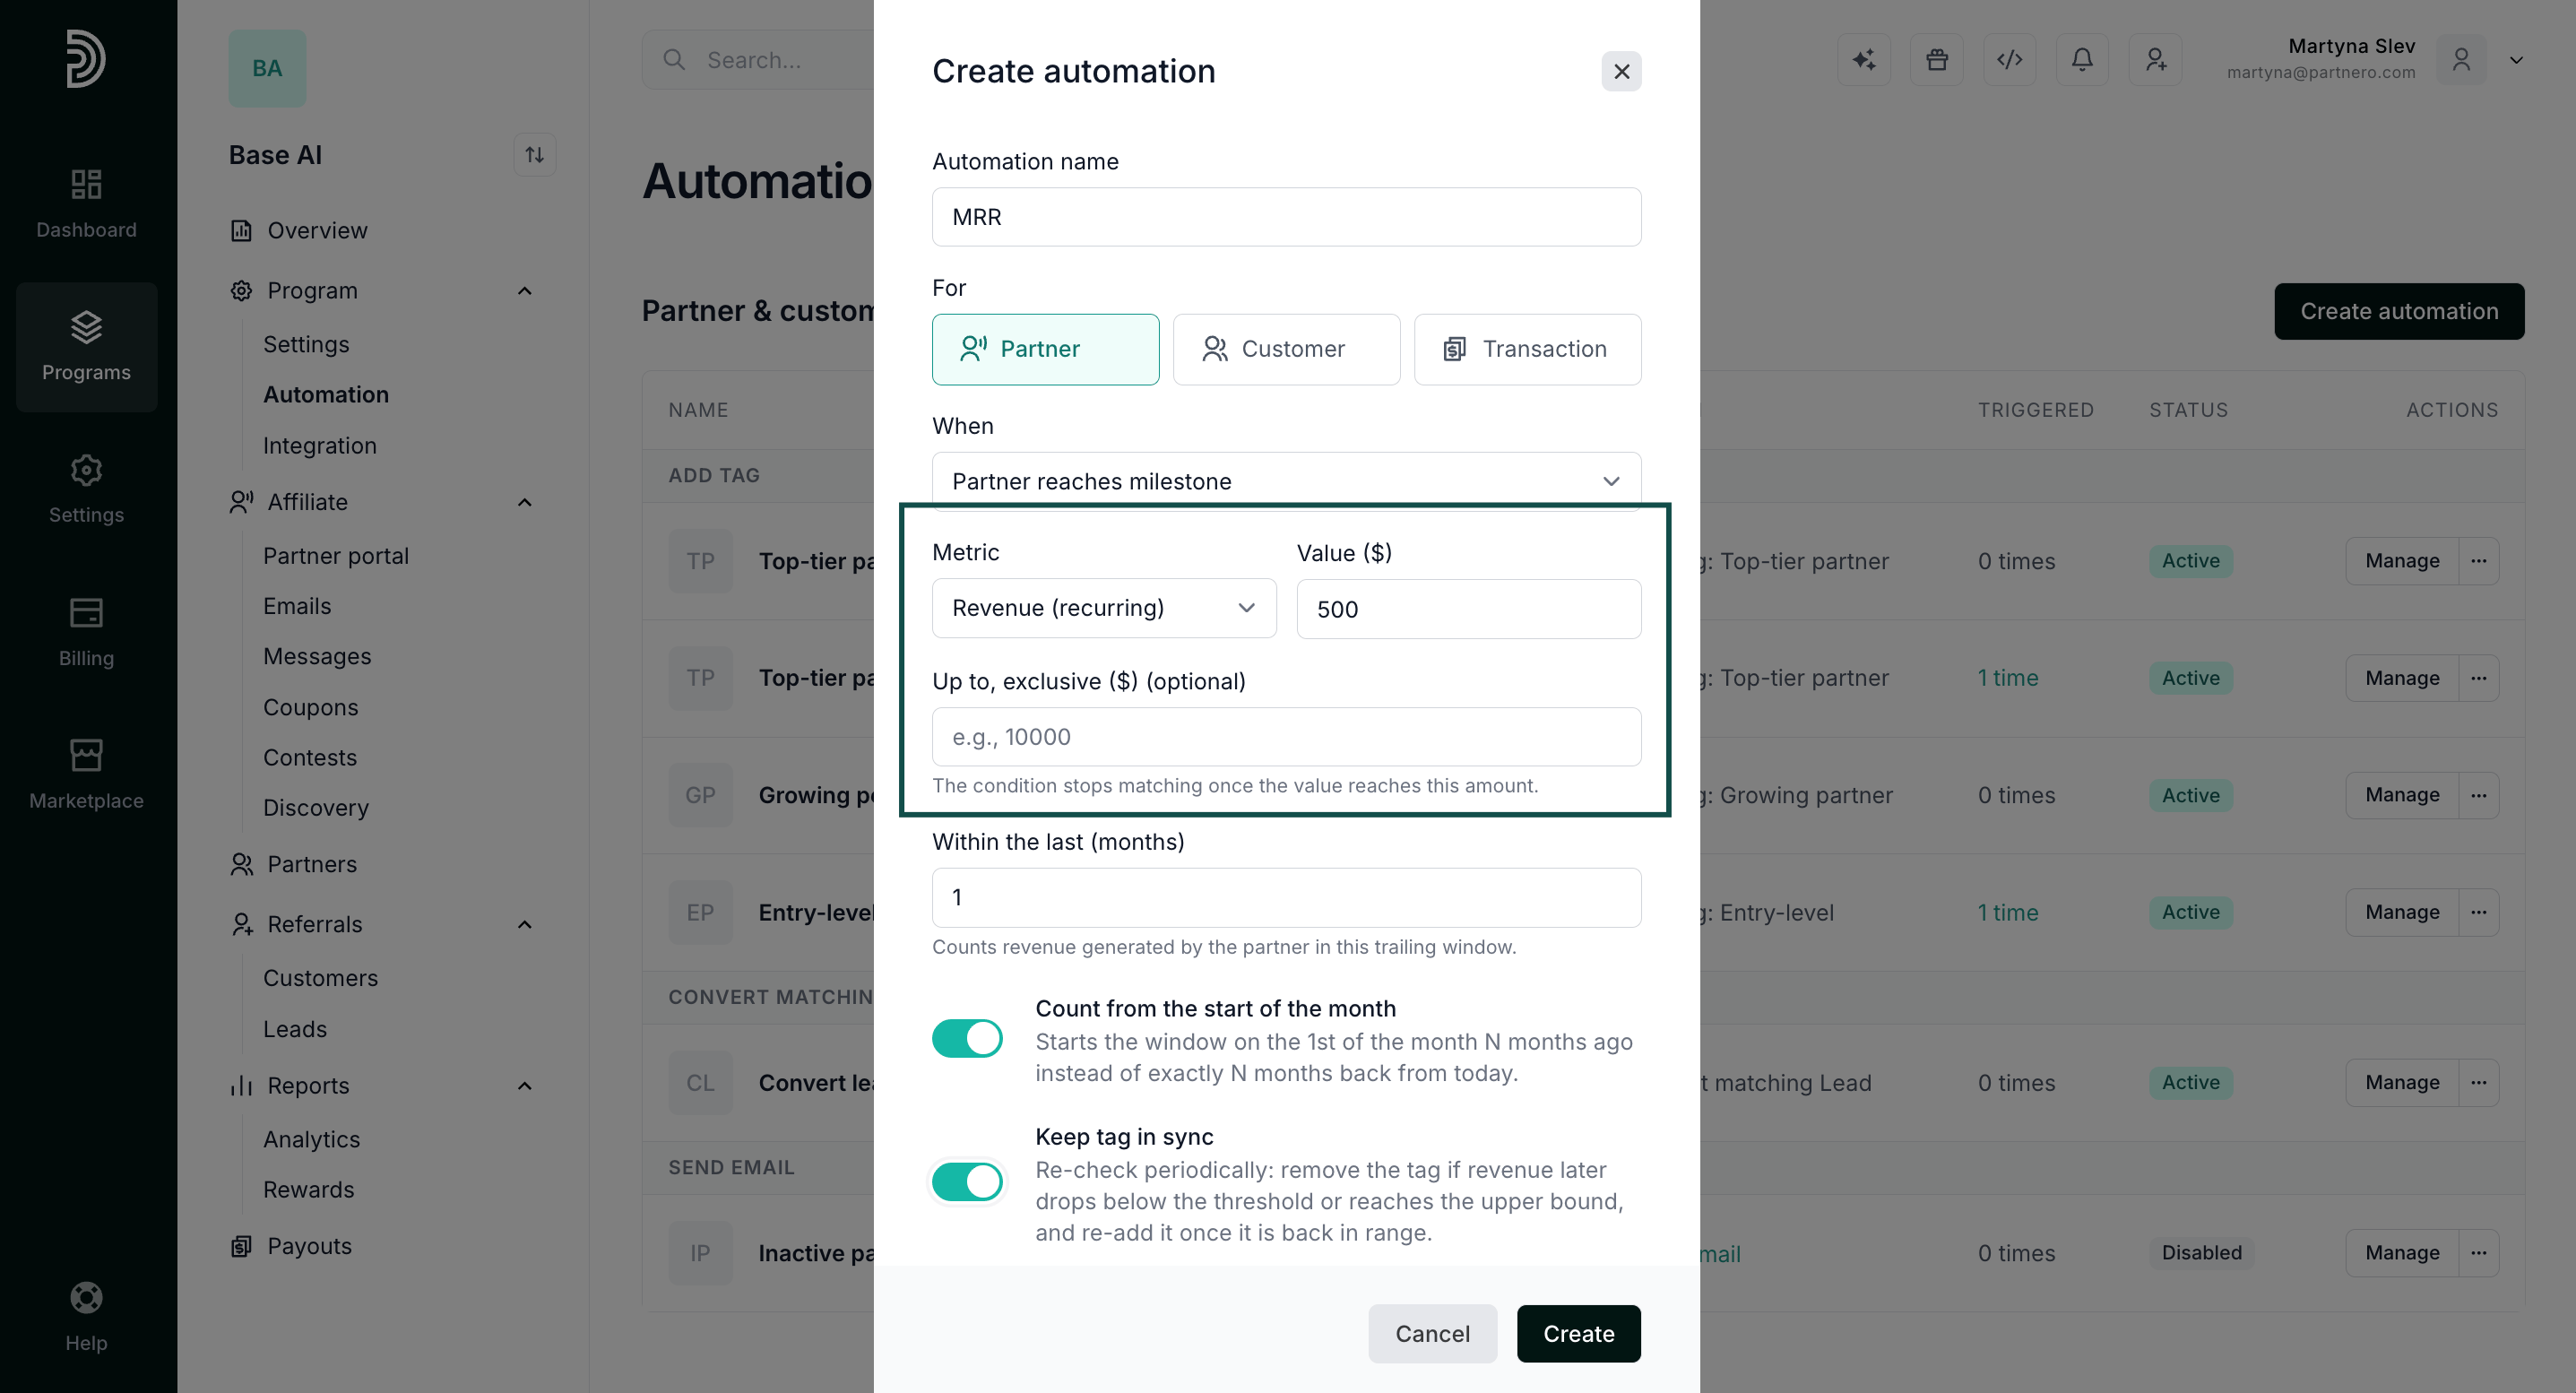
- Enter the revenue amount and the number of months to check.
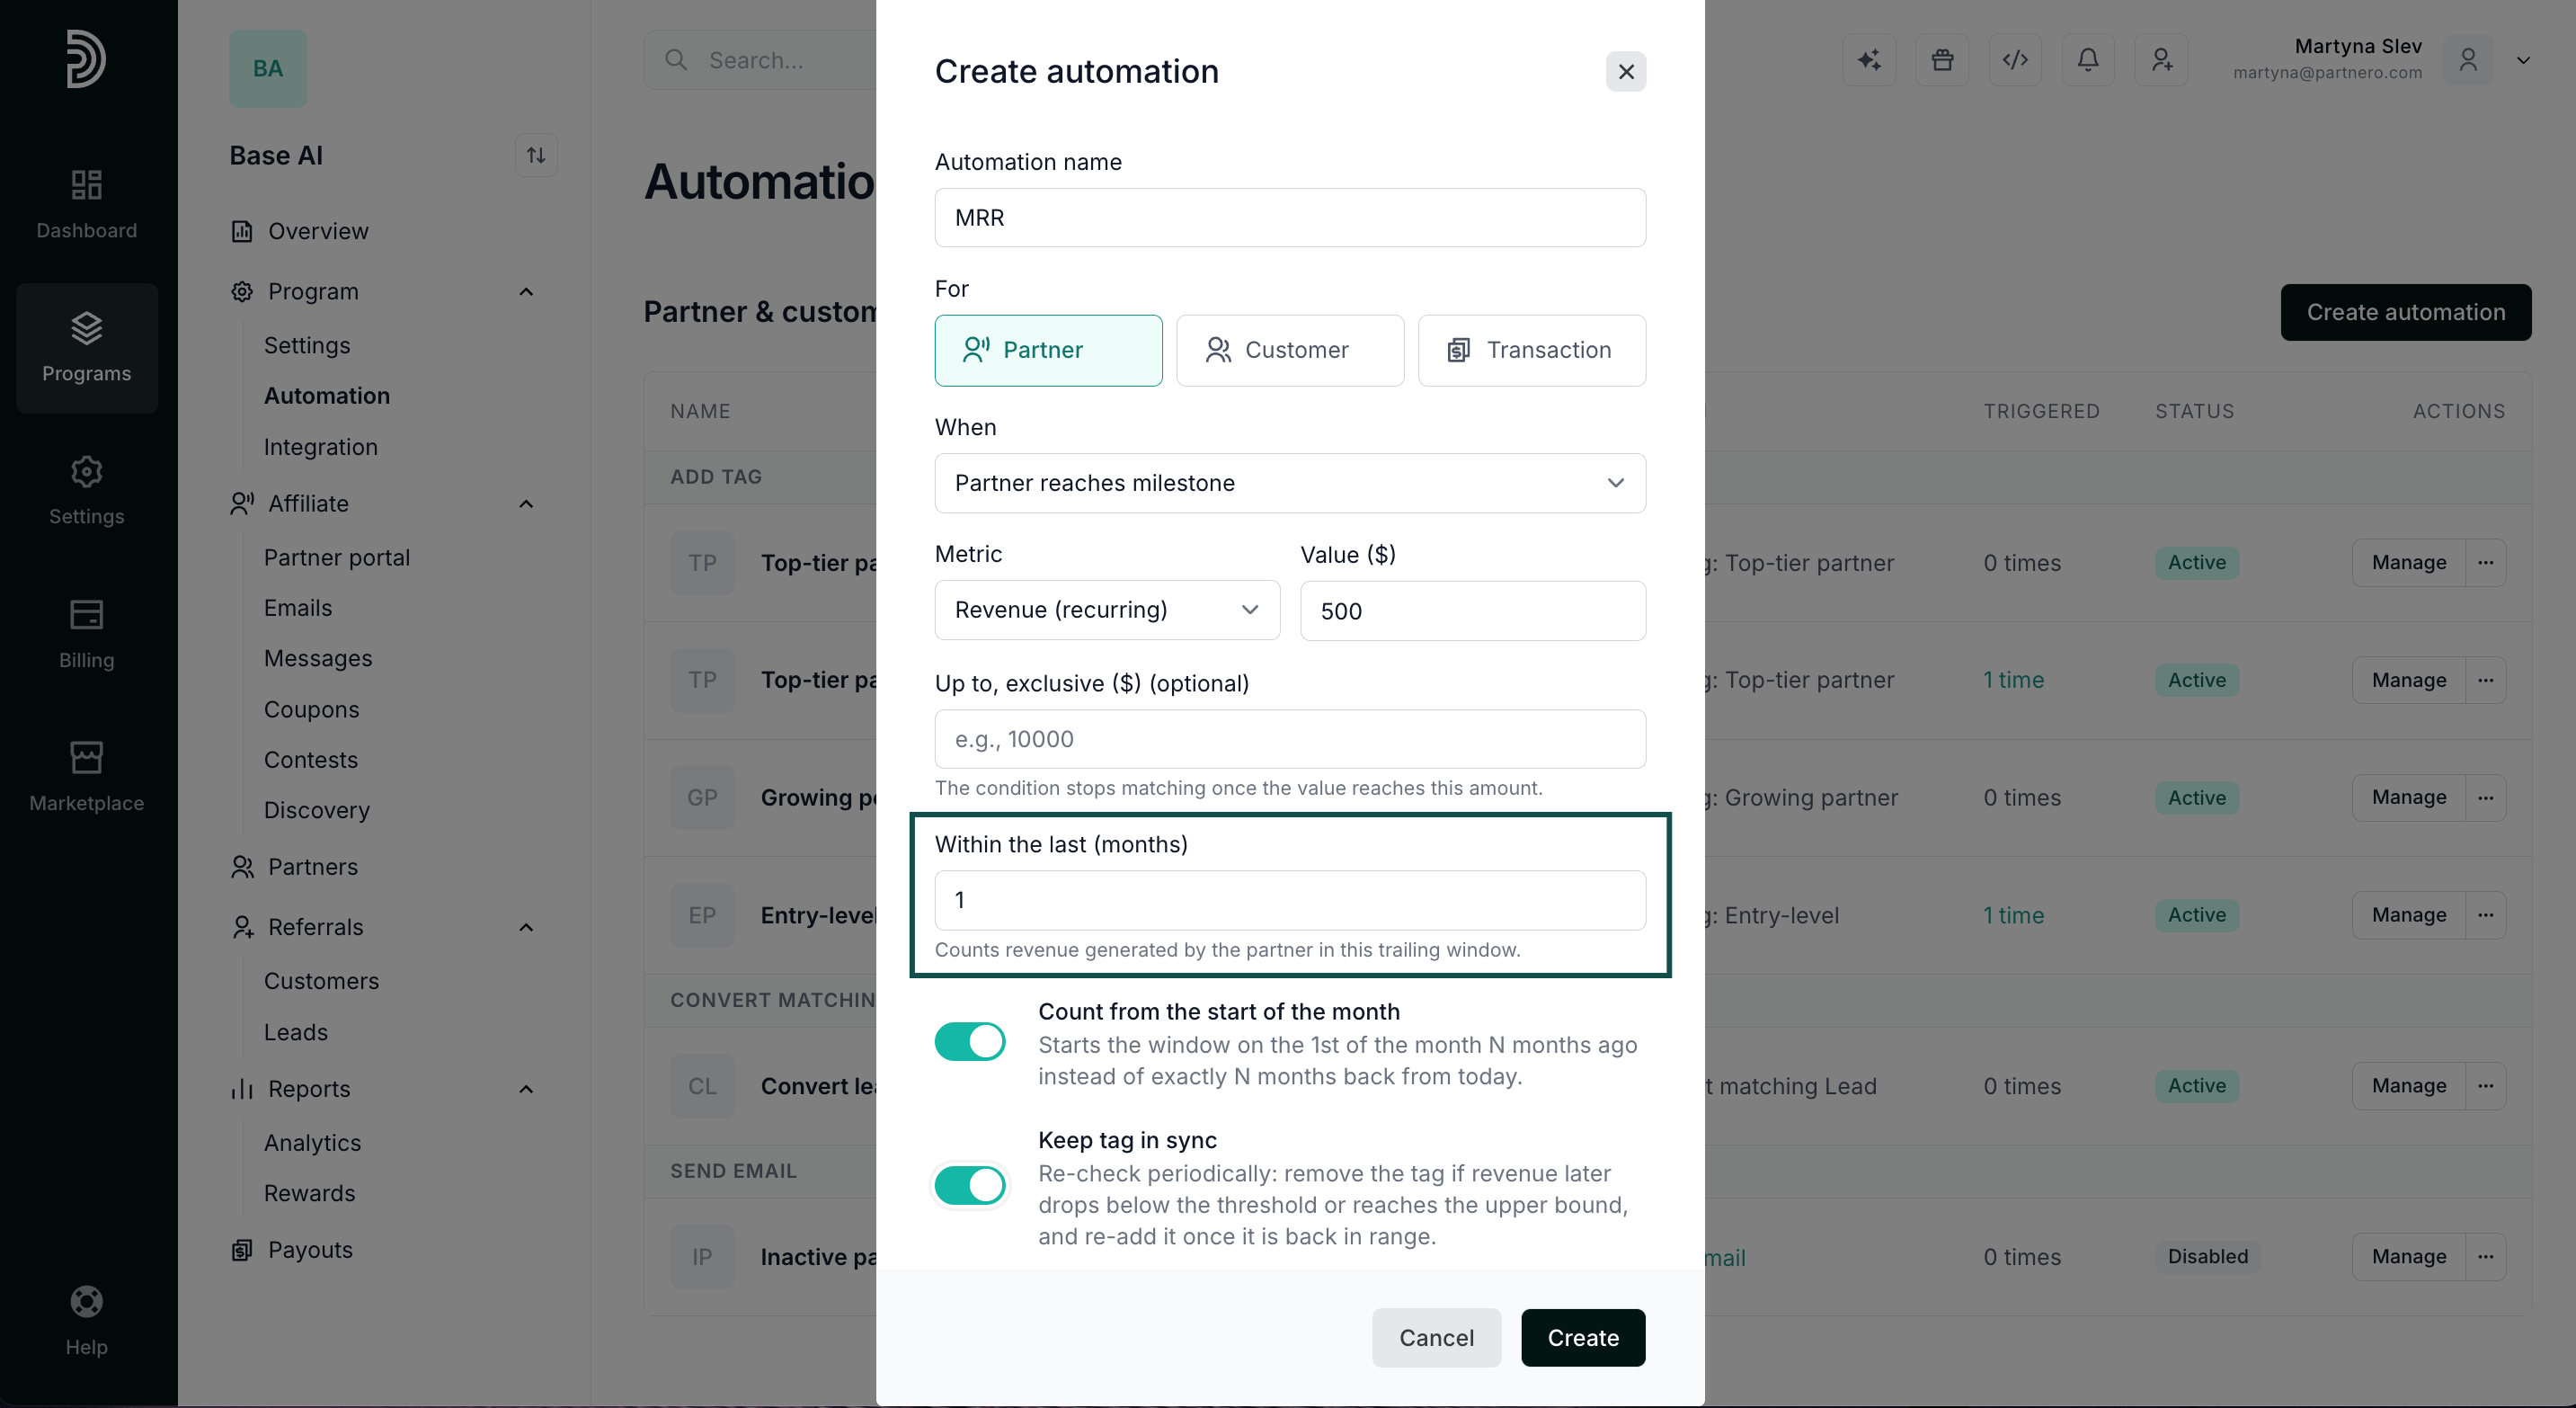
- Turn on Count from the start of the month if you want the period to be counted from the first day of the month instead of from today.
- Turn on Keep tag in sync to remove the tag if the revenue drops below the threshold.
- In the Then field, select the action: add a tag, remove a tag, or send an email
- Click Create.
Use cases
- Tag partners as “High MRR” when their recurring revenue over the last month reaches $500
- Send a congratulation email the moment a partner reaches a monthly revenue goal
- Group partners into revenue bands and give each band its own tag, email, or outreach
- Recognize partners as soon as revenue is recorded, instead of after the review period ends